Easy Lemon Cake Recipe
Enjoy a simple EASY Lemon Cake recipe this summer. It’s everything you hope for in a cake. She’s sweet but tart, light but satisfying and will be the star of any picnic or party. The best part is she’s based on a cake mix, so enjoy a fuss free dessert!
It’s said there are two kinds of dessert people in the world: the chocolate people and the lemon people. Personally, I’m BOTH! If you’re on the fence about a lemon dessert, then I invite you to give this cake mix hack a try. It makes an easy lemon cake recipe you’ll reach for time and time again.
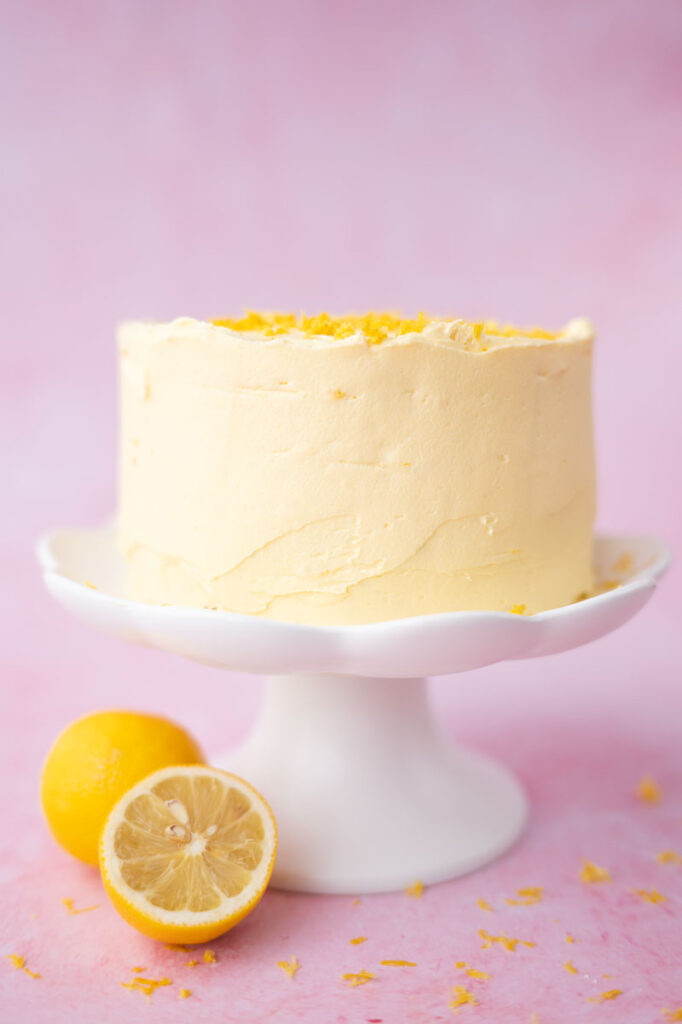
Meet the Lemon Cake of your dreams
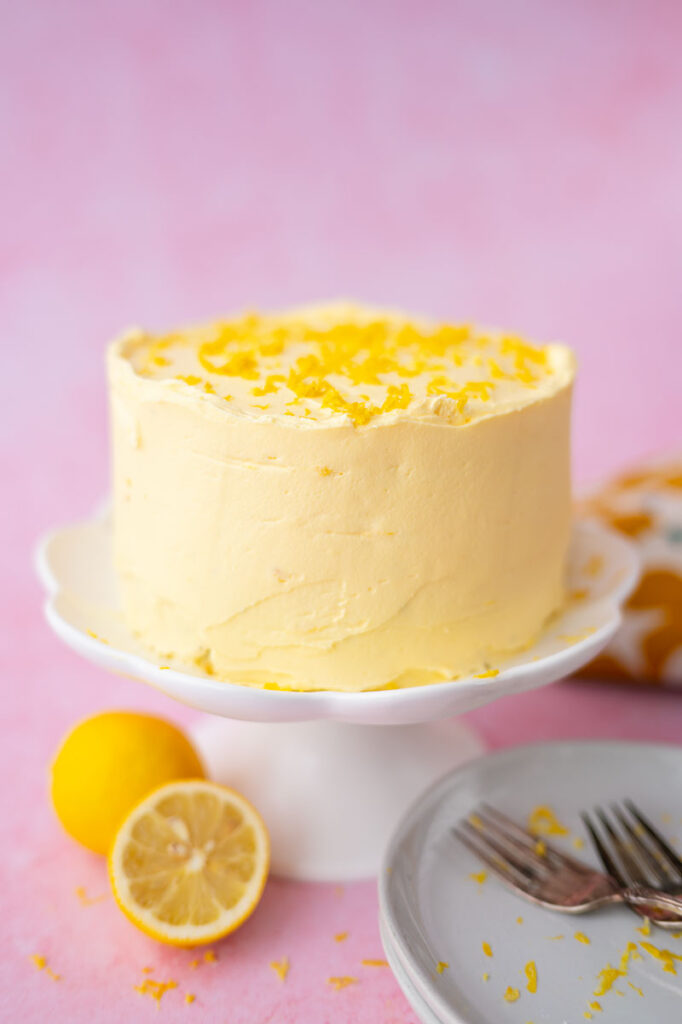
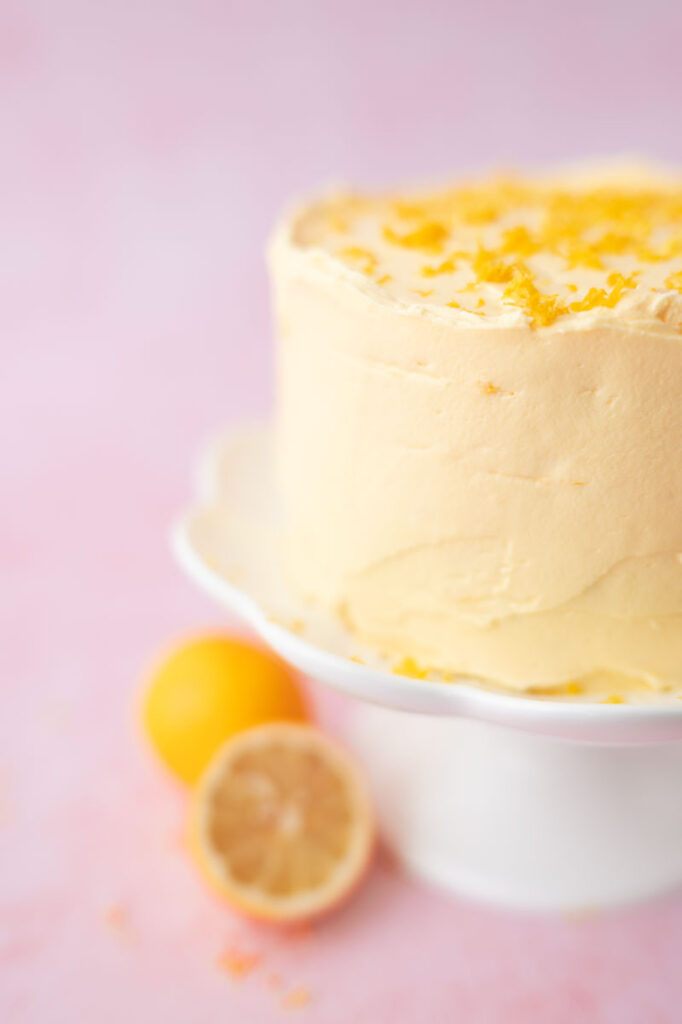
This easy lemon cake recipe features a simple method to improve your lemon cake mix. Mixing your own homemade lemon buttercream frosting and applying a simple, yet elegant finish is a wonderful way to present the cake. The decoration on top is freshly grated lemon zest which not only looks refreshing, it tastes wonderful.
I prepared this layer cake using two 6″ cake pans. I love a small layer cake and think it’s a fantastic option for parties or picnics.
🍋
Ingredients for An Easy Lemon Cake Recipe

Ingredients for the Easy Lemon Cake
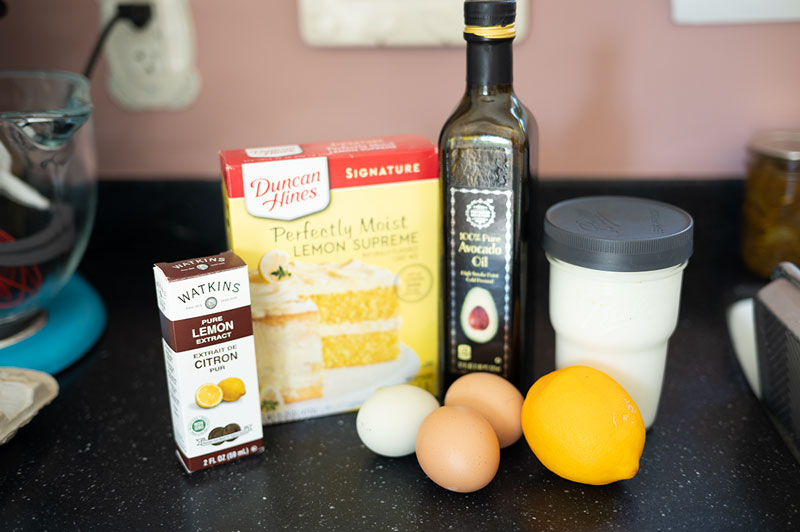
This is a cake mix hack type of recipe, so I’m using my standard methodology which is to replace the water with milk, in this case buttermilk, add a flavoring and make frosting from scratch. I also prefer 6″ layer cakes to the standard 8″ version. Additionally, I baked what was left over from the 6″ pans in mini Bundt® Silicone pans for something fun.
I love to try different pans and sizes of cupcakes so I don’t feel limited to the usual stuff everybody else does. Once you learn to recognize when your cake is baked properly, you don’t have to hem yourself in to the limited options included in most recipes or on the back of the cake mix box.
Half the enjoyment in using different cake mix hack recipes is it frees you up to experiment a little and have some fun with your baking.
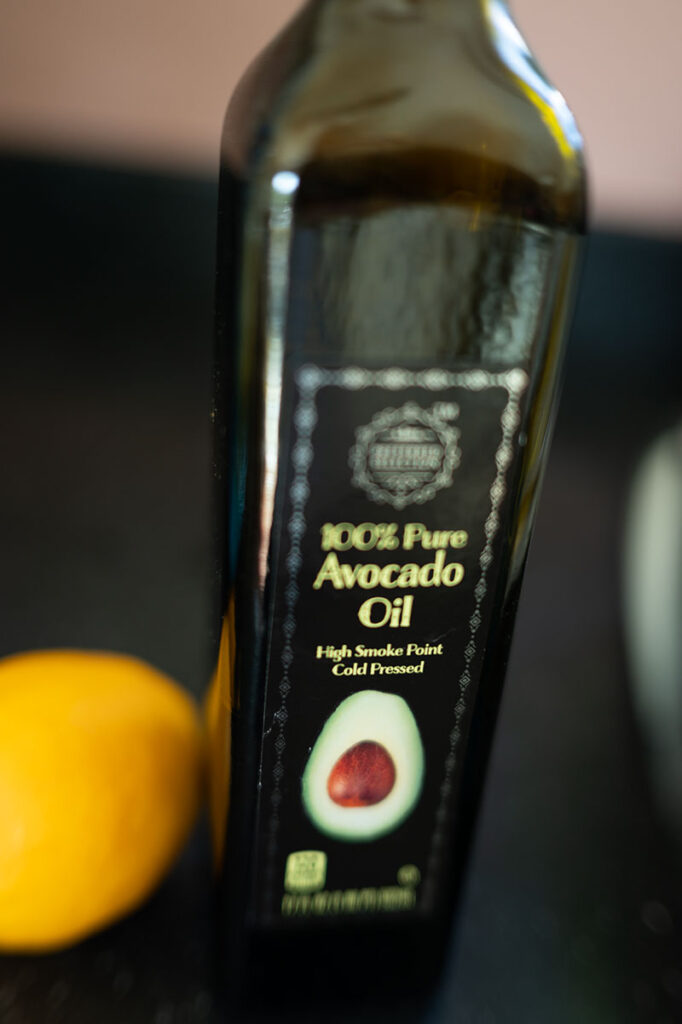
Baking with Avocado oil
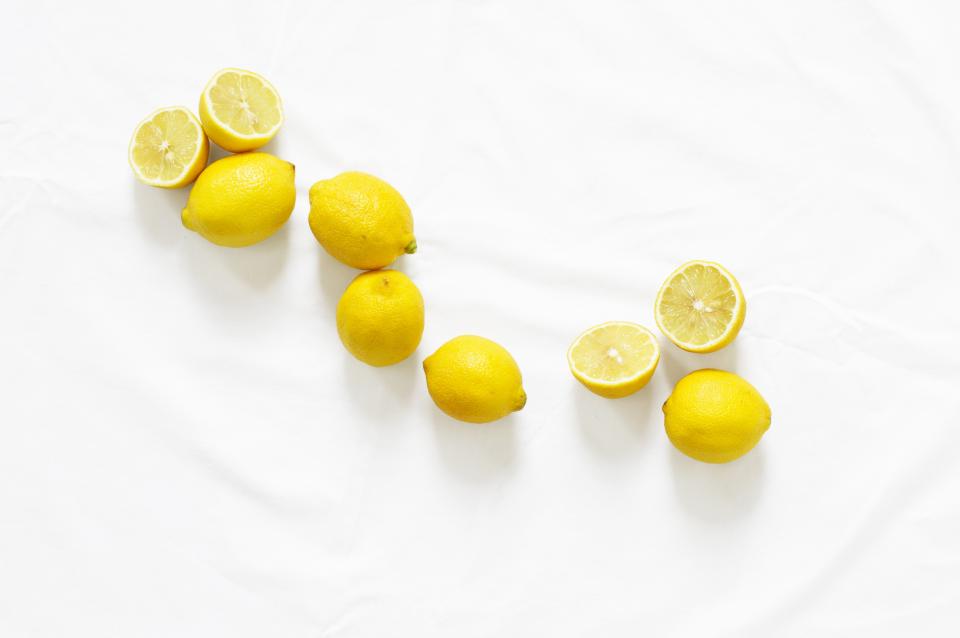
The cake mix calls for 1/3 cup of vegetable oil. Some people use melted butter but butter is not the cheapest ingredient these days. In the past I used grapeseed oil for all my baking, but I’ve been trying to eliminate seed oils. I’ve discovered avocado oil works wonderfully in baked goods, so I highly recommend it! I picked up mine in Lidl and it’s the best price I’ve seen.
You want a light colored, flavorless oil in your baking, and avocado oil works great! I know people swear by coconut oil for everything, but it can add a flavor to the final product. Use what you prefer, but I highly recommend giving avocado oil a try.
🥑
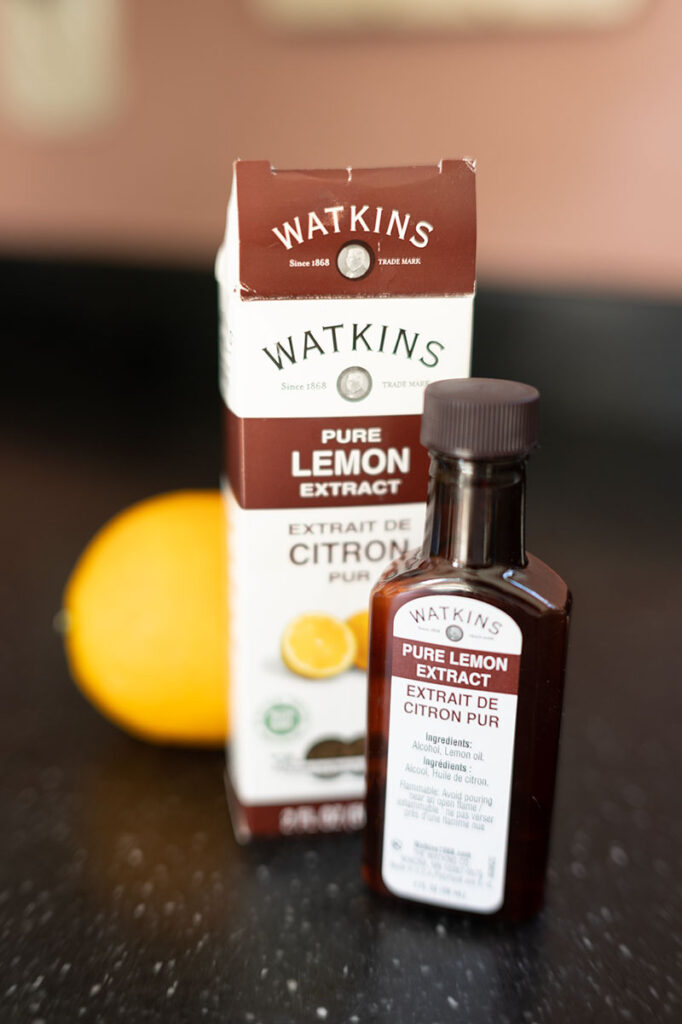
Extracts and flavorings are an easy way to elevate a simple cake mix.
Flavor extracts come in just about every flavor under the sun and are a great way to add a little something extra to your recipe.
I love Watkins brand products because they are high quality and an old American brand. I always recommend Made in America or American based companies wherever possible, because I find the quality and customer service to be superior.
🍋

Have fun with pans
I love the Wilton 6″ cake pans (affiliate link) and use them for all my layer cakes. Recently I picked up the silicone mold for mini Bundt® style cakes (affiliate link) and I have enjoyed using them!
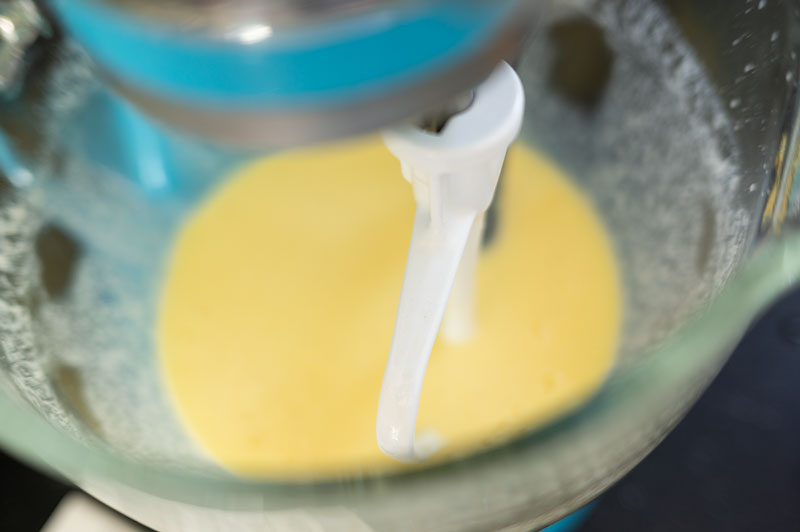
Mix your liquid Ingredients first
I always recommend putting all your wet ingredients into the mixing bowl first. Put your eggs, milk, and oil into the bowl and mix on medium until well combined. Then add the dry ingredients, in this case the package of cake mix, and mix as the instructions recommend.
Some tips for working with the cake pans
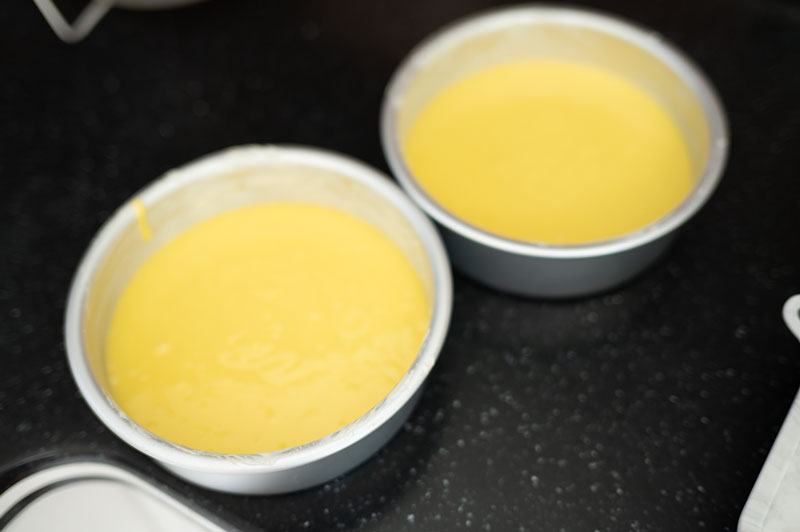
Each pan has about 350 grams of batter 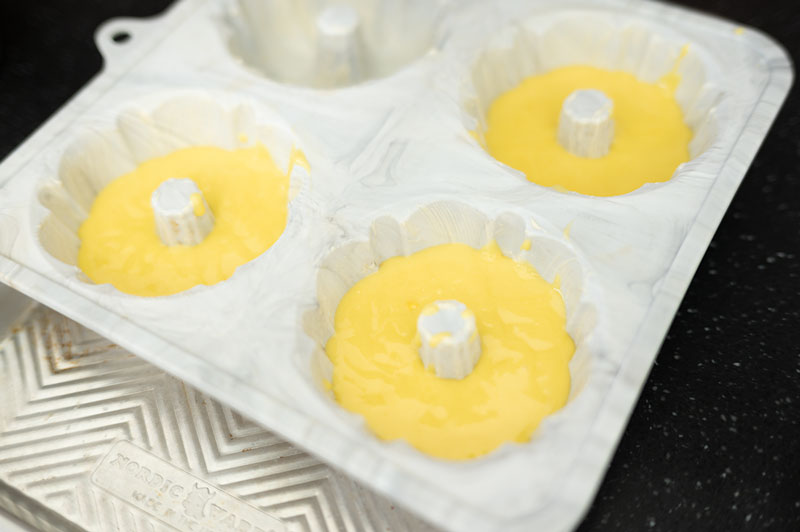
Don’t be temped to over fill the small molds
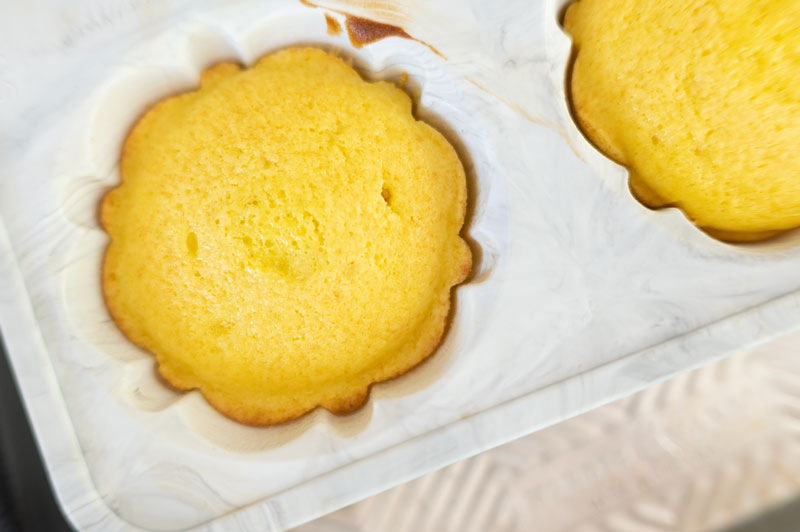
See the cakes are pulling away from the sides? 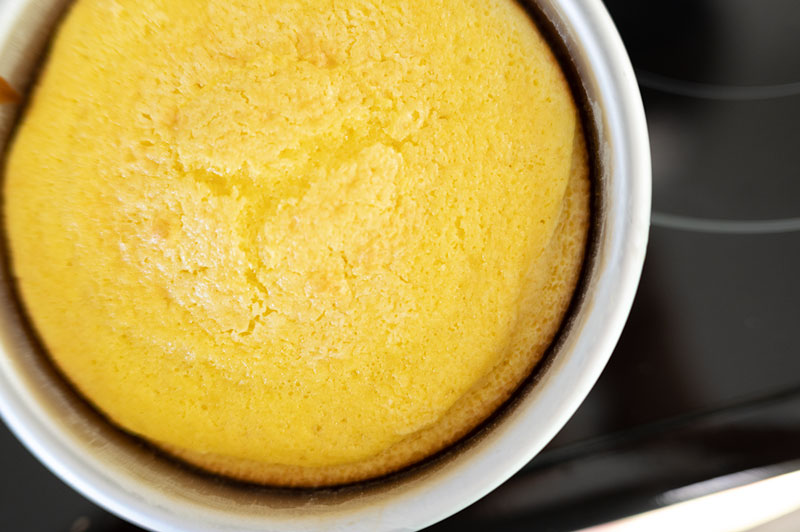
Pulling away from the sides indicates doneness
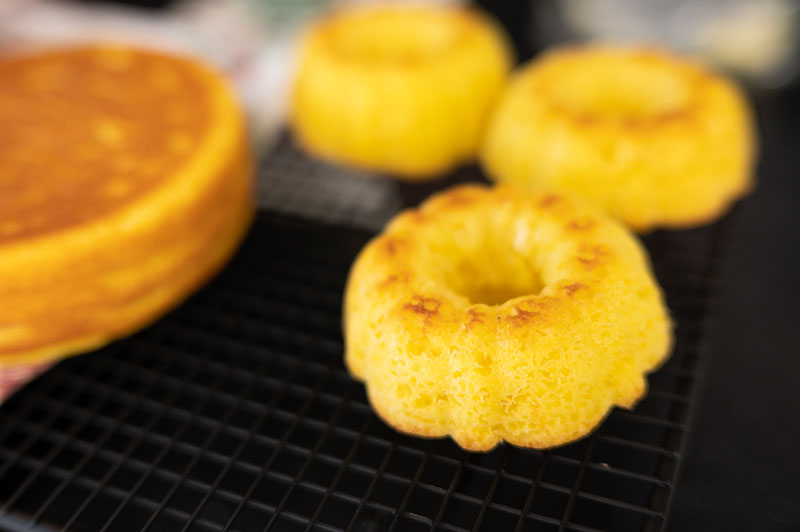
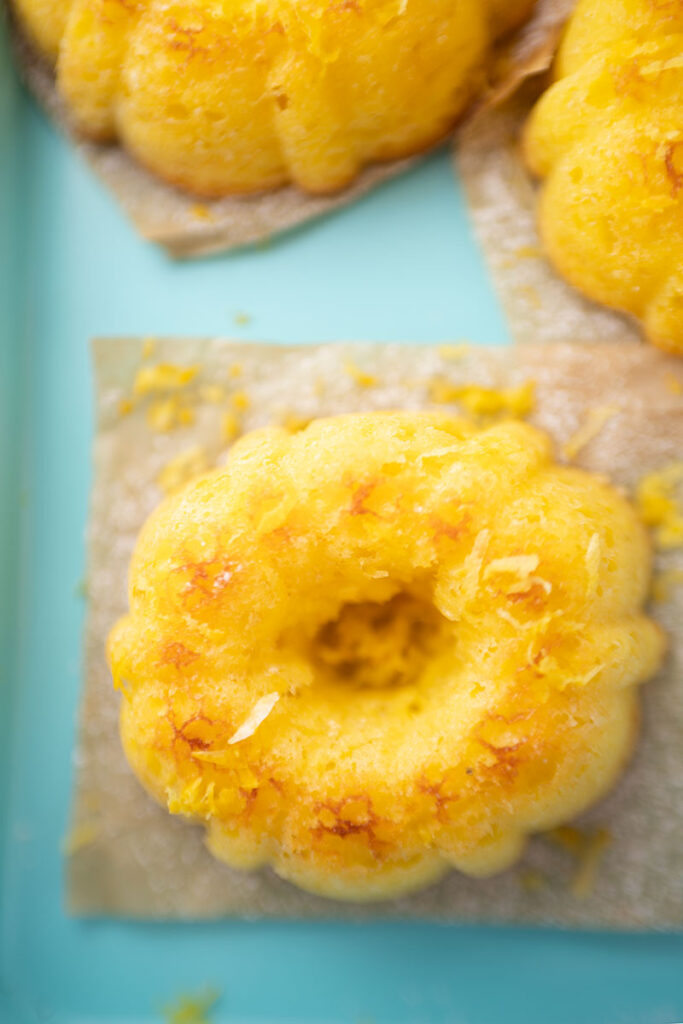
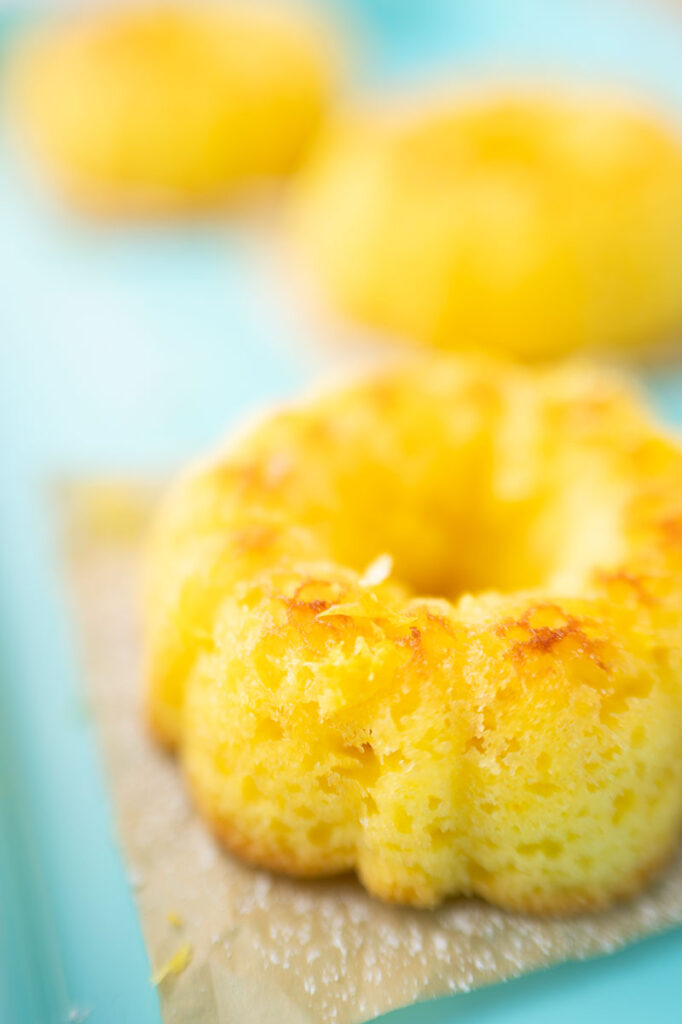
Mini cakes cooling 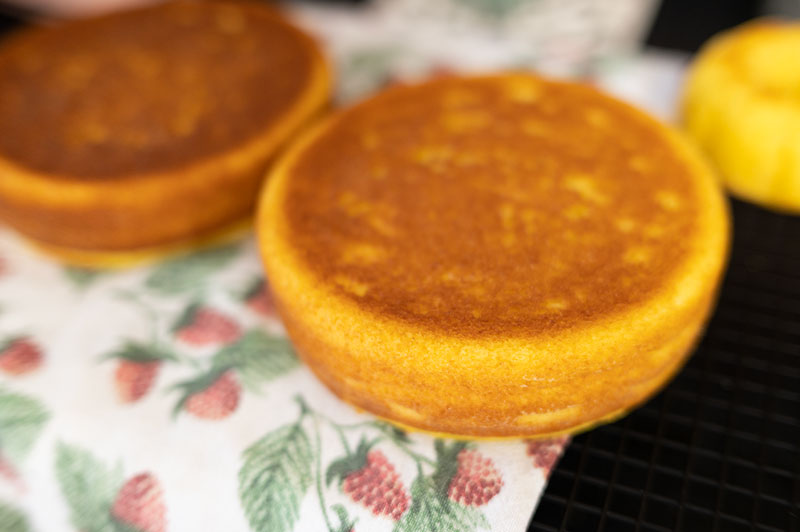
Perfectly baked lemon cake layers
Now that your Easy Lemon Cake Recipe is baked and cooled, let’s talk about decorations.
- Frosting: American buttercream is the classic choice and what I used for this cake. Every baker should master a simple buttercream, because once you find your knack for whipping up perfect frosting, your cakes and cupcakes will never be the same.
- Garnish: It’s always a lovely touch to include the main flavor as a garnish. In this case the cakes receive a generous topping of freshly grated lemon zest. It looks beautiful and it adds incredible freshness.
- The food coloring conundrum: We all know that food colorings aren’t exactly health food. But neither is cake. I used two drops of Egg Yellow gel food coloring in the frosting. (affiliate link) The cakes get their beautiful coloring from the eggs that come from the hens I have as part of a chicken share on a local farm. The yolks are out of this world. I wanted my frosting to be a little more yellow that it would otherwise be, so I opted to use two drops of food coloring. I’ll let you decide how you want to handle that end of things.
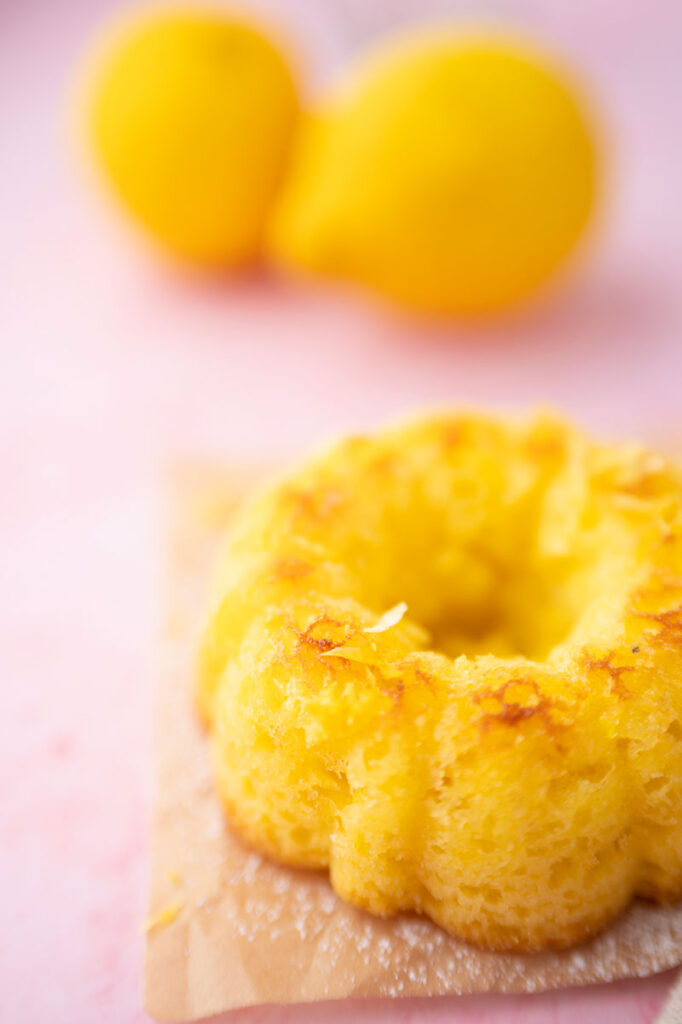
- Powdered Sugar: I served the minis as a Naked Style cake and sprinkled powdered sugar and lemon zest on top. You could add a glaze as well.
- Cake Plates: Nothing elevates (literally) a cake quite like a pretty pedestal cake plate. Home Goods used to be great for carrying gorgeous little 6″ cake plates, but notsomuch recently. They can be a challenge to find, (affiliate link) so if you like smaller cakes and you see a special cake plate you fancy, grab it.
🍋
Ingredients for Lemon Buttercream Frosting

Lemon zest topping 
Pink with a sunny yellow cake Lovely Robin’s Egg Blue Pan
How to finish the Easy Lemon Cake with a classic frosting
Nothing is prettier than a beautifully frosted layer cake. But let’s get something out in the open. This is a blog for home cooks and bakers, so the cake decorating tips shared here are for home made treats and goodies. This is not a cake decorating blog so we aren’t looking at any advanced cake decorating techniques. We do pipe some frosting here and there, but only simple swirls.
The lemon cake was decorated as simply as possible. It’s lemon buttercream frosting, first applied with a crumb coat and then finished to a smoothish finish, but not perfectly smooth as one sees on these crazy cake decorating videos. The final decoration is a sprinkle of freshly grated lemon zest both for visual appeal and taste.
Easy Lemon Cake ready for serving
Fresh Lemon Zest Garnish
Commonly asked questions about Lemon Cake
Dry cake is always one of two things OR a combination of both. Either the dry ingredients were not measured properly and too much flour was incorporated OR the cake was left to bake too long. In this case, the recipe uses a cake mix, so we know the dry ingredients are measured correctly. The culprit must be over baking, which is a common mistake. Learn to check for doneness using the spring back method and visually inspecting whether the cake is pulling away from the sides of the pan. Both will perfectly indicate when a cake is fully baked. Often, using the toothpick method results in an over baked cake.
perfectly refreshing
A delightful lemon cake is the star of any summer gathering
By taking the extra step of carefully frosting and then simply decorating your Lemon Cake, no one will suspect you started with a cake mix. I used a large offset spatula to smooth the frosting on the sides and a smaller version to even the top. Offset spatulas improve frosting (affiliate link) technique tremendously!

So what’s the big deal about using a cake mix anyway?
In this crazy economy, using a cake mix can be both economical and fun. They are easy to throw together, and who DOESN’T love an unbirthday cake?
The key to success with YOUR Easy Lemon Cake Recipe is to bake and finish it with love
Take the time to mix a gorgeous whipped buttercream frosting, and take a little extra effort to shape the frosting into a beautiful finish. Nothing over the top! Understatement is elegance!
Easy Lemon Cake Recipe
- Total Time: 40 minutes
- Yield: 12 1x
Description
Make an easy lemon cake based on a cake mix. Add your own freshly whipped lemon buttercream and freshly grated zest for a finishing touch.
Ingredients
For the Cake
For the Frosting
- 1 cup (2 sticks) softened unsalted butter
- 4 1/2 cups powdered sugar
- 2 and 1/2 tablespoons freshly squeezed lemon juice
- 2 tablespoons heavy cream (or milk)
- 2 teaspoons lemon juice
- Pinch of salt
- 2 drops Egg Yellow gel food coloring
Instructions
For the Cake
- Preheat oven to 350° F or 325° F for dark or coated pans
- Prepare cake pans as described using either cake release or butter and flour pans
- Place the buttermilk, eggs, oil and flavoring into a mixing bowl and beat on medium until well combined. 60 – 90 seconds is plenty of mixing.
- Turn off mixer and pour in entire cake mix package. Stir gently with a large spoon to moisten.
- Using the mixer, beat at medium speed for 2 minutes
- Distribute batter to prepared cakes pans
- Bake as directed on the back of the mix if using standard pans. I baked the 6″ layers with the mini cakes at the same time for 25 minutes. You should start checking your cakes at the 20 minute mark for doneness by using the spring back method and by visually inspecting if the cake has pulled away from the sides.
- Cool cakes in the pan on a wire rack for 10 minutes. Turn cakes out of the pans onto the rack and cool completely before frosting.
For the Frosting
- Using a mixer, beat the softened butter on medium speed until creamy. This takes about 2 minutes. Color of butter should lighten slightly.
- Add sifted powdered sugar in two additions mixing on low until or medium low until sugar is incorporated. At this point we’re just trying to get the sugar into the butter without having clouds of powered sugar go all over the kitchen. Sifting the sugar provides a much smoother frosting.
- Once the sugar is incorporated, turn the mixer up to medium and whip the frosting until smooth and creamy. About 3 minutes. During this time stream in first the lemon juice THEN the milk or cream. If the frosting is too thick, add a little more cream or milk to reach desired consistency. If the frosting is too thin, add a little more sugar. If it’s too thick, add a little more milk. We want it easily spreadable not runny.
- While the frosting is in the last minute of beating, add food coloring if desired. I like a more pastel color to my frostings so I use only one or two drops, but you can omit it entirely or use more.
Notes
Any leftover frosting can be stored in the fridge in a covered container for up to two weeks. Or freeze for up to 3 months. To use, simply allow it to come to room temperature on the counter and re whip to to return it to it’s creamy consistency.
- Prep Time: 15
- Cook Time: 25
- Category: Dessert
- Method: Baking
- Cuisine: American