Strawberry Wall Quilt
The nursery rhyme says “April Showers Bring May Flowers.” Where I live, May means strawberry season. To celebrate my favorite fruit, I made a darling Strawberry Wall Quilt. Let me show you how to make your own.
Does anyone know someone who DOESN’T love strawberries? If so, what on earth happened to them? Where I live, pick your own strawberry farms are everywhere, and we Virginia Beach locals take full advantage! I can my own jams and syrups as well as enjoy fresh sliced berries on cakes or in bowls sprinkled with cane sugar. Nothing says winter is over like a big bowl of fresh Strawberries! The second best way to welcome spring is to make and display your very own Strawberry Wall quilt.
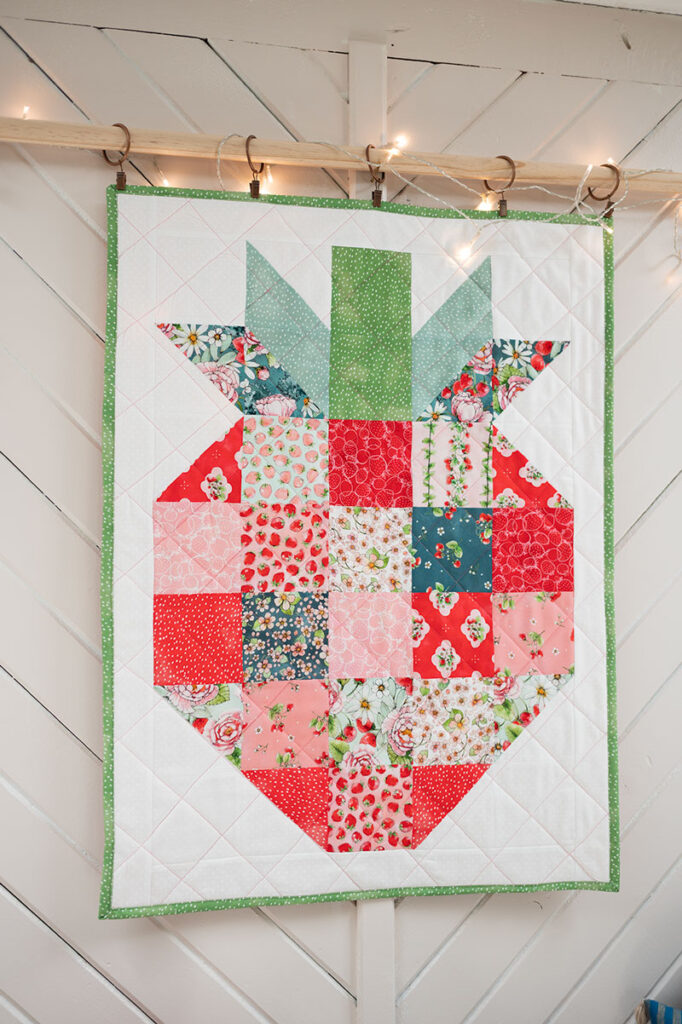
My Strawberry Wall Quilt combines two of my favorite things: Strawberries and Patchwork
You’ll love this true quilt-in-a-day project because
- It’s Fast
- It’s beginner friendly
- It’s designed to use with 5″ precuts OR your scraps!
🍓
What do you need to make a Strawberry Wall quilt?
Wall quilts are fun to make, because they are basically just a mini sized quilt project. This means you can enjoy the full process of quilt making in a day instead of something that lingers on for weeks or months. We all love the accomplishment of completing a beautiful bed sized quilt, but who wants to run a marathon every day? With a wall quilt, you can enjoy a pretty fabric line….or delve into your scrap bin, and complete something lovely to decorate your sewing room or really any place you like.
Fabric for the Strawberry Wall Quilt
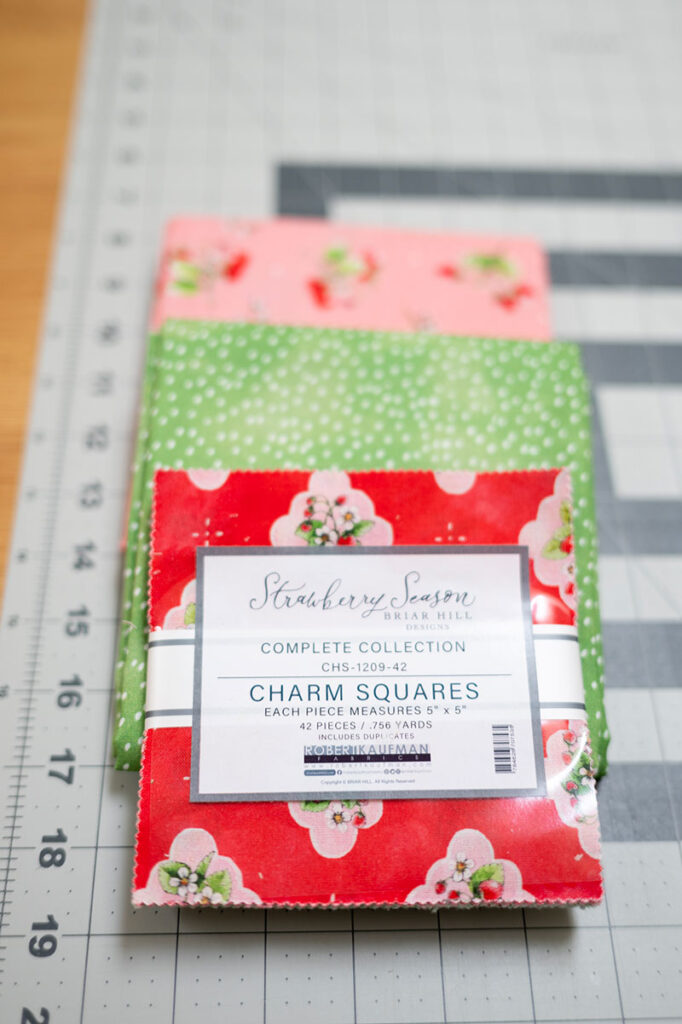
I used part of a package of 5″ squares from a line called Strawberry Season. (affiliate link) Then I purchased a little yardage from the same line for backing and binding. I was able to pull the batting from a scrap bag I’ve been saving, and I already had the thread.
The fabric came from Missouri Star Quilt Company. I am an affiliate for them, and if you use my links to their site (affiliate link) and make a purchase of $50 or more you will receive 20% off your total order at checkout! What a deal!
🛍️
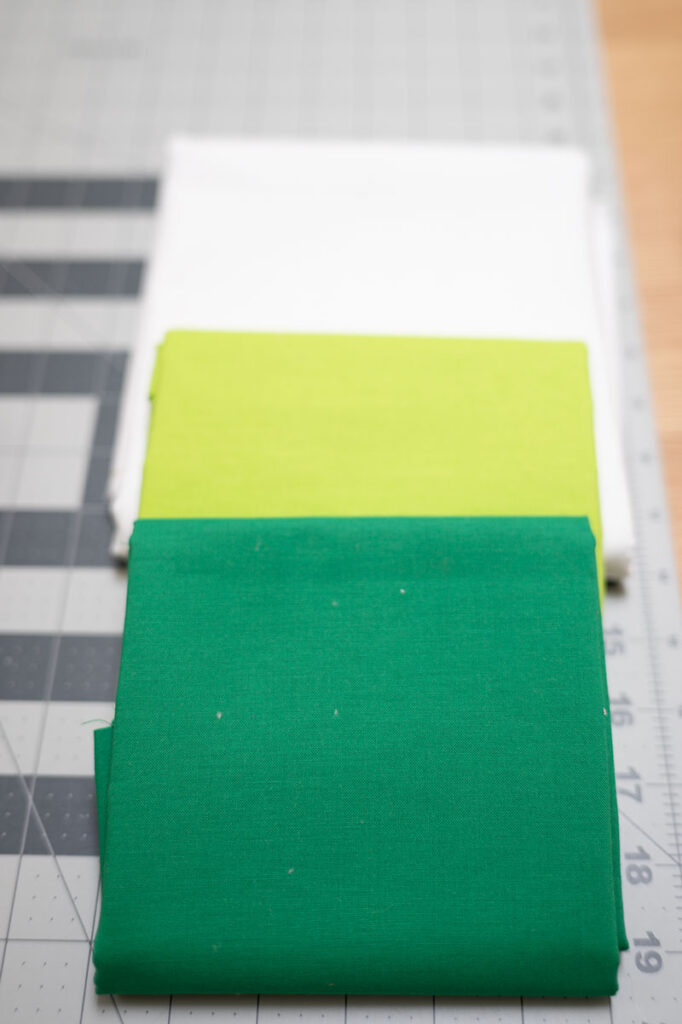
The quilt also used a tone on tone white Swiss Dot fabric for a background fabric. (affiliate link) I had 2 greens from Bella Cottons in my stash that I pulled as potential colors (Wasabi and Emerald) for the stem or the binding, but decided to use fabrics from within the charm pack for the stem and leaves. I used the Moss colorway as a cut of yardage (affiliate link) for the binding.
Materials:
- Package of 5″ squares, a Charm Pack
- 1 yard of coordinating fabric for backing. I used the Azalea Colorway from Strawberry Season. (affiliate link)
- 1/2 yard coordinating fabric for binding. I used the Moss Colorway from Strawberry Season. (affiliate link)
- 1/2 yard background fabric
- Thread
- 1 yard of quilt batting
Tools:
- Rotary cutter (affiliate link)
- Cutting mat (affiliate link)
- 4.5″ square quilting ruler (affiliate link)
- 2.5″ x 24.5″ quilting ruler
- Clover point turner Hera marking tool (affiliate link)
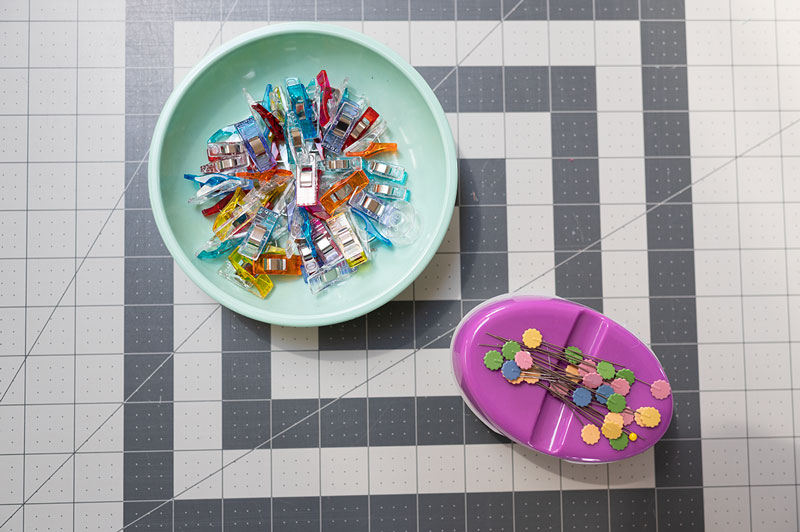
- Pins or clips
- Sewing machine
Units needed for the Strawberry Wall Quilt:
For the Berry Portion
- 17 – 4.5″ print squares (I used a Strawberry Season charm pack from Robert Kaufman) (affiliate link)
- 3 – 5″ squares of background fabric (I used a white Swiss dot)
- 3 – 5″ squares of print fabric (I used a Strawberry Season charm pack from Robert Kaufman)
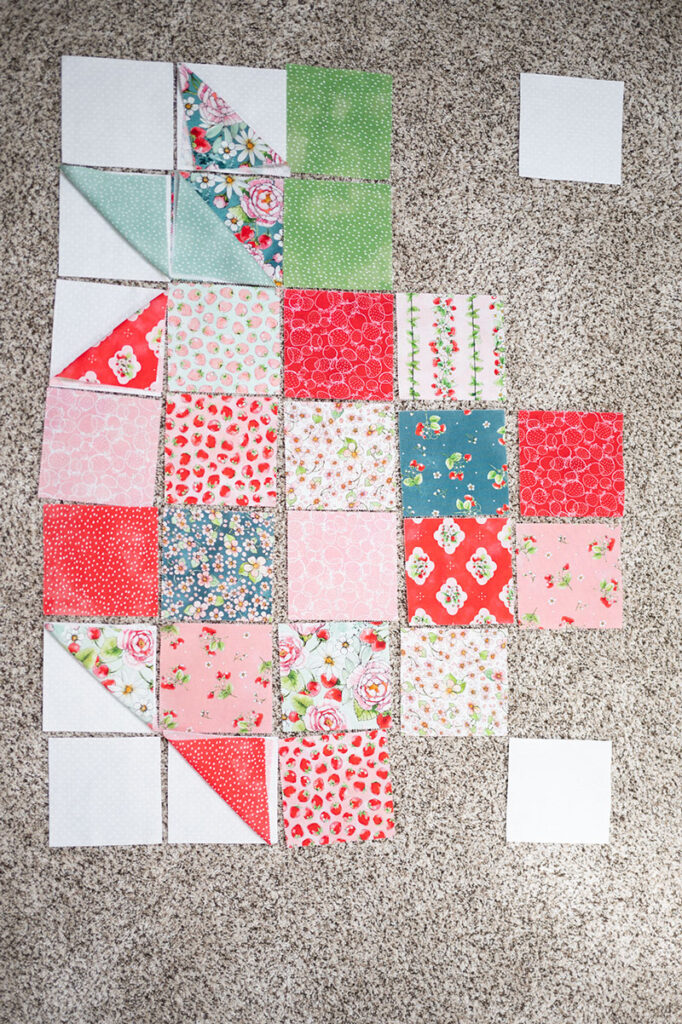
- 4 – 4.5″ squares of background fabric (I used a white Swiss dot). (affiliate link) These are for the four corners.
For the Stem Portion:
- 2 – 4.5″ print squares for the center stem
- 4 – 5″ print squares for the leaves
- 4 – 5″ background squares for the leaves
To Finish:
- 3 – WOF 2.5″ strips for outer border
- 4 – WOF 2.5″ strips for binding
- Most of the 1 yard cut for backing
Finished project measures 24″ x 32″
As is standard with quilting projects, this one uses a quarter inch seam allowance EXCEPT where a scant quarter inch seam is recommended.

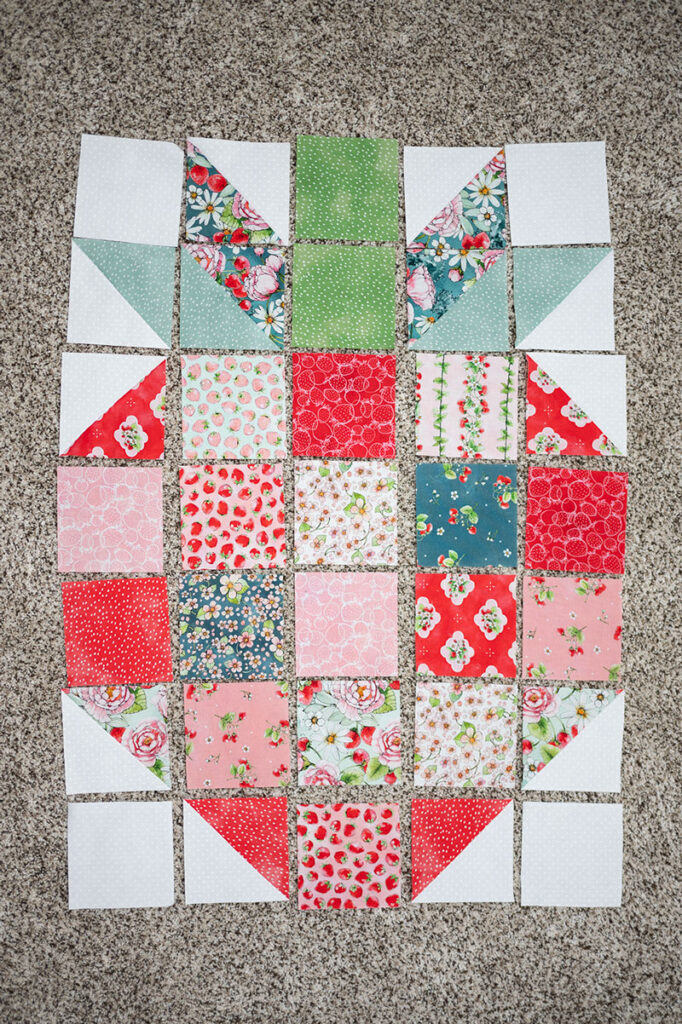
Lay out the pieces to decide what to put where Adding the background squares
Let’s put it all together
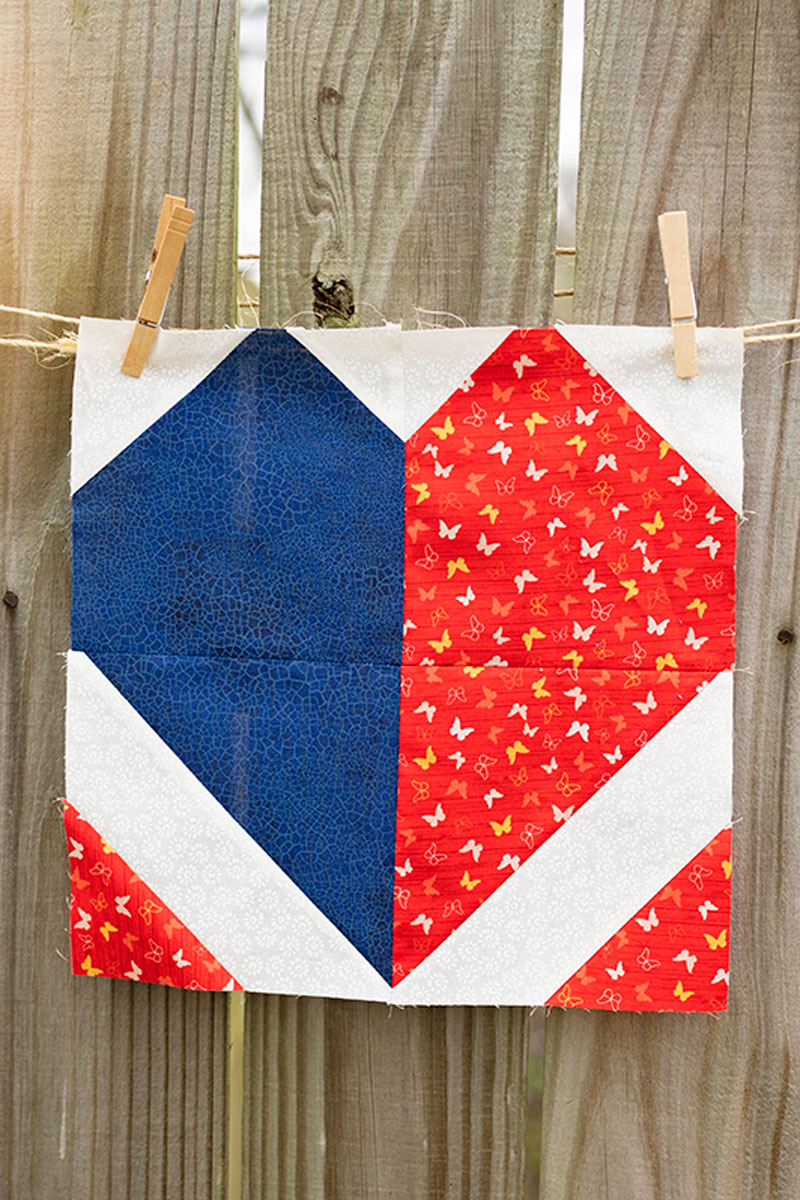
Construct the quilt block
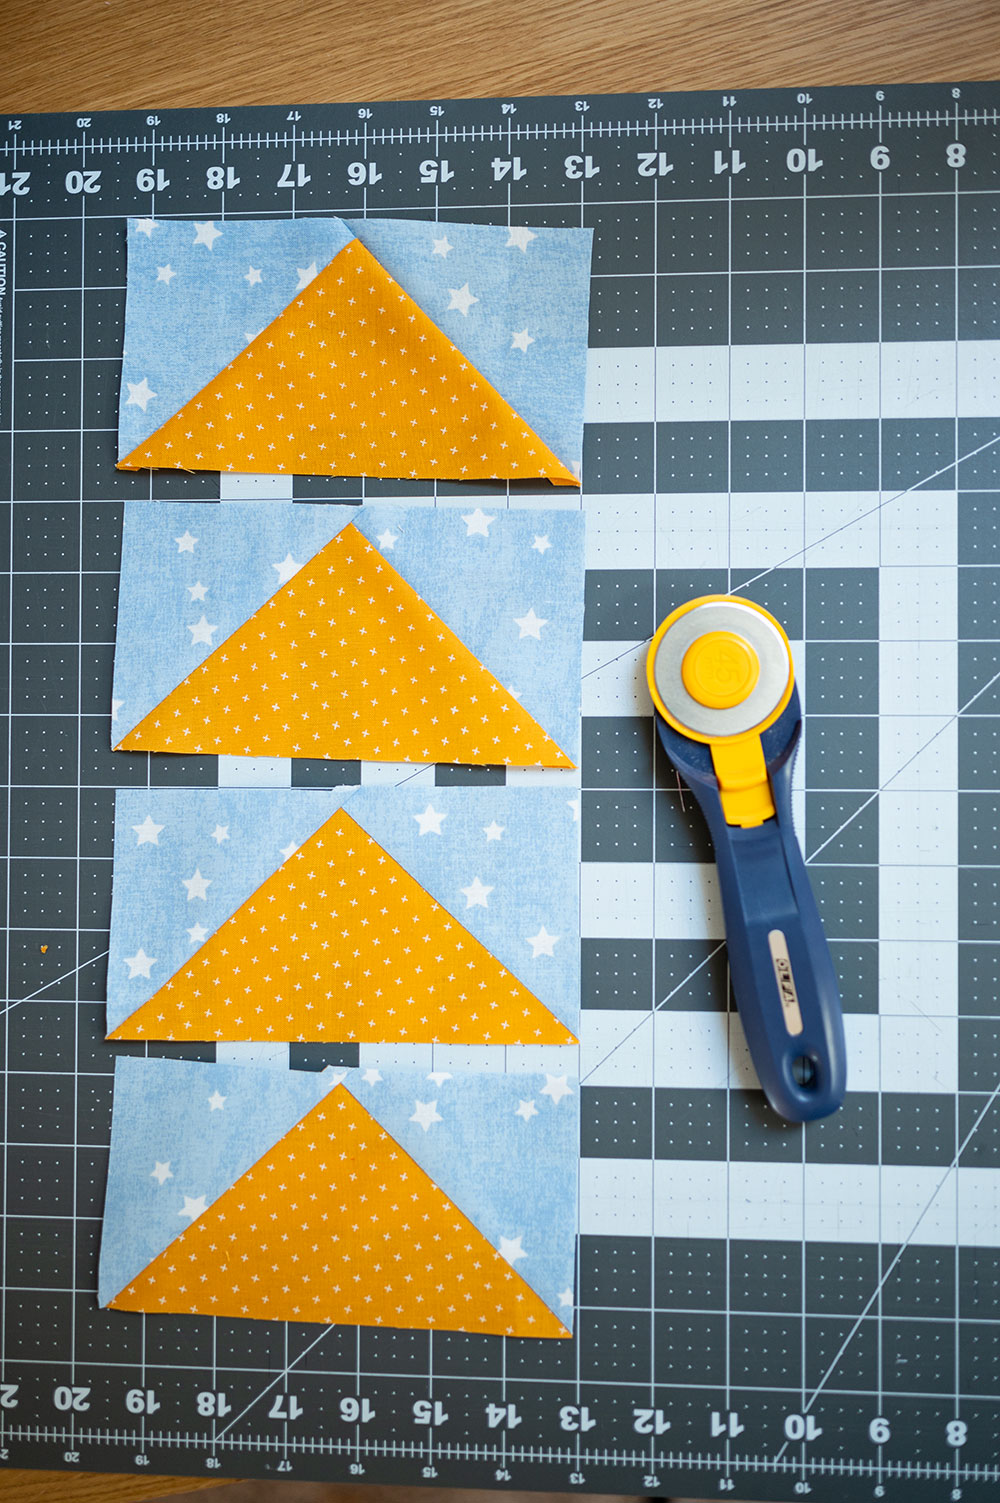
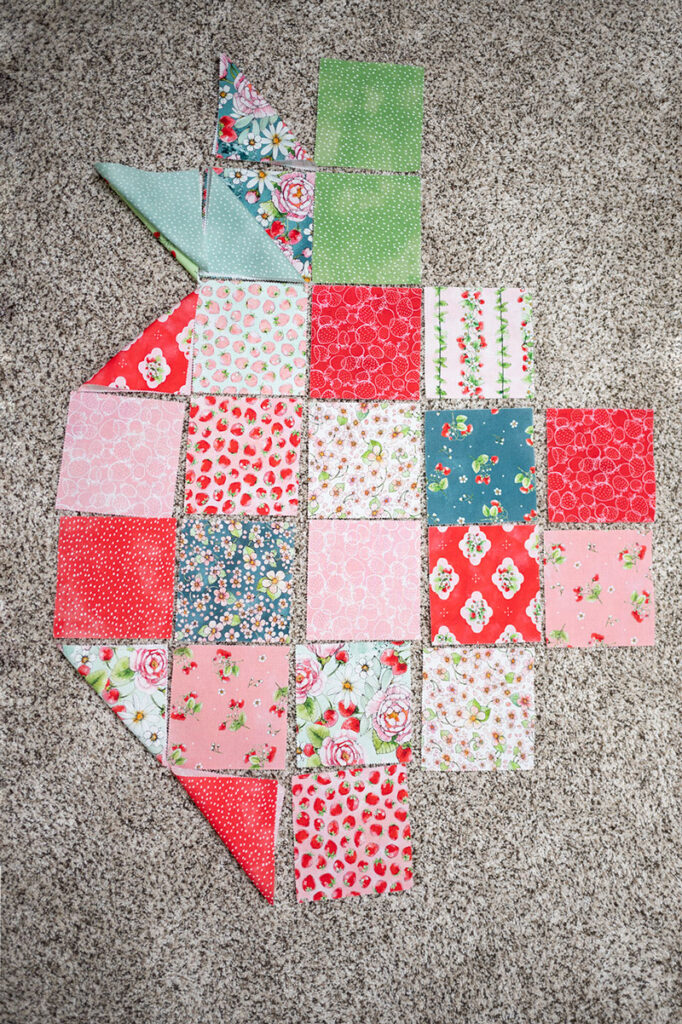
Construct the half square triangles and lay out the pieces in the order you want for your finished project.
- Notice the berry portion has 6 HST units that paired a print and a background. These are made using the 3 print and 3 background 5″ squares referenced in the materials section.
- The leaves pair a print to the background fabric but ALSO there are two HST units that pair the two prints used for the leaves.
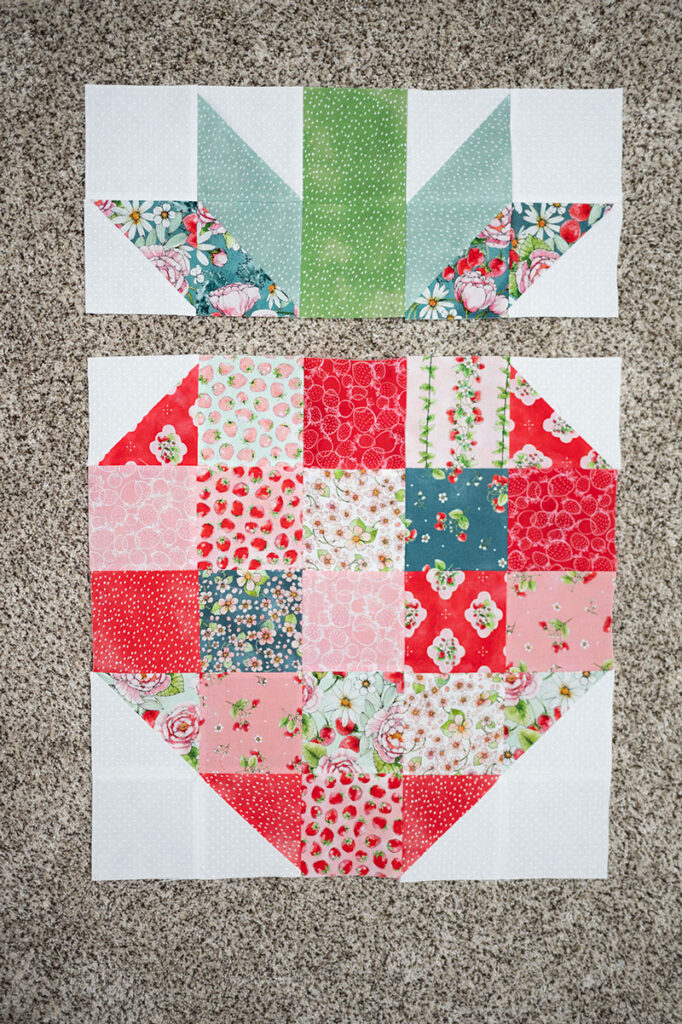
Construction suggestion:
I make the stem portion first and then put the berry together. I work in sections, but piece in whatever method works for you.
Once both parts are complete, join them to complete the block.
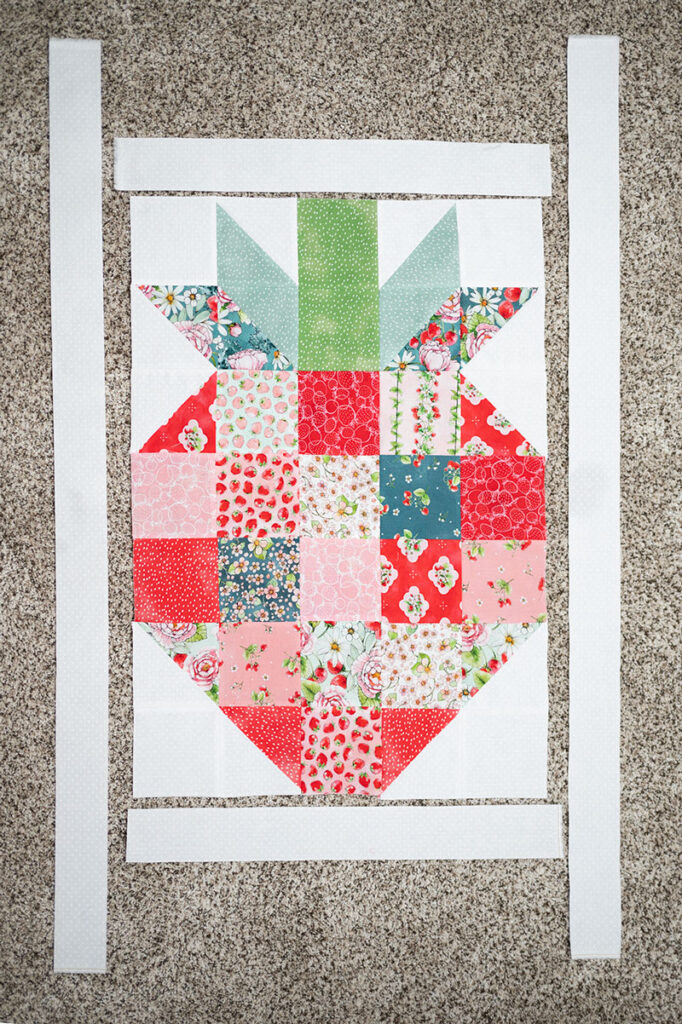
Apply the border
Three strips cut 2.5″ on WOF from background fabric will be enough to put a small border around the strawberry. If you don’t like a border, you can omit this part, but I like a little border between my block and the binding.
One strip cut in half will piece to the top and bottom of the block, and the two remaining strips will complete the sides. There is a small amount of waste, but it can go into your scrap bin if you want to save them.
Ready for quilting!
Once your borders are applied and edges trimmed square, the project is ready for quilting. Quilt using your favorite method.
Backing fabric is the Azalea colorway from the Strawberry Season fabric line, (affiliate link) and it’s absolutely beautiful.
I made my quilt sandwich using small basting pins.
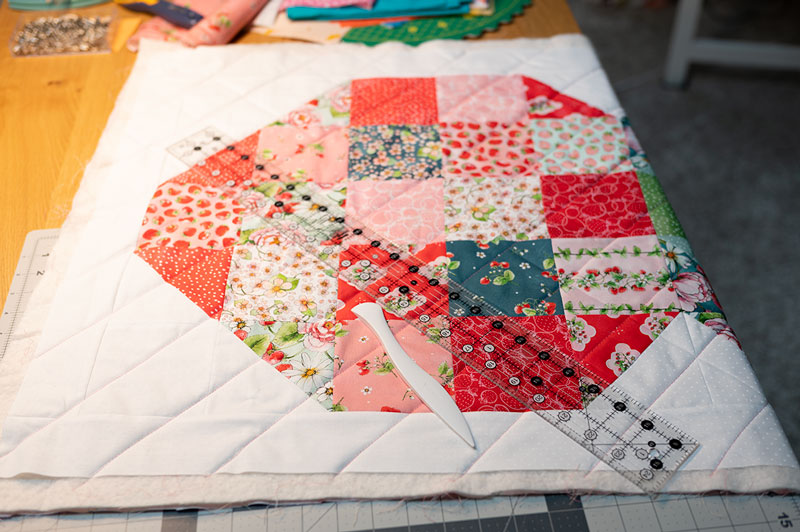
I adore a simple lattice quilting design which I mark using my long quilt ruler and Clover Point turning and marking tool. Just applying a little pressure using the rounded end of the tool tracing alongside the ruler will cause a little indentation that is a line to follow with the sewing machine for quilting.
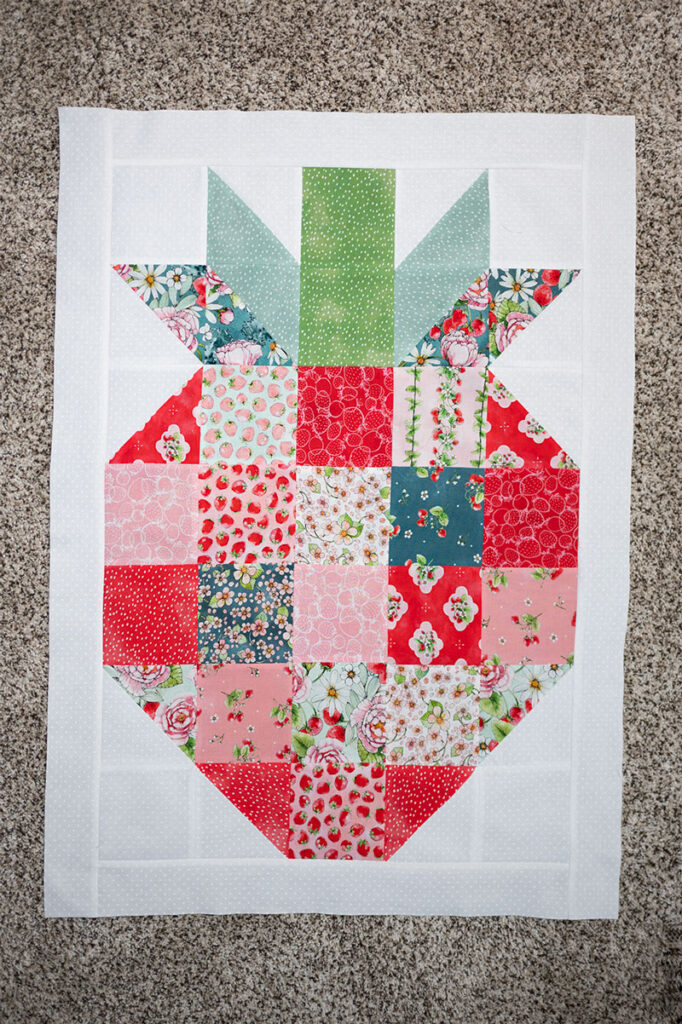
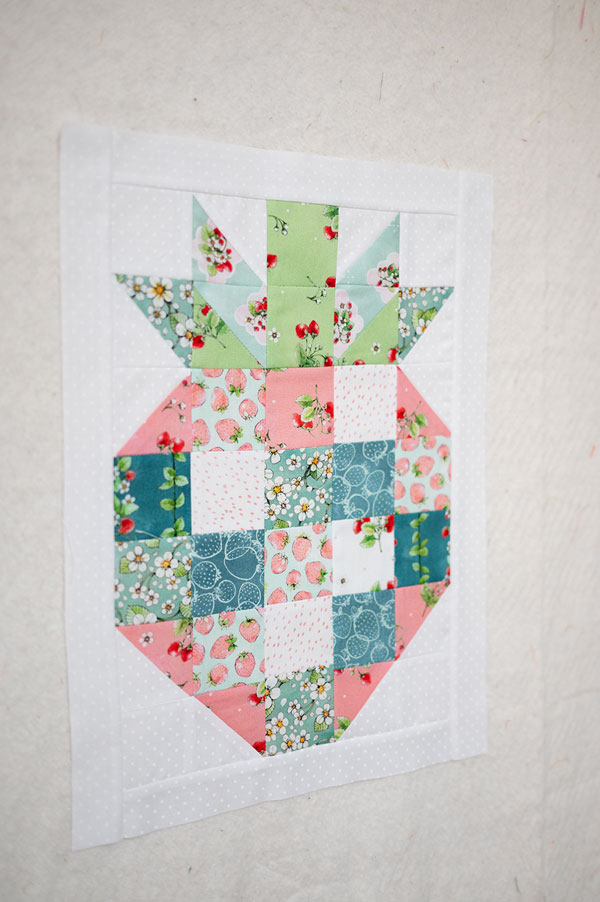
The finished Strawberry Wall Quilt
Once you’re finished quilting, trim the edges to square up and put your binding onto the project. And VOILA!!
I know you have questions. 🧐
Why are we trimming so many 5″ squares down to 4.5″ and leaving others alone at their original 5″ size. Charm packs are all 5″ squares so why are we trimming them down?
We have to trim down because I used fabric from the charm pack to make the strawberry motif and you can’t make a 5″ HST from 2 – 5″ squares. When you sew the squares together, you lose fabric in the seam allowance and the absolute biggest you can get is 4.5″ inches. It leaves the tiniest bit for squaring up. But if I had used some fabric I cut from yardage to make the HST units, I would have been able to over cut and have plenty of room for sewing and squaring up. I generally over cut by a full inch to make my units because I like the wiggle room when it comes time to trim. Sewing accuracy is key if you use the precuts to make the HSTs.
Any tips for accuracy in making the HST units?
I recommend sewing scant seams. Use them whenever sewing HST units with little margin or with Flying Geese that don’t use the Eleanor Burns method. I prefer the 4 at-a-time method for Flying Geese, but sometimes you need a different measurement that the rulers provide. My sewing machine, a Singer Patchwork, has an electronic needle left and right. I set mine two ticks to the left of center. Generally a scant seam is one tick to the left, but this is so tight, I went two. Very carefully double check that your presser foot has enough clearance before trying this. Broken machine needles are not a good thing! Finally, use the handwheel to confirm your machine setup will let you do that before hitting the foot pedal. Safety first! Your actual seam will be smaller that usual, but your unit will trim to size.
Not sure about Scant Seams?
This is how I started sewing my scant seams. It helped me to get them right, and it might help you too!
⬅️
What about sewing the lattice pattern for quilting?
Here’s a short visual demonstration about how I use the Clover tool with my long quilting ruler to mark sewing lines.
➡️
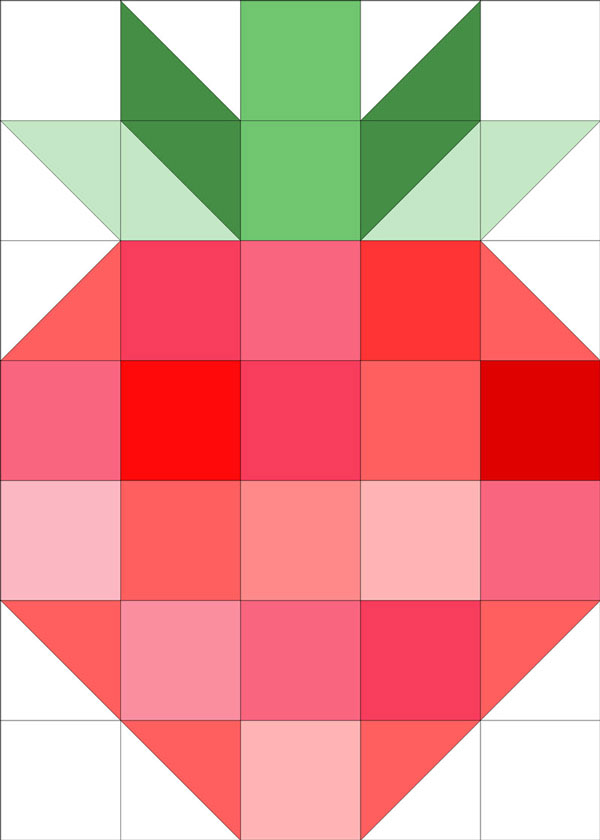
Diagram for the Strawberry Mini Quilt
If you’re like me, seeing the visual representation of the block or the overall quilt design is A LOT more helpful than reading lists with measurements often filled with fractions.
The base unit size is 4.5″ so make your HST units finished at that size. Make them however you like but achieve that finished size. I generally over cut my starting squares by a full inch to make sewing and trimming easy. Some people bristle at the fabric waste, but personally, I like to enjoy my sewing so making it easier to achieve a perfect unit is appealing to me. Please review my complete posts on constructing HST units for more details if you are unsure about this unit.
But wait….there’s MORE!
Here is the same pattern sewn with 2.5″ squares as the base unit. I used some of the Azalea yardage to construct the HST units in the berry portion of the quilt, so I followed my usual advice of making the units from 3.5″ squares. I made the HSTs in the stem from 5″ squares leftover from the first project that were trimmed down. In fact, this entire project is made from leftovers from the wall quilt!
It’s the perfect size to display a fun summer door quilt!
🚪
Enjoy Strawberry Season!!
I hope you love this sweet block as much as I do! Originally I was inspired to make today’s version from snapshots floating around on pinterest. I spent quite a lot of time looking for the original, but turned up empty handed. Eventually this one turned up in my search results so I wanted to link back to the post even though I don’t think this is her original design either. Like recipes, some things don’t “belong” to anyone but instead are classics. Similar to Sawtooth Stars or cake mix hacks, we all have our own version to share. And today I’m delighted to finally share MINE!
Hi! I’m Pattymac
Quiltmaker, baker, Garden Enthusiast