How to Can Tomatoes
It sounds like such a simple thing doesn’t it? When I expanded my garden a couple of years ago, I began to learn all I could about food preservation. I didn’t want to give all my hard work away, and I didn’t want it to go to waste. So I decided it was time I learn how to can tomatoes.
My own tomatoes. The ones I started from seed and nurtured for months and months until I was harvesting 15 pounds of fresh fruit every week. Mom and dad canned tomatoes every summer on our little farm up until Daddy just couldn’t manage the garden anymore. So, how hard could it be?
Let me just say, I was not prepared for the arduous task that is canning your own tomato sauce at home. There’s a reason why the Italians have over the entire family and run huge vats of strained tomatoes outside in late summer to get their sauces put away for the season. Everyone helps, because canning 100s of pounds of tomatoes requires a small army to get it done. My mom and dad split the tasks and Daddy ran the canner in the barn to keep the heat out of the indoor kitchen. It took 40 years, but now I understand SO MUCH about what they did and why they did it.
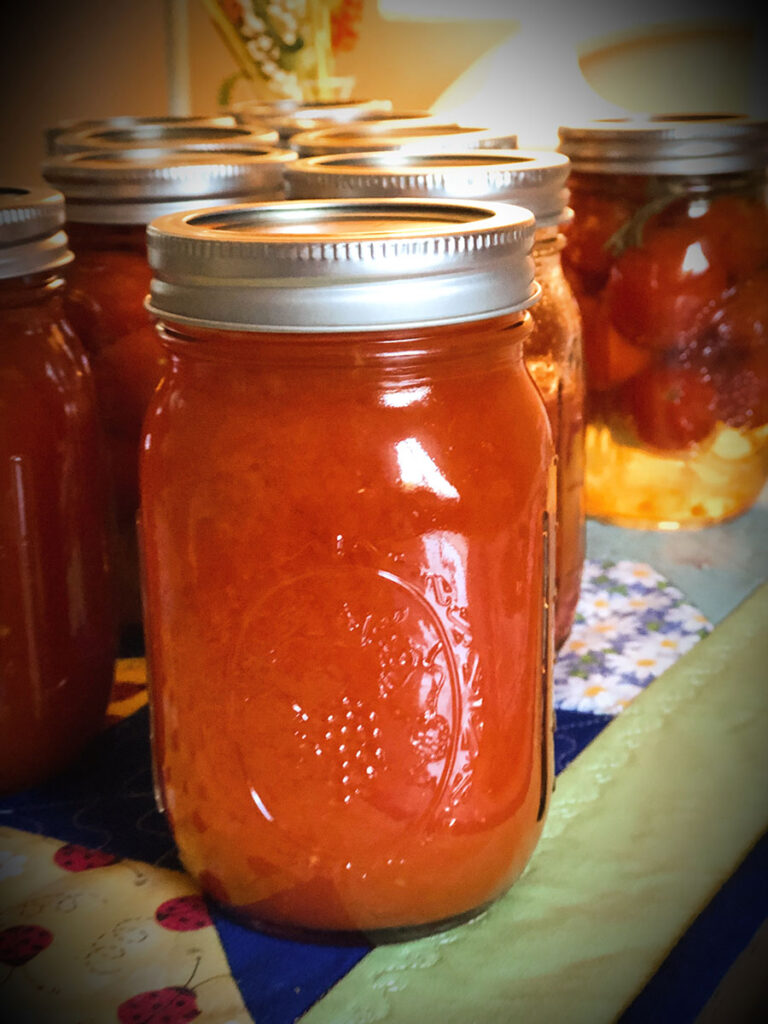
When people dream of how to can tomatoes this is the image that comes to mind.
I admit there really isn’t anything as lovely as pulling a jar of home canned tomato sauce from your canner and hearing that little pop that indicates a seal.
The amount of blood sweat and tears that goes into that pint jar of sauce is kind of mind boggling, and I have all new appreciation for the convenience of the grocery store. Still, I prefer to store my own products whenever possible because I know exactly what’s in them.
🍅
The Peace Corps used to have a slogan that said, “It’s the toughest job you’ll ever love.” Well, maybe. I think growing, processing, and ultimately canning your own tomatoes gives the Peace Corp a run for their money.
Let me give you the list I follow of how to can tomatoes, and then we’ll get into the nitty gritty of it all.
Before we start I need to say a couple of things:
- I work from frozen then defrosted tomatoes. This is hands down the easiest way of doing this. You get your best results when the tomatoes are peeled and seeded, and working from mushy defrosted tomatoes AND a food mill simplifies the process more than you can imagine.
- The point of this post is to share my process to get from whole tomato to canned sauce. Most people do it all in one day, and I came up with the revolutionary idea of splitting it up over two days. I do the same thing if I’m making a fancy layer cake. Splitting up the canning process, while still arduous, is much better than pulling a 14 hour day over vats of boiling water and tomatoes.
- The recipe I’ll share with you is from Ball®. I’ll link to the book, because it’s an excellent book (affiliate link) that covers a range of food preservation methods. Water bath canning is just one tool in the food preservation arsenal. I landed on this particular recipe because the recipe part of the process takes place in the JAR and not the stock pot. So it’s not critical you have the full 45 pounds of tomatoes called for in the recipe AS LONG AS you process the raw tomatoes into a cooked sauce properly AND put the correct measurement of an acid product into the jar size you’re using. I prefer pints to quarts, and the measurement of acid, lemon juice in my case, is different from a pint to a quart size container.
- This is not a tutorial on how to use a water bath canner. I have full details on what I use in a different post.
In fact, this blog post is not going to have specific instructions on canning the tomato products, because there are recipes available. Many of these recipes I’ve suggested in the form of books. I’ll let you select your your own specific recipe, decide what jars you want to use, how you want to water bath your tomatoes, etc. What I am sharing with you here is a couple of methods to make the process a bit easier. Namely to work from frozen tomatoes and to split up the juicing and the physical canning over two days. I’m showing you the recipe I use now for all my tomato sauce canning, and I’m sharing the book where I found it. Consider this post to be a behind of the scenes of HOW to get it done, and you will need to fill in the blanks when it comes down to the specifics.
- Don’t give up now. I know it’s a lot. But if you take it step by step, you can do it. The sense of accomplishment you’ll have when you’ve opened that first jar of your own home canned sauce to use in a dinner recipe will cause all the memories of the torment it created to fade away. Kind of like when your baby smiles at you. You forget all about those 26 hours of labor.
👩🍼

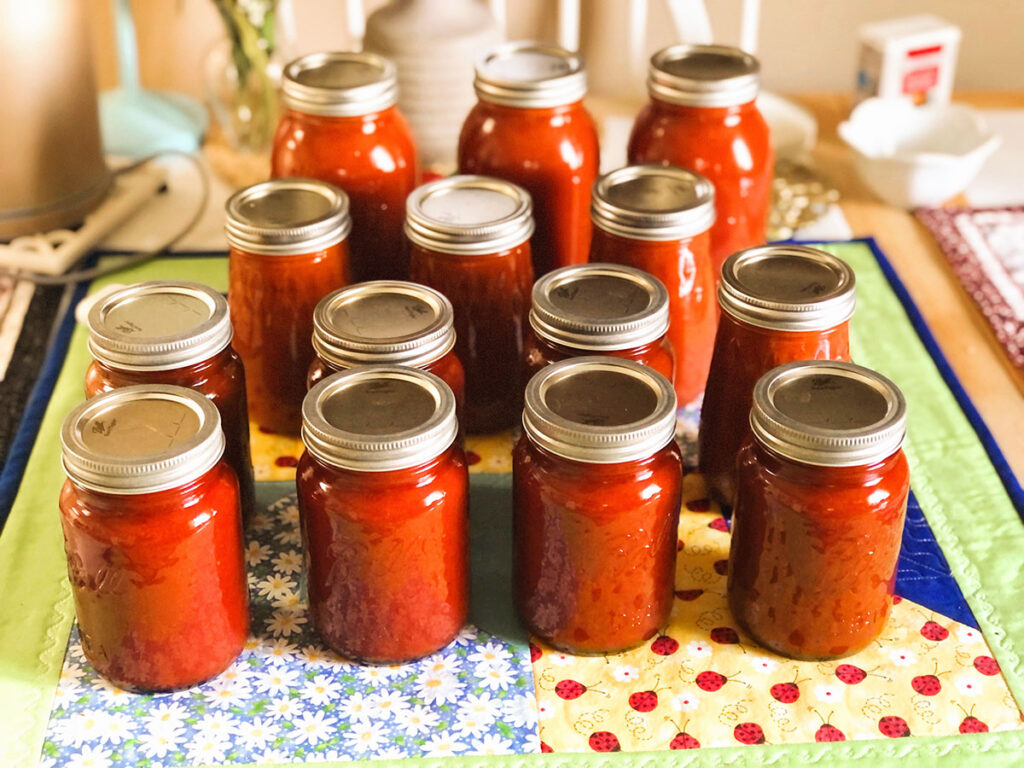
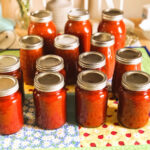
On this day I canned 11 pints and 3 quarts of tomato sauce. I had to run two batches through my canner, so the canning process alone took most of the afternoon to complete.
Yes I did just compare the process of how to can tomatoes to child birth. Once you’ve been through it, you will understand why.
Ok, here we go. The full illustrated guide to understanding my process of how to can tomatoes in a home kitchen. I’m going to split the process up by Day 1 and Day 2.
Day 1: How to Can Tomatoes
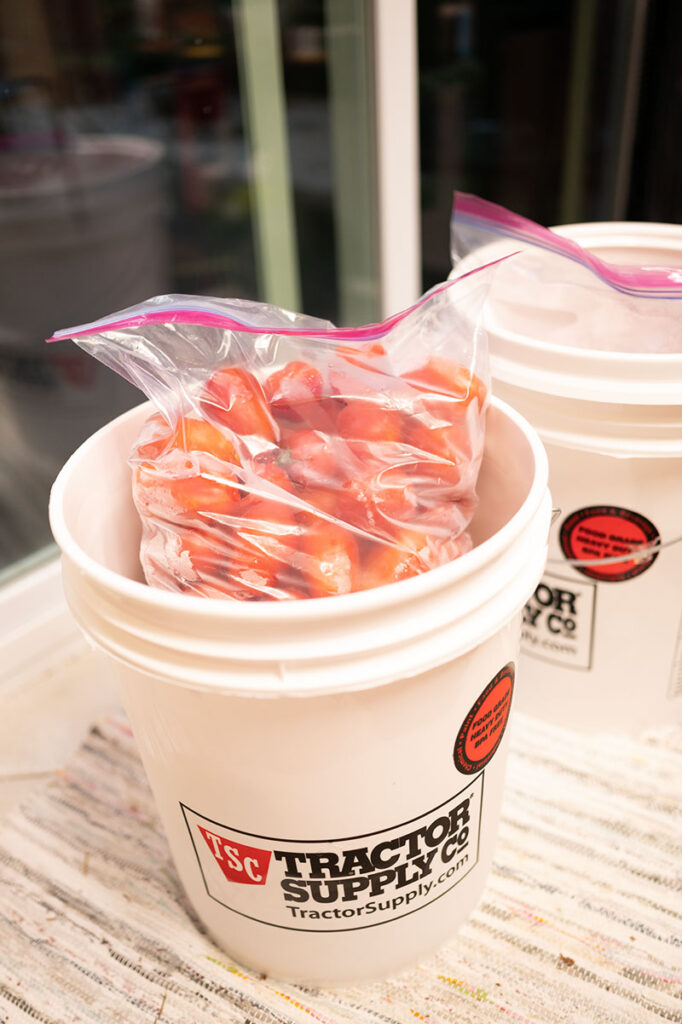
Actually it all starts the night before.
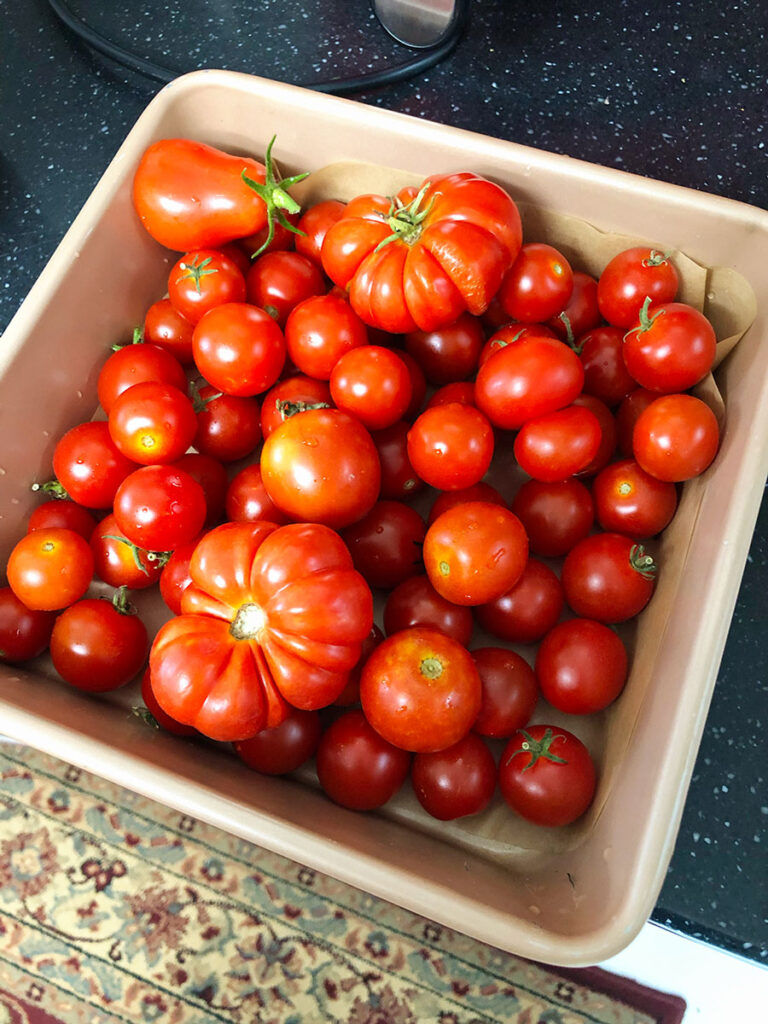
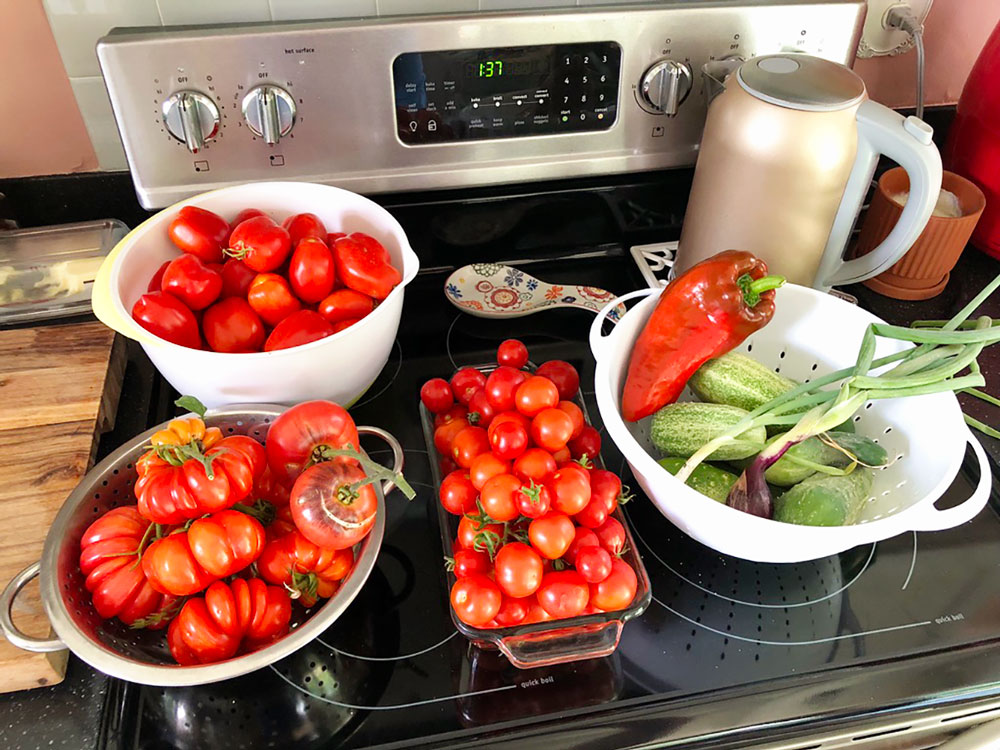
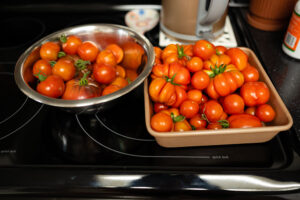
Remove about 30 pounds of frozen tomatoes from your deep freezer. I recommend putting them into 5 gallon buckets in the kitchen. If you don’t contain the bags, you’ll have puddles of water everywhere.
In the morning, place a bag at a time of mostly thawed tomatoes in a HIGH SIDED sheet pan. You need the high sided pan to catch all the water that is going to cook off the tomatoes as they continue to thaw.
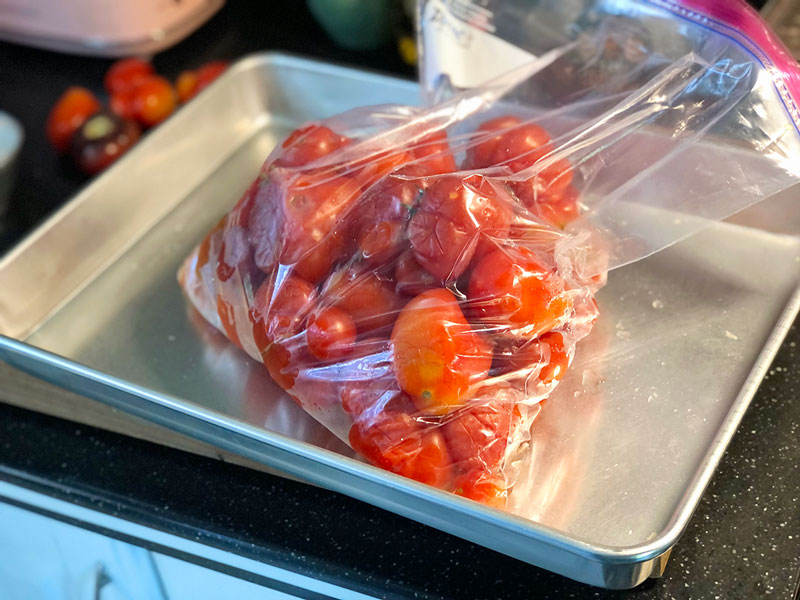
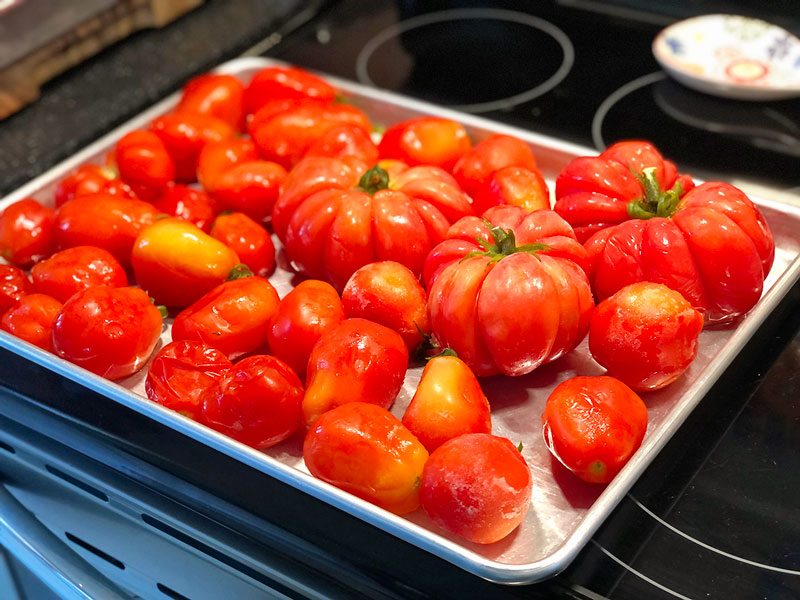
Spread the partially thawed tomatoes out on the pan evenly. Roast them in a 400° F oven for about 20 minutes. This will finish the thawing process of the tomatoes which are still frozen in the middle. You do NOT want to mill partially frozen tomatoes as it will break the equipment. Ask me how I know.
Once the tomatoes have been prepared in the oven, remove them and start running them through the food mill of your choice. I recommend this setup if you’re doing anything more than 10 pounds. The skins will squeeze right off and you can mill the squishy remainder.

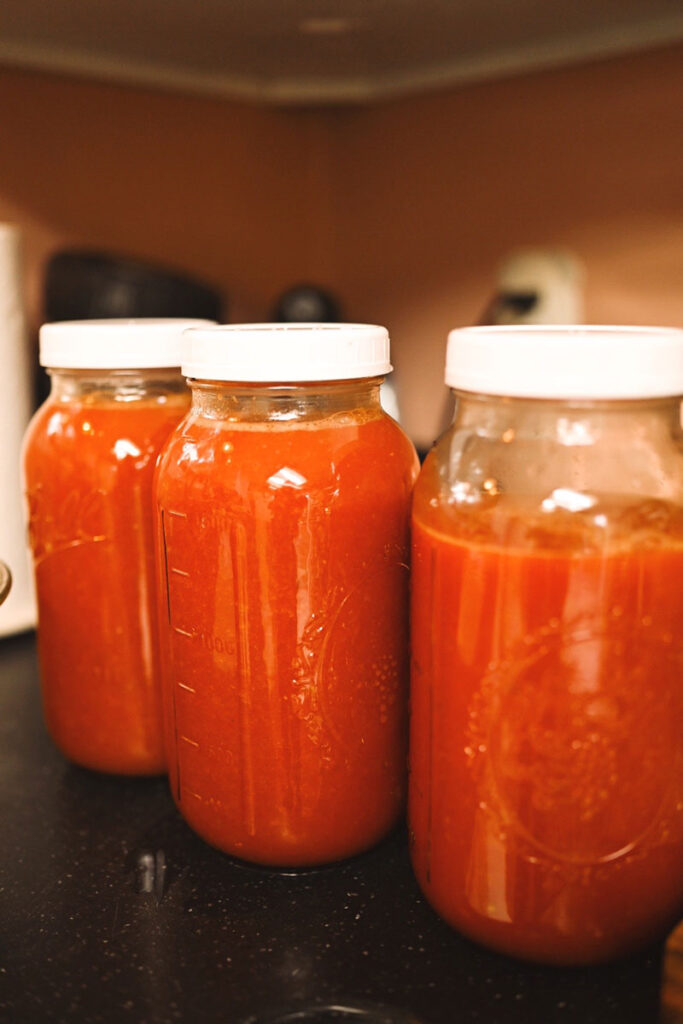
Pour the milled tomato juice into large mason jars and refrigerate over night.
I use large half gallon jars and as you can see approximately 10 pounds of frozen tomatoes will mill down to about a half gallon of tomato juice.
The jars are extremely heavy so don’t store them all on the top shelf in your fridge! I lay mine on the side and store them on the lowest shelf to distribute the weight in the fridge.
Use good tight fitting lids so nothing drains out.
Day one is complete.
😮💨
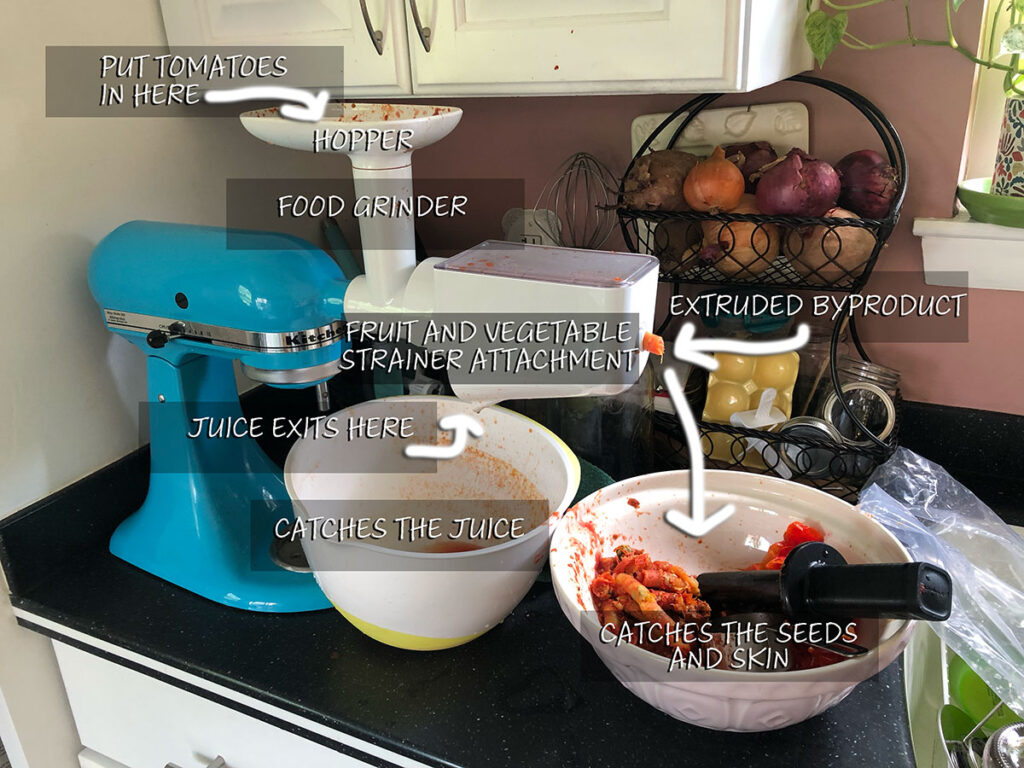
Let’s take a closer look at how I set up the food mill operation.
It’s kind of a lot going on, I listed all the parts to give a more descriptive look at the process. In year’s prior, I did much smaller batches and used a small hand crank food mill. It was ok, but this KitchenAid® setup is the only way to go if you truly want to start processing your fruits into canned and frozen juices. I also did this with watermelons I grew, but that’s a story for a different update.
And if you’re wondering WHY we are milling the tomatoes at all, it’s to separate the juice from the seeds, the pulp, the skins and the core. Your best sauce is achieved when you’ve removed as much of the tomato product that isn’t pure juice. You do not find seeds or pulp in commercial sauce, and that’s because it’s so much better without it. Some people just cook up and grind down everything, but milling and then cooking yields a much higher quality product.
An engineering schematic for how to can tomatoes using a food mill to prepare the juice
If that seems like kind of a lot, well that’s because it is.
The worst thing is the amount of mess it makes. The dishes and cleanup just from this part are reason enough to split up the juice extraction from the actual canning. You might also note it took a fair amount of equipment. Let me list out what you’ll need to follow this set up.
- Clean, preferably food grade 5 gallon buckets. Use these to defrost the tomatoes as they will catch all the water that drains off. Clean, food grade buckets get used a LOT in my pantry set up, so having a nice collection is useful.
- High Sided Half Sheet sized Sheet pans. People use high sided sheet pans (affiliate link) to make cakes, but they work really well for the little bit of roasting we need to do in order to be sure the tomato centers are fully defrosted. Part of what we’re doing with the tomatoes is cooking off excess water to distill down to a thickened tomato sauce. The conversion from soupy to saucy happens because of cooking off all that excess water. It starts here as the tomatoes fully defrost.
- KitchenAid® mixer with the food mill set up. This is the expensive part of the setup. If you already have the mixer, you are simply adding attachments. More on that in a minute. If you really want to pursue cooking at home and preserving food, I can’t recommend investing in a Kitchenaid® mixer highly enough.
- Two or three large bowls. The bowls catch the juice (affiliate link) and the extruded pulp and seeds.
- Half gallon Mason Jars. The large Mason jars (affiliate link) will efficiently store the tomato juice over night in the fridge. I use the large half gallon sized jars in numerous ways around my home and kitchen. They can be hard to find in the store, so grab a case if you happen to see them. I check the aisles where I purchase jars every time I go to see there are any on hand. They are seasonal and in short supply these days. Plan accordingly.
- Reusable lids. I love the plastic reusable lids (affiliate link) designed for use with mason jars. The Ball® branded variety are rated as leak proof so safe to use in the freezer as well as fridge. But I often use the cheaper knock offs (affiliate link) for shorter term storage.
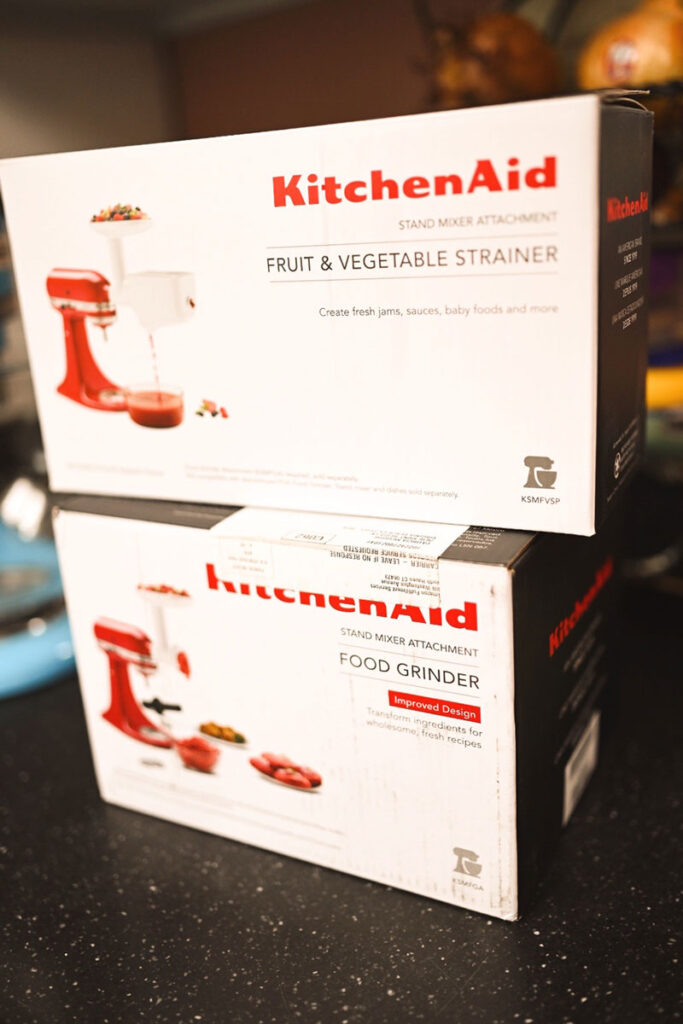
How to construct the food mill on the KitchenAid® mixer.
What people are not clear about when it comes to setting up your food mill attachment is that it’s actually constructed of two separate items
- The Food Grinder (affiliate link)
- The Fruit and Vegetable Strainer (affiliate link)
You need both to do this. The food grinder will also grind meats, so you can get more use out of it than simply running garden produce through it.
I know this sounds like a lot of equipment, but I processed close to 100 pounds of tomatoes from my garden into sauce this year, and no way I could have done it without the food mill. And if I take care of it, it will last me the rest of my life.
Welcome to Day 2 where we are finally ready to can the tomatoes!!
In order to can the tomatoes, you need to use a good, tested recipe.
This one is my go to now, and it appears in the Ball® Blue Book Guide to Preserving 2023. (affiliate link) Why do I like it so much?
The recipe part of this occurs IN THE JAR and not the saucepan. This means however much sauce you have doesn’t really matter BECAUSE you are only having to cook down the juiced tomatoes and the acid is added to the jar based on jar size.
Canning a plain sauce means you can season it however you like later, but honestly, it doesn’t need much.
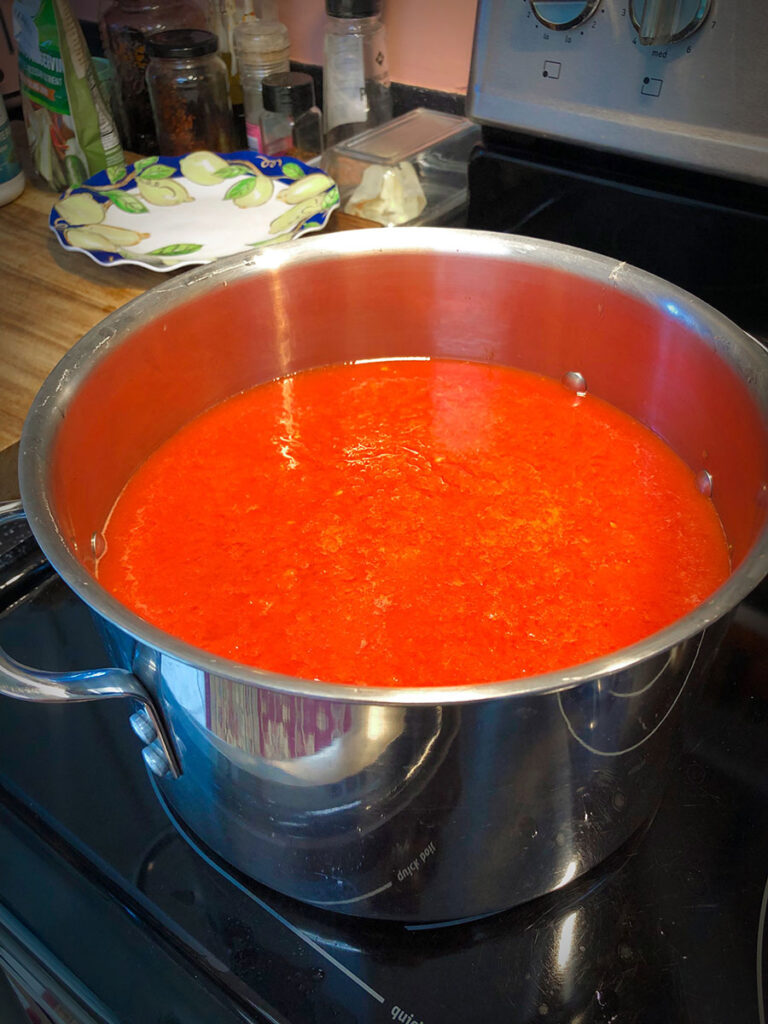
Pour your juice into a stockpot or a dutch oven. Use any heavy bottom, non reactive pot you have. Then you cook on medium high heat until the juice reduces down by around half.
Be careful, because you don’t want to burn your sauce! All the work, including the growing and cultivating of the plants could be ruined if you get careless here and burn the tomatoes.
Also, this takes a while. Like a couple of hours, so prep your jars and the canner while this cooks down. follow the recipe as written, but I can tell you, I used the one I posted above.
Once you’ve completed the canning process, you will have beautiful jars of your own home canned sauce!
This process took me literally all day to complete, so it’s not fast. And you have to be really careful in handling the jars and having the canner set up properly etc.
This is not a tutorial on how to can but rather a story to show you how I split up my process and how I get from whole tomato to canned sauce.
My friend, who cooks everything, asked me if it was really worthwhile to spend this much time and effort transforming my garden tomatoes into canned sauce.
And I would say resoundingly YES!! I love knowing how my tomatoes were grown and what’s in my sauce. Essentially the only added ingredients to my sauce are sunshine and lemon juice.
I can’t begin to describe the satisfaction and pride that comes with being able to can your own tomato sauce. I’ve cooked and baked a million things. This is the most arduous, tiring, challenging thing I’ve ever done. And I pray that I get to do it every single summer.
☀️
Here’s a short video showing highlights of the summer growing season and how the sauce looks cooking before going into jars for canning.
Sometimes a short video or a picture can sum up many thoughts at once, and I hope this helps to put together some of the steps we’ve been discussing.
Tools and equipment used for day two of the process, the cooking and canning of the sauce.
For the Canning part of it:
- Canning jars, lids, (affiliate link) and bands: I used a combination of quarts and pints. Note that the instructions for quarts and pints is slightly different, so follow the instructions carefully.
- Canner of your choosing: I have a Ball Waterbath canner, (affiliate link) and I love it. It’s gone way up in price since I got mine, so I hope what I have lasts a very long time. They aren’t cheap.
- Various canning supplies: You’ll need a ladle and a good funnel, and special tongs to move the hot jars.
- A good recipe: I use and recommend the recipe I shared with you earlier from Ball®.
For the Cooking part of it:
- Large Stockpots: I use a stockpot and a 5 Quart Dutch Oven to cook sauce on tomato day.
- Large spoon for stirring: You need to keep a close eye on the sauce to make sure it boils away extra water, but not so hot that it scorches. Checking the bottom of the pot with a spoon for anything sticking is a signal to turn the heat down slightly. You know you have been completely successful when the last drop has been put into jars, and you finally see the bottom of the pot, and it’s completely clear of burned or scorched spots.
- At least 2 or 3 half gallon jars of the tomato juice you milled the day prior: The star of this show is tomato juice you made the day before, so make sure it’s been properly refrigerated overnight. Carefully cook it down so that when you arrive at the bottom of the pans they are clear and scorch free. Not burning a tomato product that needs to be cooked down is a pinnacle achievement in cooking, so celebrate it when you pans look like this at the end.
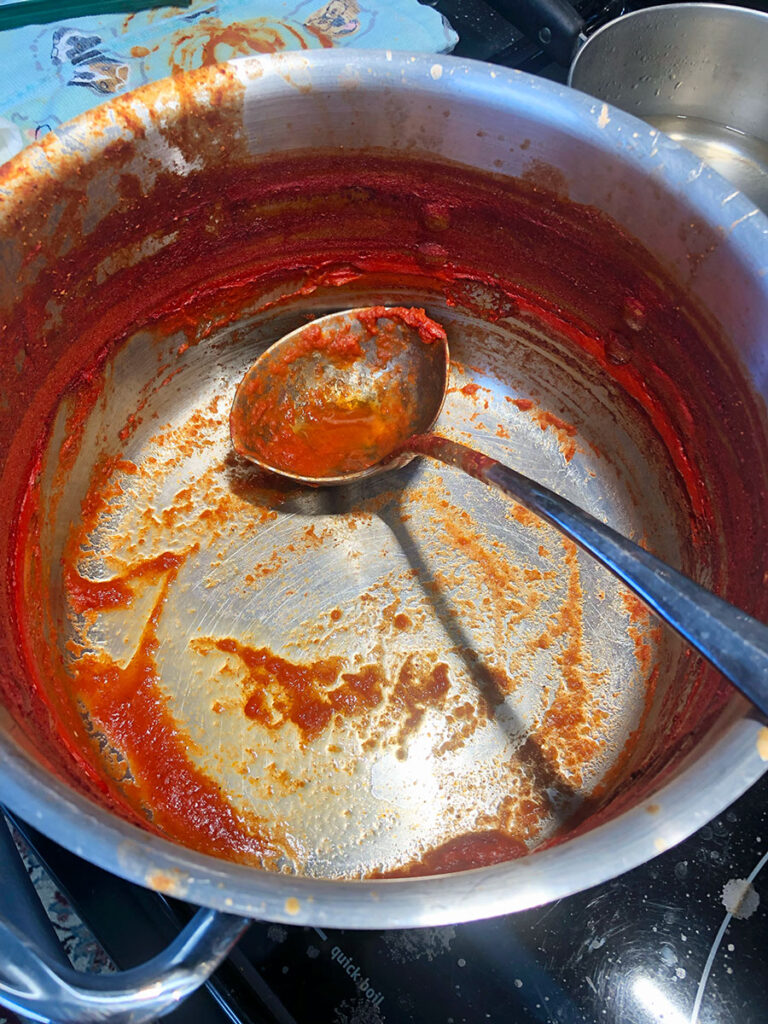
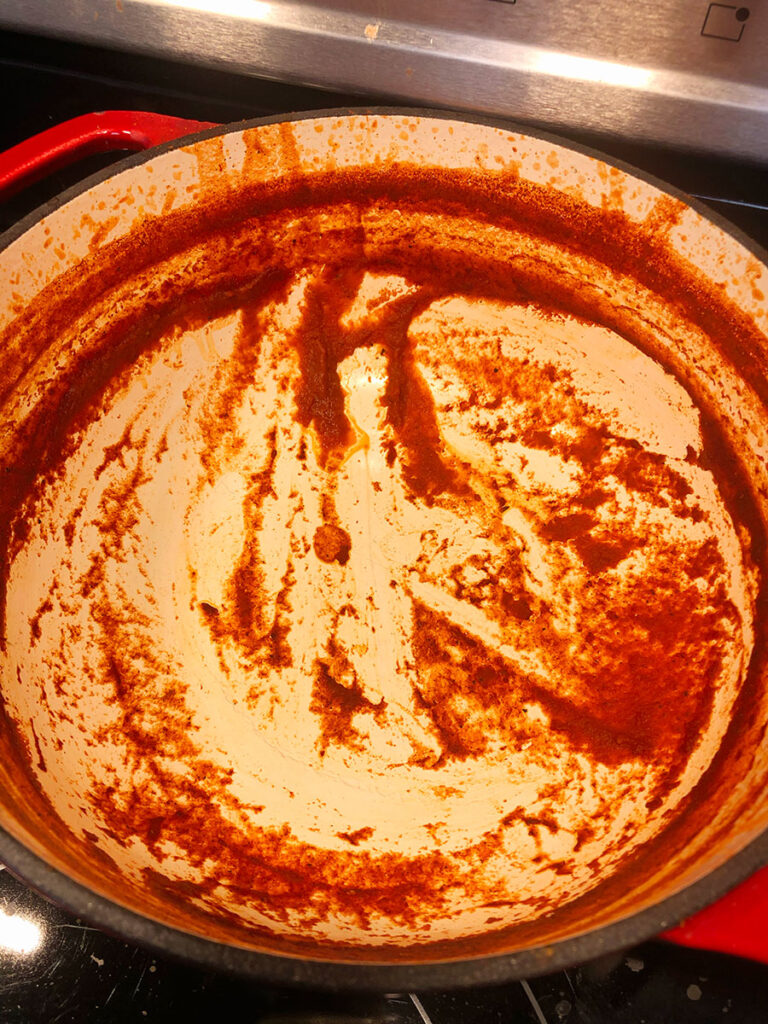
After two laborious days spent milling and cleaning and washing and cooking and cleaning, at the very end you’re left with two large pots that will need to soak for a while to clear up the tomato product on the sides of the pots.
Yeah it’s a hot mess to clean up after. As I said, this task is not for the faint of heart.
- What is the easiest way to can tomatoes: Honestly, if you’re looking for easy, then this is not your project. The box cake mix hack is more up your alley if you’re looking for easy. If you want truly easy sauce, buy the Classico on sale and stock your pantry with that.
- Do tomatoes need to be cooked before canning? Well it depends. Some recipes are hot pack, which means cooked, and some are cold pack, which means raw. I’ve only done cooked sauces and spreads so I can’t speak on cold pack canning. According to the National Center for Home Food Preservation, tomatoes can be canned raw or boiled. The standard time for boiling tomatoes for canning is five minutes, but again, be sure to follow the time listed in your specific recipe.
- Do you have to pressure cook tomatoes to can? No you don’t! Tomatoes are a high acid food which makes them safe for water bath canning. You still add an acid to be absolutely certain the chemical balance is safe, but all that means is you’ll add a small measurement of lemon juice. How much depends on the size of the jar.
- What happens if you forgot to put lemon juice in canned tomatoes? Officially, if the tomatoes have not been acidified prior to canning you are risking the possibility of bacterial growth, which can be fatal. If you just canned them, and they haven’t been stored, you might be able to open the jars and start over, or maybe freeze them. Personally, I would cook a couple jars into soups or a pasta dish and freeze that, freeze a few of the whole jars after they’ve cooled and then use a jar or two right away in cooking. If it was a large batch, I would open them all up, reheat to boiling in the stockpot and basically start the canning all over again.
- Do you have to boil jars when canning tomatoes? You normally sterilize canning jars in boiling water before filling, to make sure there are no molds or bacteria that will spoil the food. Then you boil them again with the lids on, which further sterilizes them, but also drives out air, so the lids create a vacuum seal.
- Do you have to peel tomatoes for homemade sauce? Working from thawed, frozen tomatoes, the skins literally fall off the fruit so you only running the insides through the food mill to separate the juice from the pulp and seeds.
- Why are Roma tomatoes better for sauce? I personally mix all my tomatoes together and so several varieties make up my sauces. Romas are wonderful for sauce because they have more flesh and less water than other tomatoes. Also, roma tomatoes have fewer seeds. When they cook down, they really intensify in flavor.

I hope you’re still with me.
If that seems like a lot, well that’s because it is. To be honest, I was surprised by how much information I need to convey in this story, and this is doesn’t include the specifics of the actual canning process. I’ll leave that to the books I’ve suggested. You can decide on your preferred methods and recipe. But I hope you will make your life a bit easier and follow the instructions I’ve shared with you here.
There are far easier items to can out there, but none as rewarding. And you simply cannot top the taste of your own garden fresh tomatoes in sauce over pasta that you prepare on a cold winter day in January. I love pulling food I’ve preserved for meals in the dead of winter. It’s wonderful to enjoy the fresh food from summer. It feels like I’m reconnecting with those who lived before mass marketed grocery chains filled daily with truck deliveries from huge agribusinesses became our primary food source. The actual connection you’ll make to the food, the REAL food, when you take the time and effort to grow and preserve your own garden is an experience well worth having. Even if it is a ton of work. It truly is the toughest job you’ll ever love.
👩🌾
How to Can Tomatoes
- Total Time: 12 – 14 hours
- Yield: depends
Description
Tips and tricks to make canning tomatoes easier
Ingredients
- Several pounds of frozen and thawed tomatoes
- A good recipe to use for canning the tomatoes. I always recommend books from Ball® but you can choose your own adventure when it comes to the specific canning recipe.
- Brings lots of patience and have a couple of days to get this project complete. It’s a lot of steps and it is fairly time consuming.
Instructions
- Defrost your frozen tomatoes overnight at least but 24 hours is best.
- Mill the thawed tomatoes using your preferred method. You want juice as free of seeds and pulp as possible.
- Store the tomato juice in glass jars overnight in the fridge.
- The next morning, cook the tomato juice into sauce using your chosen recipe.
- Can the sauce using your preferred method. The recipe you use for canning will instruct on times etc.
Notes
As I stated in the body of the blog post, this is not so much a recipe for making home canned tomatoes as it is a step by step process I have developed for making it easier. It’s still not “easy” but splitting up your work helps. Like a LOT. Work from frozen and thawed tomatoes, and use a really good food mill to extract the juice in one afternoon. Refrigerate the juice overnight, and the second day cook the actual sauce and do the canning. I find I do the cooking in the morning, take a lunch, and can the sauce all afternoon. Generally I work in several batches of cooking sauce and canning because my stockpots are only so big and can hold only so much juice at a time.
It’s a big project, but if you take your time and split up the work, it goes so much better. Everyone else mills and cooks and cans all in one day, and unless you have several people helping you, it’s really too much. I do this process by myself, I have a small kitchen and no dishwasher. So the only way I can keep up with the dishes AND get my sauce into jars correctly is to split my work. I hope this helps you!
- Prep Time: 4 hours
- Cook Time: 8 hours
- Category: fresh fare
- Method: canning
- Cuisine: italian

Hi! I’m Pattymac
Maker, Baker, Tomato Queen