How to make quilted fabric
Disclosure: This post may contain affiliate links. As an Amazon Associate, I earn from qualifying purchases. 😊
Here we talk a lot about quilt blocks and making different types of quilted projects. What about how to make quilted fabric?
Ok. I know what you’re saying right now. Why should I care about how to make quilted fabric? I’m here to learn piecing skills and make fun quilted projects. I totally understand that, but there is more to quilting than making blocks and bed quilts. The truth is that sometimes we need to construct the fabric we want to use in the making of another project.

I know, right? If you still aren’t with me here, you probably want to know WHEN do we need to make our own fabric for projects. Isn’t what we get off the bolt good enough?
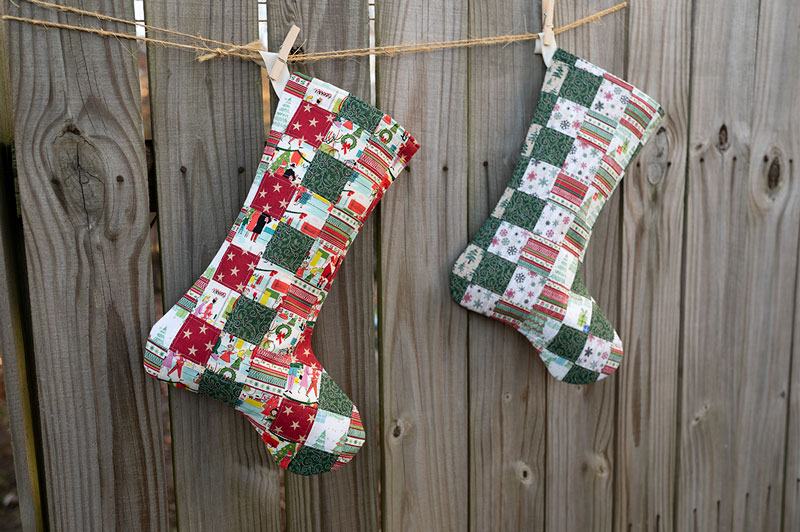
Well sure! But sometimes you might want to have quilted fabric for bags or for placemats or simple mug rugs etc. The real reason I’m sharing this post is for the Christmas stockings I made. I realized that putting in the details on how I made the fabric for the stocking shell was going to make the stocking tutorial WAY too long. So I’ve split the fabric making part into it’s own story. The actual making of the stocking is the next post. Let’s jump in, shall we?
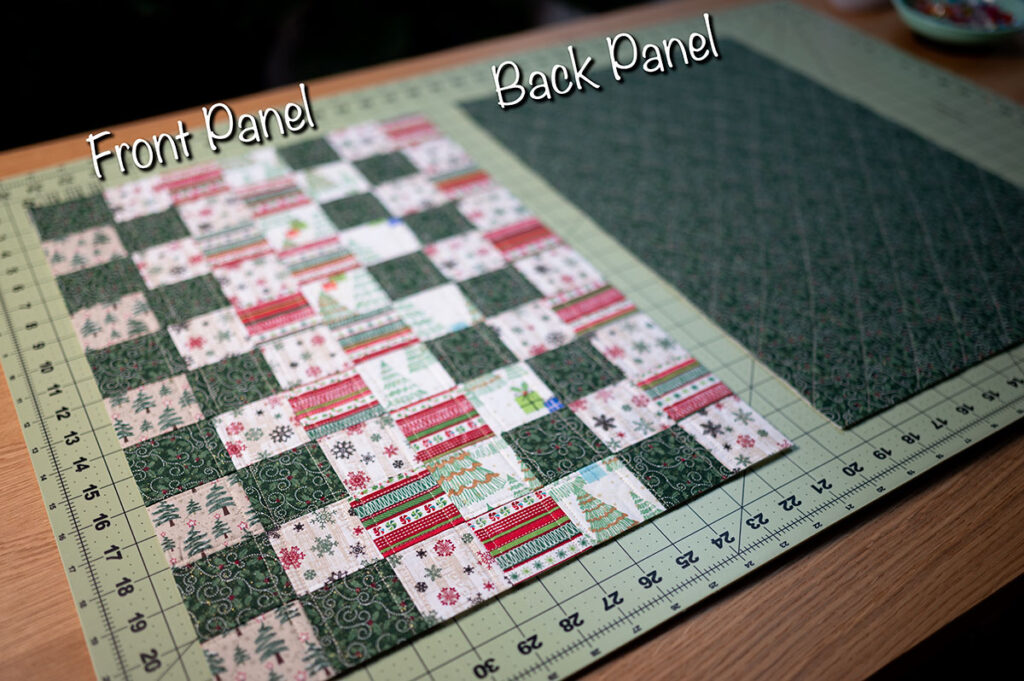
If you want this:

Patchwork front to a Christmas Stocking 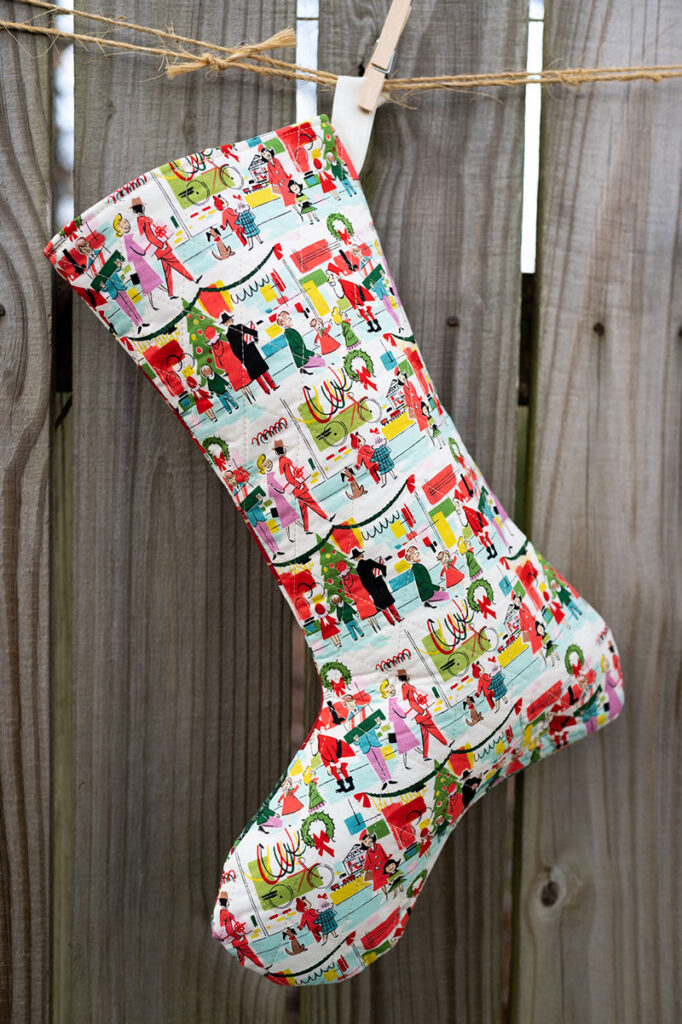
Quilted fabric on the back panel
Then you will need to construct a couple of different quilted fabrics: The front panel is Patchwork Squares and the back panel is a cut of fabric quilted in a diamond pattern. Let’s talk about how to do it.
To Construct the Quilted Panel:
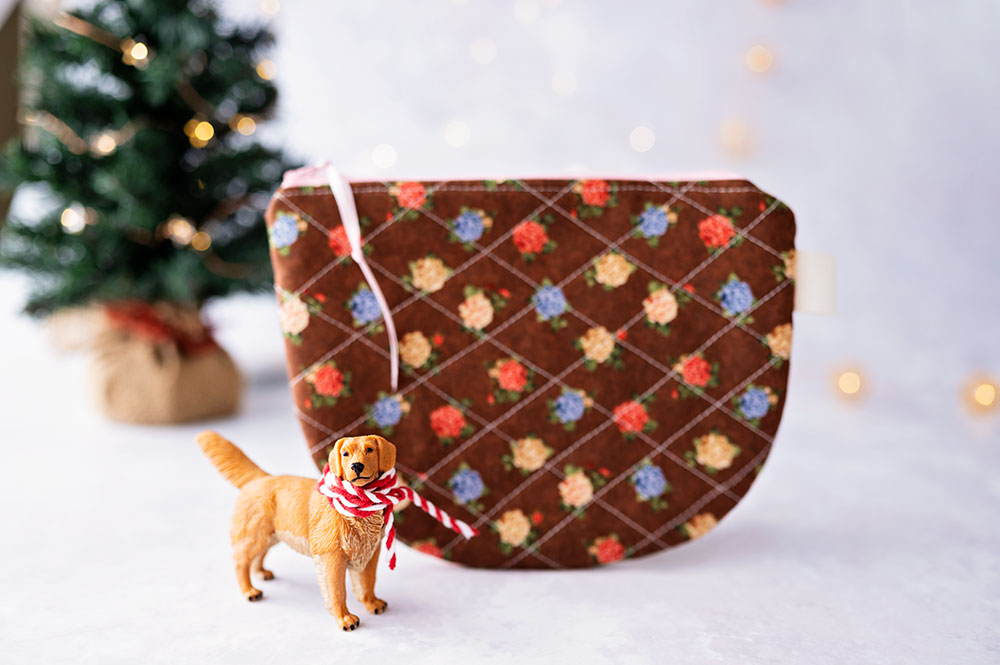
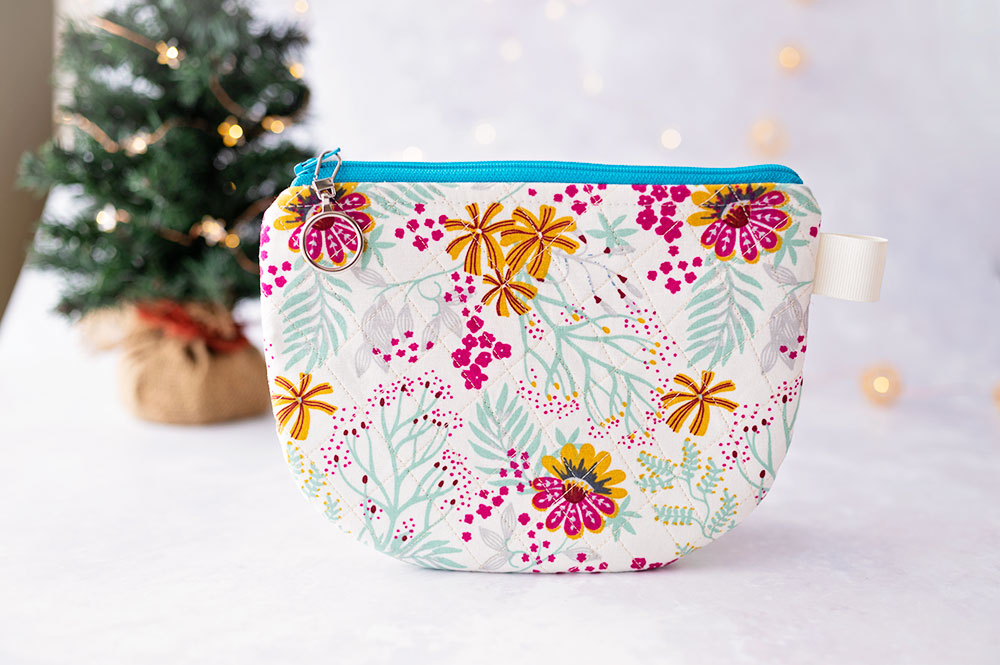
- Working with a cut of fabric the size of a fat quarter is the easiest place to start. That measures 18″ x 21″. With a piece that size, it’s plenty of room to cut all sorts of other projects. (affiliate link) I did this to make a cute zipper pouch. And it’s also the perfect size for the Christmas stocking pattern I used.
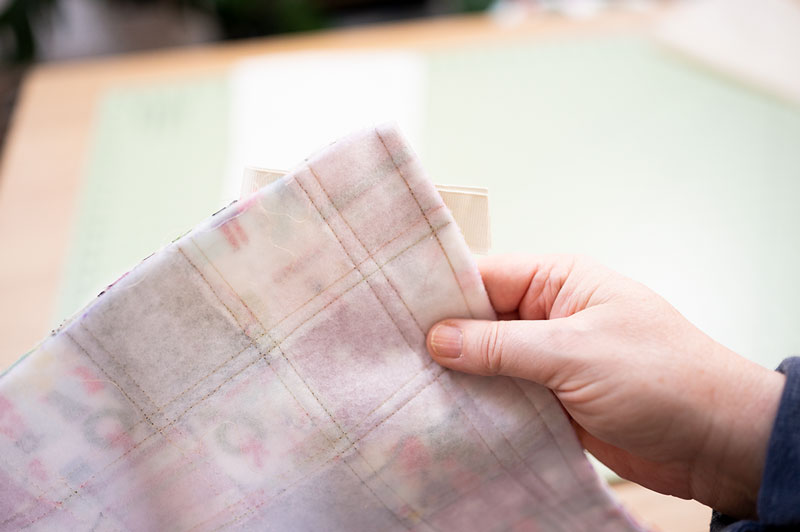
- Adhere fusible quilt batting to the fabric. Follow the instructions for the product you’re using. You could use regular batting, but you will need to secure the pieces together, and this will yield a drapey fabric. When I make bags or craft projects, I typically want the structure, and use a fusible product.
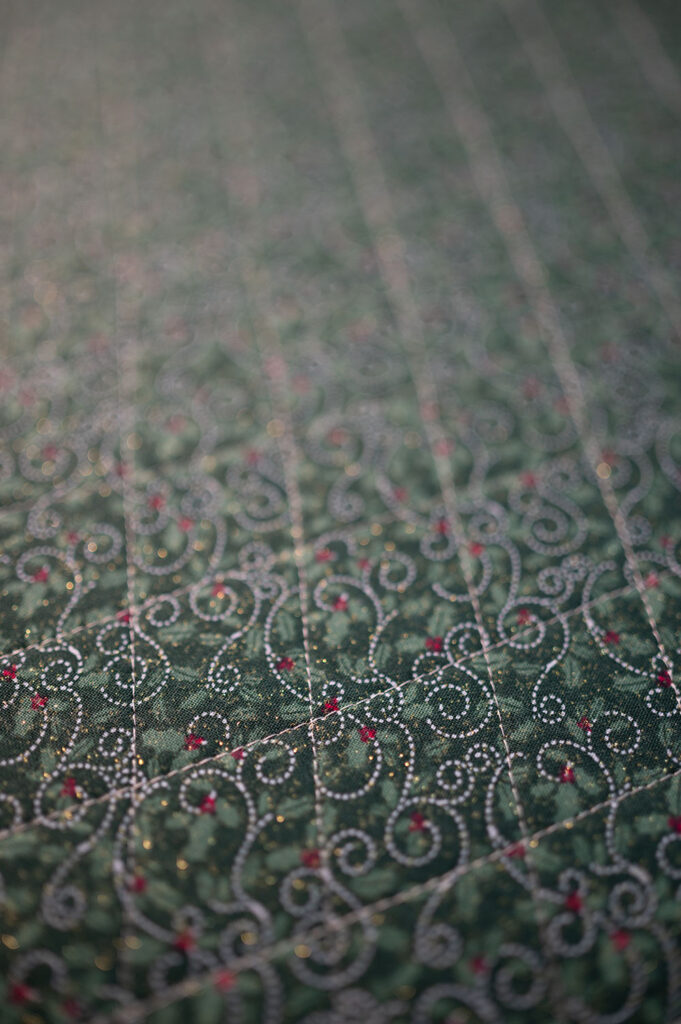
- Using a sewing machine fitted with a walking foot attachment, start in a corner and stitch at a 45 degree angle across the fabric. Sewing stitch lines in equal intervals, continue this process until the fabric is covered in stitches all going the same direction. Then do the same process from the opposite side of the fabric.
- Sew the stitch lines in an interval that suits you and be sure to criss cross one side and the other to give the characteristic diamond pattern.
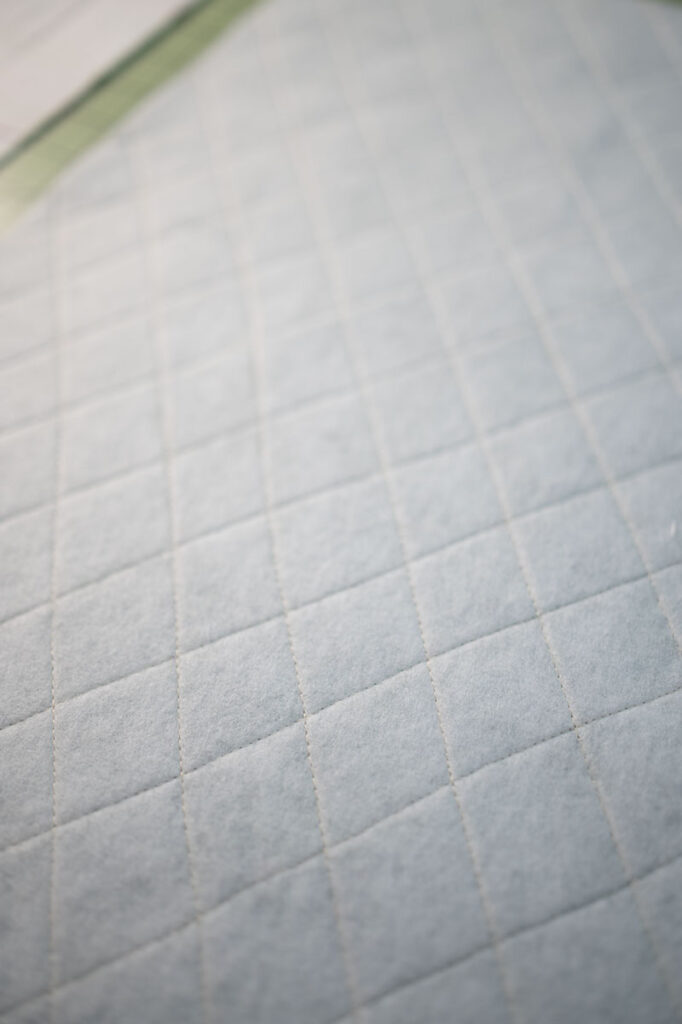
The front of the quilted fabric will look like this when finished.
Because you start in a corner and stitch at approximately 45 degrees, the stitches look like they form diamonds when the quilting process is complete.
Use this quilted fabric to cut your project pattern out. I’ve used this to make different zipper bags and, most recently, Christmas stockings.
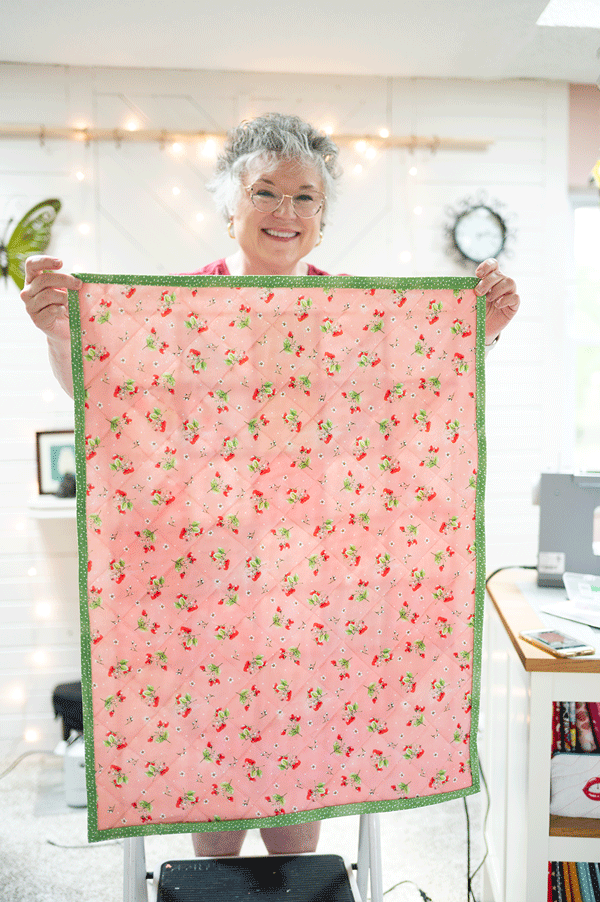
Here’s what the back side of you self quilted fabric will look like.
A tip I will share with you is that the batting does have a tendency to get hung up in the feed dogs as you start the stitch line. So you have to stop, put the needle down, lift the presser foot, and unjumble the fabric. It’s slightly annoying. To remedy this, I would suggest you either sew with the fabric side down or make a mini quilt sandwich and use the inexpensive, thin muslin as a backing. That way your piece will float through the machine instead of have that stop and start nonsense at the beginning. I prefer to run the piece through the machine with the pretty fabric side up, so the muslin backing is my preferred choice. Here I simply did the stop and start thing and ran the quilt batting through the machine on it’s own.
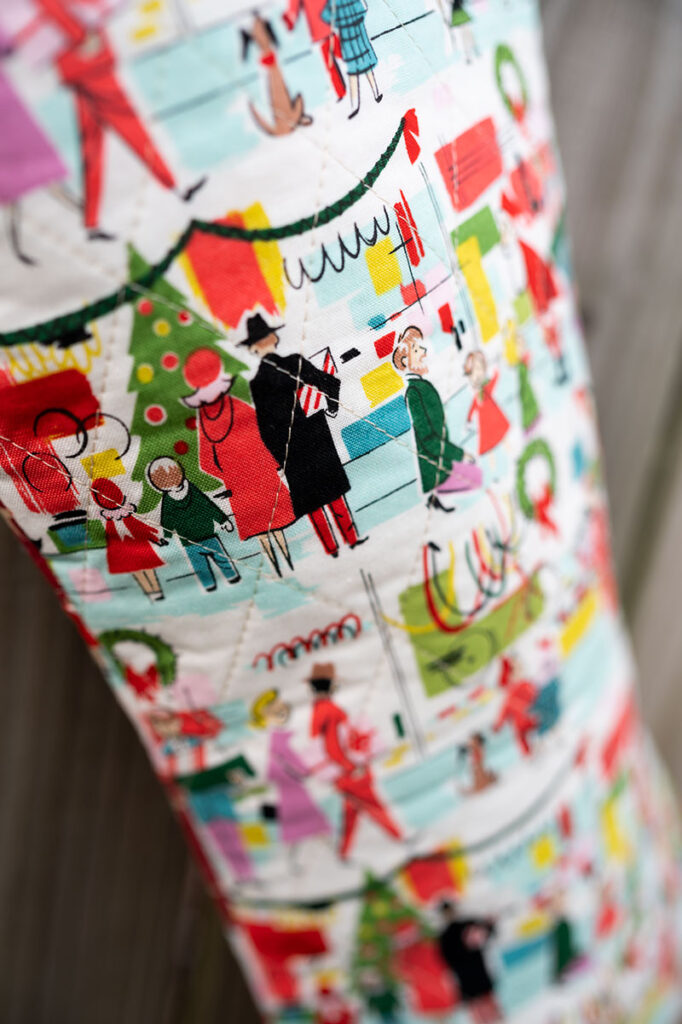
Behold the quilted fabric sewn into the finished project.
This is a detail of the backside of my Christmas stocking. Here you can see the look of the quilting detail in a project. I love the finished result. And it’s fun to know you can make any fabric you like into a quilted panel to use in another project.
If you want a poofier look to your quilted fabric, then a batting with higher loft will better suit that desired result. I used fusible batting which gives more structure than poof. (affiliate link) This is where you can get creative and design the look YOU want to have in your finished project!
To me, this is the best part of making our own projects. We can decide how we want something to look.
Ok, so that sorts out the diamond quilting pattern on a solid cut of fabric. Easy Peasy. What about the front of the stocking with the patchwork look? I’m so glad you asked!
To make the patchwork front, you have a couple of choices.
- Cut a bunch of 2.5″ x 2.5″ squares, and sew them together into rows, and then piece the rows together. This is a great way to use scraps or other small pieces of leftovers and will give you a true patchwork look.
- Make a couple of strip sets using 2.5″ strips and then subcut the strip sets. Piece the cut strip sets together. This is definitely the faster method and the one I used.
Let’s take a closer look:
Tutorial to make the quilted fabric panels:
First make at least two strip sets with the fabrics in different order so you don’t wind up with the same fabric right next to one another
It’s also important to notice if your fabric is directional or not. I had some directional prints and cut my strips cross grain instead of on width of fabric. It’s technically wrong to do that, but I’m a rebel. I wanted my trees right side up and it was the only way to do that AND use strip sets.
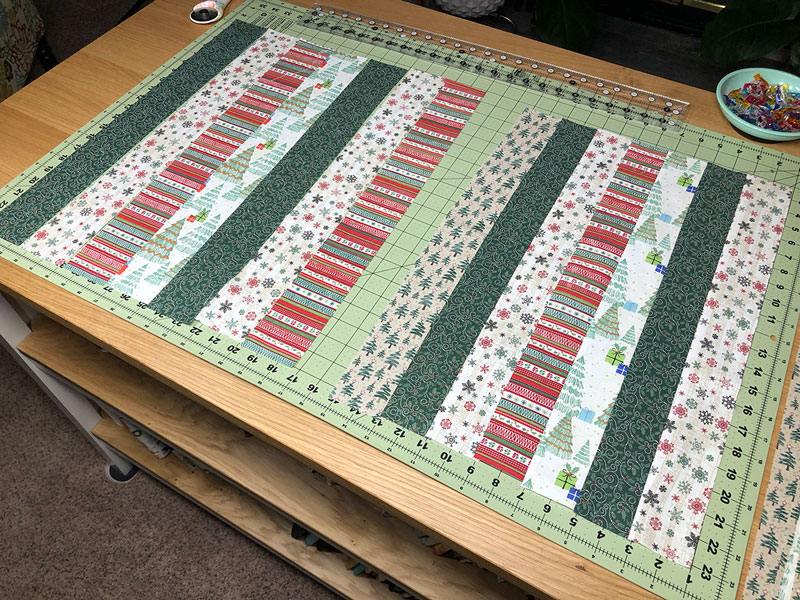
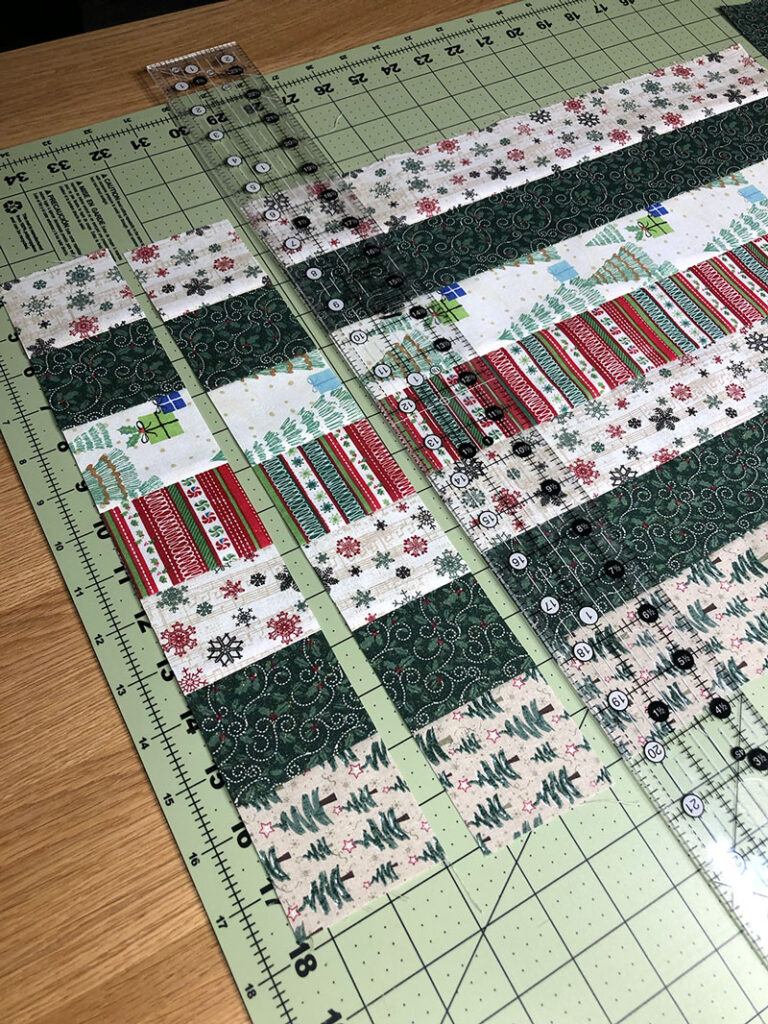
Once the strip sets are made, we can sub cut.
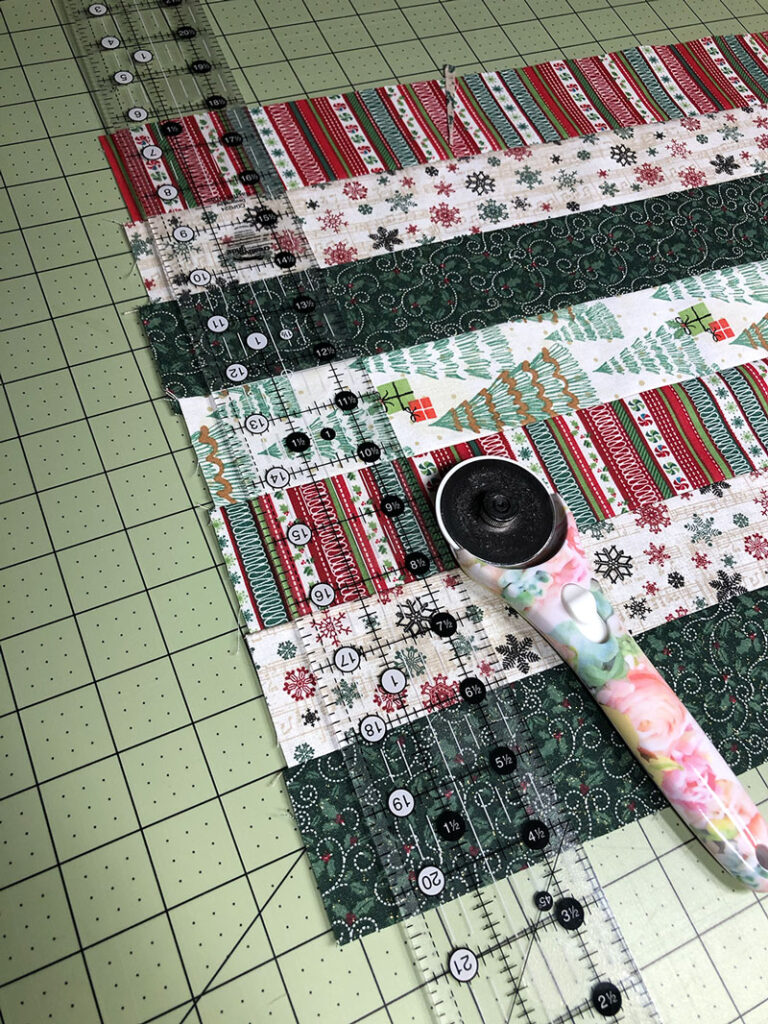
The first step is to trim off the uneven end so you have a straight edge to begin the subcuts. Line up a mark on the ruler with a seam in the middle of the strip set. Then trim away that uneven edge. Use that clean cut as the edge to start cutting strips. I wanted patchwork squares, so I need to cut my cross cuts the same width as the original strips pieced into the strip set. In this case, I went with jelly roll size strips with is 2.5″ wide. I use a creative grids ruler in a 2.5″ width (affiliate link) and my cuts are always perfect.
I LOVE this ruler and cannot recommend it highly enough. You use 2.5″ strips all the time in quilting projects and having this ruler makes quick yet accurate work out of all that cutting. Line up the edge and cut away. No worries if you measured correctly.
The subcutting has begun!
Slide the ruler and get all the subcuts you can from the strip. Mine is 7 strips wide by about 21 inches long.
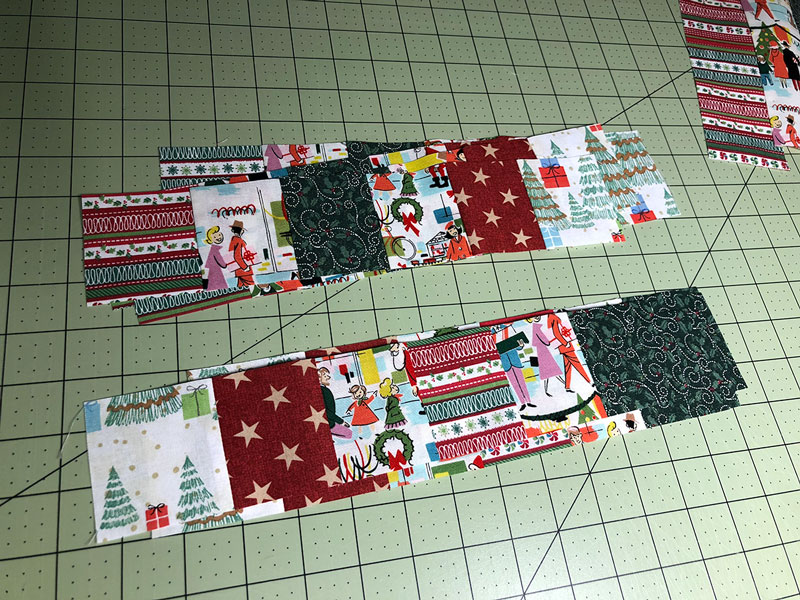
Piles of patchwork:
Now that both strip sets have been sub cut, put the cuts into their own piles. Because this has two different strip sets, I want to alternate the order I put them together. Each cut represents one ROW in the mini patchwork quilt we are piecing together.
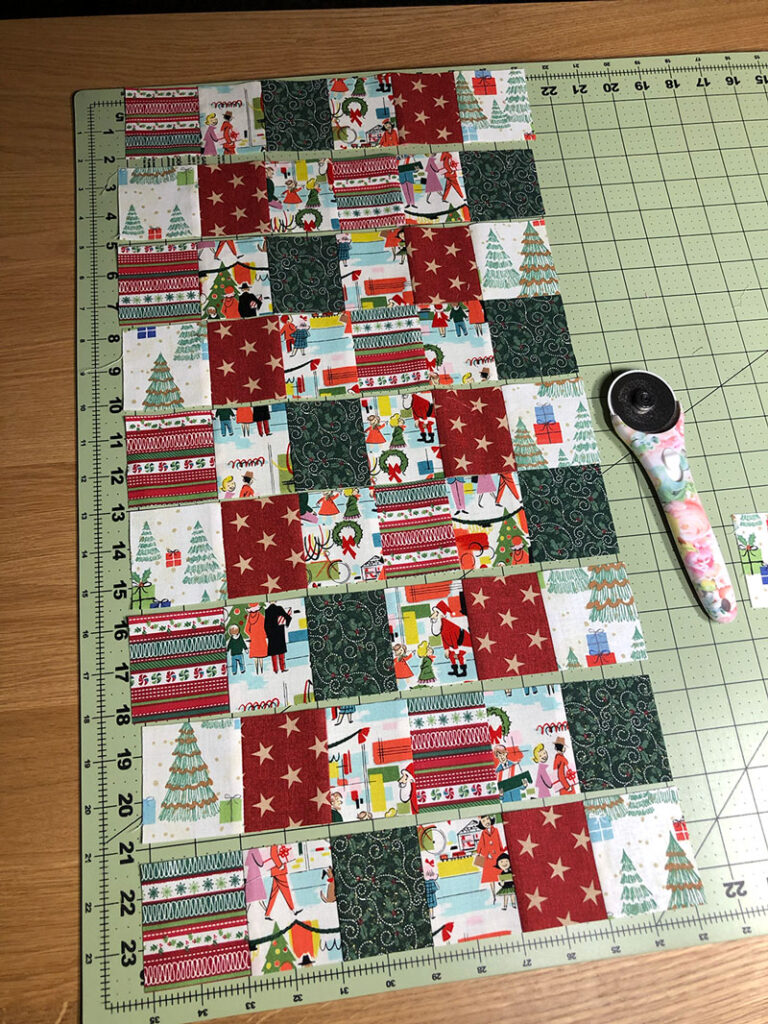
Lay out the full piece of patchwork to be sewn.
By only using two strip sets, it does create a pattern in the patchwork, which isn’t true patchwork. But I only had but so much Christmas fabric to use, and I needed to get my project completed. If you don’t want a pattern in your piecework, then either make more strip sets to subcut and piece OR sew true patchwork with involves sewing every square individually. I’ll leave that up to you.
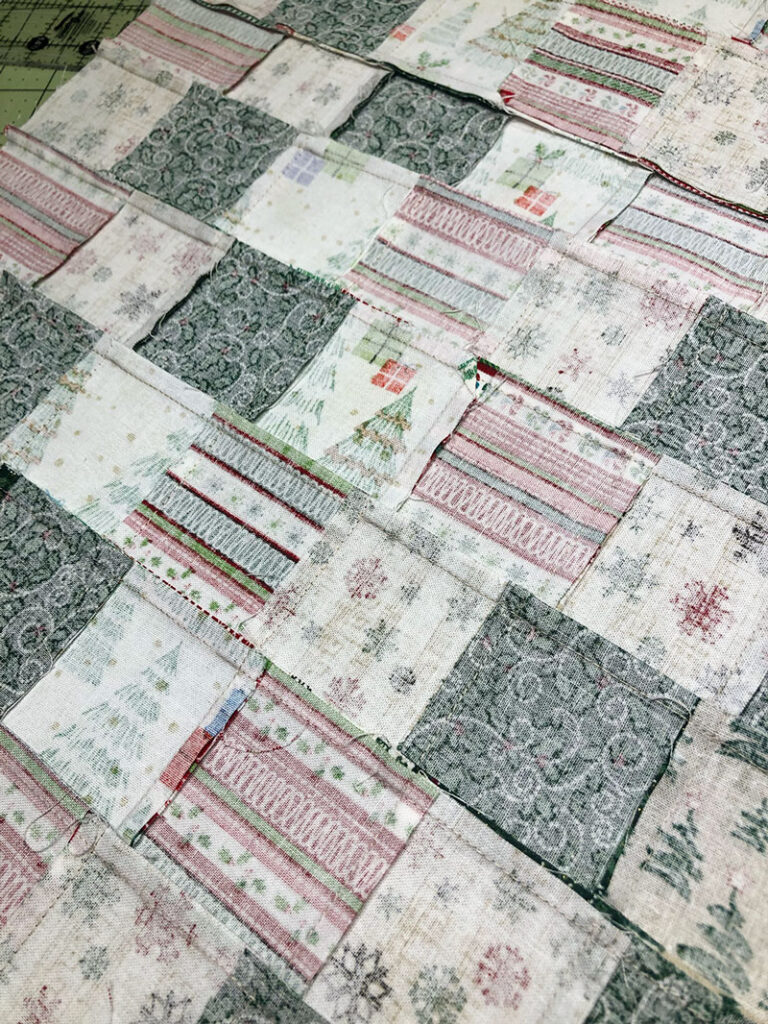
Pressing matters in patchwork.
It’s really important to have nested seams in patchwork so the seams go together cleanly and so the fabric is as flat as possible. I think a beautiful pressed backside of a piece project is a sight to behold.
Don’t get hung up on perfection…unless you’re submitting something for a show, of course. I think a better goal is to always do the best job you can at your present level of skill, but don’t allow perfectionism to steal the joy in the process. I have a seam in this project that’s not perfect and I didn’t notice it until the end. Rather than rip out the row, I decided to live with it. And no one knows it’s there in the finished project.
They say comparison is the thief of joy, but I would also place perfectionism in that sentence. There is a difference in striving for excellence and being fixated on fault finding.
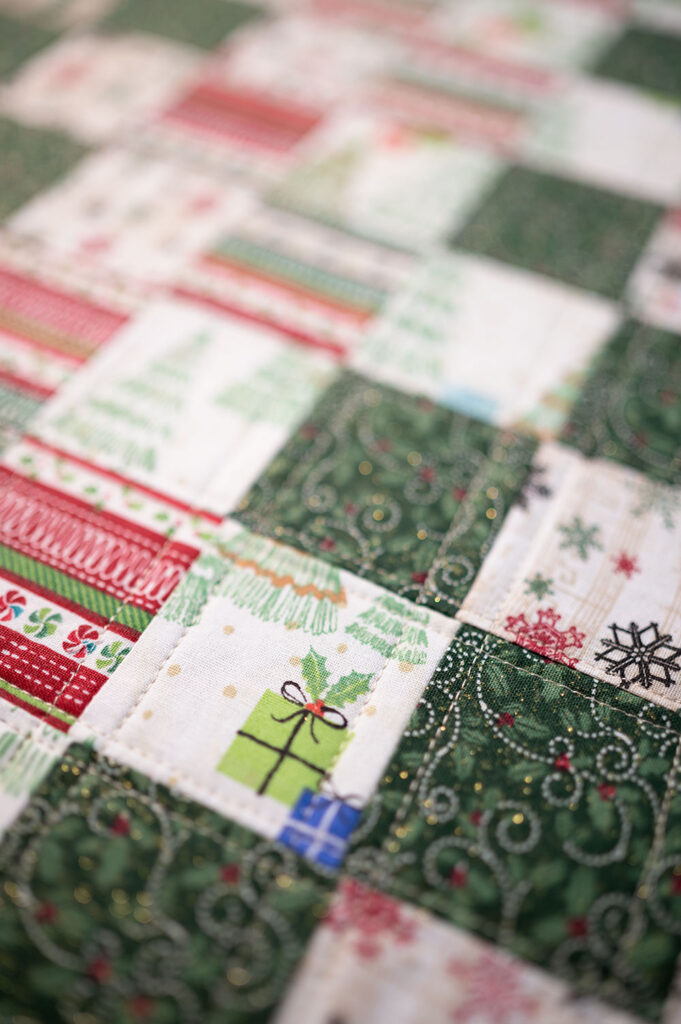
The patchwork fabric adhered to fusible quilt batting.
Just like when we quilt a larger quilting project, I cut the batting oversized and then adhered the fabric panel. Not all of my seams are perfect joins in this project, but kept going anyway. Remember, we are not robots. We are humans and no human is able to achieve perfection.
And though we find forgiveness in our Saviour, we never find perfection. Only He is perfect, and yet He loves us despite our many imperfections. Remember that always.
Once the batting is adhered or the quilt sandwich is made, it’s time to decide on how you want to quilt the panel. Again, this is your decision to make and another way to put your personal touch on the project.
Here are some options for quilting:
- Stitch in the ditch is always on the table and my generally preferred method.
- Sew from corner to corner of your squares to introduce the diamond pattern again.
- Get a little crazy and go full free motion quilting!
- Have some fun with decorative stitches!
- Sew in even intervals on either side of the seams. This is what I did.
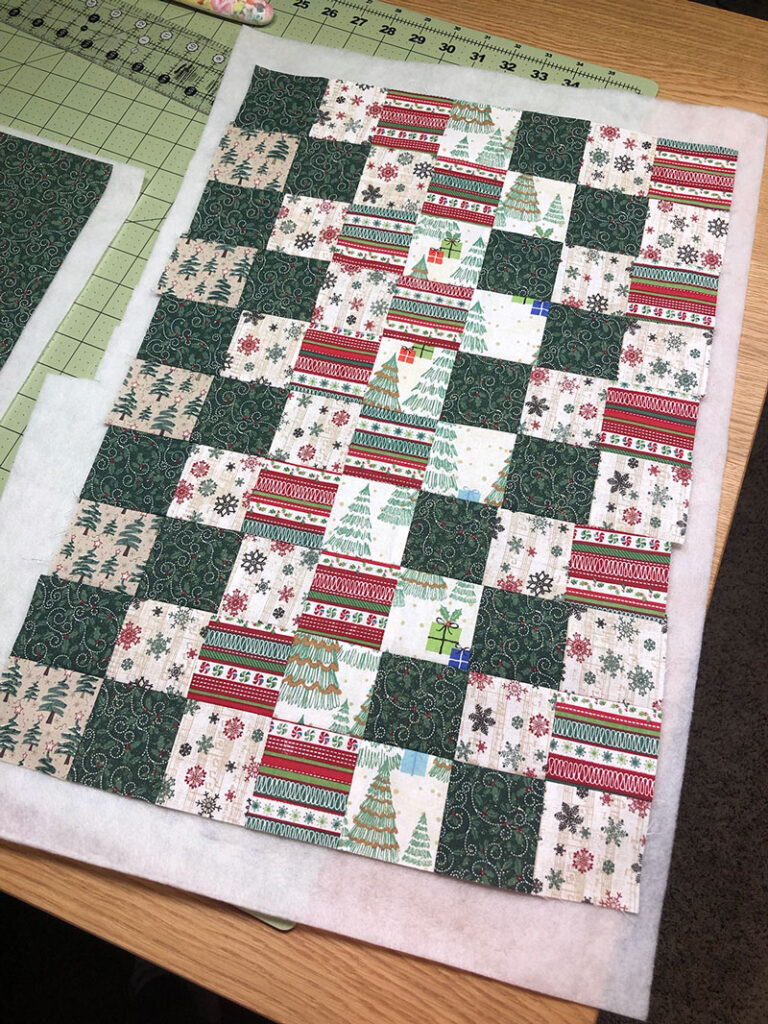
The finished quilted patchwork panel.
I stitched in even (mostly) stitch lines on either side of my seams. I love how this looked in the end.
Even with my imperfect seams, the straight line stitches looked great in the end. I thought anyway. It is a traditional look which I personally liked for a Christmas stocking.
Here’s how the quilting looked on the fabric wrong side.
I’ve already cut the fabric into my project here, but you can see the stitches clearly that I used on the front quilted panel.
Ok, Ok, Ok….so this is not exactly a fast process. It takes some time to construct the quilted fabric to be used in other projects. But….if you have come to quilting looking for a fast hobby, then you might want to look into doing something else.
Quilting is more about process than speed.
I personally make smaller projects and generally craft large blocks so I can finish things. Having a steady stream of finished projects is important if one is interested in sharing said projects on a blog. A blog with one new project every 6 or 8 months isn’t going to do all that well. Let’s be honest!
So, by following the process on a smaller scale, we still get to enjoy hand crafting quilted projects AND yet we can finish our makes in a weekend instead of a month or several months as the case may be. However, this is your call. And I still would not say it’s fast.

Quilted fabrics trimmed and ready for new projects
As I said earlier, the point in making the fabric I’m sharing with you in this post is to go into the Christmas stockings that I will share in the next post. But what else can you make? Here’s a few fun projects for you to consider!
So grab your fabrics and your quilt batting! Christmas stockings are next on deck!
Hi! I’m Pattymac
Quilter, Baker, Maker
I’m a creative lifestyle blogger living and working in Coastal Virginia. When not mixing or quilting or taking pictures, I’m out exploring the cookbook section of my favorite library or munching on my own home baked cookies at a classic movie matinee.