Heart Quilt Block Pattern
Today’s project tutorial is brought to you by Valentine’s Day. It’s the perfect holiday to make a sweet heart quilt block.
Here’s the thing. Even though we instantly think of hearts when the phrase “Happy Valentine’s Day” is said, I think hearts are lovely all year long. So enjoy this heart quilt block pattern in any color, in any print and in any number of projects all year long.
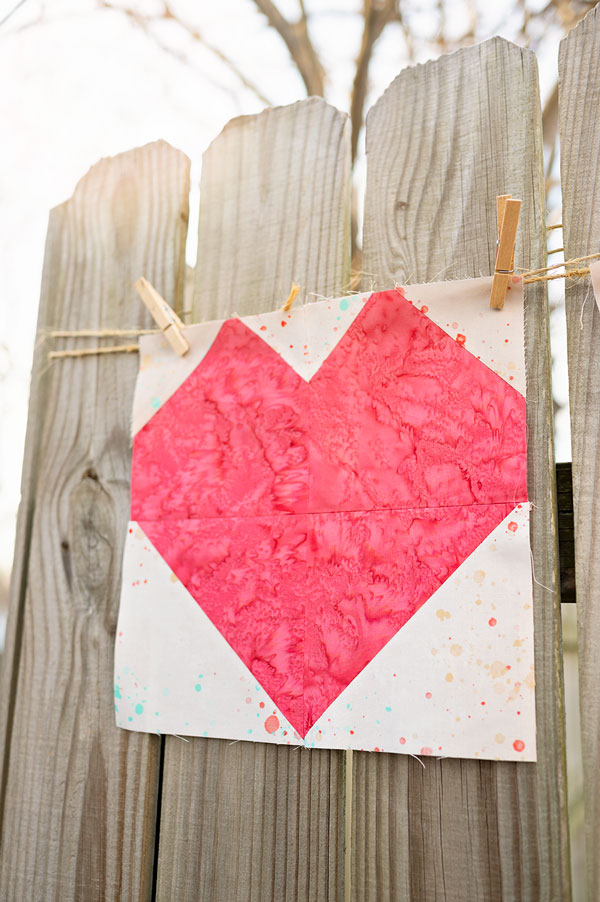
A warm sunny heart is the perfect motif all year long.
You’ll love this easy to piece 12.5″ block that finishes at 12″ once placed into a project. A pretty pink or red for the heart and super fun neutral for the background and this block will look beautiful in any finished project.
How do you make a heart quilt block pattern?
To be honest, there are several ways to make heart quilt blocks. I shared one last year that wound up as a small pillow project. The question you should really ask is. “how complicated do you want the block to be?” The one I made last year used 16 individual blocks to complete the finished quilt block, but this one uses 4. So ask yourself how much piecing you want to do, and find a pattern as easy or as complicated as you like. The pattern in this tutorial is on the simpler end of things.
How to Piece the heart quilt block in today’s tutorial:
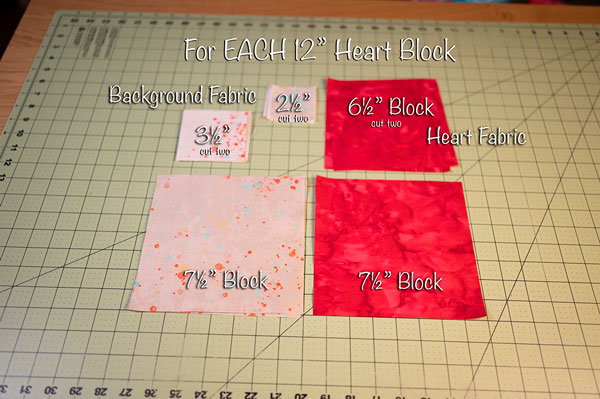
Cutting instructions:
Background Fabric:
- 2 – 2.5″ squares
- 2 – 3.5″ squares
- 1 – 7.5″ Square
Heart Fabric:
- 2 – 6.5″ squares
- 1 – 7.5″ square
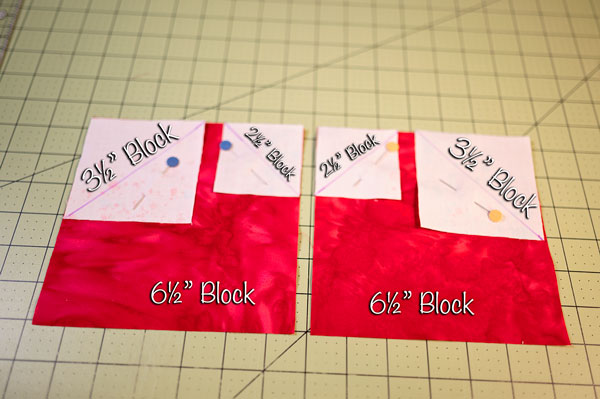
To piece the top of the heart:
- Lay out the 2.5″ and the 3.5″ blocks right sides facing on the 6.5″ blocks as shown in the picture.
- Mark a line from the inside upper corner to the outside lower corner on each background square. This is the sew line you’ll sew on when you go to the machine.
- Pin blocks together on the inside area of each block.
**make sure the two blocks are a mirror image of each other. The smaller block should be on the midline of the layout.
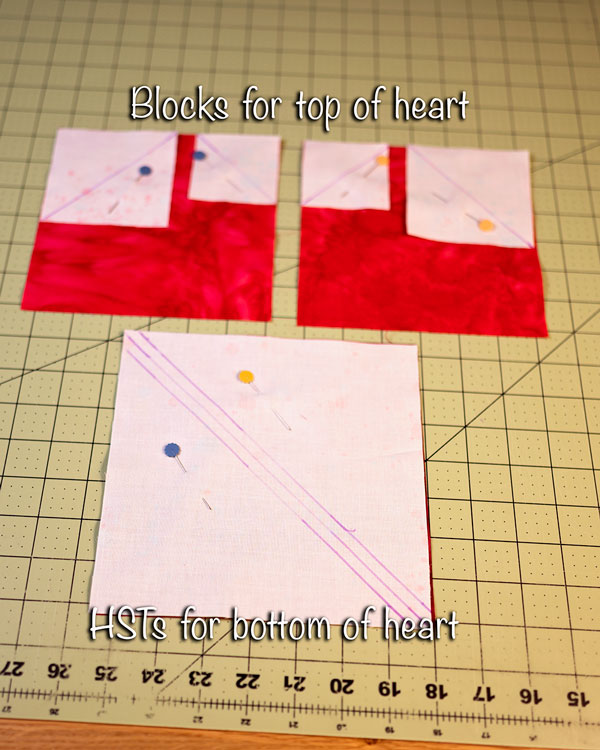
Prepare the lower half of the heart:
- The lower half of the heart block is made from two half square triangles.
- Prepare and sew your HST block however your like, but keep in mind the finished squares should be 6.5″ each
**To see my method for preparing HST blocks please see that tutorial. Essentially, I recommend over cutting the squares by a full inch and then trim back using a square ruler in the size of the finished block needed for the pattern.
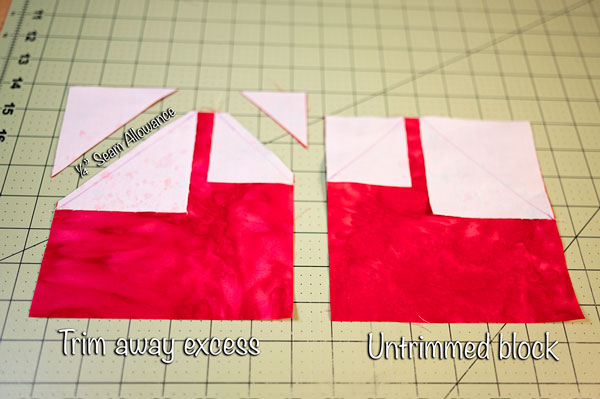
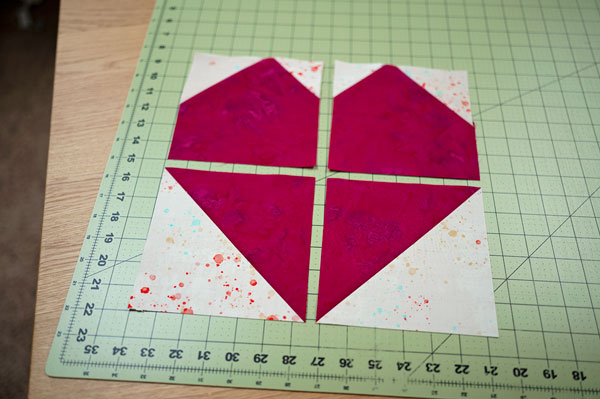
Trimming the blocks:
- Trim away the excess fabric on the top of the heart blocks as shown.
- Maintain a 1/4″ seam allowance in the trimming.
The picture demonstrates a trimmed and untrimmed block. Trim both. Once trimmed carefully press open.
**the trimmings can be saved and sewn as tiny hst blocks to go into your scrap pile for later.
Trim your blocks to maintain the 1/4″ seam allowance.
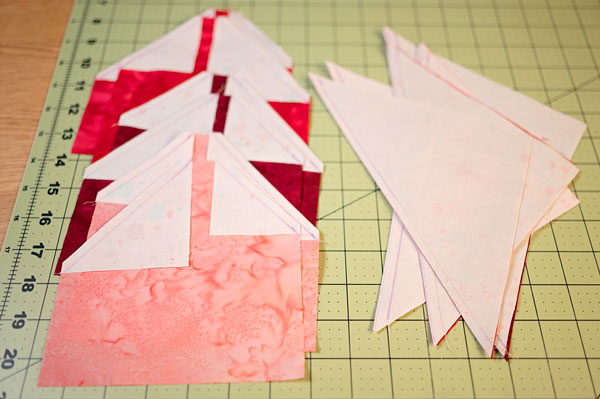
Once everything is trimmed, press all the blocks open carefully with a hot iron. HST blocks should be pressed to the darker fabric.
Preparing the HST blocks:
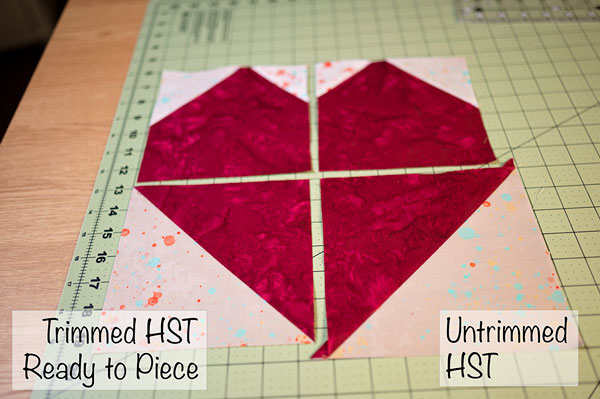
This picture is included to show the difference in size between the trimmed and untrimmed blocks. Final trimming is essential so the 4 blocks go together correctly.
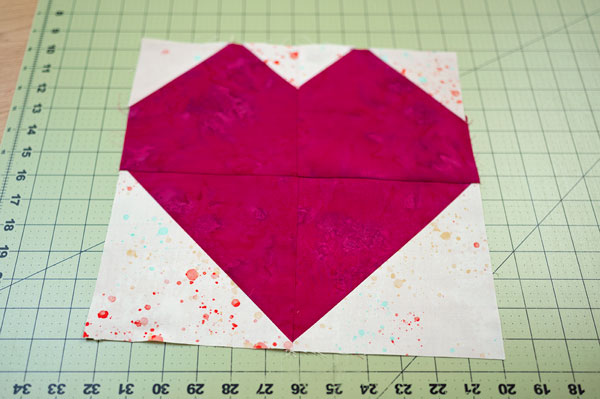
Piece the prepared blocks:
- First sew the top two blocks together along the midline.
- Next, sew the hst’s together along the midline.
- Press seams as desired.
- Sew top half to the bottom half making sure the center seam meets in the middle.
- Press as desired.
**I press seams open when working with hst blocks because I think it’s easier to see where tips are and thus preserve the points. I do have a tutorial on how to read the back of your block for final piecing.
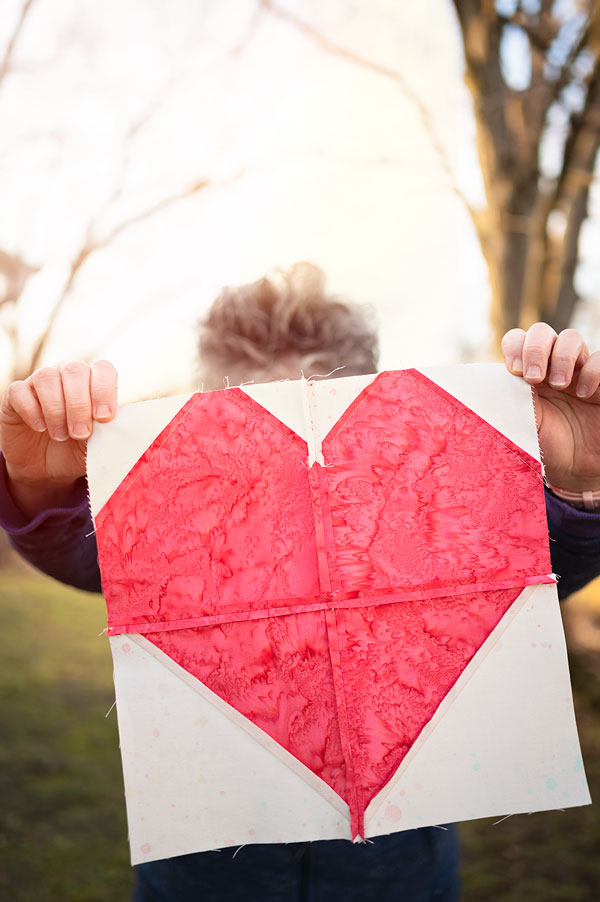
Completed Heart Quilt Block
The completed block is ready for your project! Notice the seam allowance on all outer borders of the hst blocks. This is important to achieve so that you retain sharp points in the final project.

The Seams The Front of the Block
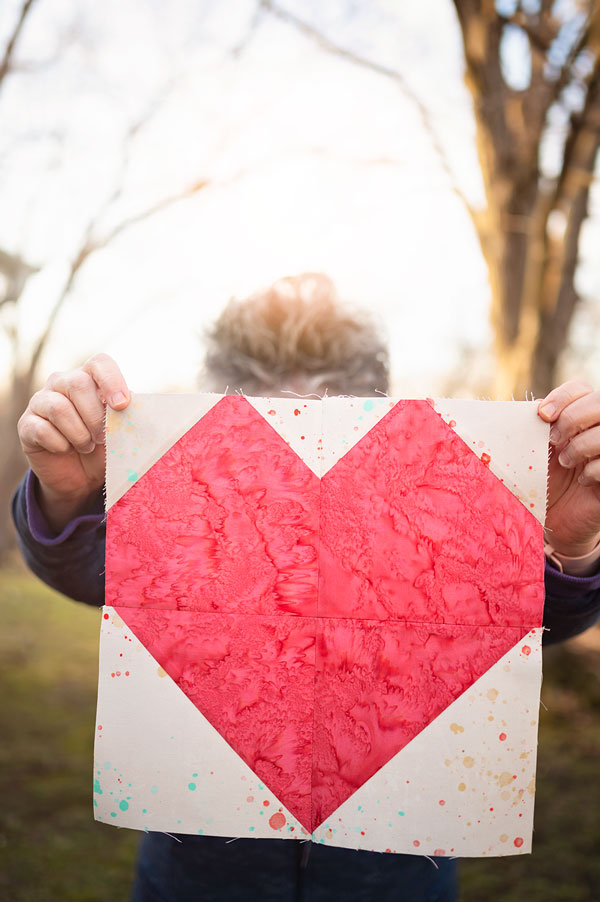
Essentially this design of heart block is a fancy 4 patch style of quilt block. How can you make it special?
- It has added interest in the half square triangles along the bottom and in the small blocks on the top edge. But in the end, this goes together like a 4 patch.
- The color blocking of design lends itself to larger or more bold prints, so have fun with your fabric selection for the heart.
- I love the water color splatter look of this Moda fabric called Lipstick Cowgirl in Sand ombre. It made a beautiful background fabric choice.
- The heart fabric is the 1895 Batik Perfectly Pink Bali Watercolors Fat Quarter Bundle from Hoffman Fabrics. (affiliate link) It’s the beauty of a solid pigmented fabric, but the watercolor look is stunning. I loved the reds and pinks that came in my fat quarter bundle.

That’s all for this time makers!
Stay tuned for the next post which is a project that uses 3 of these blocks. It’s a perfect weekend project and looks absolutely lovely on display. I would like to try making it in seasonal colors and enjoy the pattern throughout the year. I can absolutely see a patriotic version coming for summer!
Enjoy this week’s block and happy quilting!