Hand Stitching on Paper
Let’s close out summer with a lovely craft celebrating the beauty of those late season flowers. Hand stitching on paper is a fun and easy way to make a beautiful piece of art suitable as a card or displayed in a picture frame.
As much as we love machine sewing, there is something incredibly relaxing about hand sewing. A sweet hand stitched embellishment looks special, and even a simple pattern can be elegant. Hand stitching on paper is perfect when you want to craft something quick and simple.
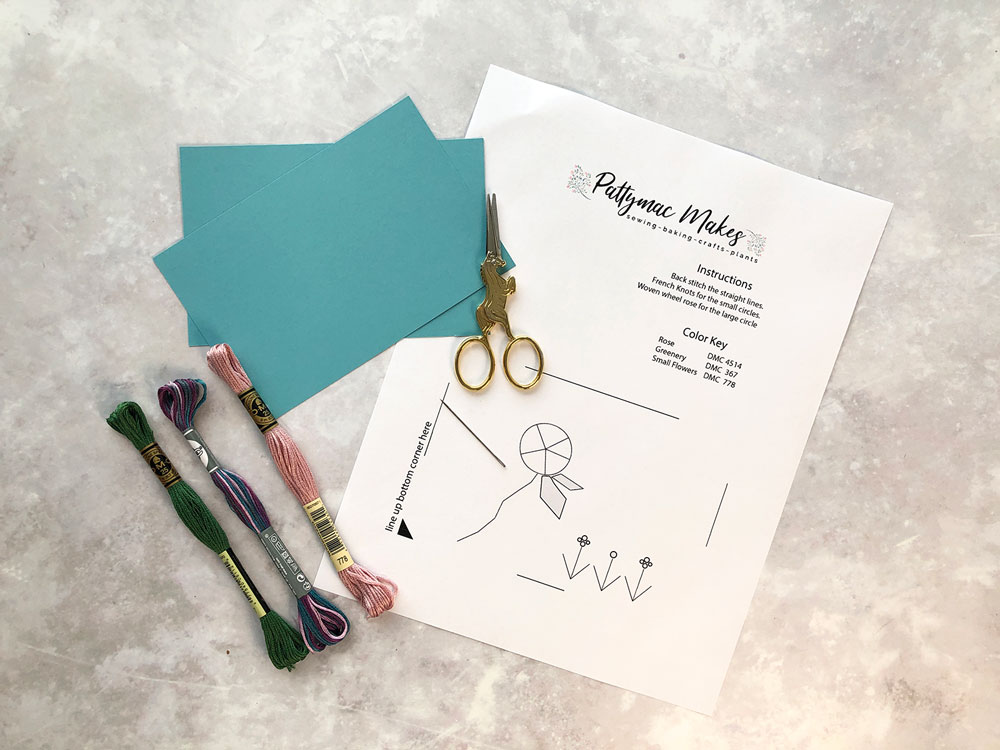
Here is your supply list for today’s hand stitching on paper design:
- 65lb Cardstock paper
- Chenille sewing needles in size #24
- Embroidery floss. I used DMC #4514, #367 and #778 for these designs
- Washi tape: use to secure ends on the back of your work
- Pencil: the eraser with the needle embedded is the easiest way to punch the holes
- Small scissors: to snip the floos
- Small piece of cardboard or cork
- The pattern that shows exactly set up the design
How to start on the hand stitching on paper Summer Flowers Embroidery Design:
- Download and print out the free pattern with the design printed. Cut the design on the straight edges to yield a 4×6 inch pattern.
- Cut the card stock to the size 4×6 inches.
- Sandwich the cardstock in between the pattern and the cardboard making sure the edges of the pattern and the card stock line up.
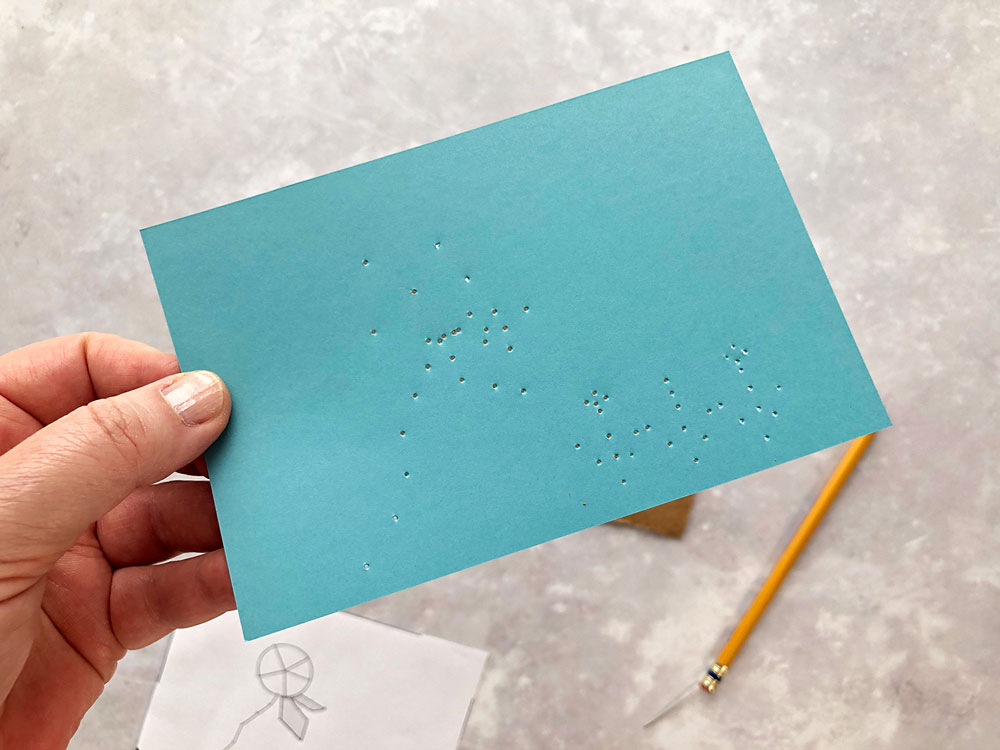
- Using a needle in the eraser end of a pencil (trust me it’s easier on your hands) punch small holes along the pattern that pierce the card stock. Essentially, you are tracing the pattern by placing small holes in even spaces along the lines and dots.
After punching the design through the provided pattern, you have a card with a bunch of holes. Keep your original design nearby to help you decipher what to stitch where. Hand stitching on paper always begins with punching holes into the card stock.
Stitches for the Summer Flower Embroidery on Paper design:
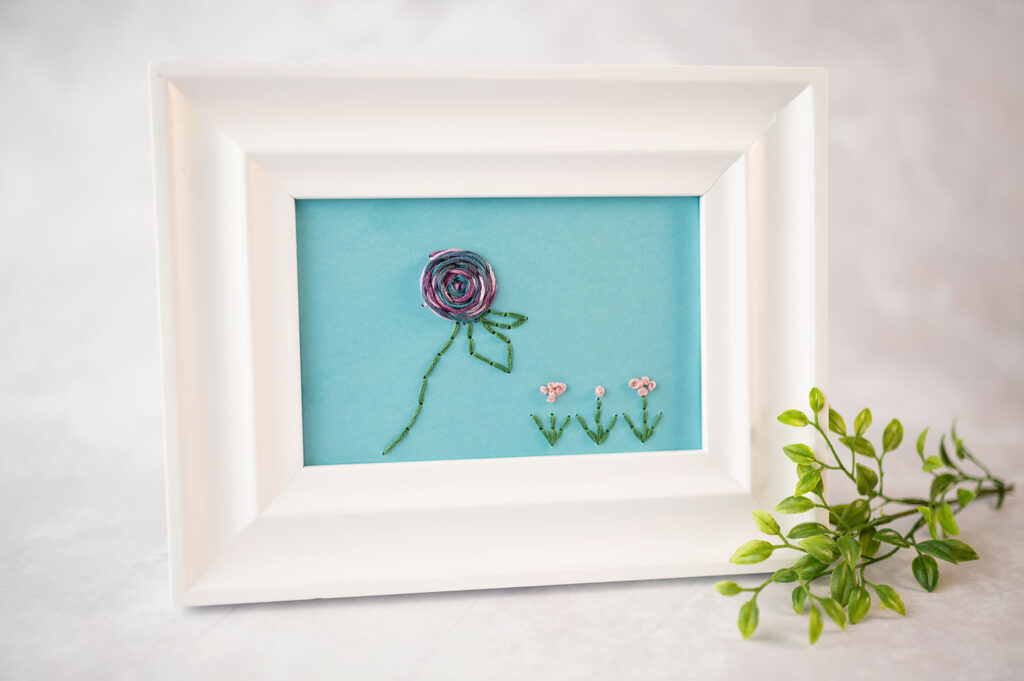
- Woven Wheel Rose: the showpiece element of the design
- Back Stitch: the rose’s stem and leaves, the greenery of the smaller flowers
- French Knots: the blooms of the smaller flowers are indicated by French knots
As you can see, we are using 3 stitches to make the whole design. The Christmas Card project is probably great for you to review if this is your first stitching on paper project. I go into a little more detail there about making a back stitch and how to use the washi tape on your project.
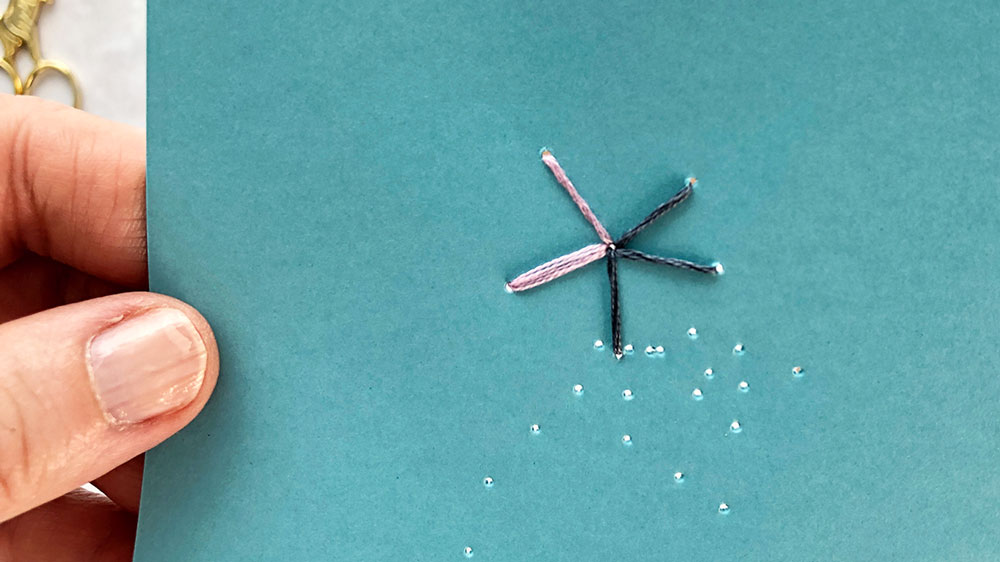
Begin the project by making the Woven Wheel Rose
- When making a woven wheel rose, the first step is to stitch the spokes that form the architecture of the rose.
- Use a full strand of floss, and make 5 spokes.
- Always use an odd number of spokes. This size design uses 5. The odd number allows you to always alternate the floss over and under the spokes as you weave around in circles.
- Starting in the center, weave a full strand of floss over and under the spokes. The floss builds the rose from the center out. Pull floss taught, but not tight.
- A woven wheel rose uses a LOT of floss, but it’s a beautiful and eye catching design element.
- You will probably run out of floss while weaving. Before the strand is too short, run the needle under the rose, piercing the paper to take the tail to the back of the paper, and secure with washi tape.
- To add a new strand of floss to finish the design, simply cut another strand and run the needle with new floss through the last hole made to bring the first tail behind the artwork. Secure the new floss tail and going back through the last hole made, from back to front, run the needle under the rose on the front of the art and continue weaving the floss over and under the spokes along the outer edge of the rose.
I love the woven wheel rose, which I call the wagon wheel rose, because the spokes remind me of a wagon wheel. I watch Westerns every Saturday morning, so that’s probably why I see them as wagon wheels. 😉
The rose looks so special and it is very eye catching. And while it takes a little practice getting your thread tension as you weave, it’s not difficult to master. It is easy to get confused on whether you should go over or under, so work with good light and minimize distractions.

The greenery on the pattern is all done in Back Stitching with the full 6 strands of floss. Start at the bottom of the stem and stitch your way up and around the leaves. Remember to secure the start and finish with washi tape. And again, use even tension, but don’t pull excessively.
The three smaller blooming flowers complete the design.
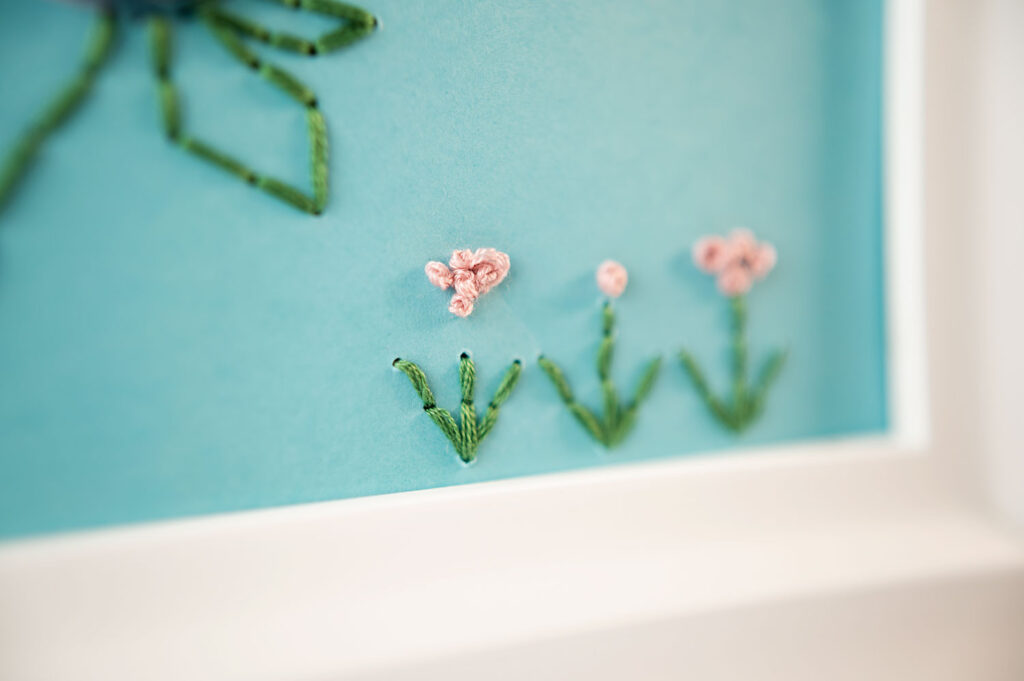
Our final element in the pattern is the blooming flower motif.
- Start on the left most hole.
- With a full strand of floss back stitch the greenery all the way across the design. Secure the start and finish with washi tape. Cut a strand long enough to stitch all the greenery in one strand.
- Stitch the blooms using French Knots. Two wraps with 6 threads, or a full strand, of floss makes plenty large blooms. I did four French Knots on the outer flowers and one in the middle. I also did all the blooms with one strand of floss starting on the left and working my way to the right.
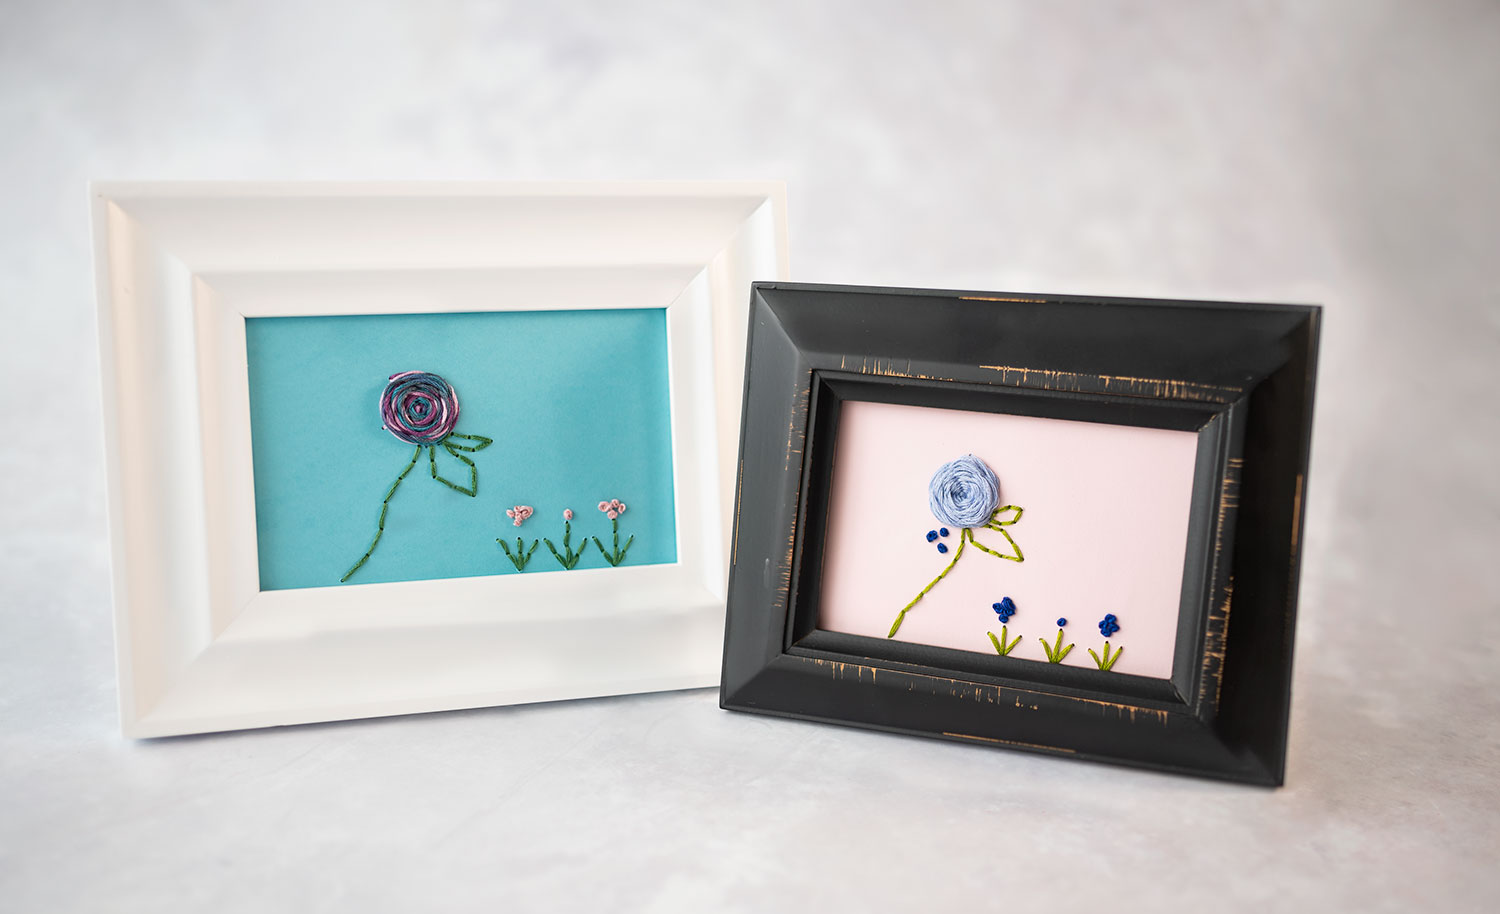
Place the finished design into a frame with the glass removed.
Using a handful of embroidery stitches, it’s easy to create a lovely design. It takes some motor skill to stitch a project like this, and the needles are sharp, so I suggest this project for older children and teenagers as well as adults. My final tip for you is to have very clean hands. Anything on your fingers will show up on the paper. So this is not the time to be snacking on chips. 🙂
Don’t be afraid to do some practice stitching on scrap card stock to the get the hang of making stitches. It takes a little practice to have a neat result, but it’s so worthwhile!
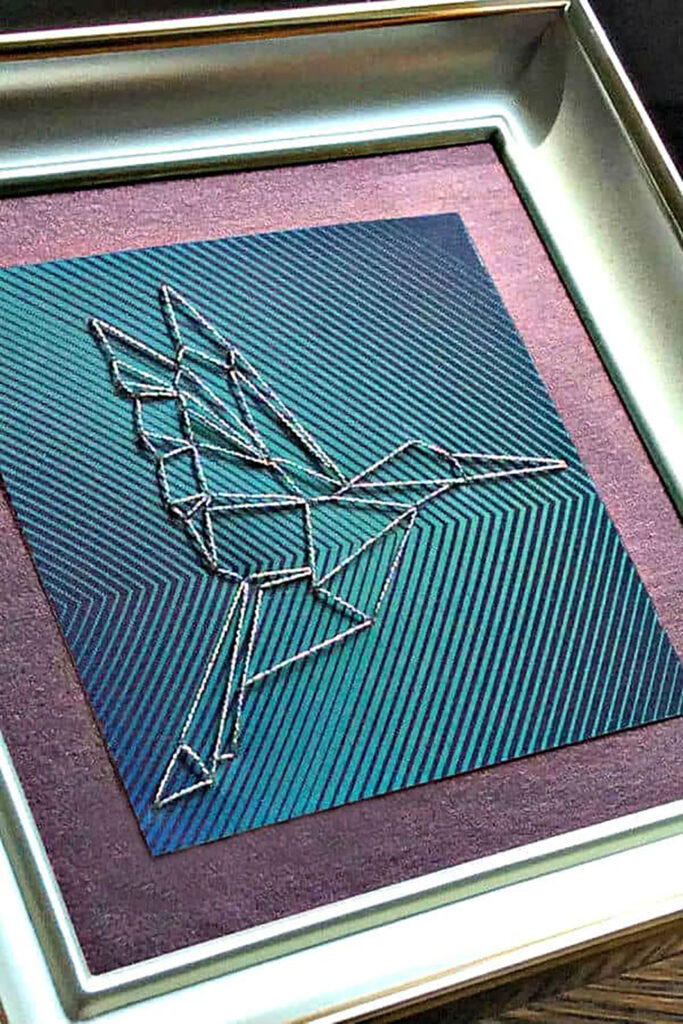
Today’s project was done in collaboration with my friend Ann from All Things Paper. She created a lovely hummingbird project that will pair beautifully with my Summer Flowers hand stitched picture.
You might also like:


Hi! I’m Pattymac
Sewist, Baker, Maker
I love figuring out new ways to use pom poms, where I can stash more fabric, and I’m always wondering what to bake next…chocolate or lemon? When not dreaming up new things to make (or bake), I love riding my beach cruiser on the Boardwalk, enjoying classic movies, and planting new things in my tiny but mighty container garden.