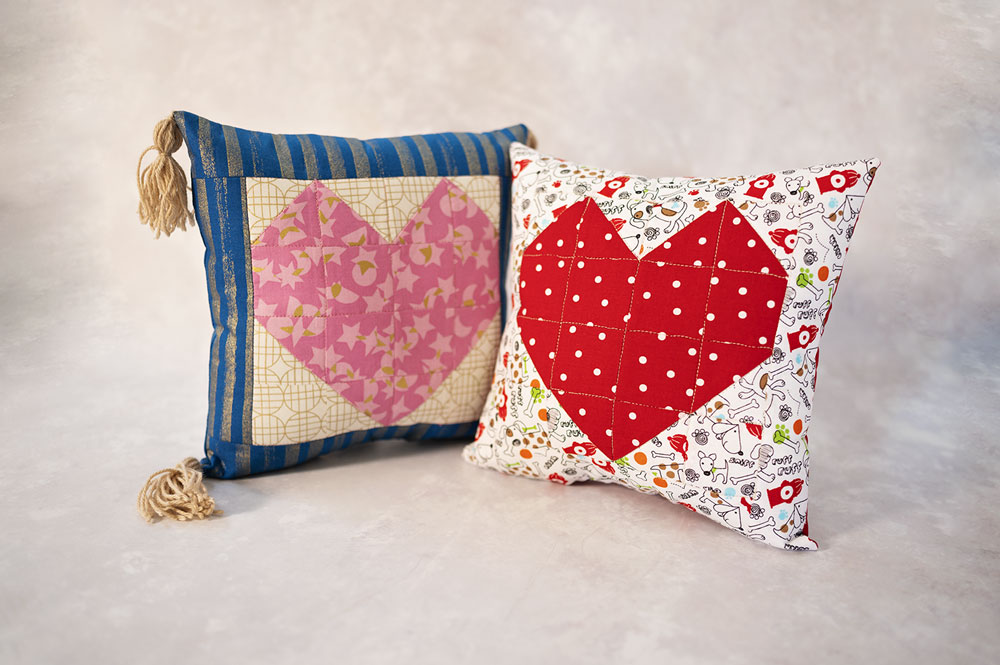
Sew a Quilted Heart Pillow
Around Valentine’s Day, the world is awash with all things hearts. You won’t hear me complain, because I think they are a wonderful motif, and should be made all year long, to be honest. Let’s sew a heart pillow.
Today’s pillow comes with a bit of a twist. We first piece a block cut from 16 smaller blocks, quilt that mini quilt top, and stitch the whole thing into a pillow. Sewing a heart pillow sounds like fun, eh?
Parts of a Quilted Pillow:
- The pieced and pressed quilt block
- Sashing
- Backing fabric
Many people get hung up on quilting and believe they need to construct full sized bed quilts in order to enjoy quilting. Nothing could be further from the truth! One quilted block can make for a lively pillow.

This pillow is stuffed and sewn closed as opposed to an envelope pillow which is a cover that slips on and off a pillow form. I’ve shared another pillow project with you that was for an envelope pillow.
Today’s pillow is smaller and something we are going to stuff with stuffing and hand sew closed with ladder stitch.
If you’re interested in a super sized heart quilt block I have something you might love! It’s essentially the same pattern design as this project, but larger.
Tools and Equipment to sew a heart pillow:
- Cutting mat (affiliate link)
- Rotary cutter (affiliate link)
- Quilt Rulers. I used long ones, 2.5″ x 24″ (affiliate link) and 6.5 x 24″, (affiliate link) and a square 2.5″ (affiliate link)
- Sewing Machine
- 1/4″ Piecing foot for accurate 1/4″ seams
- Walking foot to quilt the pillow, but this is optional
- Iron (affiliate link)
- Ironing Board
- Point Turner, (affiliate link) optional but makes a huge difference
- Scissors (affiliate link)
- Hand sewing needle
- Pattern Weights, optional but helps with cutting fabric
- Disappearing Ink Pen (affiliate link)
- Spray Starch, (affiliate link) optional but helps give body and stability to quilt blocks
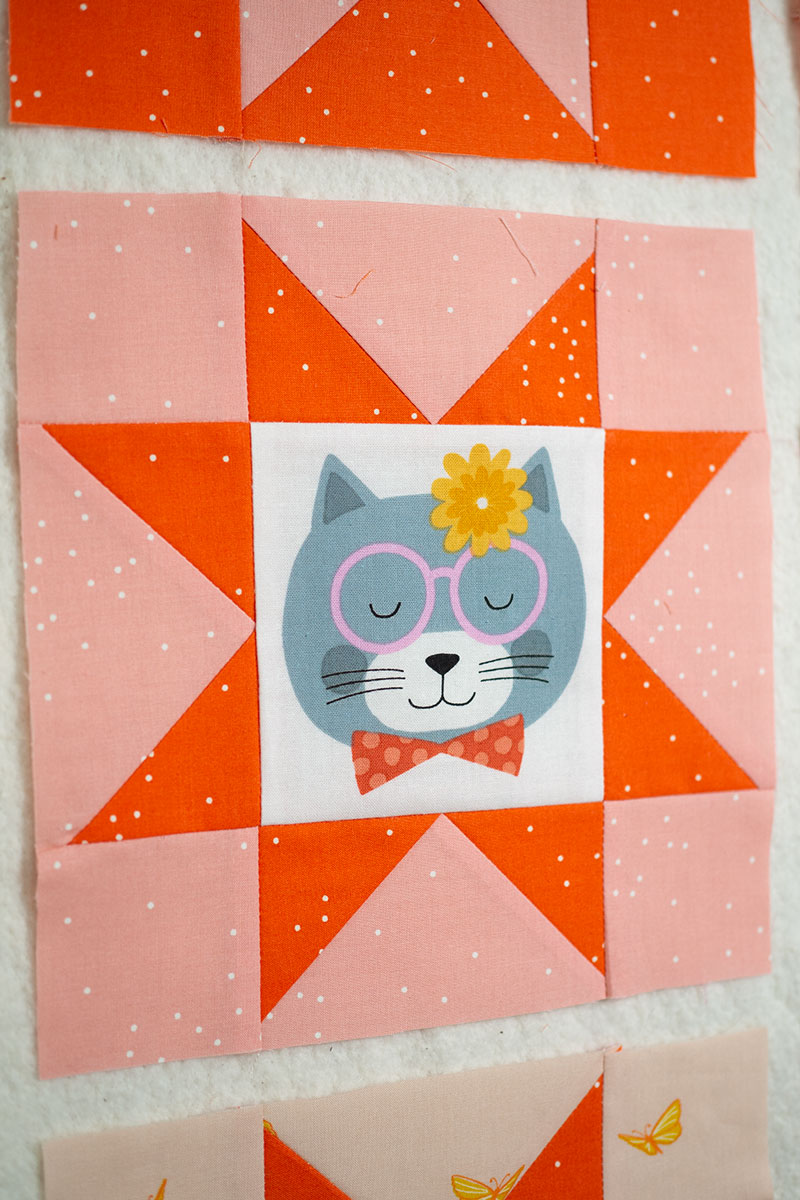
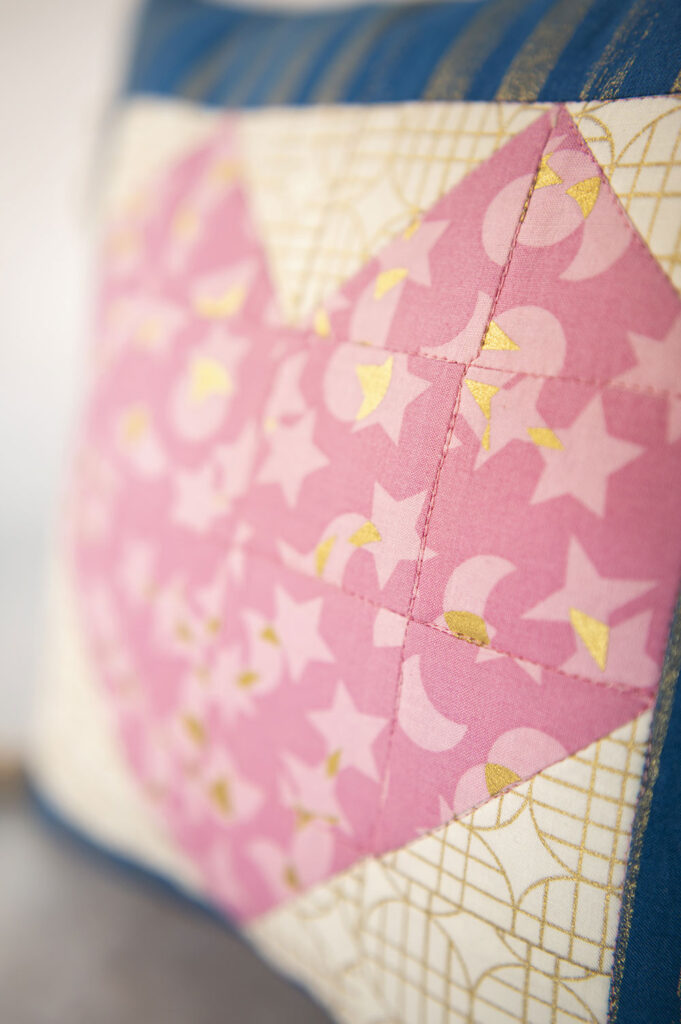
Sew this pillow using as few as 2 colors for high impact. But I personally love it using 3 colors. It’s a great skill builder for mixing patterns and color.
Going for unexpected color and shape combinations with 3 different fabrics in a small project is an excellent exercise to build your skill in designing more interesting full size quilting projects.
If you’re interested in a high impact, larger scale project using a similar layout, you might enjoy piecing a stunning wall quilt.
❤️
Materials needed to sew a Heart Pillow:
- 2 Contrasting fabrics. 3 if you feel a little more adventurous. This project is a perfect stash or scrap buster. It’s also perfect to use with fat quarters. (affiliate link)
- Pattern and instructions to piece the heart block
- Thread
- Quilt Batting. I use fusible quilting for small projects (affiliate link) like this
- Light or medium weight interfacing
- Embroidery floss
- Poly fil (stuffing)
A quilted pillow like this is made from 3 distinct Parts:
- The pieced and pressed quilt block
- Sashing, the 4 strips sewn on all sides of the finished block
- Backing fabric
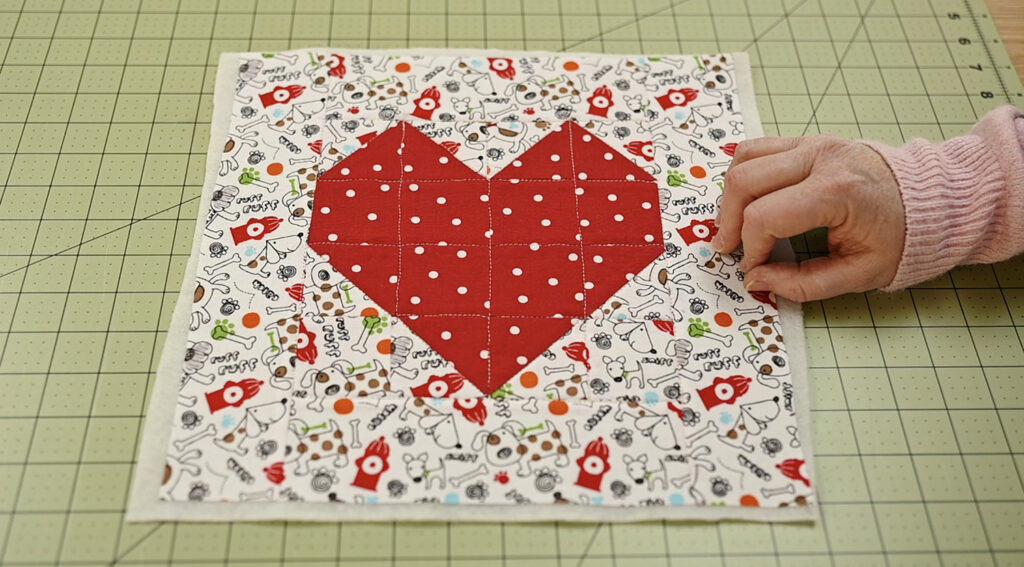
Here’s what the front looks like.
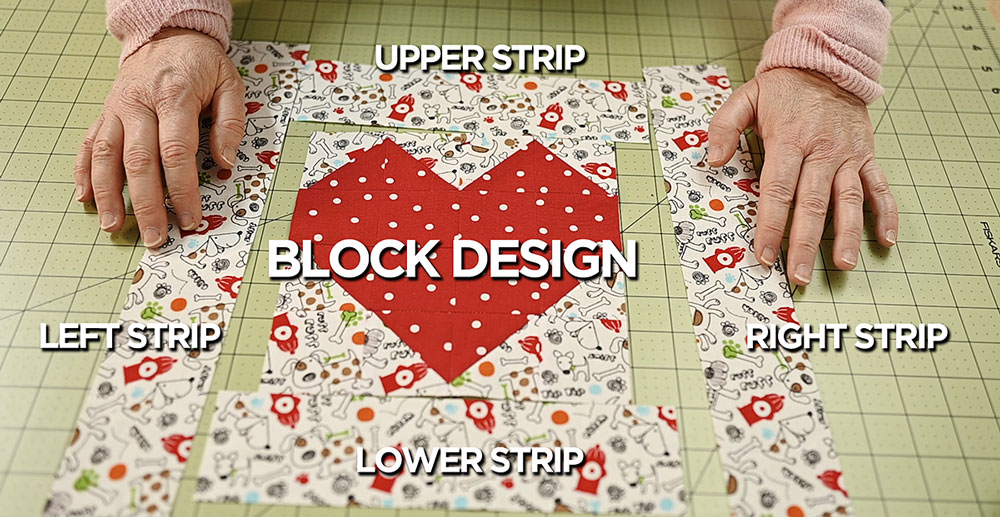
In quilting, we sew on the top and bottom strips (the north/south orientation) first. Trim them to be flush to the block size if needed. Then sew on the longer side strips (the east/west orientation).
My Tips for Sashing Success:
- Cut sashing strips, that is to say the strips that go around the pieced block, in 2.5″ WOF cuts. This is the same thing as a jelly roll strip. Once the strips are completely sewn, they give a 2″ border. I invested in a special ruler designed to make cutting this size strip quick and easy. I use this size a lot so having that specific ruler has made a big difference in my cutting accuracy and productivity.
- I leave my sashing in the long WOF cuts and place them next to the finished block when I’m ready to sew the borders in place.
- I cut the sashing or the border strips a little bit long, piece them on using the 1/4″ foot, press and then trim to the exact size needed. While this wastes a few inches of a strip set doing it this way, my borders are always perfect.
Getting a perfectly sized quilt block is not the easiest thing in the world. Let’s be honest about this. It’s a challenge. The beauty of a project that uses only one block like this is that ultimately, the perfect size of the block is not critical.
Getting away from absolute precision and perfection allows one to better enjoy the process. Hobbies are supposed to be fun and relaxing, so stop stressing about absolute perfection.
For a beginner, it can be difficult to get everything precise, and when the blocks are not going together as expected it can be demoralizing. A quilted pillow like this is the best of both worlds. Small projects provide a huge sense of accomplishmet.
Build your skills AND enjoy the process while creating an adorable finished object.
Once your borders or sashing strips are secure, it’s time to do the quilting. I recommend fusible quilt batting for small projects like pillows and bags. Apply the quilt batting according to the manufacturer’s instructions.
Steps for Quilting:
- Apply quilt batting to mini quilt top. i.e. the finished quilt block with borders applied.
- Quilt in desired method. I followed stitch in the ditch on my sewing machine fitted with a walking foot.
- When quilting is complete, use larger quilt ruler to square up the mini quilt top which is the pillow front.
How to finish your Quilted Pillow:
- Once the quilted top is complete, lay it on to the fabric to be used as the back and cut it to the same size.
- I suggest applying at least a light weight interfacing to the backing fabric as it makes a sturdier pillow. But it’s optional, and some fabrics are heavy enough they don’t need the interfacing. But if your project is a gift, I would definitely interface the back panel.
- Place quilted front and back piece right sides together and sew using a 1/4″ seam allowance. Remember to leave an opening on the bottom big enough to get your hand inside.
- Clip the corners to take out weight.
- Turn the work and use the point turner to fully open the seams and corners.
- Press the pillow being sure to steam the seam allowance at the opening. Steaming the turned fabric makes sewing the pillow closed easier.
- Stuff the pillow as desired.
- Sew pillow closed. I recommend two strands of embroidery floss to close projects as it’s much sturdier and uses a larger needle which makes closing the work easier. I use ladder stitch but overcast stitch works well.

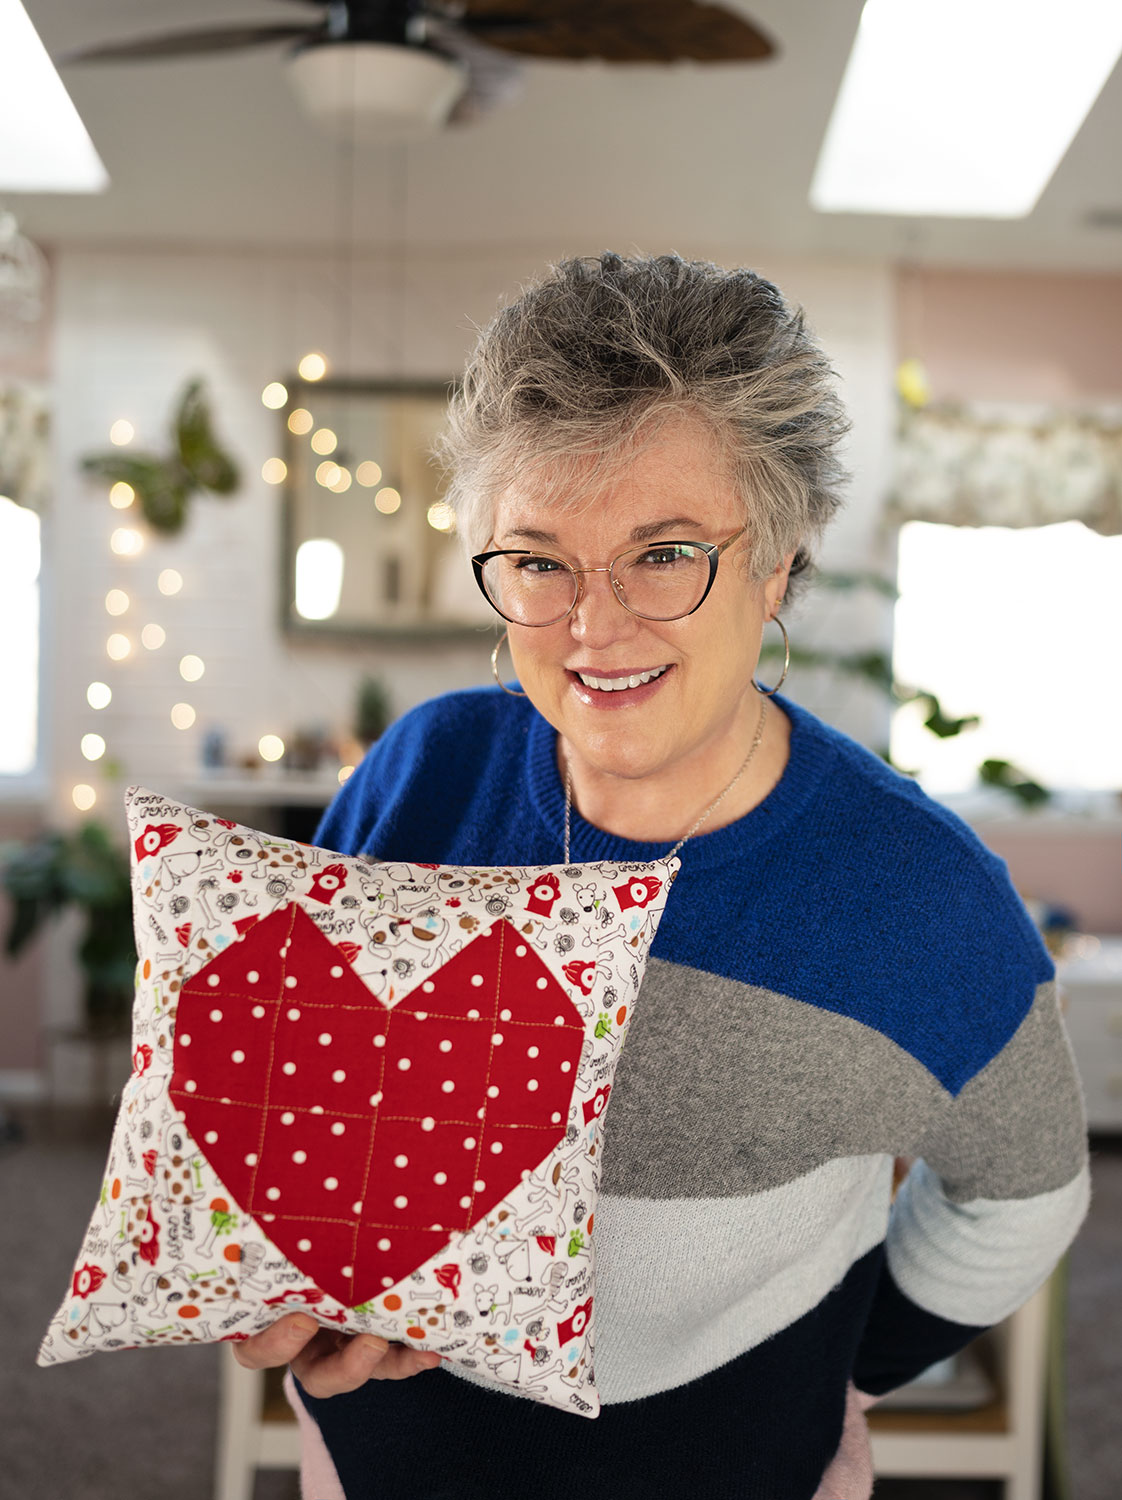
Your pillow is ready to be enjoyed! A project like this is a fun way to personalize a space or send something custom along with a loved one without taking up too much space in a dorm or suitcase.
To conclude, even though this project can be made in any size you like, cutting instructions are in the notecard below.

Sew a Heart Pillow
Description
Today’s heart pillow comes with a bit of a twist. We first piece a block cut from 16 smaller blocks, quilt that mini quilt top, and stitch the whole thing into a pillow. Ready to sew your very own heart pillow?
Ingredients
Pillow pieces:
Find the Pattern and instructions for the heart block in this blog post.
- Finished quilt block measuring 8.5″ square
- Top and bottom sashing: 2.5″ x 8.5″
- 2 side sashing pieces: 2.5″ x 12″
- Back Piece 12.5” square
Materials needed to sew a Heart Pillow:
- 2 Contrasting fabrics. 3 if you feel a little more adventurous
- Thread
- Quilt Batting. I use fusible quilting for small projects like this
- Light or medium weight interfacing
- Embroidery floss
- Poly fil (stuffing)
Instructions
How to finish your Quilted Pillow:
- Construct the quilted top to include the block and sashing stips.
- I suggest applying at least a light weight interfacing to the backing fabric as it makes a sturdier pillow. But it’s optional, and some fabrics are heavy enough they don’t need the interfacing. But if your project is a gift, I would definitely interface the back panel.
- Place quilted front and back piece right sides together and sew using a 1/4″ seam allowance. Remember to leave an opening on the bottom big enough to get your hand inside.
- Clip the corners to take out weight.
- Turn the work and use the point turner to fully open the seams and corners.
- Press the pillow being sure to steam the seam allowance at the opening. Steaming the turned fabric makes sewing the pillow closed easier.
- Stuff the pillow as desired.
- Sew pillow closed. I recommend two strands of embroidery floss to close projects as it’s much sturdier and uses a larger needle which makes closing the work easier. I use ladder stitch but overcast stitch works well.
Notes
Getting away from absolute precision and perfection allows one to more fully enjoy the process. Hobbies are supposed to be fun and relaxing, so I like to find ways to make that happen. Also, for a beginner, it can be difficult to get everything perfect and when the blocks are not going together as expected it can be demoralizing. A quilted pillow like this is the best of both worlds. Build your skills AND enjoy the process while creating an adorable finished object.
Hi! I’m Pattymac
Sewist, baker, maker
I’m a creative lifestyle blogger living and working in Coastal Virginia. When I’m not mixing or stitching or taking pictures, I’m out exploring the cook book section of my favorite library or munching my own home baked cookies at a mid week movie matinee.