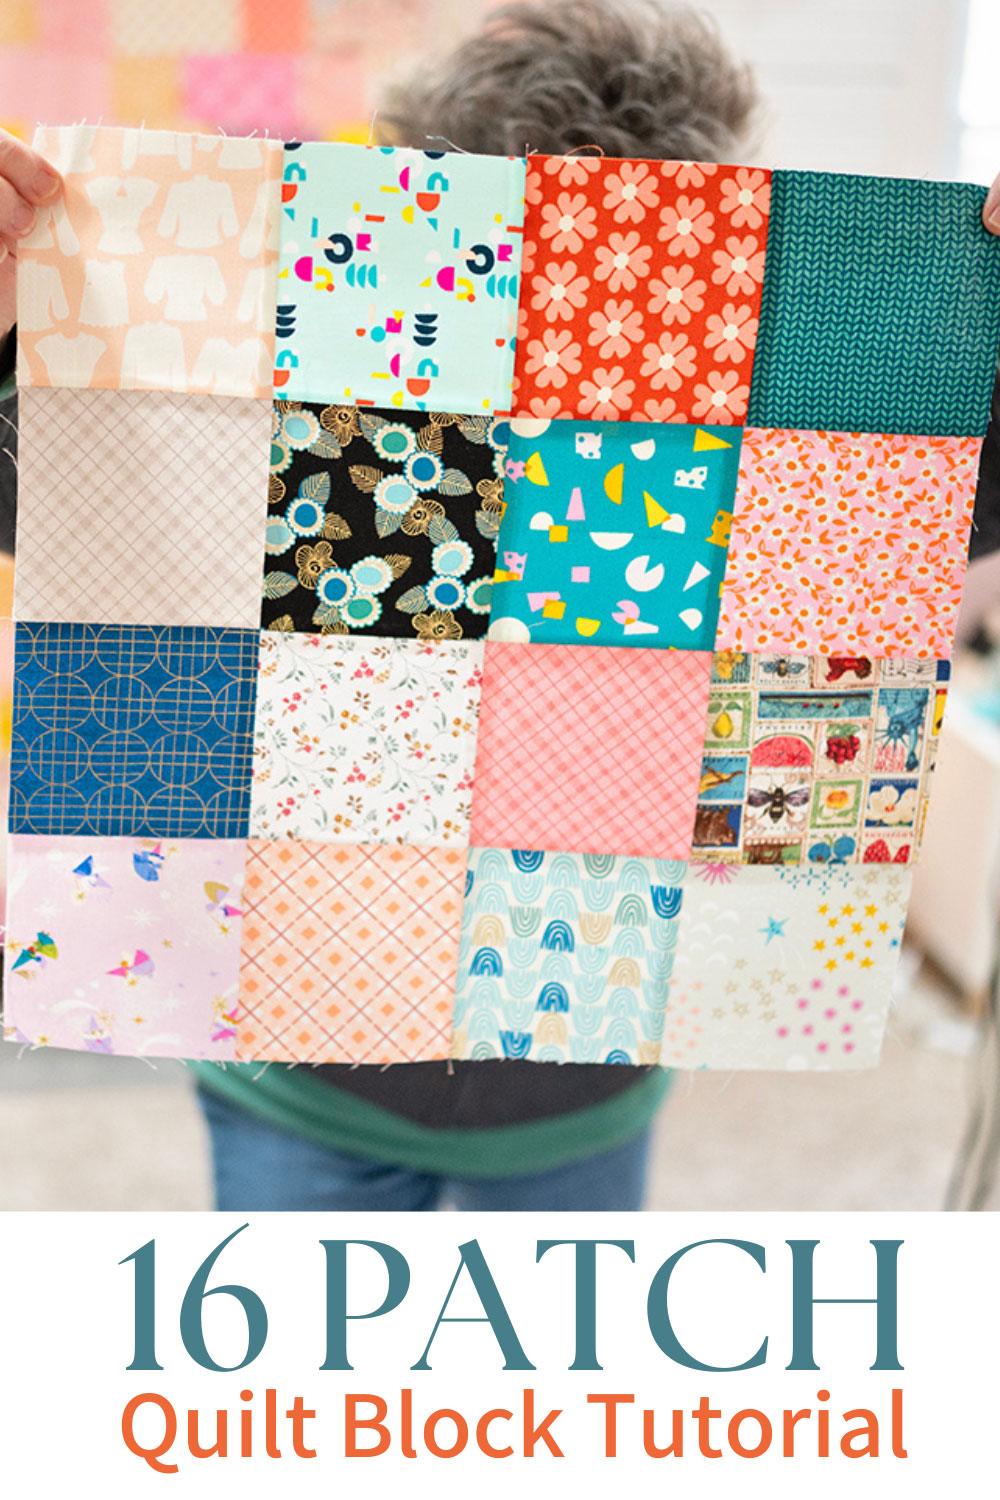
Colorful Sawtooth Star Baby Quilt
Few things in life bring as much joy as a new baby. And as quilters, it’s our great delight to put together a hand made gift to welcome in that new life. Today, let’s take a look at a Colorful Sawtooth Star Baby Quilt I designed using a darling panel print featuring kittens.
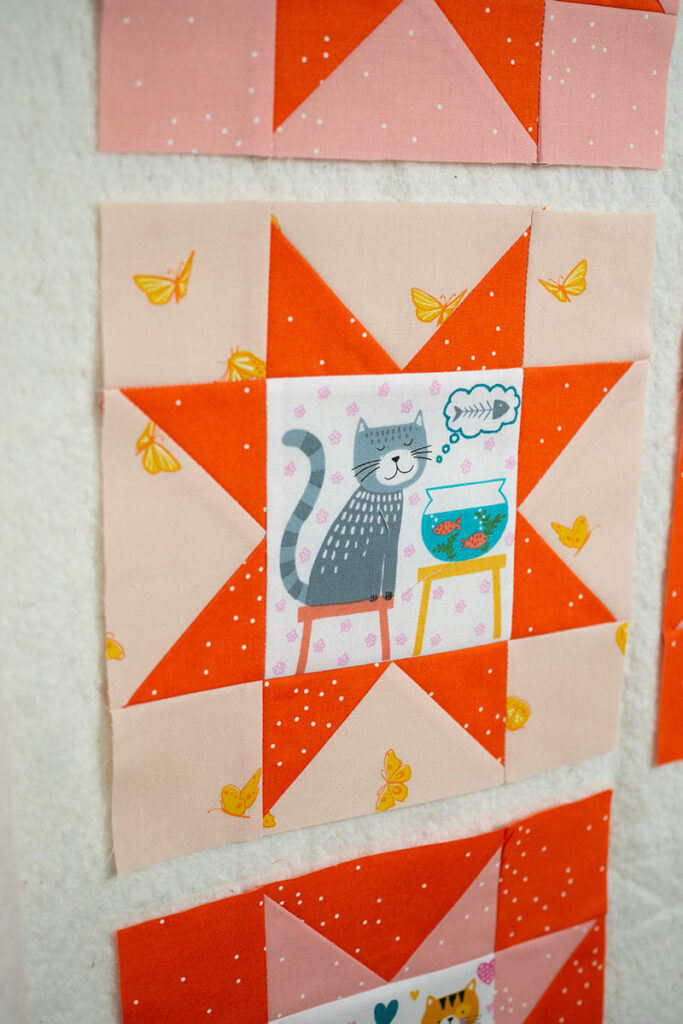
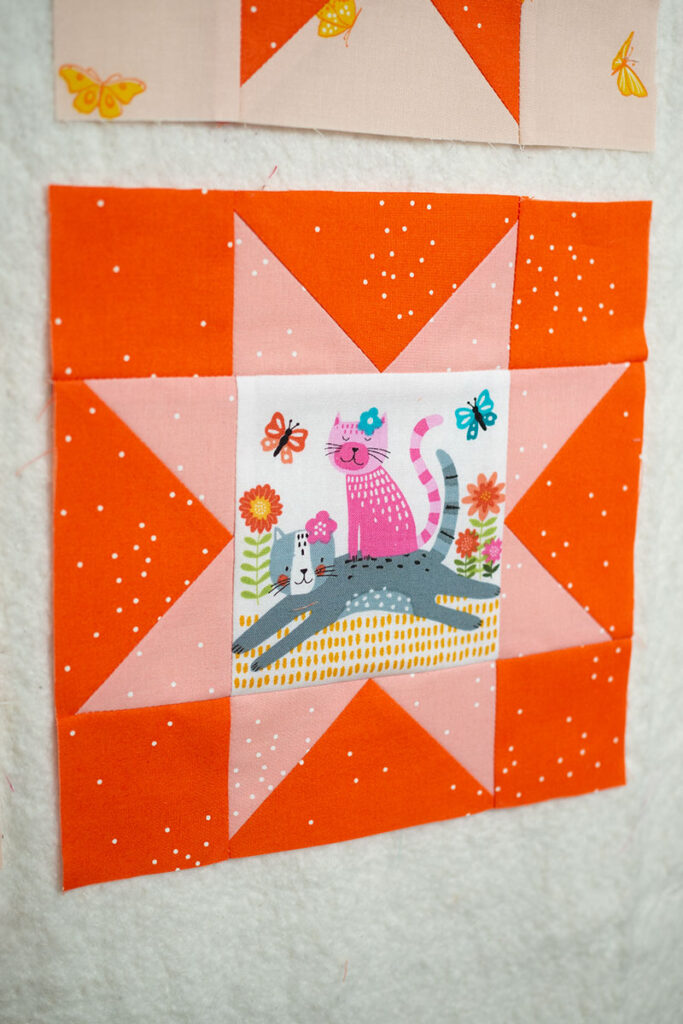
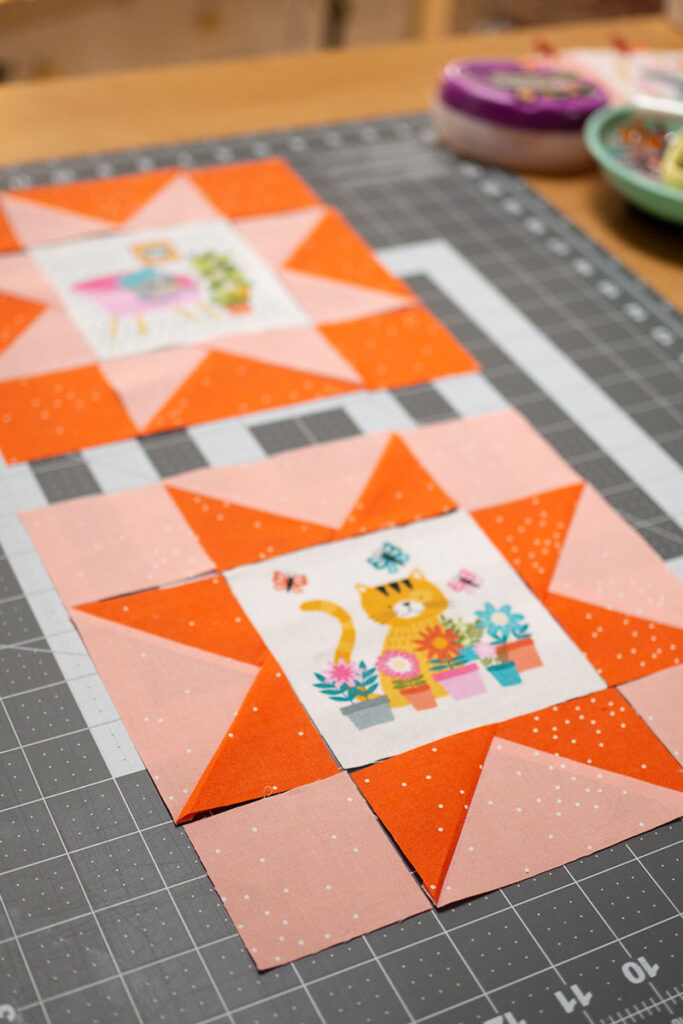
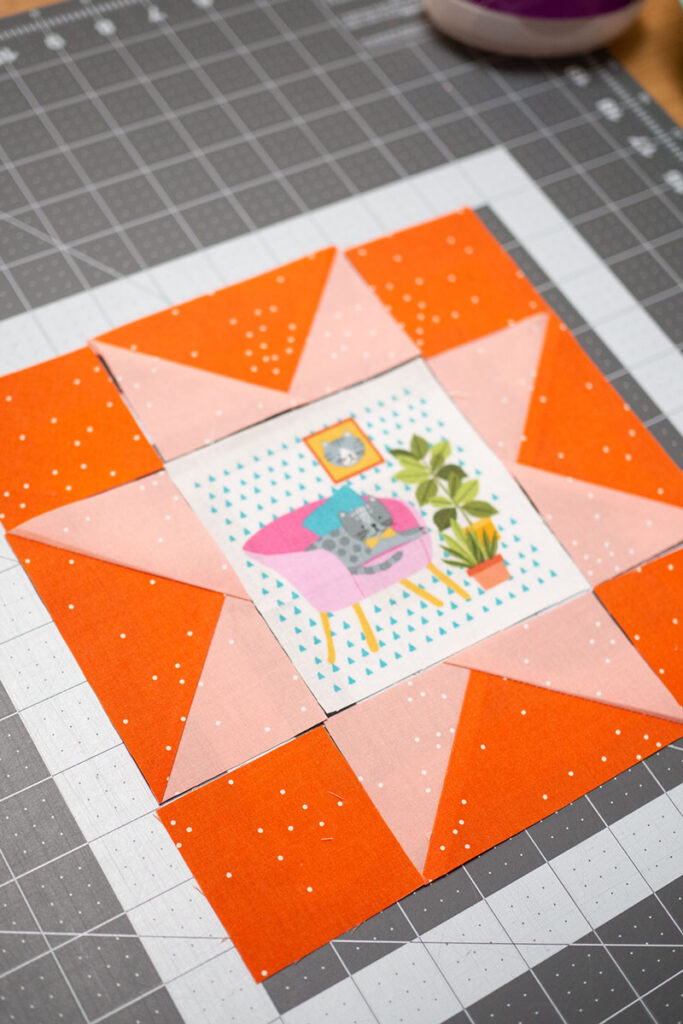
When I first saw the panel from Makower UK in their new Whiskers collection, I knew I had to have it! And I knew immediately it would make a darling children’s item. I discovered I could fussy the kitten illustrations with a 4.5″ ruler and that they made the perfect center panel for a star block. And with that, the Sunshine Kitten Quilt was born. The resulting quilt top is non traditional, but who doesn’t love a super colorful sawtooth star baby quilt?

Meet the Sunshine Kittens!
This quilt features:
- 16 Sawtooth Stars with a unique fussy cut center panel.
- Uses a limited number of fabrics and colors to create a bold statement without being over whelming.
☀️
Materials to make Sunshine Kittens, a Colorful Sawtooth Star Baby Quilt:
Dimensions: 42″ x 42″
- Fabric A: Orange 1 yard (I used Florida from Sugar, a Ruby Star fabric, but this is a good substitute.) (affiliate link)
- Fabric B: Blush 3/4 yard (I used Peach Fizz from Sugar, a Ruby Star fabric, but this is a good substitute.) (affiliate link)
- Fabric C: Neutral 1/4 yard (I used this one from Ruby Star in the Flowerland Line) (affiliate link)
- Fabric D: White or Background 3/4 Yard
- Fabric E: The Whiskers Cats Cream Panel (affiliate link)
- Quilt Batting: Crib size fits best, but you can cut what you need from anything larger.
- Backing: 3 yards of backing fabric.
- Thread
Careful color selection makes a small, colorful quilt read as fun and not as over whelming. I was careful to pick colors that were in the cat prints AND that sit next to each other on the color wheel. I stayed with two main colors, pink and orange, and added a third print that reads low volume and had some orange in it to pick up the main color which is orange. Using variations of blues and greens would probably work well for a boy’s quilt. I also selected fabrics that were predominantly color and not a ton of print. That way, the star points and background don’t compete with the kittens. This is definitely a case for less is more.

Blush and Orange Orange with Low Volume Orange and Blush
Tools to Make the Sunshine Kittens Baby Quilt:
- Rotary cutter
- Cutting mat
- Rotating cutting mat (affiliate link)
- Assorted quilt rulers: I used a 4.5″ square, 2.5″ x 24″, 2.5″ square, 8.5″ square, Large sized Quilt in a day Flying Geese Ruler, (affiliate link) 1/2″ Omnigrid ruler (affiliate link)
- Fabric Scissors
- Thread Snips
- Iron
- Spray Starch
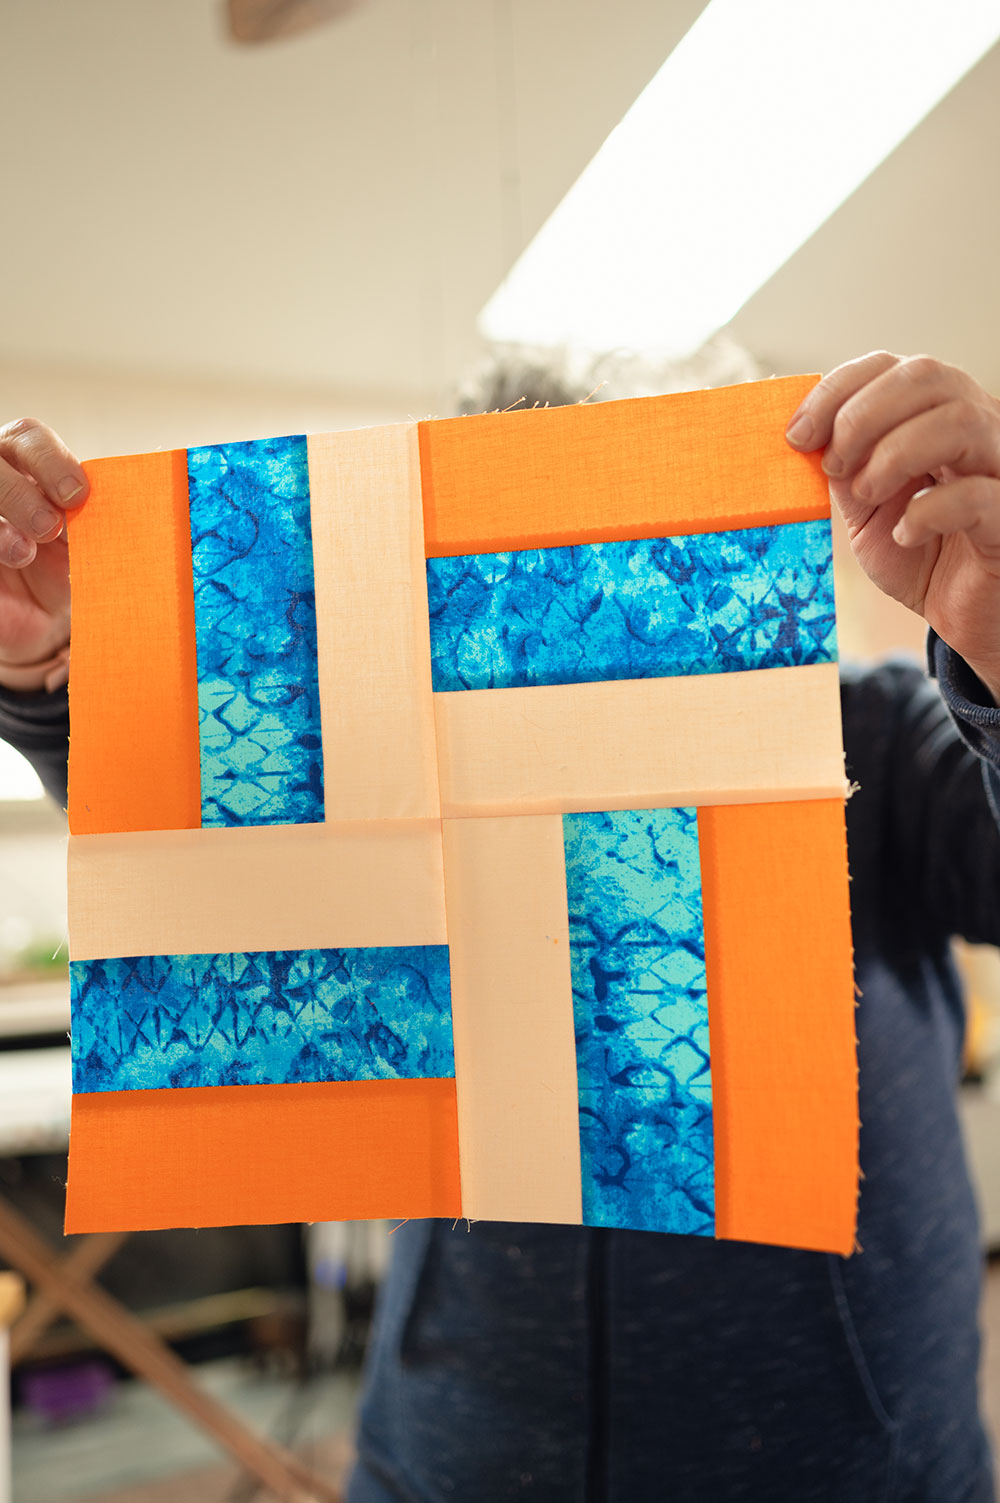
There are a couple of ways to make Sawtooth Stars. One uses half square triangles and the other uses flying geese units. I choose to make 2″ x 4″ – four-at-a-time flying geese units using the Eleanor Burns method. If you are not clear on this method, I do have a more detailed blog post on how to make them. The ruler with the size you need will come with cutting instructions.
Tiny but Mighty
Even though this is a small quilt generated by making small, 8.5″ quilt blocks, I used several rulers to assist me in accurate cutting and piecing.
A sawtooth star is considered a basic block, but it has a LOT going on. There are 8 star points that need proper seam allowances to preserve the points and several seams to manage. There are a ton of bias edges, so I found that spray starch helped with some stabilization.
😸
How is the quilt constructed?
- 16 total blocks
- Sashing between each block and the border cut at 1.5″ on WOF (Fabric D, background)
- Outer border cut at 2.5″ on WOF (Fabric A)
How are the blocks made?
- 6 blocks with orange (Fabric A) background and pink (Fabric B) star points
- 5 blocks with pink (Fabric B) background and orange (Fabric A) star points
- 5 blocks with low volume (Fabric C) background and orange (Fabric A) star points.
- 16 fussy cut cat illustrations from the Whiskers panel print
😮💨
Cutting instructions for the quilt blocks
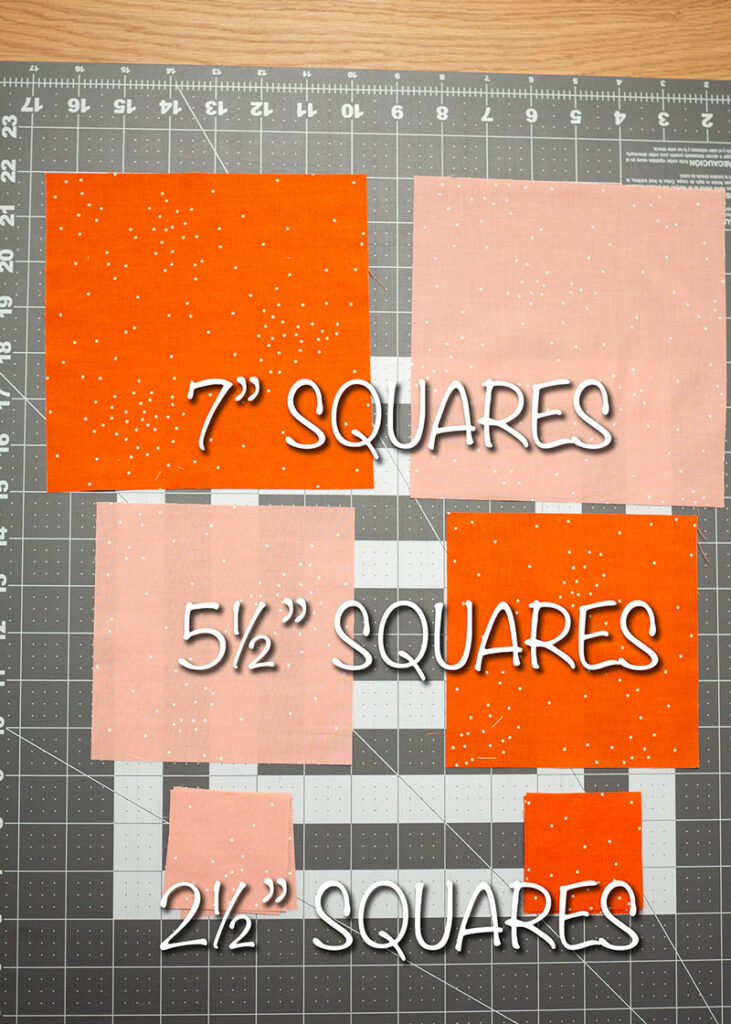
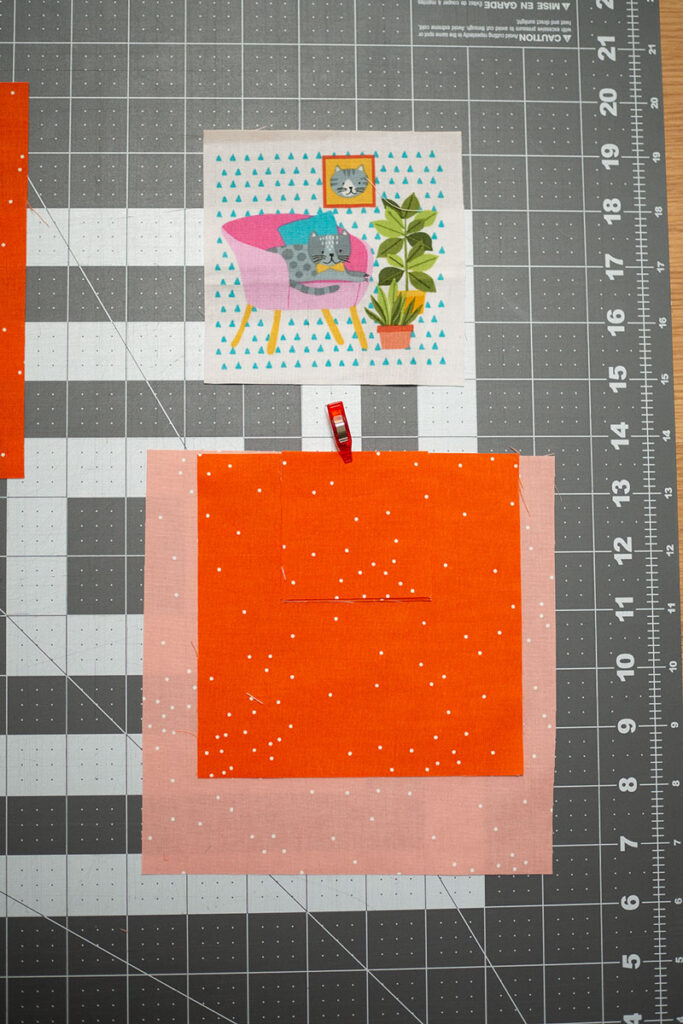
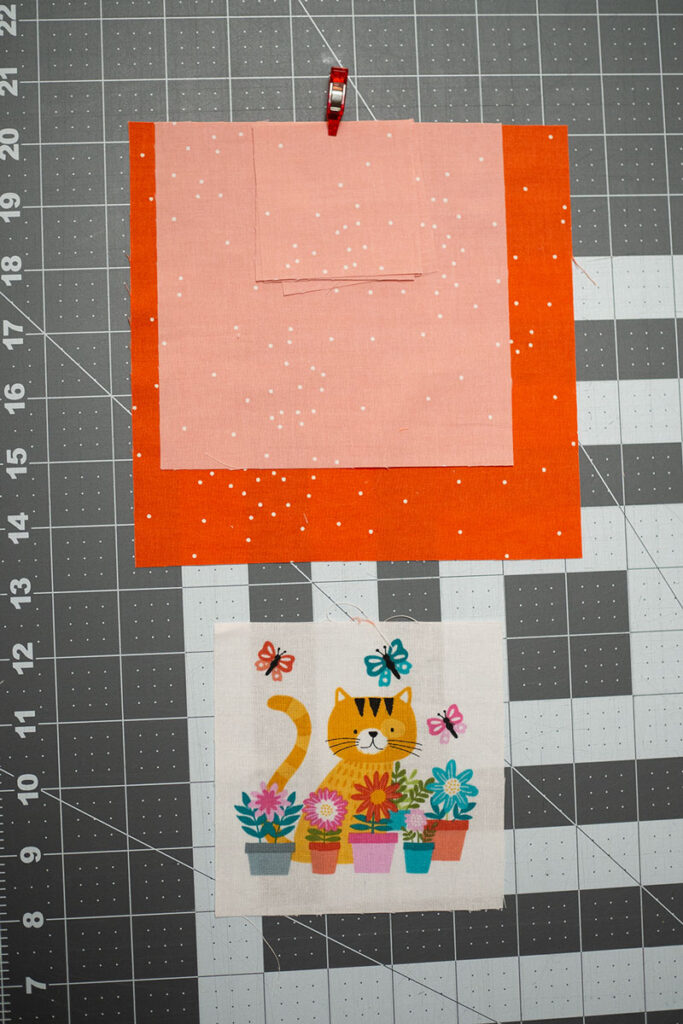
I made flying geese units following the Eleanor Burns method, so each block used a 7″ square paired with a 5.5″ square to construct 4 flying geese.
Each block also uses 4 – 2.5″ squares cut in the corresponding background color.
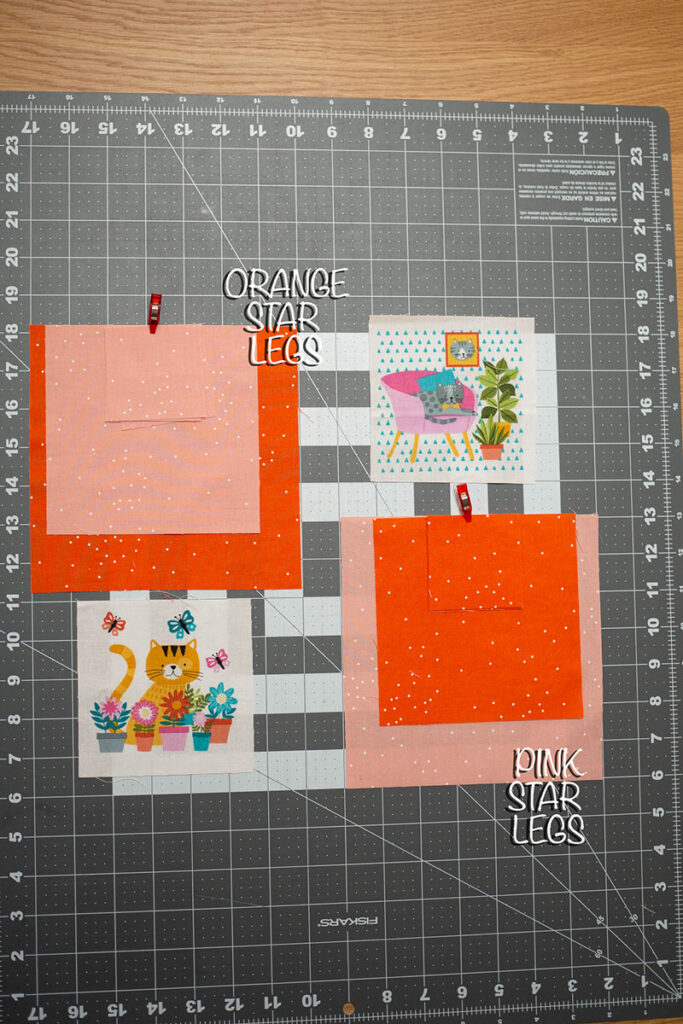
The picture demonstrates squares to construct two blocks, one with orange star legs and one with pink star legs.
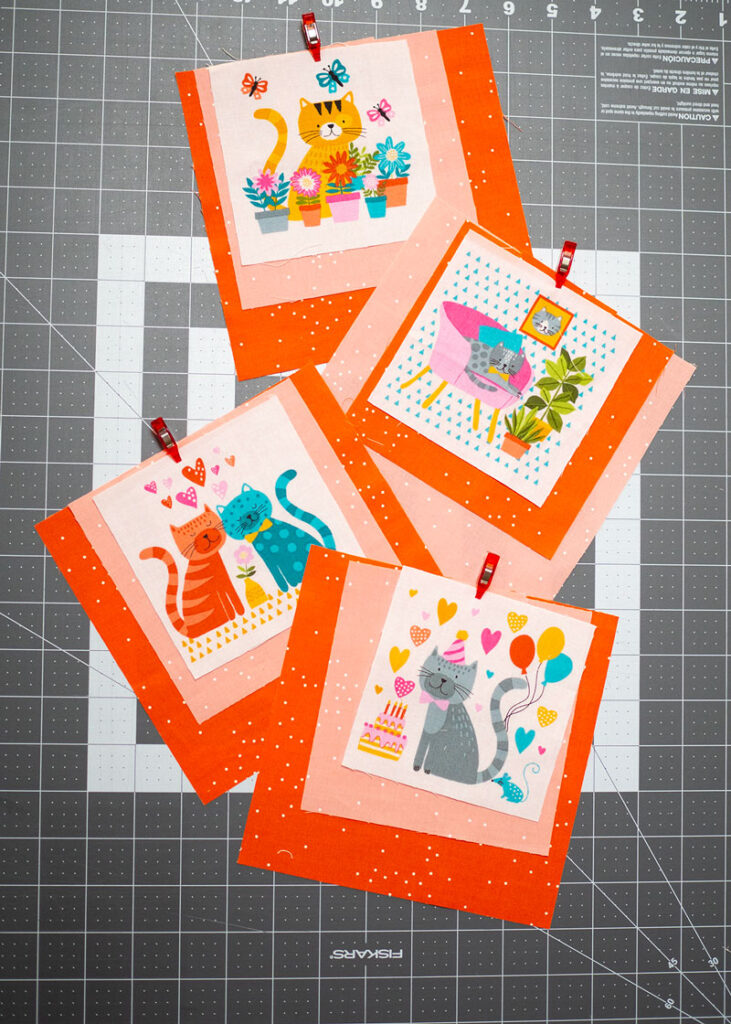
Remember to pair a fussy cut Kitten block from the Whiskers Cream Panel print for the center panel. They are cut using the 4.5″ square ruler, so any 4.5″ center panel would work.
But since we are featuring those cute kitties in this colorful sawtooth star baby quilt, I recommend the panel if you can get one.
👶
Assembly instructions for the individual blocks.
Each block is constructed of 4 – flying geese units, 4 – 2.5″ squares and one 4.5″ center panel. This is a brief over view on how to put the block together. If you need more in depth information of making flying geese, here’s the method I use. And if you need more details on constructing Sawtooth Stars blocks, I made this larger version that might help you if you need more info.
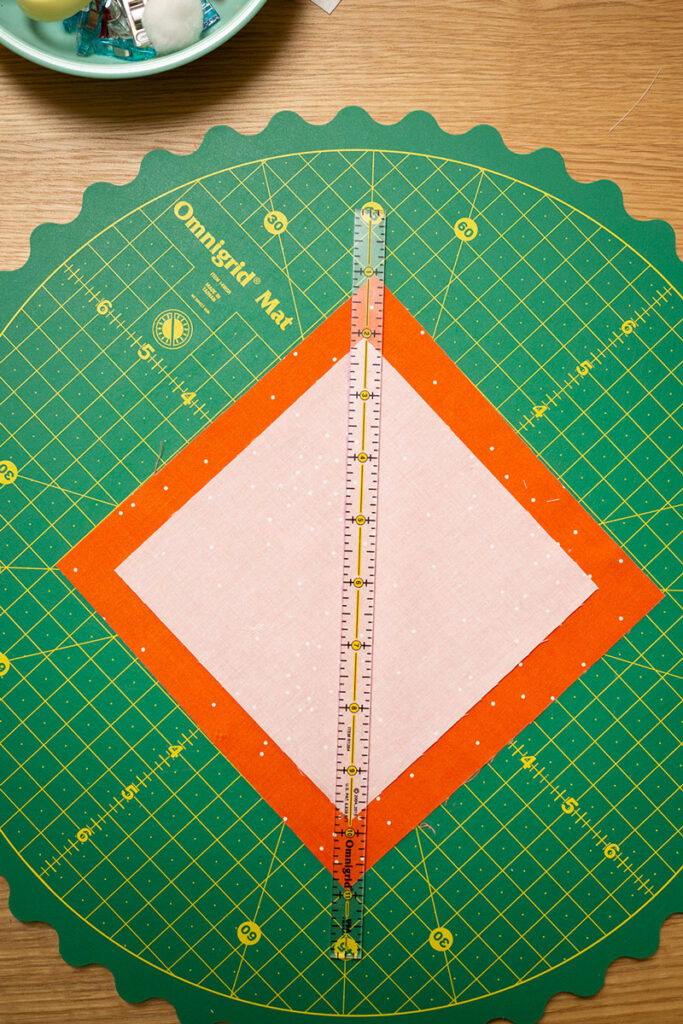
Step One:
I’ve lined up the large and small squares on my rotating mat with the half inch ruler. Mark lines using the ruler, and these are the sewing lines.
I generally shift my needle 2 ticks to the left, so into the seam allowance, since I have an electronic machine that lets me adjust my needle left and right.
I have found sewing just to the left of the drawn line, a scant seam if you will, helps with accuracy when making flying geese units. Any stitch and flip style block would benefit from a scant seam.
Step 2:
Once the fabric has been sewn on BOTH lines, return to the cutting table and cut the square into two pieces.

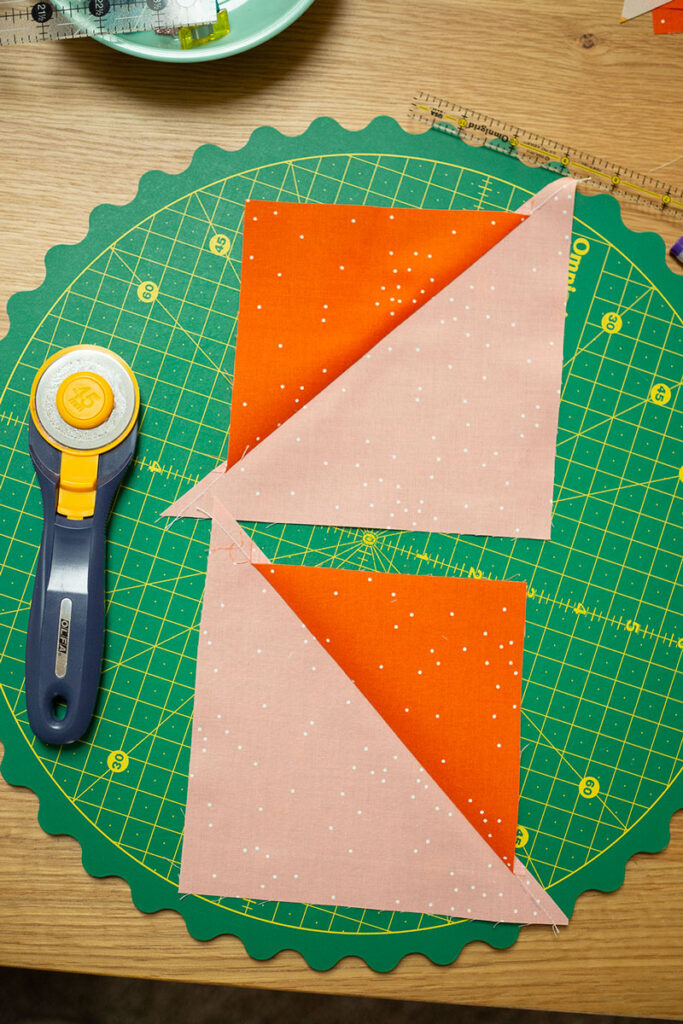
Step 3:
Once the squares are cut apart and pressed open, it reveals a funny looking HST type of unit. Place the squares right sides facing and matching the opposite colors to each other. So pink to orange facing.
Line up along the outer edeges. The center seams will be WAY off. This is normal and how it should look.
Repeat step one drawing the sewing lines perpendicular to the seams.
Step 4:
Cut the sewn squares apart after sewing. Snip the seam allowance in between the two sewn seams. This helps with pressing the flying geese.

Step 5:
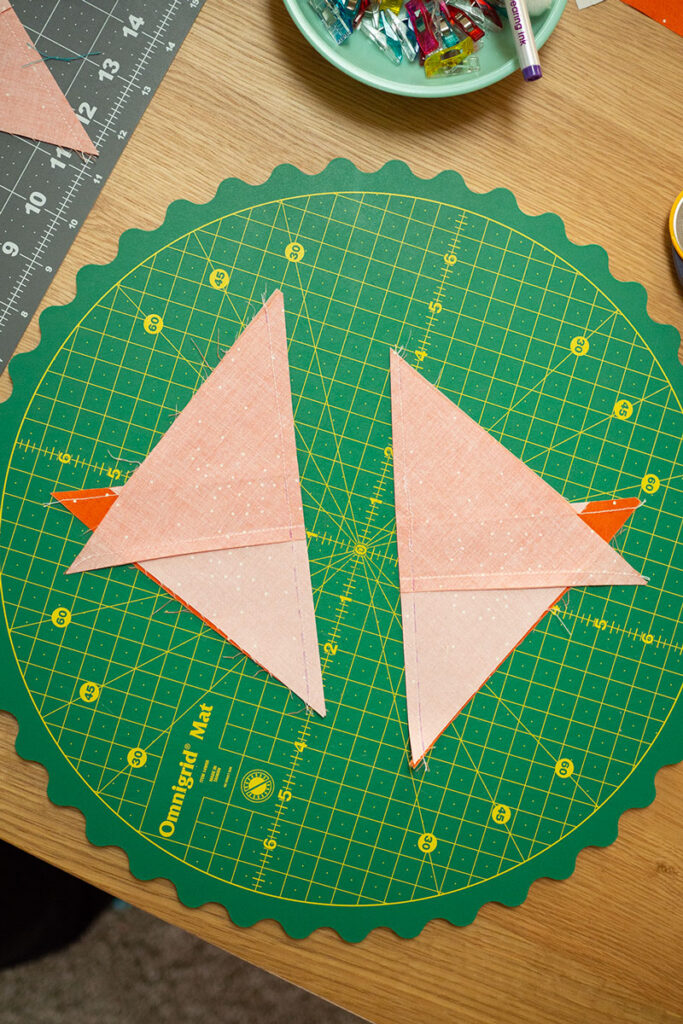
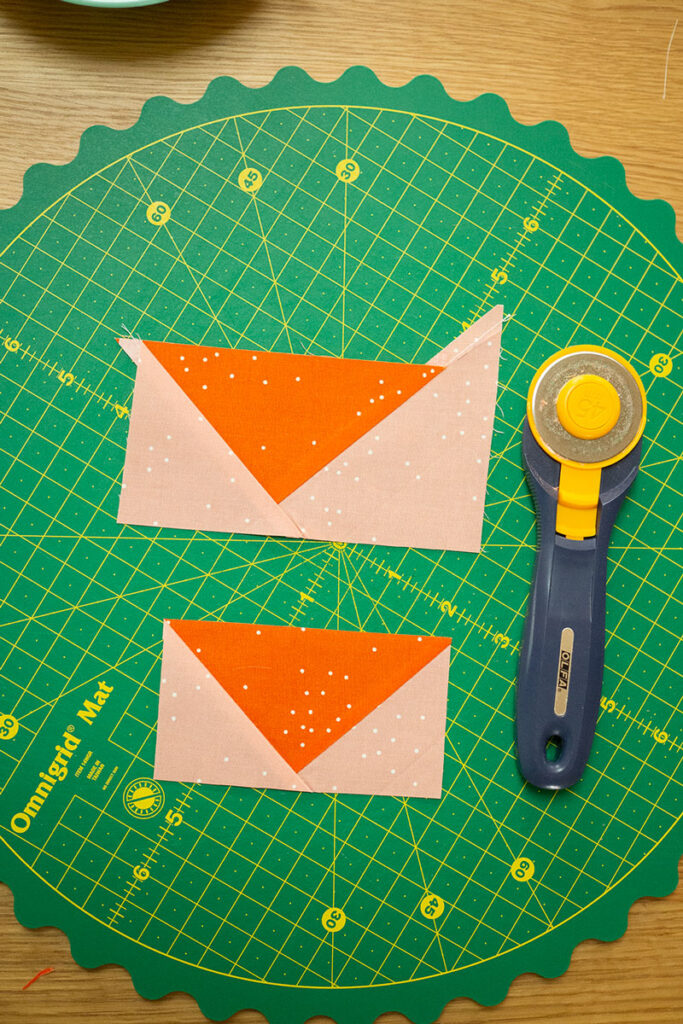
Time to get the flying geese ruler and trim the blocks to size. This pattern calls for 2″ x 4″ and each of those squares will yield two units.
One is for a block with pink star legs and the other for a unit with orange star legs.
Step 6:
Using the Flying geese ruler, first trim the large unit in half. Then trim each half to size using the ruler for accuracy.
You now have your star legs prepped for your block!
If you need more details, please review my post on making 4 at a time flying geese.
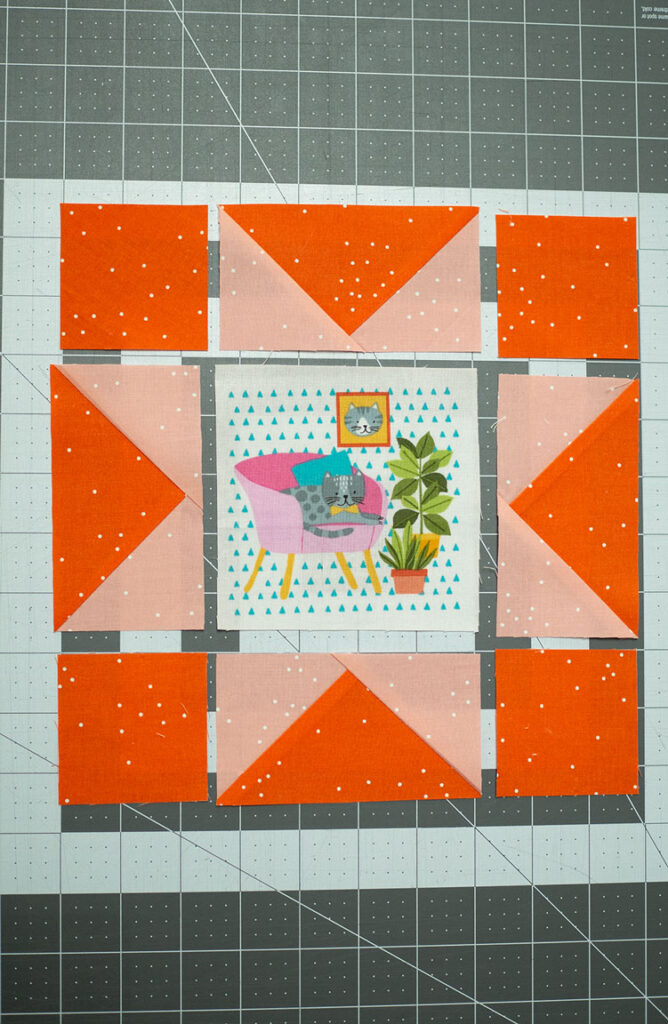
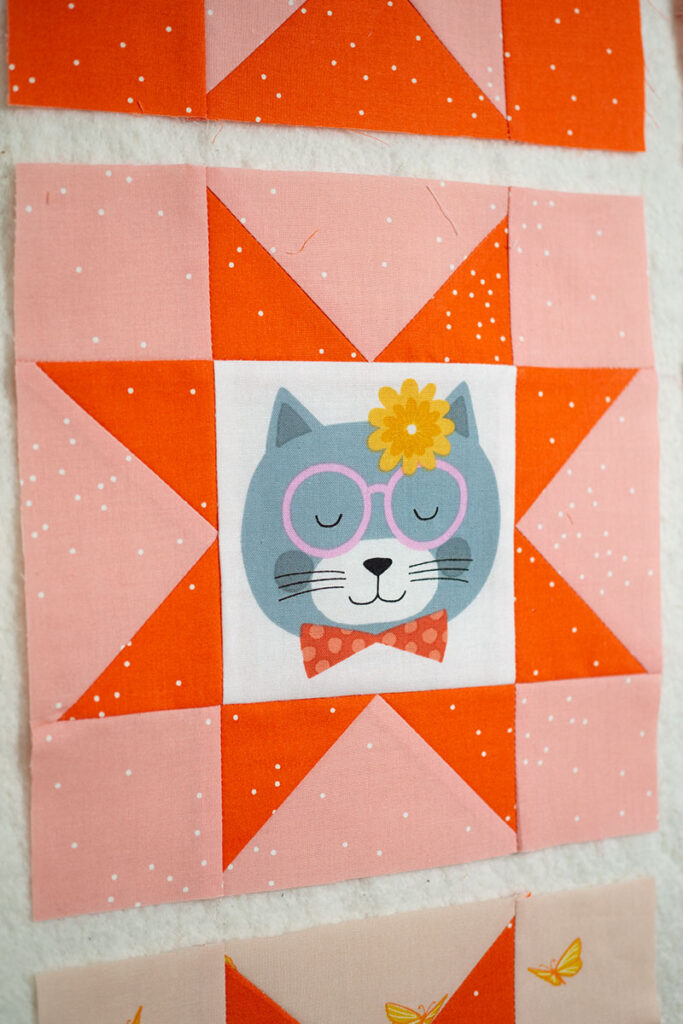
Step 7:
Once the 4 flying geese are trimmed to size, lay out the quilt block as shown in the picture.
Step 8:
Join the pieces row by row to construct 3 rows.
Step 9:
Matching the seams on either side of the center panel, join first the top and then the bottom rows to complete the star block.
Now do it 15 more times to complete the blocks needed for the baby sized quilt.
🐱
Final assembly of the quilt:
- Once you’ve made all of your blocks, get them into the correct order and join each row together with the sash strips in between each block. Then join the sashed rows to each other with the same 1.5″ background strips.
- Sew 1.5″ strips all the way around the blocks as a thin, inner border.
- Apply the 2.5″ outer border, in this case Color A or the orange color.
- Quilt and bind as desired.
Tips and tricks for success:
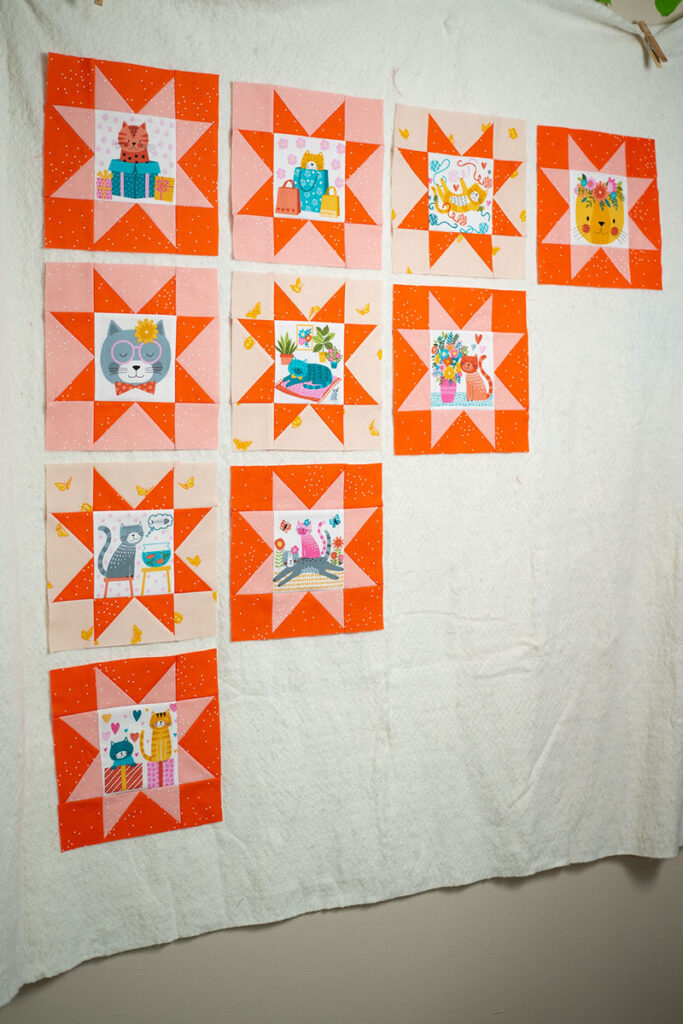
Be mindful of the arrangement of the blocks by color for the final assembly. Notice the colors move in a stair step, alternating pattern across the quilt top.
While you could mix them as you like, this design offers a little more order to a busy quilt top.
I typically like to work in small batches and cut and piece row by row. I cut out all the pieces for a sewing session, and clip them together with wonder clips to keep all the squares for one block together in one place.
If you prefer to cut everything at once, you could do the same thing and clip all the components for a block together and simply grab two or three as you have time to sew.
Take your time with this
While this is a simple pattern, keeping the pieces organized and getting the colors in the right arrangement is a little challenging. This is a smaller block, only measuring 8.5″ square, so accurate cutting and seam allowances are critical. I do recommend squaring up each finished block before hanging on your design wall waiting for assembly.
That being said, it is a darling little quilt! The panel print comes with 40 or 42 individual illustrations, so you could use them all in one large quilt if you wanted. I would sketch it out with the color so you get the stair step effect correct. But it’s a fairly easy thing to figure out and sew.
If you need more exacting instructions, or just prefer a standard pattern with more detail, I am planning on publishing a written pattern for the Sunshine Kittens.
Don’t miss the announcement of when new projects and patterns go live. Simply hop onto my email list and I’ll keep you informed of new posts and videos and products, including patterns, as they release.
🪡
Hi! I’m Pattymac
Quilt maker, baker, lover of tomatoes