Christmas Sugar Cookies
This post has affiliate links to products I use and love. If you buy something I can make a small commission, so thanks in advance. 🙂
Nothing says Seasons Greetings like a cozy home filled with the fragrance of freshly baked cookies. When it comes time to dust off those seasonal cookie cutters, what Christmas Sugar Cookies recipe is best for those decorated Reindeer and Silver Bells?
Christmas Sugar Cookies are something we look forward to baking all year. We romanticize the vision of our littles wearing special pajamas, cutting out their favorite shapes, sipping hot cocoa while enjoying a playlist of vintage Christmas music. But all too often, our reindeer and trees come out more like blobs than the design promised by the cookie cutter.
Let’s fix that.
The truth about making rolled out sugar cookies is this. They can be a challenge because they have so much butter and sugar, and that makes them have a tendency to spread. The way we combat this is by working with really cold cookie dough.
There are other recipes out there who promise you can mix, roll, cut, and bake the cookies right away and still give you perfect shapes. All I can say is this: I’ve never had that happen and I’ve baked all sorts of sugar cookie recipes over the decades. I don’t know how people get that to work. Maybe their house is freezing cold or they are cutting the cookies out on a marble slab outdoors in 40 degree weather. Those are the only ways I know that it could work.
So, how do we get our Christmas Sugar Cookies to hold their shape?

One word. Refrigeration.
I’m sharing my method for success with this kind of cookie, and you may not like it. Why? Because you have to plan ahead. And you have to refrigerate the dough TWICE. I know, I know. It’s not what you want to hear. And I understand. But I would rather give you a real recipe with honest tips for success than just write some chirpy recipe post that doesn’t help you to actually succeed. That’s no fun. I struggled through several batches of these before I developed my own method, and here goes.
Steps to success for Christmas Sugar Cookies holding their shape:
- Mix the dough as recommended in the recipe.
- Lay out a piece of parchment paper the size of a cookie sheet. Preferably the flat sheets that come as individual sheets.
- Put half your mixed dough in the center of the parchment paper.
- Place another sheet of parchment paper over top of the dough so it’s sandwiched between the paper.
- Using your hands, press the dough out a little so it’s not such a big mound. Then roll the dough through the parchment with a rolling pin. I like a rolling pin with interchangeable discs so I can maintain even thickness when I roll out my cookie dough. I roll my dough so it’s about a quarter inch thick.
- Do the same thing with the second dollop of cookie dough using two fresh sheets of parchment.
- When both dollops of sugar cookie dough are rolled out to even thickness between layers of parchment, transfer this to a full sized cookie sheet. Allow this cookie sheet of dough to rest in the fridge at least 4 hours, but overnight is best.
Yeah. You’re going to mix and roll the dough the night before so it has time to re solidify. You want the butter to be solid again. It’s going to look like this.
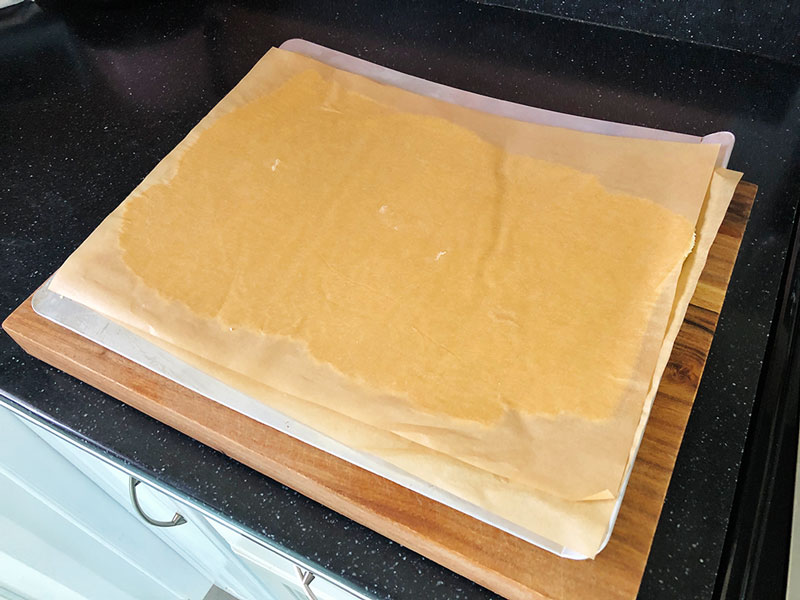
I know, I know. It’s not sexy. It’s not even all that much fun. But trust me. It’s worth it. Here’s what you do the next morning.
The next step in success with Christmas Sugar Cookies:
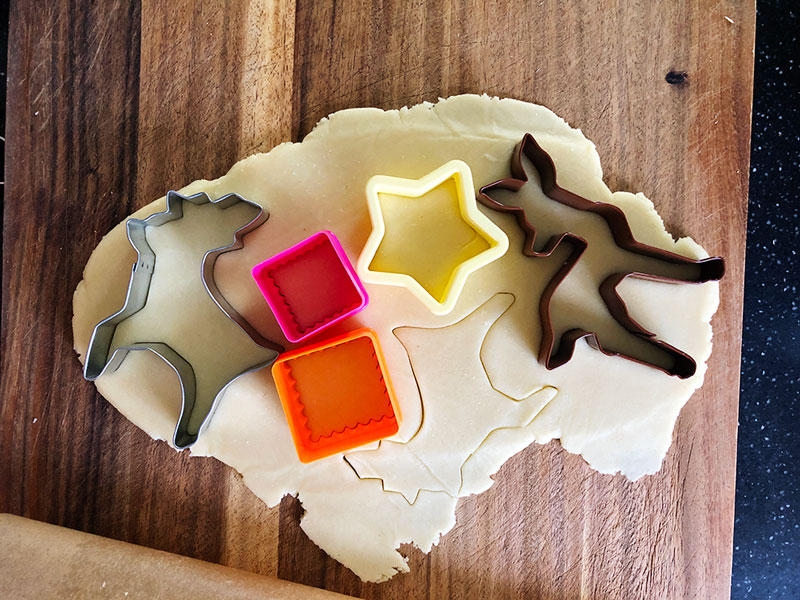
- Remove one slab of dough at a time from the fridge. You want it as cold as possible when cutting so only remove what you are using in that moment.
- Peel away the top layer of parchment and with the dough still on the bottom layer of parchment, start cutting out your shapes.
- Put the shapes on parchment on another cookie sheet. You can re use the parchment you peeled off top of the dough slab.
- Cut all the shapes you can and when you have them all, feel free to re roll the remaining dough for more cookies. Fold the parchment over the top to roll so nothing sticks to your rolling pin. You can repeat this process of cutting every thing you can and re rolling scraps until you can’t get anything else. It is helpful to use a small offset spatula to get under the cut cookies and transfer them to the lined cookie sheet with the other shapes. You will notice the dough gets softer and softer as you go.
- When all the shapes are cut, put the sheet with the cut out cookies BACK IN THE FRIDGE. Let them sit in the fridge for round two chill time at least an hour but 3 or 4 is better.
Don’t hate the messenger. People write to me all the time asking how to get their sugar cookies to hold the shape when they bake. And the second chill is the secret.
It’s the secret step no one else wants to tell you.
People read this instruction and click off the recipe. They curse the blogger and vow never to come back to that stupid website ever again. And proceed to bake more cookies that spread all over the pan and forever wonder why their dog gone Rudolf cookie bakes into a blob. Trust me. Do the second chill.
More tips for success with Cut Out Sugar Cookies:
- Pick simpler shapes. Something like a circles or Christmas trees are much easier than more complex shapes like the fawn or my beloved little kittens. Master the easier shapes before moving on to the more delicate ones.
- Bake your cookies on a room temperature cookie sheet. If you try to bake from the cookie sheet you just pulled from the fridge, your cookies will never bake properly. Part of what cookies need in the oven is for the pan under neath them to get really hot. It’s how you get a crispy bottom on your cookie. If you try sticking a cold cookie sheet in the oven, it never heats up properly and the top of your cookies will be over baked before you ever get the bottoms done.
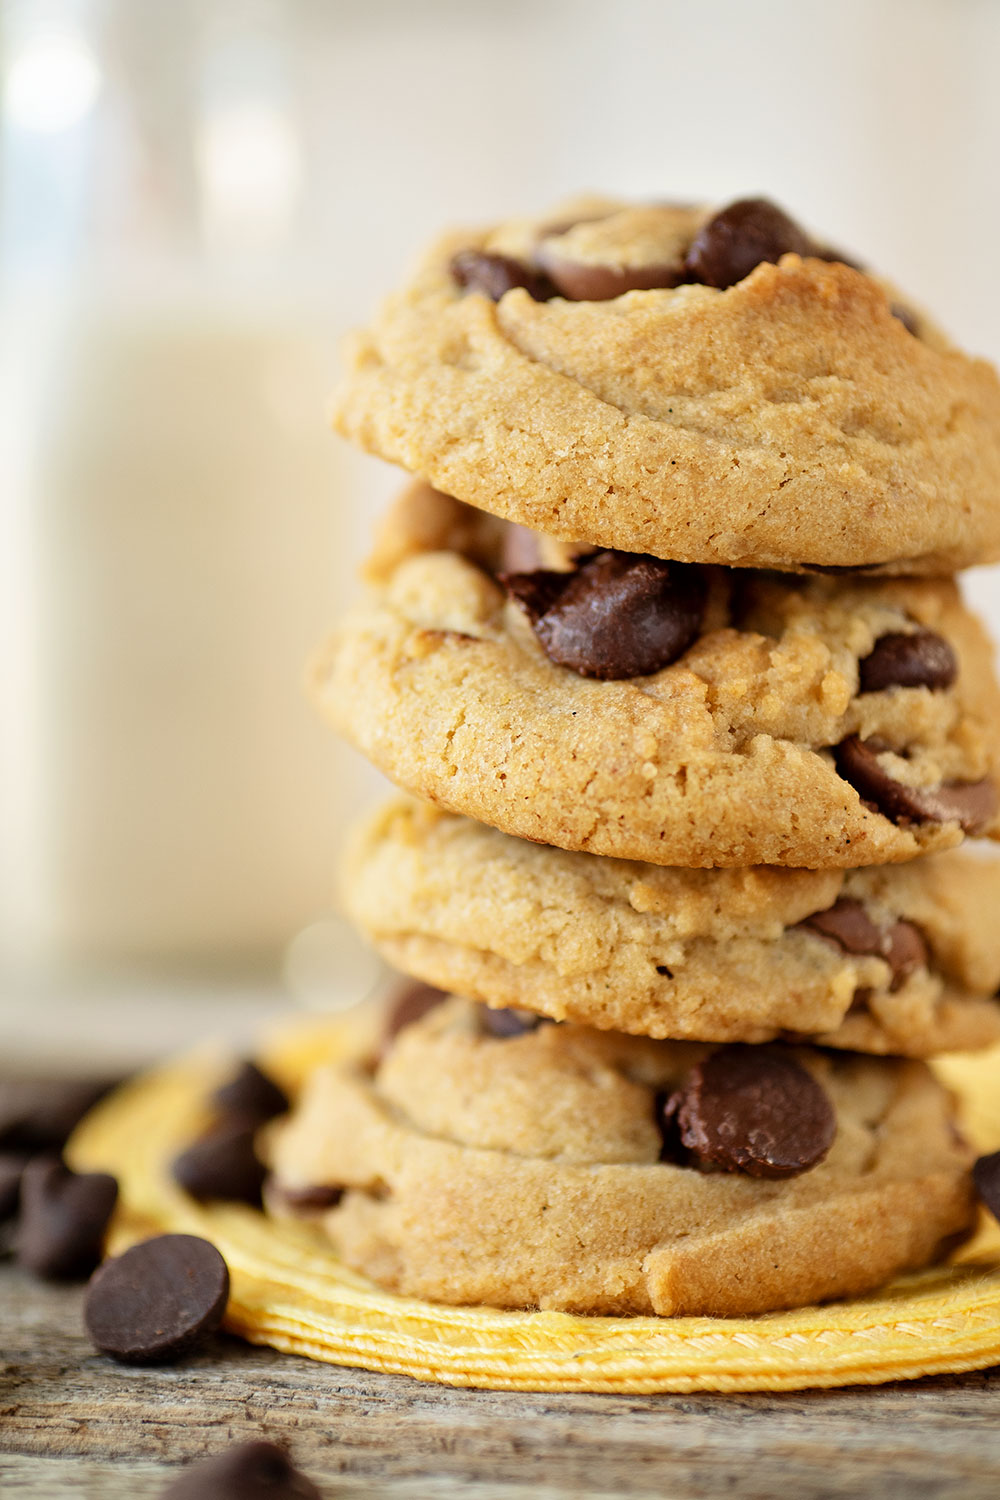
- Bake your cookies on a parchment lined heavy aluminum plan. Skip the silpat. Cookies spread on silpat. The only time I use a silpat is for my vintage chocolate chip cookies which require the combination of putting parchment over a silpat line pan to get them to work. Look, I never said getting perfect cookies would be easy. But I promise you this, they are worth it!

All this talk about the cookie….
But what about the icing?
Since I’m serving up cookie facts in this post, let me just say something else nobody wants you to know. Royal icing is hard. It’s soooo hard to get it right. It’s either too thick or too thin, and it takes a lot of practice to get it right. But don’t despair.
Icing Glaze is much easier. Let me say it again. The Glaze is So. Much. Easier.
For a glaze, mix it, put some in a bowl, dip your cookies top down in the glaze, gently shake off the excess and put your cookies on a rack to dry. Generally, it takes over night for the glaze to harden.
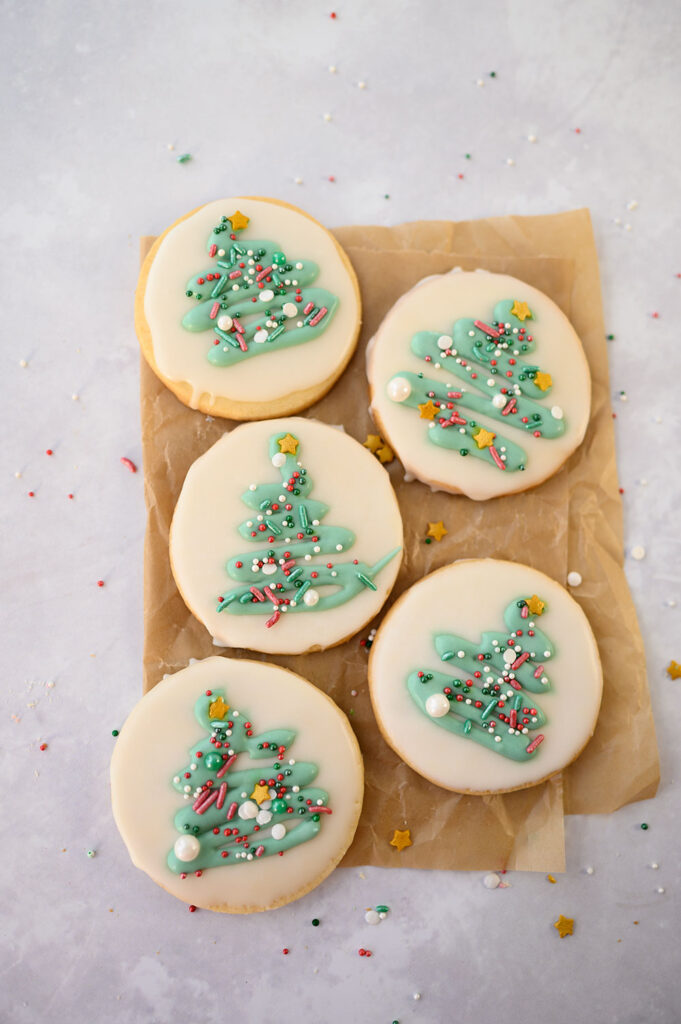
The glaze can be tinted, it can be white and decorated with sprinkles, it can be piped on top of the dried glaze in a design as I did with the Christmas tree design.


Kittens decorated with glaze and a food safe marker.
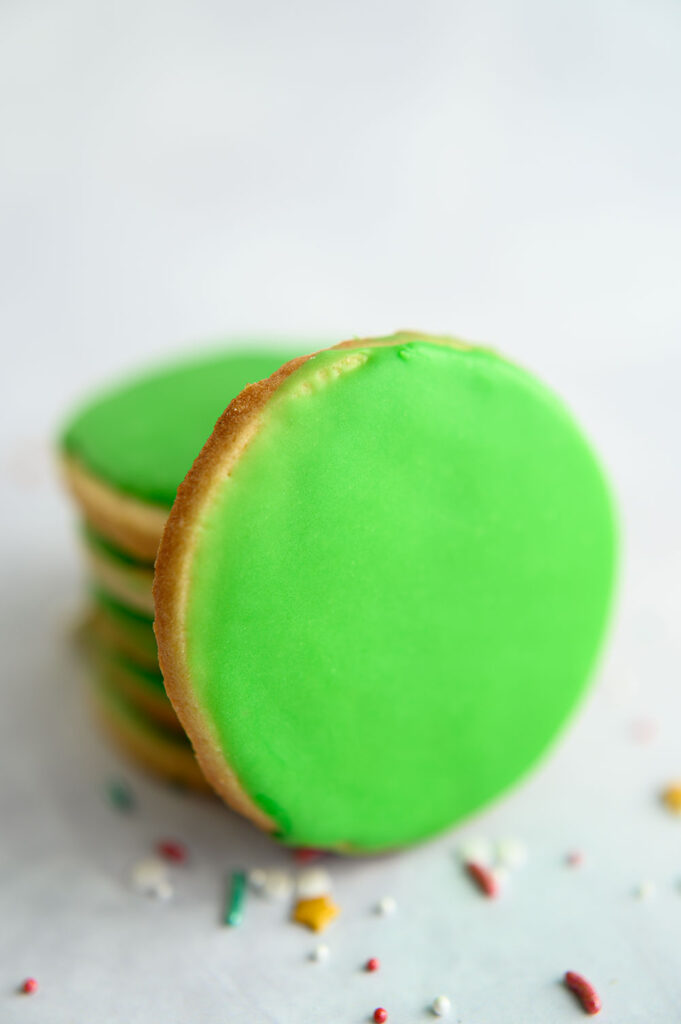


Just because you’re dipping your cookies in a glaze as opposed to piping layers of royal icing is elaborate designs does not mean your cookies are boring. Personally, I love simplicity in design! It’s why I enjoyed the round cookies dipped in muted red and green glaze so much.
Ways to jazz up Christmas Sugar Cookies dipped in glaze:
- By dipping a toothpick in a gel food color, you can then swirl that tiny bit of color through a bowl of white glaze and create a gorgeous swirled effect on your cookies.
- Cutting all your cookies in the same shape, but making several colors of glaze will deliver a gorgeous collection of decorated cookies as pleasing to the eyes as to the taste buds. Sharing a cookie box with a half dozen decorated cookies with each cookie in a different color is incredibly striking.
- Investing in a food safe marker lets you draw on details like faces or other designs. It’s much simpler to use the marker than piping on a minuscule amount of a royal icing detail.
- The glaze can be any flavor you choose, so use lemon or almond or something exotic like rose water. Spend a little time investigating flavoring options.
- Pipe an abstract tree design on top of the dried white glaze and finish with seasonal sprinkles.
The trick to getting the last one right, the abstract tree, is the consistency of the green icing. Save some of the white and thicken it back up with more powdered sugar so it holds the shape better. Also, this glaze thickens as it sits, so mixing it and letting it hang out a bit will often do the trick. Then add a touch of green food coloring for a traditional green tree. It takes a wee bit of practice to get the hang of piping your swiggly tree just right, so practice on a piece of parchment. You can scrape up your practice trees and put it back in the bag to use on actual cookies once you get the hang of it. Just don’t wait too long, because the glaze does set up pretty fast.
One tip I’ll share is that you will space out the squiggle more than you think since it spreads a bit as it hits the cookie surface. And honestly, don’t be stingy with sprinkles!

You might also like:

Christmas Sugar Cookies
- Total Time: 1 hour 14 minutes
- Yield: 24 1x
Description
Tips and tricks for how to make Christmas Sugar cookies that hold their shape, taste great and look beautiful. Complete recipe.
Ingredients
For the Cookies:
- 2 1/4 cups (280 grams) all purpose flour
- 1/2 tsp baking powder
- 1/4 tsp salt
- 3/4 cup (180 grams) room temperature unsalted butter
- 3/4 cup (150 grams) caster sugar
- 1 egg
- 2 tsp vanilla, clear vanilla won’t color the cookie dough, but you can use whatever vanilla or flavoring you desire
For the Glaze:
- 1 1/2 cup (260 grams) sifted powdered sugar. More if needed to thicken the glaze.
- 2 tbsp light corn syrup
- 1 tsp flavor extract
- 1 –2 tbsp warm water, as needed
Instructions
For the Cookies:
- Whisk dry ingredients, flour, salt and baking powder together in a bowl.
- Place room temperature butter in a large mixing bowl and cream on medium until fluffy. I like to use my Kitchen Aid stand mixer fitted with a paddle attachment, but you can use what you have.
- Stop the mixer, scrape down sides of bowl, and add the sugar. On medium speed, cream together butter and sugar until white and fluffy. About 2 minutes.
- Add the vanilla or flavoring your choice.
- Scrape down the sides of the bowl and add the egg. Mix on medium until well combined. The mixture may look broken or curdled at first, but keep mixing until it comes together.
- Once the wet ingredients are well combined, turn off mixer, scrape down sides of the bowl, and add the bowl of dry ingredients. Run mixer on low until flour mixture is combined, but don’t over mix.
- Divide cookie dough into two portions and roll out each one separately to 1/4″ thickness between sheets of parchment. Put the rolled dough onto a cookie sheet and place into the refrigerator 4 hours or overnight.
- After chilling cut desired shapes from dough. Place shapes on parchment lined cookie sheet. Re roll and cut from scraps until you can’t get any more cookies. Put trays of cut cookies back in the refrigerator for 2-4 hours.
- Preheat oven to 350 degrees F.
- With a room temperature cookie sheet, line with parchment and transfer a selection of chilled cookies to sheet. Don’t pile them too close as you want hot air to circulate.
- Bake 12-15 minutes. Cookies will be light golden underneath. Do not over brown.
- Cool cookies on sheet for about 10 minutes and then transfer to cooling rack. When completely cooled, decorate as desired.
For the Glaze:
- Combine sifted powdered sugar, corn syrup, flavoring and 1 tsp warm water in a large mixing bowl. I use a whisk, but a fork also works.
- Check the consistency of the glaze and if it’s too thick, whisk in a little more water. If it’s too thin, add a bit more powdered sugar.
- Using a wide bowl, add about 1/3 cup of glaze and add a touch of color if desired. Holding the cookie by the edges, with your top side down, dip cookie lightly but evenly into the glaze. Move it around to coat as needed, Shake the cookie gently to let the excess glaze drain off.
- Flip cookie right side up and allow to dry over night on a cooling rack.
Notes
Mix the glaze slowly to minimize air bubbles. Whipping too quickly will incorporate air, hence air bubbles which is not what we want in our glaze.
A few air bubbles in the glaze is inevitable, but using a toothpick to gently pop them and swirl the glaze while it’s fresh on the cookie does the trick to achieving perfect glaze.
I recommend caster sugar or superfine sugar for this recipe. It dissolves more completely into the butter and makes a much smoother cookie dough. Regular granulated sugar is ok, but caster is so much better.
- Prep Time: 60 minutes
- Cook Time: 14 minutes
- Category: dessert
- Method: baking
- Cuisine: American


Hi! I’m Pattymac
Sewist, baker, maker
I’m a creative lifestyle blogger living and working in Coastal Virginia. When I’m not mixing or stitching or taking pictures, I’m out exploring the cook book section of my favorite library or munching my own home baked cookies at a mid week movie matinee.