Christmas Tree Quilt Block Pattern
This post has affiliate links to products I use and love. If you buy something I can make a small commission, so thanks in advance. 🙂
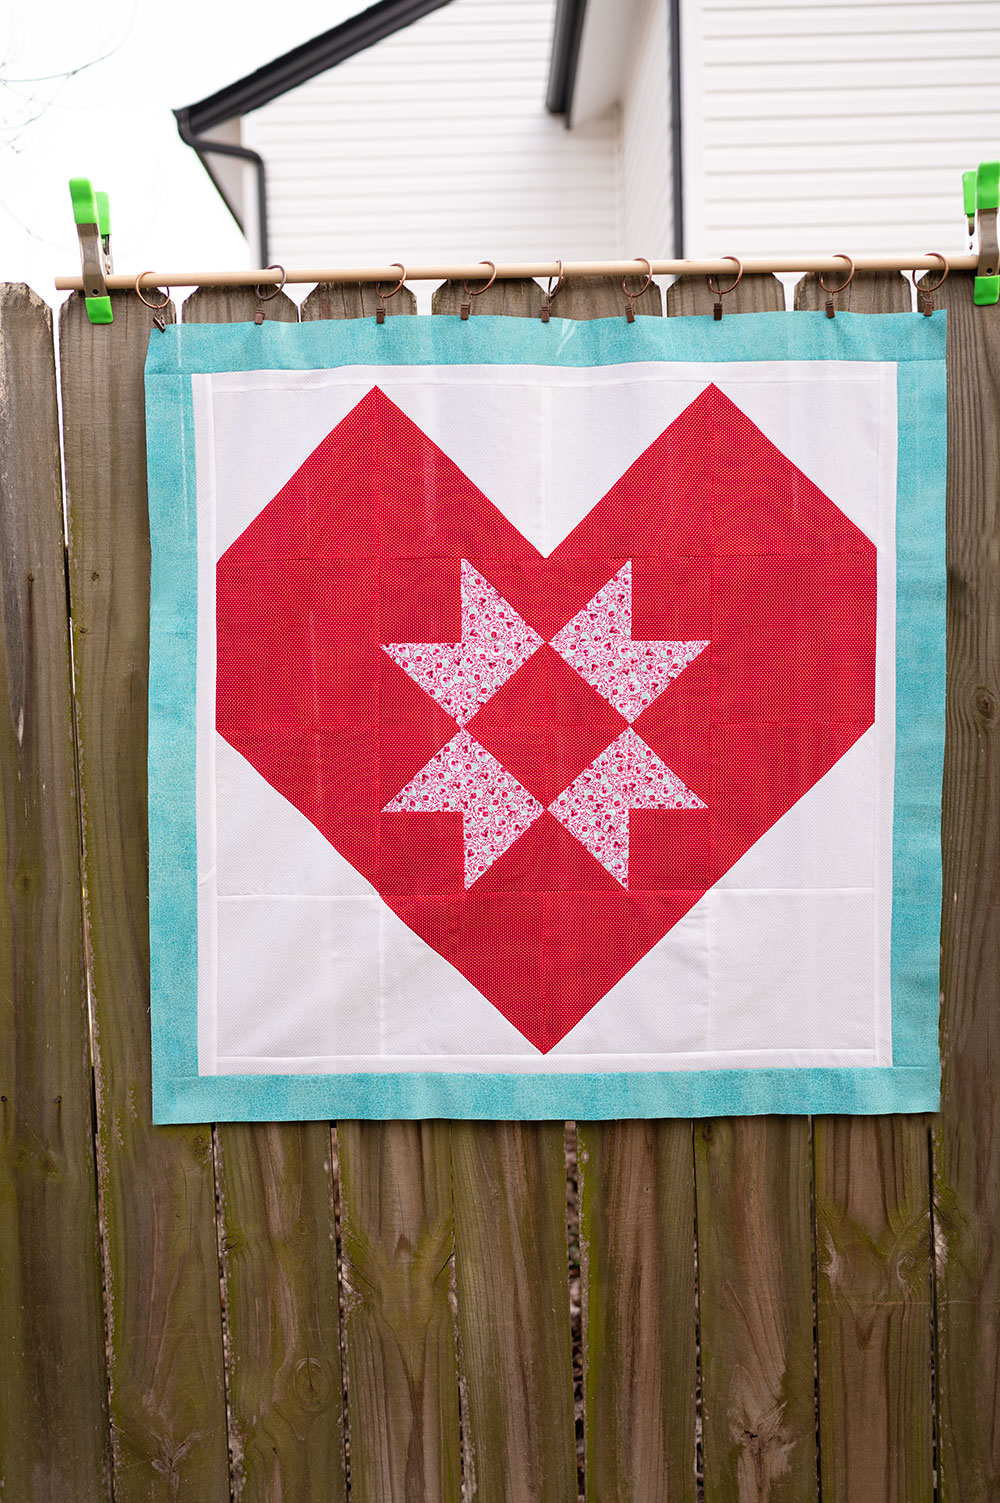
What would the holiday season be without something fun and seasonal to piece? Not much fun as far as I’m concerned! Enjoy today’s tutorial where we create an adorable Christmas Tree Quilt Block Pattern.
I’ve spent some real time and energy the past couple of months searching high and low for a tree pattern that is just as fun for beginners as it is for more experienced quilters to stitch up. And this version of a Christmas Tree Quilt Block Pattern really does check all the boxes.
See what I mean? Today’s tutorial is cute, colorful and fun. And be sure to stick around, because I’ll be sharing a couple of projects (besides a standard quilt) you can sew this quilt block into.
Can we talk? I’d like to be completely honest with you about something. It bothers me (I’m trying to be restrained here) to see impossibly intricate mini gingerbread houses and complex king size quilts constructed of 1.5″ scrappy squares of Christmas fabric being promoted as something even remotely reasonable for us normal people to craft over the holidays. Are they beautiful? Yes, of course they are! But doable? No. Inspirational? I’m gonna say no, because that stuff leaves me feeling inadequate.
When I sit to down to craft, I’m looking for something that is not only a cute finished project, but something that doesn’t leave me frazzled from attempts at attaining perfection.
And if you quilt, you know how precise a craft it is. Today’s project is designed to be fun, and light. Who doesn’t need THAT right now?
So what do we need?
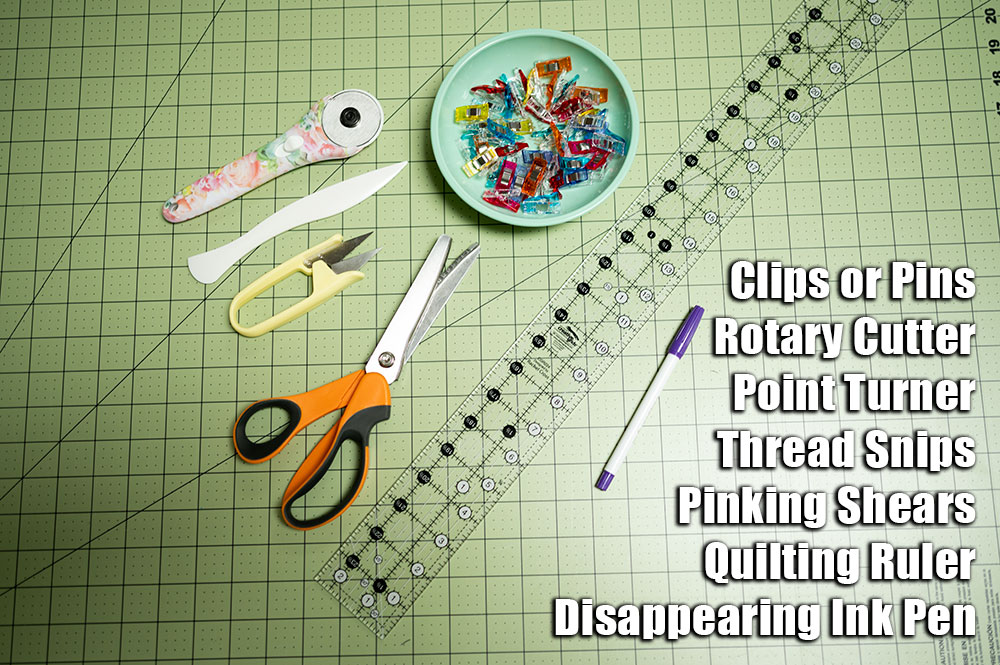
Tools to piece the Christmas Tree Block Quilt Pattern:
- Cutting mat to cut the fabric
- Wonder clips or Pins to secure the pieces for sewing
- Rotary cutter
- Quilting ruler. My current favorite is the 2.5″ by 24.5″ ruler from Creative Grids
- Point turner (actually this is if you make one of the projects I share using this block)
- Thread Snips
- Pinking Shears (this is for the projects we’ll explore later)
- Disappearing ink pen
- Sewing Machine
- 1/4″ presser foot
- Cotton 50 weight quilting thread
- 5 different prints of quilting cotton. This is a perfect project for fat quarter bundles.
- Iron
- Ironing board or pressing mat
Now that we have our tools gathered, how should the pieces be cut?
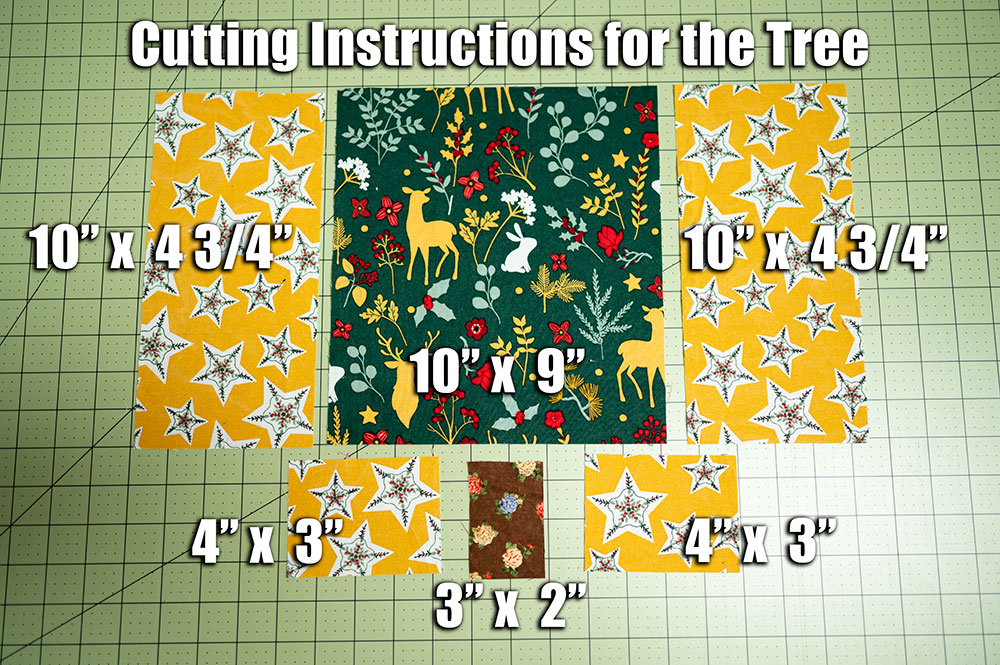
Fabric cuts needed to piece the Christmas Tree Block
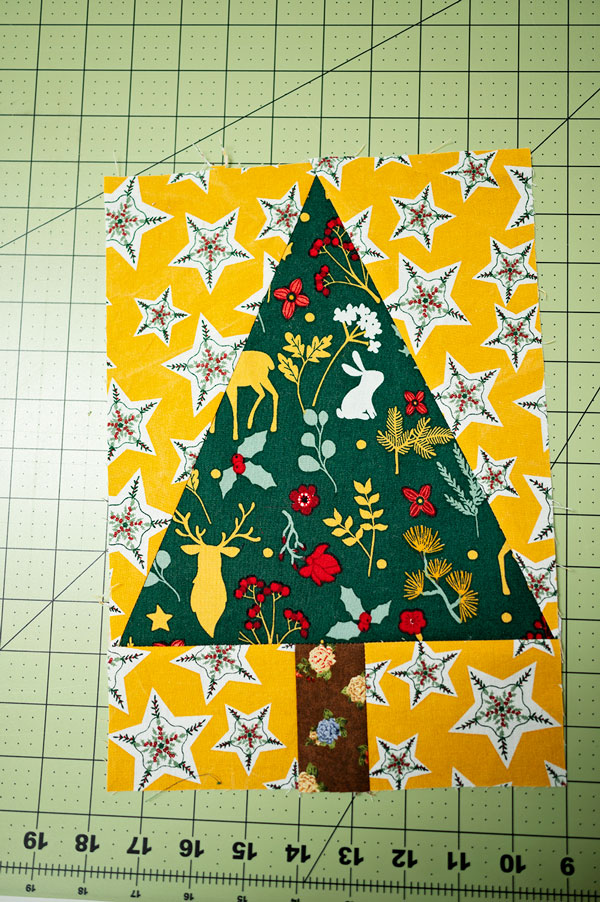
- Fabric A: 1 piece at 10″ x 9″ (the tree part)
- Fabric B: 2 pieces at 10″ x 4 3/4″ AND 2 pieces at 4″ x 3″ (the sky parts)
- Fabric C: 1 piece at 3″ x 2″ (the tree trunk)
Cut all your tree pieces out and be mindful of directional prints, if using. You can see the bunny and deer print is clearly directional so it will be important it’s laid out correctly when we subcut later.
Additionally, you will need to cut strips for the inner and outer border.
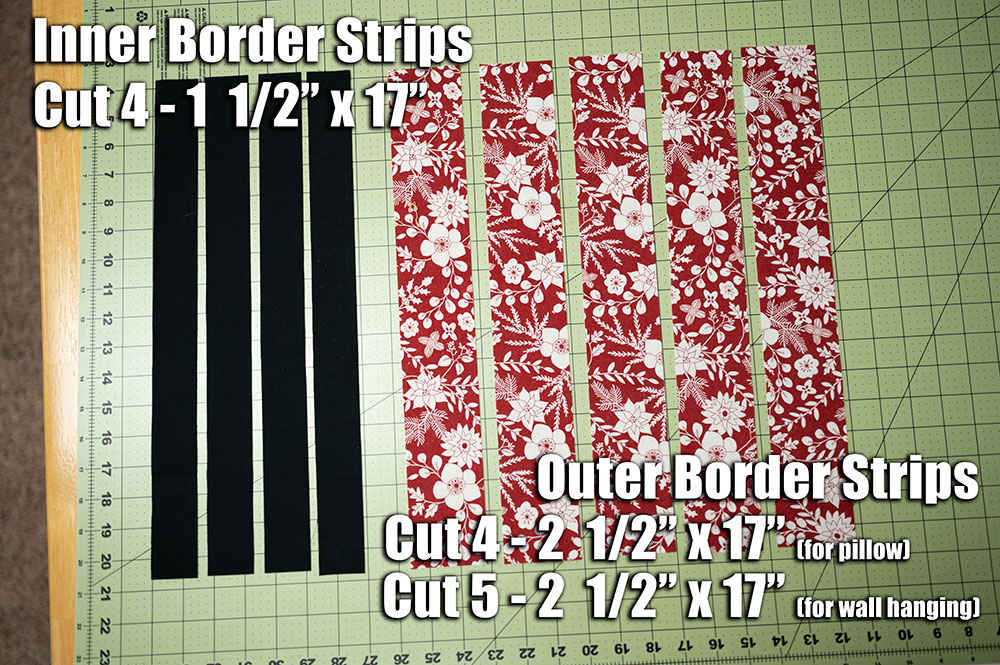
Fabric strips needed to piece the Tree Block:
- Fabric D: 4 pieces at 1 1/2″ x 17″ (The border, which I recommend using a bold solid to separate the tree from the outer sash.)
- Fabric E: 4 pieces at 2 1/2″ x 17″ (The outer border, or sashing)
Please note that the image above gives two different instructions for the outer border. This is because if you decide to make the mini hanging quilt, you will need one extra strip cut from the outer border fabric to sew the sleeve that is used to hang the quilt.
Also, note that the strips differ in width but the length is all the same. This makes the initial cutting instructions a little easier. I find it’s easier to cut strips a little long, piece them onto the block and then trim down on either end to square up with the block. Trust me when I say it’s much easier to trim down than to wind up short. Additionally, cutting everything at the same time is a bit of a time saver.
The specialty quilt ruler in the 2.5″ by 24.5″ size shines in a project like this. It makes cutting accurate strips a breeze, and since I sew with 2.5″ strips so frequently, I found it a worthwhile investment.
Now that all our pieces are cut, the next step is to subcut the 3 rectangles that become our tree top and sky.
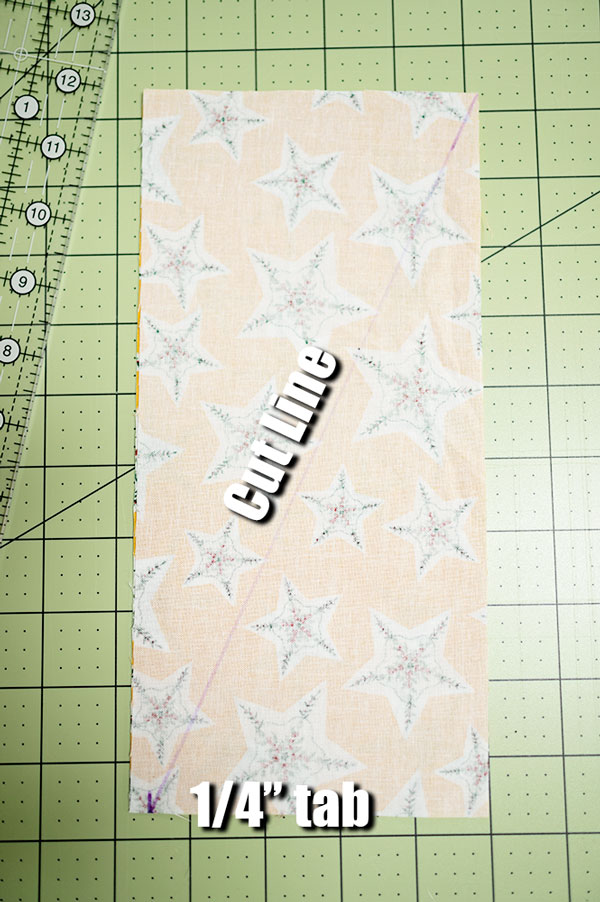
First let’s sub cut the upper sky.

Use the fabric cut on the left side of this cut. The one with the tab at the bottom.

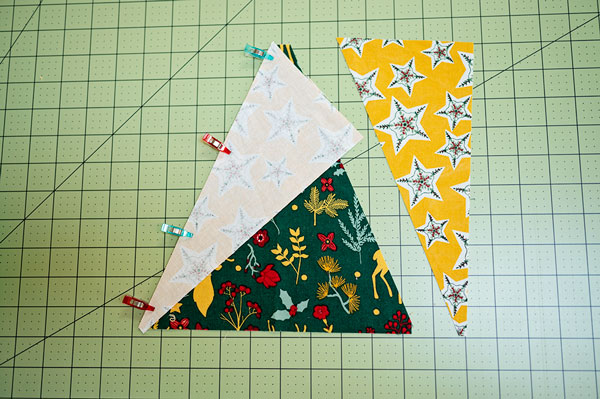
Steps to subcut the Sky pieces:
- Take the two Fabric B – 10″ x 4 3/4″ pieces and lay them right sides together.
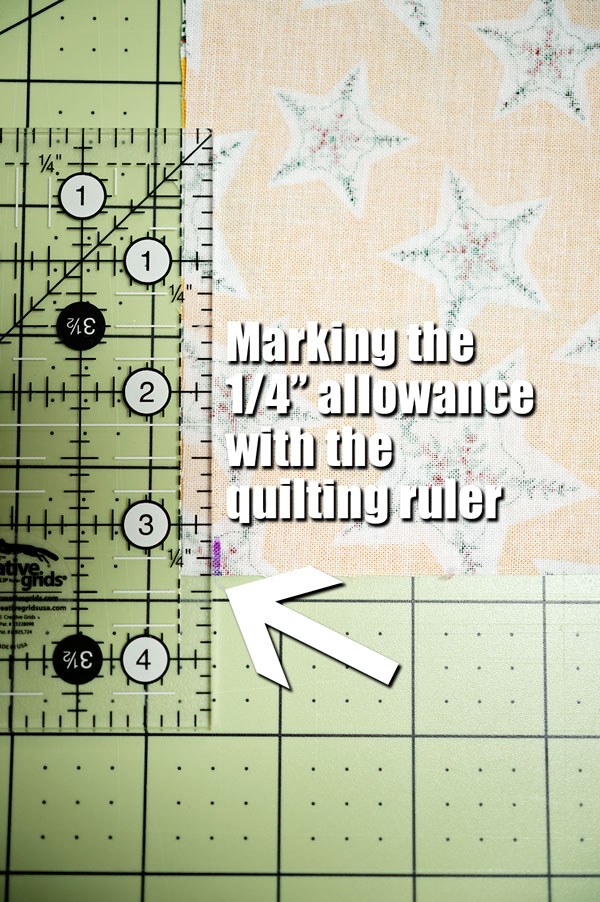
- At the lower left corner, mark a small 1/4″ line.
- Lay the quilting ruler diagonally on the fabric intersecting the upper right hand corner and just to the right side of the mark made next to the lower left hand corner.
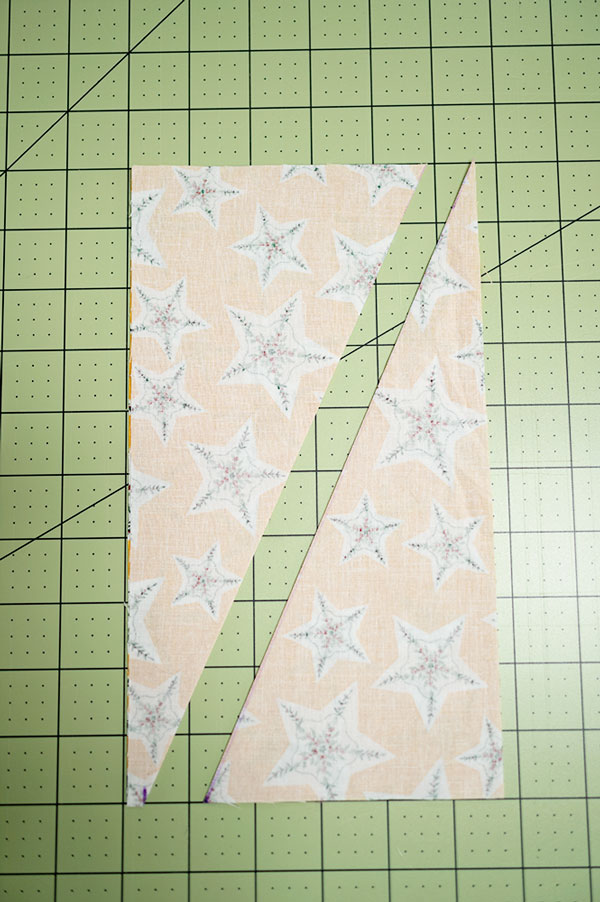
- Cut fabric which will yield a small tab at the bottom and sharp points on the top.
Now, let’s subcut the foliage part of our tree.
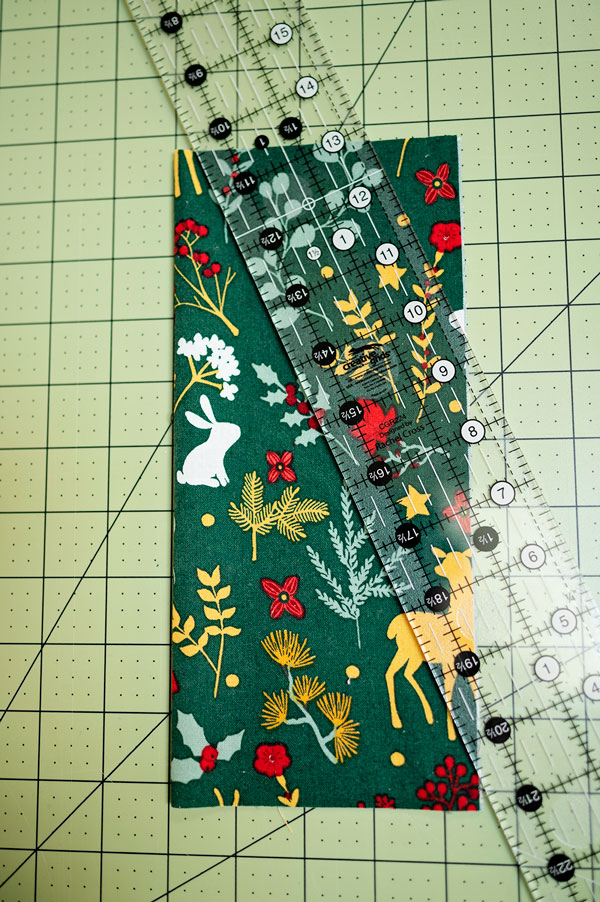
To subcut the Tree portion do as follows:
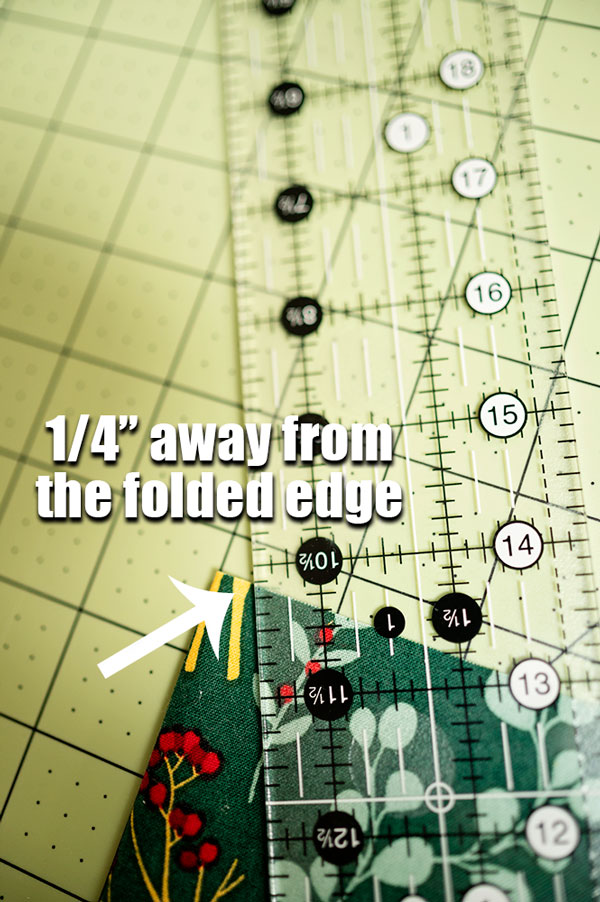
- Fold fabric rectangle wrong sides together on the shorter side of the cut.
- With the fold on your left, mark 1/4″ to the right of the folded edge.
- Place quilting ruler on the diagonal from the lower corner of the tree to the inside of the 1/4″ mark at the top of the tree.
- With the rotary cutter, cut the fabric following the edge of the ruler.
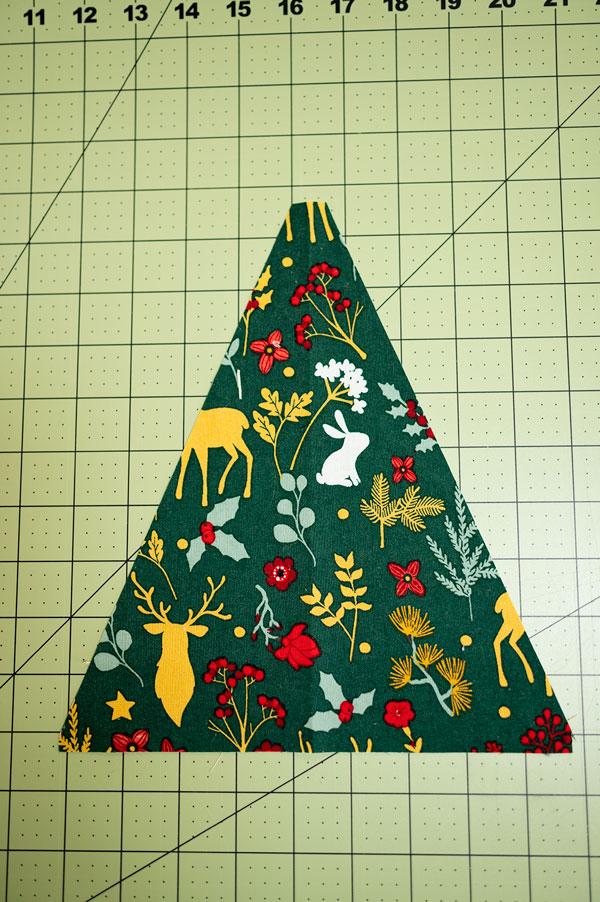
- Open the cut fabric and place the widest side in the south position.
Everything is subcut and ready to piece! Let’s go!
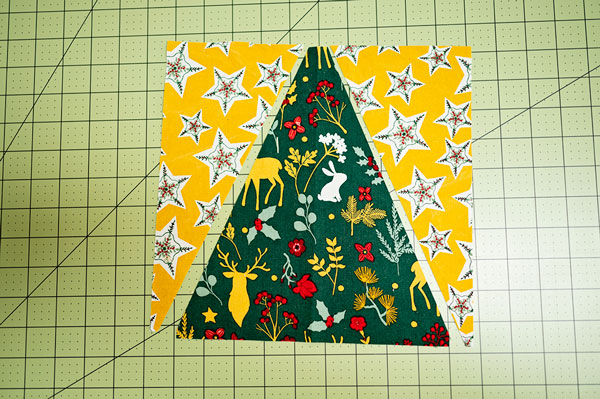
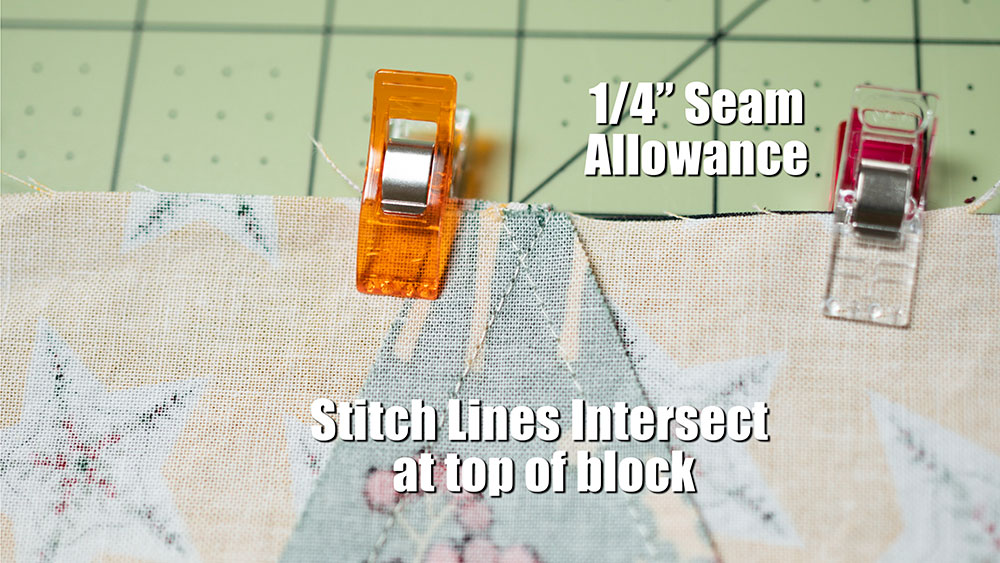
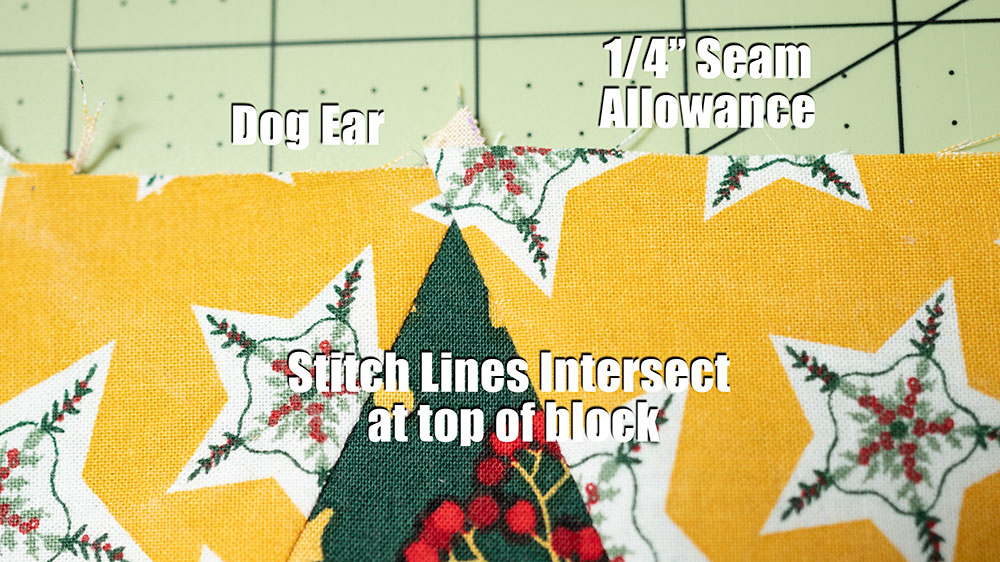
Sew one side of the sky piece to the tree, press and then piece the other side. Remember to keep your 1/4″ seams accurate!
The secret to getting your point at the top of the tree is to be sure the stitch lines cross each other. It will look like this:
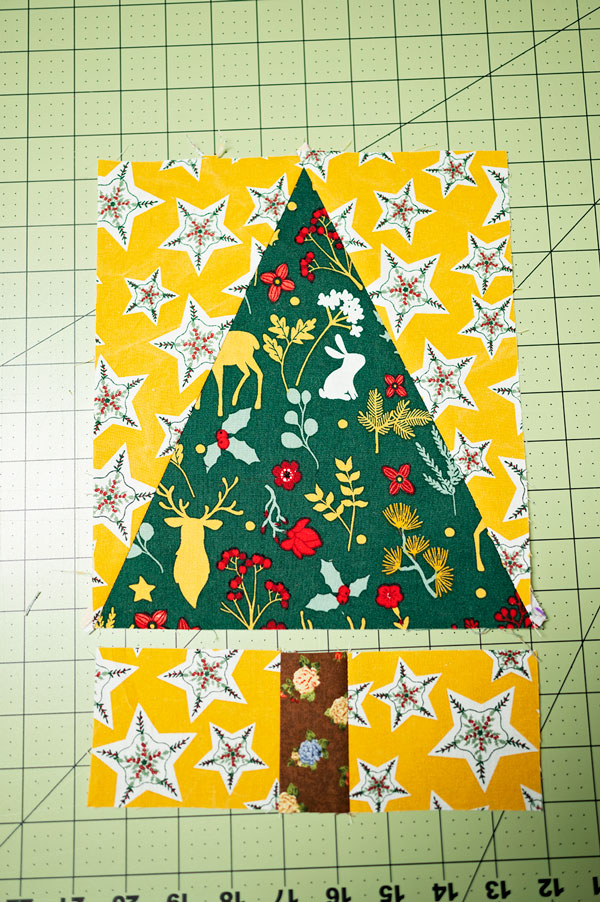
Lastly, we piece the tree trunk together with the lower sky pieces. Then we put the upper and lower part of the tree together.
The 2 Pieced Sections Both sections joined into one
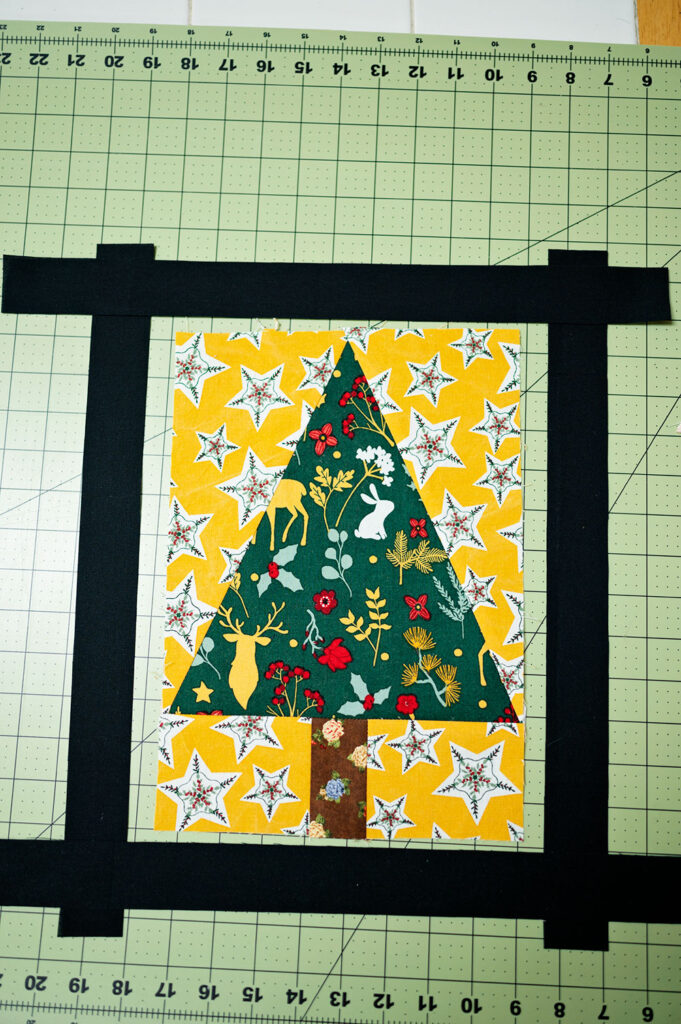
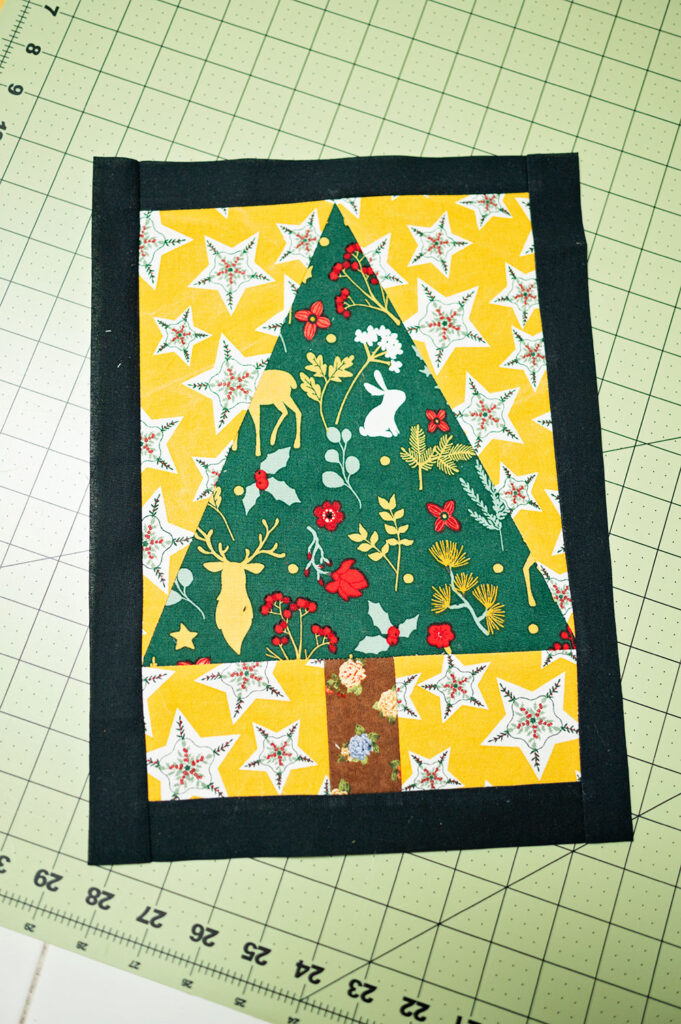
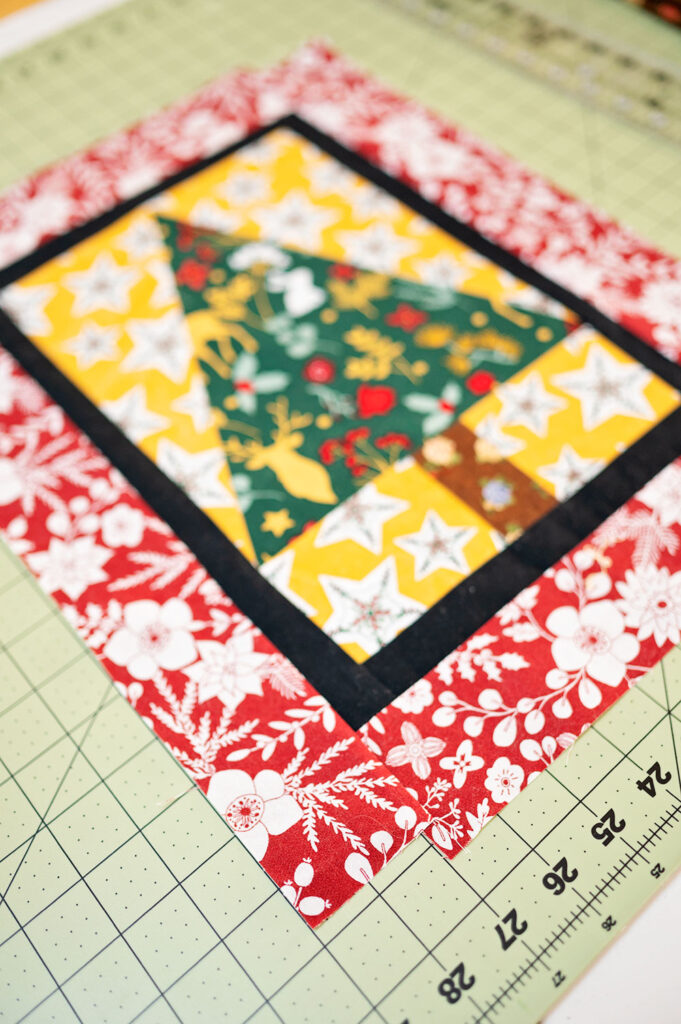
The finishing touch for this darling quilt block is in the inner and outer border. Personally, I found that putting a 1.5″ strip in a bold solid in between the tree block and the sashing literally framed the tree design. It set up the block as a wonderful element to use in a mini quilt or pillow.
As mentioned earlier, I cut all the strips the same length to make the initial cutting instructions easier.
To place the inner border, I secured the north and south, or top and bottom pieces first, sewed them on using the 1/4″ seam and after pressing open trimmed away the excess. This way, my borders fit perfectly with no fuss. I followed the same procedure for the east, west or side panels.
The last step to completing our Pine Tree masterpiece is to place on the outer border constructed from the 2 1/2″ strips. I thought another fun print to finish the mini quilt top was in order.

Simply square up the top and bottom of the block to finish.
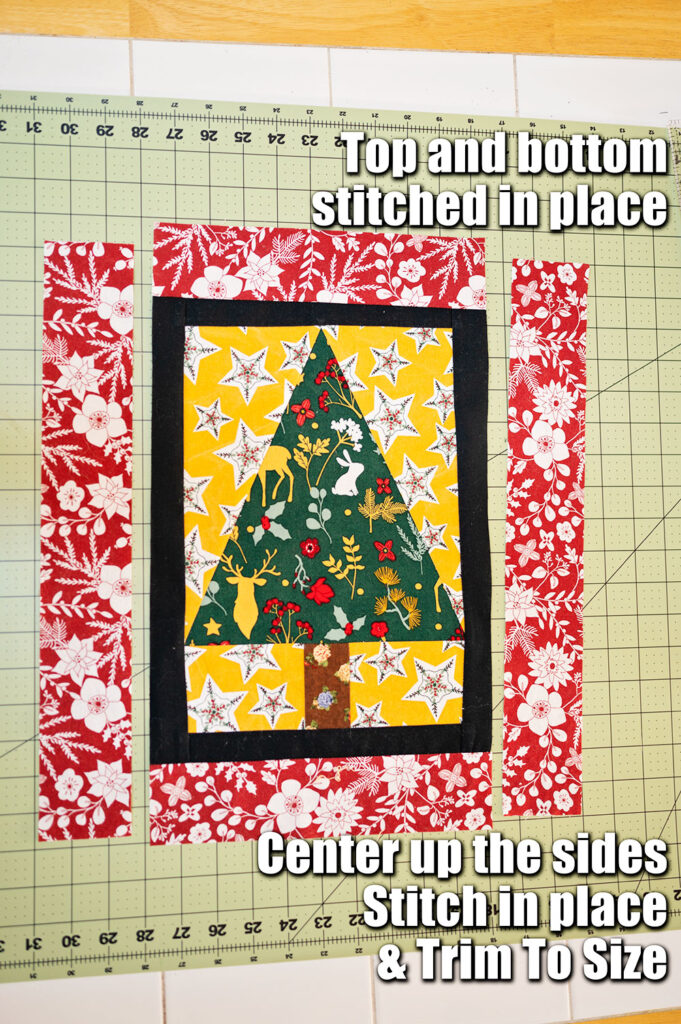
Earlier I mentioned this is a no fuss project. And you know that I am a woman of my words. So notice how those sash pieces don’t meet up perfectly? No problem. Square up the block and trim off that little bit of excess to yield a perfect block.
I designed this project to take advantage of fat quarter bundles. Fat quarters are cut to be 18″ x 22″, and they always need to be trimmed a little to get them squared up for cutting. So, I found the 17″ length to be ideal for using fat quarters. But if you work from yardage or have larger scraps, feel free to cut the side sash at 18″ to give a perfect fit.
Because I used this project as a single block to go into a pillow and a mini wall hanging, I didn’t need the accuracy demanded by a full quilt pattern. When next year comes around, maybe we’ll quilt an actual quilt that uses this block, and we can concern ourselves with precision then. But right now, it’s the end of 2020, and I thought something fun was in order.
Now let’s look at the back of the work so you can see how the seams are pressed.
The pressing instructions are simply to press to the dark side, on this block. The seam allowance naturally wants to go the way it wants to go, so let it!
Remember, this quilt block is all about keeping it easy and fun
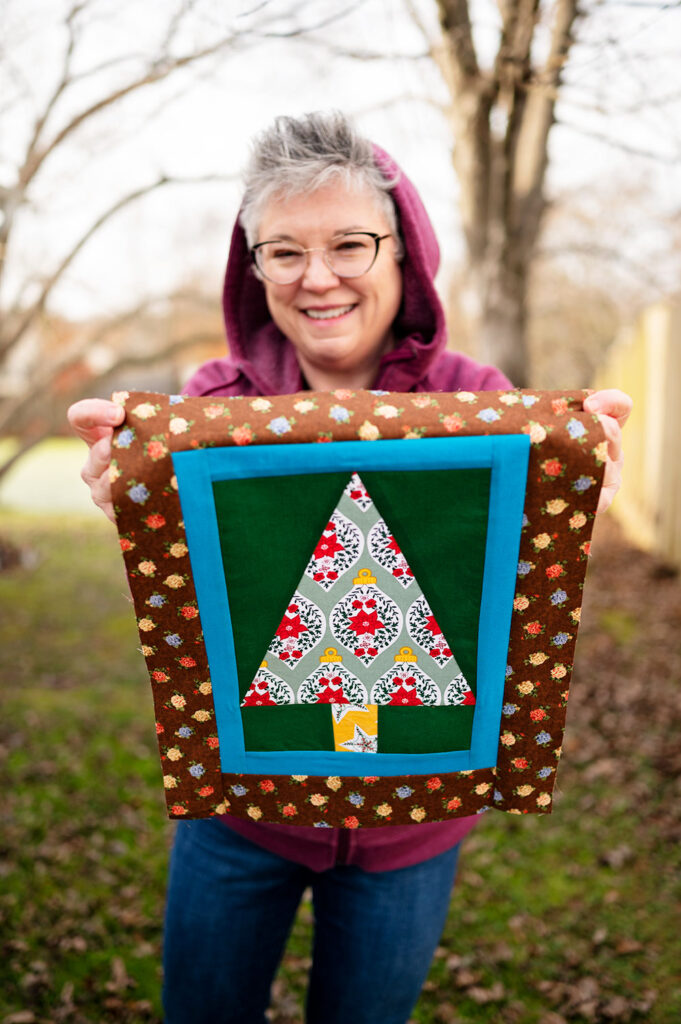
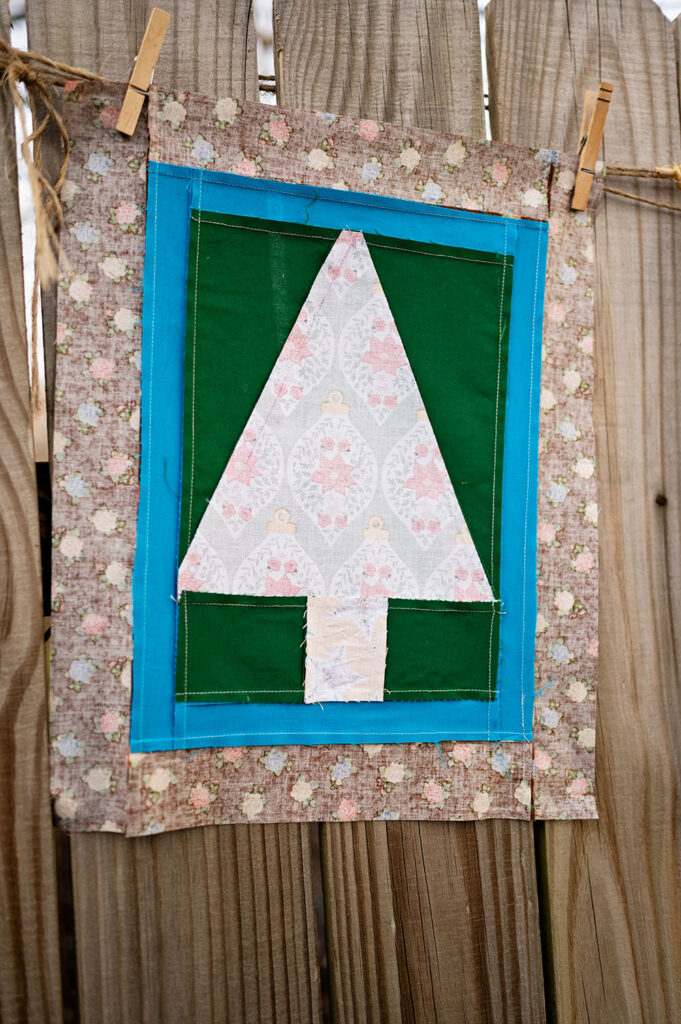
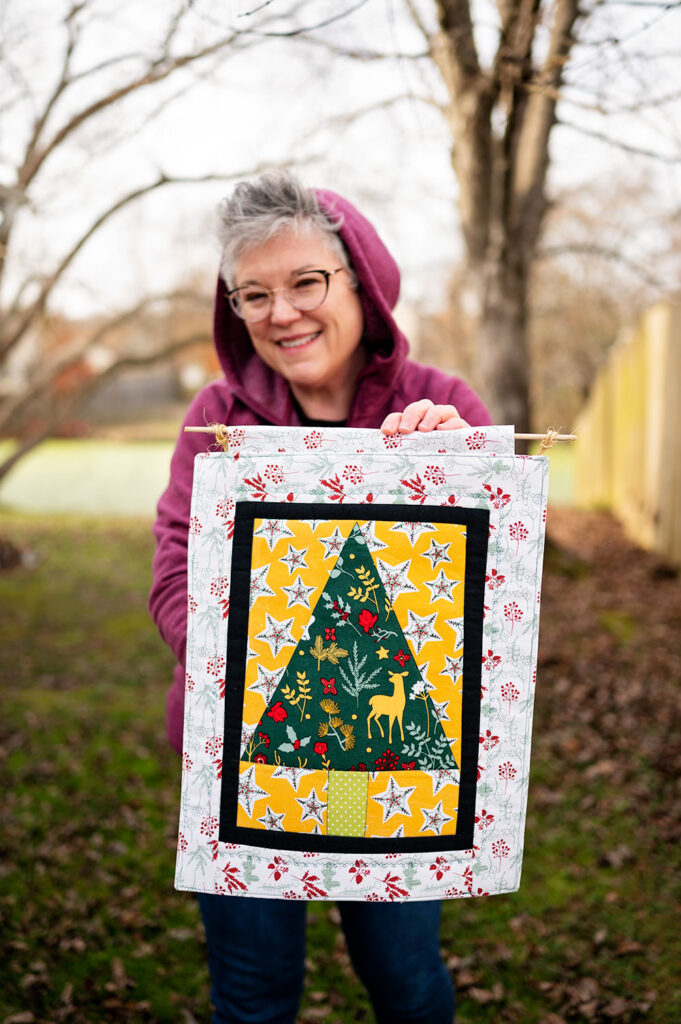
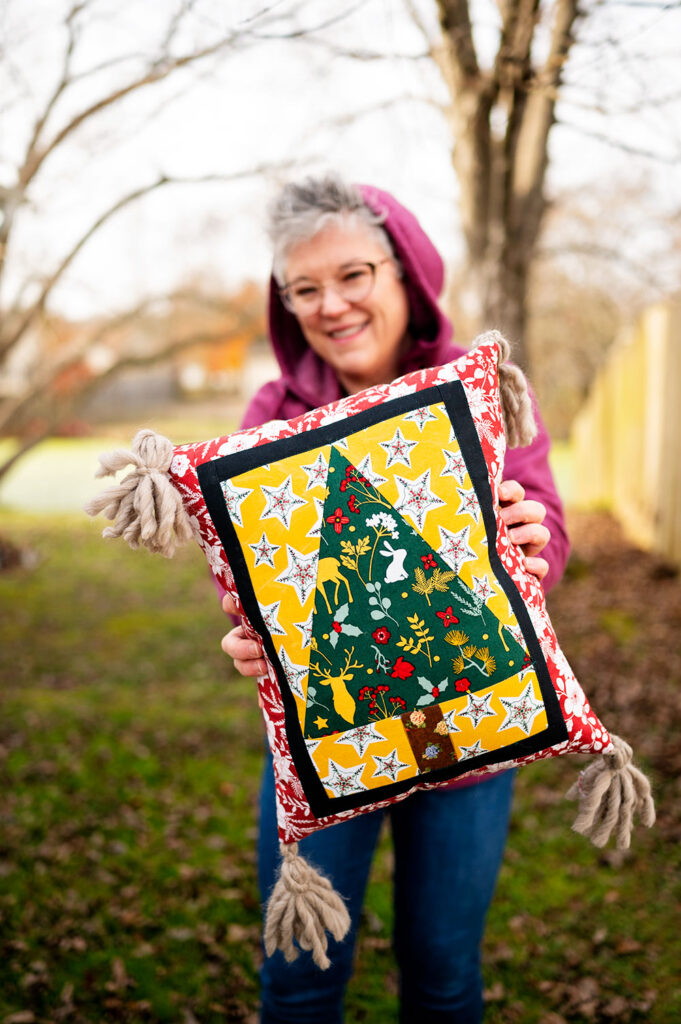
A fun way to use your Christmas Tree quilt block is to sew them into pillows or a mini quilt wall hanging. Well, to be totally honest, pillows and mini quilts are a fun way to use ANY of your quilt blocks. But with this sweet tree, it’s doubly cute.
You might also Like:
- Quilted Tree Pillow Project
- Mini Quilt Wall Hanging (coming soon)
- Ribbon Quilt Block
- Patchwork Pillow

Hi! I’m Pattymac
Sewist, Baker, Maker
I’m a creative lifestyle blogger living and working in Coastal Virginia. When I’m not mixing or stitching or taking pictures, I’m out exploring the cook book section of my favorite library or munching my own home baked cookies at a mid week movie matinee.