Coconut Cake made with Cake Mix
While we love to make as many things as possible from scratch, there’s nothing wrong with taking a little shortcut here and there. Let me show you how I baked my Coconut Cake made with a Cake Mix.
Some days we all need a little extra help. If you’re in the mood for a treat, but not up for a ton of dishes and measuring, then a Box Cake Mix hack is your BFF. Let me show you how I made a delicious coconut cake with a cake mix. No one will believe it came from a box!
There are many ways to hack a box cake mix, but I generally do the same thing regardless of the flavor.
- Replace water with Milk, generally buttermilk.
- Add flavoring, usually vanilla.
- Make homemade buttercream frosting.
- Add a complementary topping. Something like sprinkles or nuts or chocolate.
The #1 way to jazz up your box cake mix is to take some time on the presentation.
- Use a pretty cake stand.
- Pipe some decorative flowers or swirls with an open star tip and a piping bag.
🍰
Let’s start at the beginning…
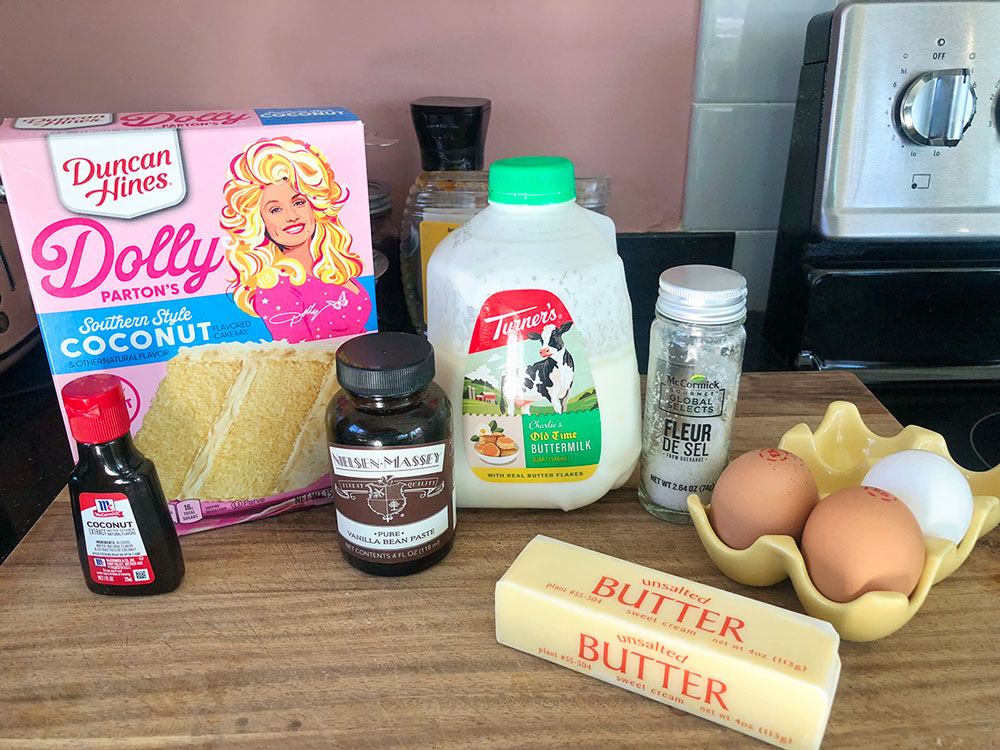
Ingredients to make an amazing Coconut Cake made with a cake mix:
- Cake Mix: This should be obvious! I used the Dolly Parton Southern Style Coconut Cake mix (affiliate link) from Duncan Hines®. It’s a standard 15.25 oz box cake mix. If you have one you prefer, then use that one, but I love anything Dolly and wanted to try out her new line of cake mixes.
- Buttermilk: I prefer to use buttermilk in my cakes and muffins, but you can use any milk you have on hand. I haven’t tried using almond or cashew so I can’t report on how they perform. I use whole milk if I don’t have buttermilk on hand.
- Flavoring: Extracts and flavorings go a long way with just a little product. To amp up the coconut, I used a half teaspoon of coconut extract and a full teaspoon of Vanilla Bean Paste (affiliate link) to further amp flavor.
- Fresh eggs: A lot of times people add more eggs to the cake mix than called for when making a cake mix hack, but I only use the number of eggs recommended on the box. Baking is a delicate balance of wet and dry ingredients and fat ratio. So I don’t ever add extra eggs or fat (butter and oil) to my cake mixes.
- Butter: cakes need some kind of butter or oil, and this cake used a whole stick of melted butter.
That leads us to the filling and frosting part of this recipe:
- Butter: I made the basic buttercream frosting that I generally make for my cakes. I used two sticks of soft butter. They recommend room temperature butter which is 68 degrees, but I have been mixing my frostings lately using a much softer butter.
- Powdered Sugar: Sift your measured powdered sugar for the best results. I use 3.5 cups or 420 grams of powdered sugar in my buttercream frosting.
- Flavoring: I used a full tablespoon of Vanilla Bean Paste in this frosting. It was delicious and cut the sweetness of the sugar AND all those little flecks made a beautiful frosting.
- Coconut: I used sweetened coconut and toasted it in the oven. It looks pretty and gains a little flavor and crunch in the process. You can store leftovers in a container and use them to top your yogurt or ice cream.
- Salt: I recommend a fancy Fleur de Sel (affiliate link) which is a French sea salt in your baking. It’s a finer flavor and if you are going to splurge on cake, it should be the best possible cake you can make.
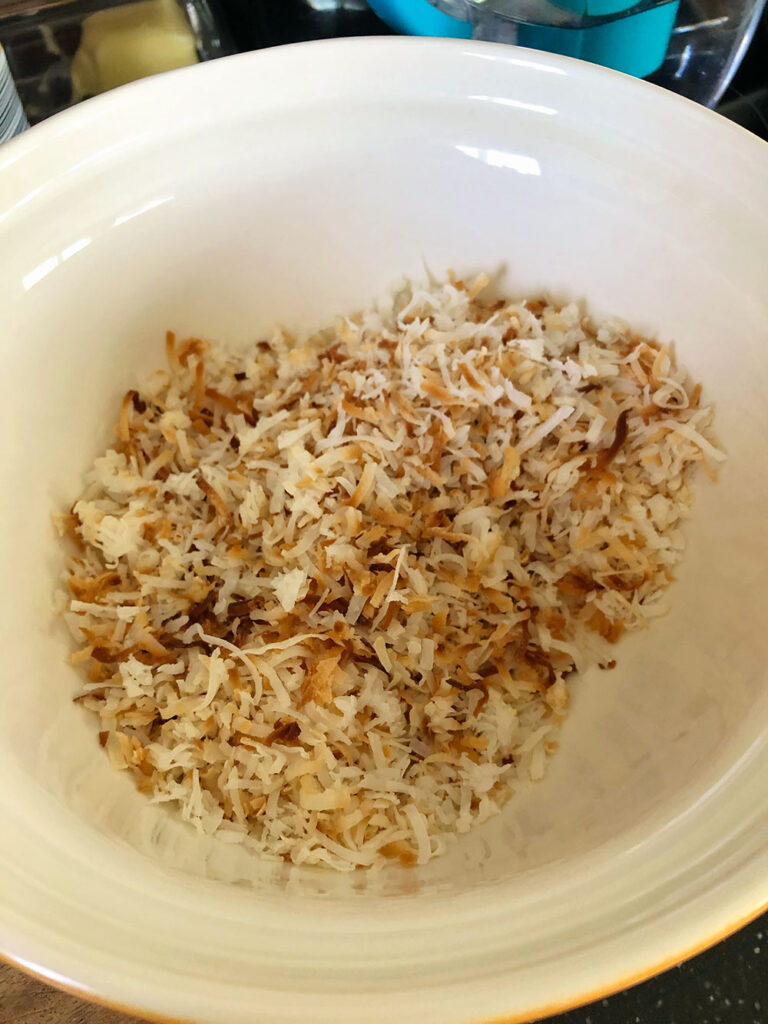
Your first step is to toast your coconut.
Spread your bag of coconut onto a parchment lined cookie sheet. Bake in a preheated 350° F oven for 4 minutes. If you want it darker, bake another minute or two. But be careful, because it will burn quickly if left too long. Cool completely before using.
Combine the wet ingredients
I put all the wet ingredients into my mixing bowl and mix them on medium until well combined. This includes the melted butter, the eggs and the flavoring.
I save my milk for later, but you could add it now if you’re really in a hurry. I like to add it after the dry ingredients go in.
The final mixing instructions on the Coconut cake made with a cake mix:
Turn the mixer off, pour in the entire cake mix, mix on low to start combining and simultaneously stream in the milk.
When the milk is fully incorporated, follow the package instructions for mixing which is generally to mix on medium for 2 minutes. This is an important instruction and you should use a timer and mix as directed for best results.
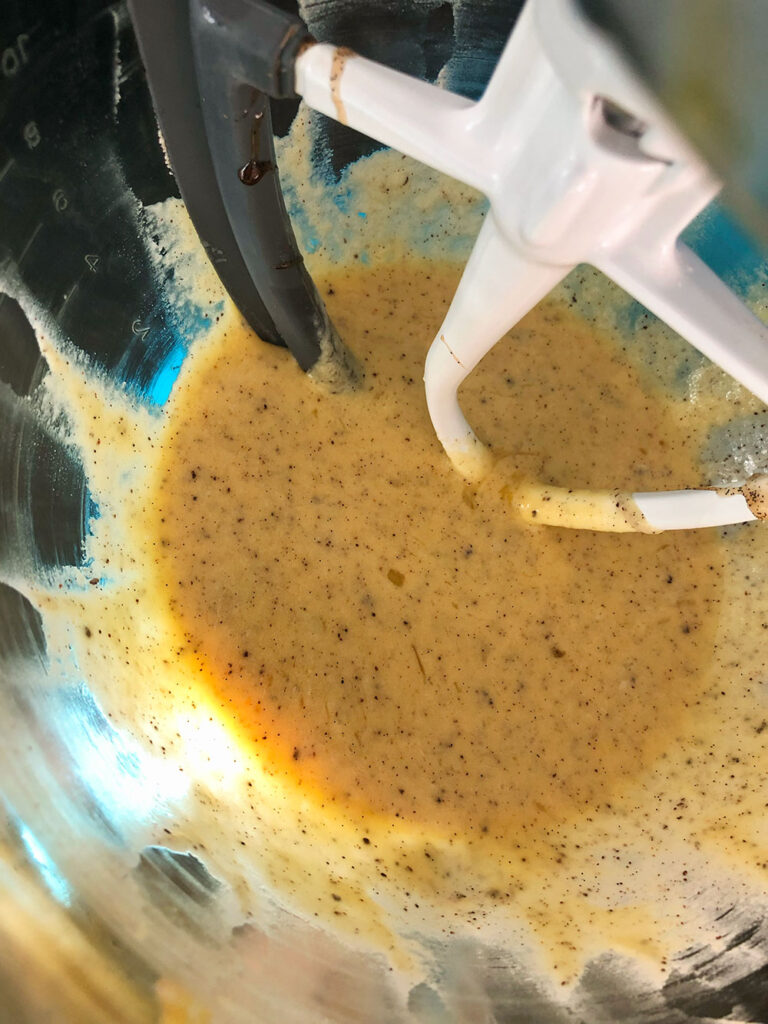
Once your batter has completely incorporated, it will look something like this:
What pans should I use to bake my coconut cake?
Cake mixes always recommend using either 8″ or 9″ cake pans. This will provide 2 layers for your layer cake. You also have the option of using a sheet pan or making cupcakes. When I want to make a layer cake, I opt for 6″ pans (affiliate link) which gives me 3 layers. I bake them for the same amount of time as the 8″ pans.
A layer cake takes a little more finesse that a sheet cake, but it’s so worthwhile. I wrote a blog post on how to make your best layer cakes and you might find that helpful. You’ll also want to make sure your cake pans are properly prepared so there is no sticking.
A 3 layer cake baked with 6″ pans is the cutest cake, and once you start baking them like that, you will not go back to a two layer cake ever again. 😂
Remember how earlier we talked about presentation being an important part of making your box cake appear more like a bakery cake? Let’s talk about how to do that.

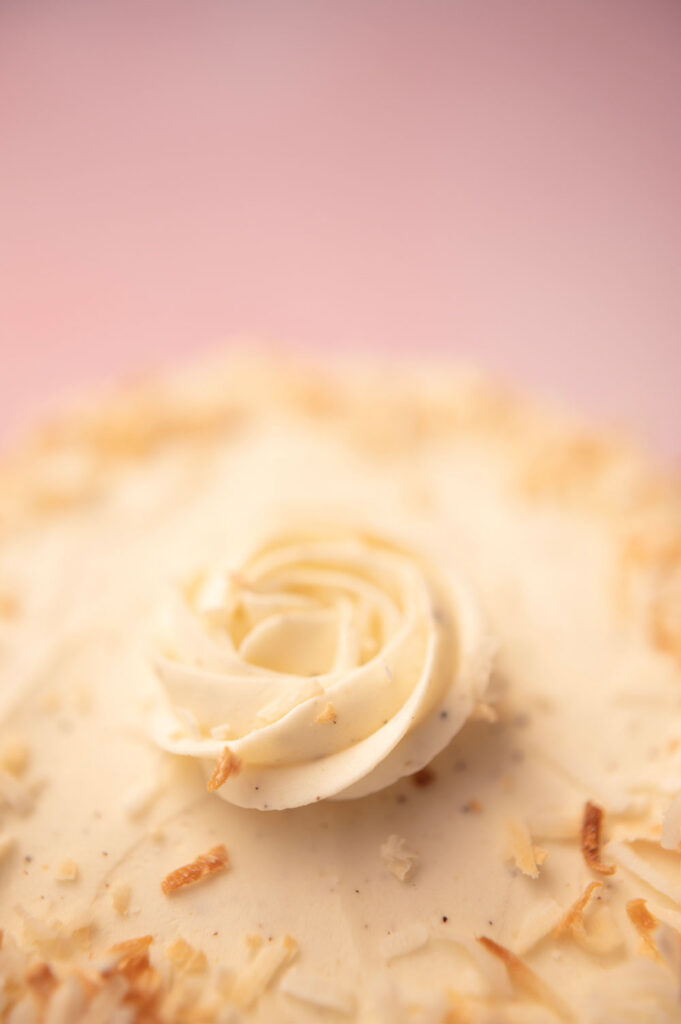
Elegant Coconut Cake Closeup of toasted coconut and vanilla specks
Once your cakes have baked and cooled, it’s time to get them decorated. A big part in having your coconut cake made with a cake mix seem like a bakery cake is taking a little time to work on the presentation.
Here’s what I used and what I recommend:
- Pretty cake plate: I have a small collection of cake plates designed for 6″ cakes that I purchased over time in Home Goods. They are the only place I’ve been able to find smaller plates, but they seem to be harder to get now. If you decide you like the smaller cake, the smaller cake plate (affiliate link) really makes a difference and they are worth the search to find a few.
- Cake Leveler: You’ll want to trim the dome off your cake layers so they stack well. I use a contraption from Wilton (affiliate link) that I love, but you are welcome to use a serrated knife if you don’t want to invest in a specialty tool.
- Wilton Star Tip: This specific frosting tip, the Wilton 1M open Star, (affiliate link) is highly recommended. It makes beautiful piped designs and it’s fairly easy to use. If you want to practice before committing the frosting to your cake, pipe some designs onto clean parchment. When you feel confident enough to pipe frosting onto your cake, simply scrape up the practice swirls and put them back into the frosting bag.
- Piping bags: A lot of people use freezer bags with an end snipped off, and while that’s fine to do, I think you get a much better result from using a real piping bag. (affiliate link) I like disposable because it saves on cleanup AND if you have a lot of leftover frosting, you can stick the piping bag into a freezer bag and freeze the remaining frosting up to 3 months. Simply thaw over night in the fridge to use later. I also have a reusable bag (affiliate link) I use, so they are available as well.
- Offset Spatulas: This tool helps to smooth the look of your frosting and get a neater look as compared to using a butter knife. I love them so much I have them in a couple of different sizes. (affiliate link)
Let’s see how to decorate the cakes!
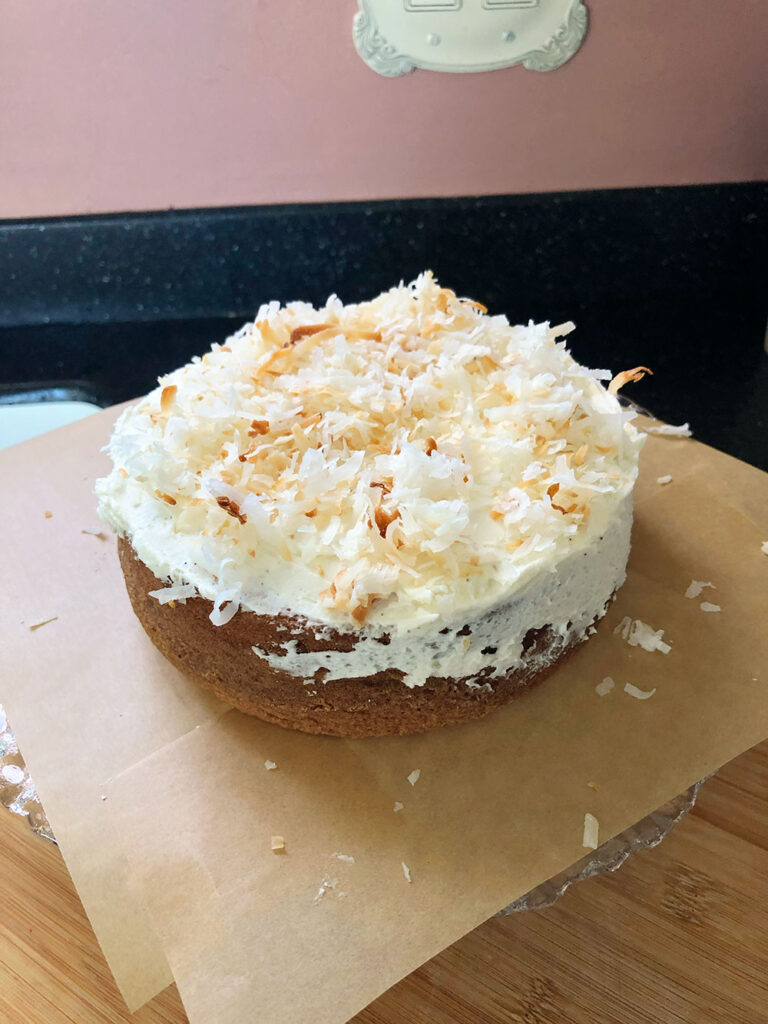
Start with putting your frosting in between the layers
The first cake layer has been leveled and placed onto the cake plate. Parchment paper has been cut down and placed between the edges of the cake and the plate to make cleanup easier at the end.
Put a generous dollop of frosting on the cut side of the layer and smooth it out. Sprinkle some toasted coconut on top. This gives a frosting AND a filling in between cake layers.
Stack the next layer on top, and follow the same procedure.
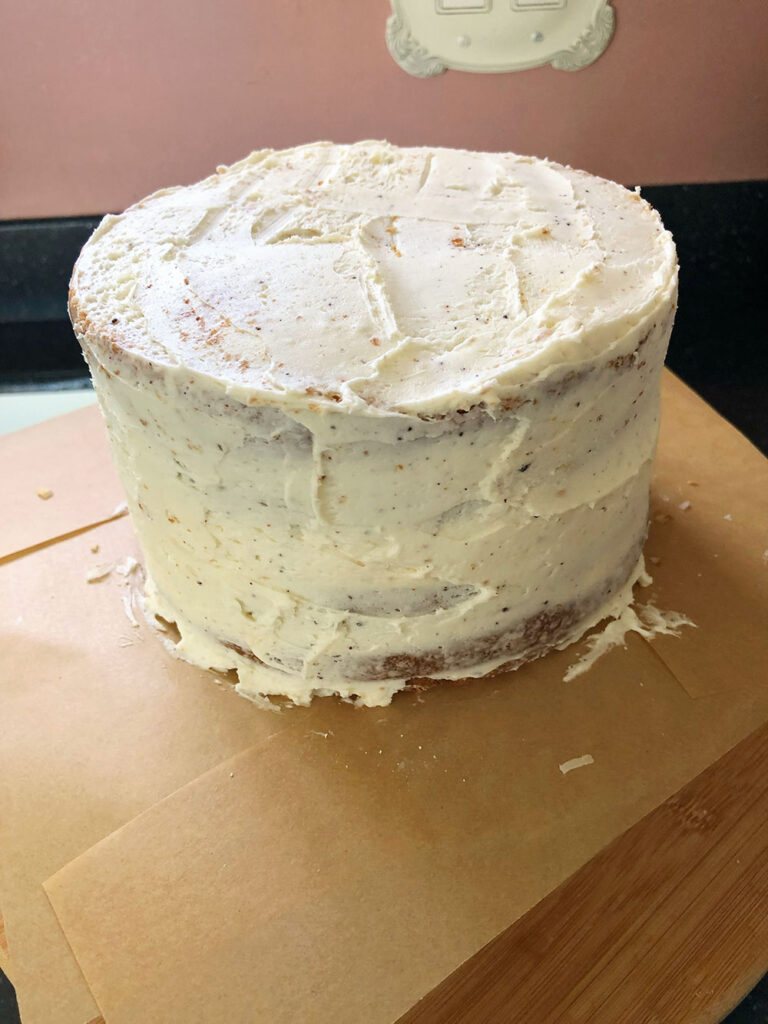
Crumb coat the assembled layer cake
When placing the final layer on top of the cake, turn the cut side down making sure the bottom of the cake is the top. This gives a smoother finish and a sharper edge.
Place a relatively thin, smooth layer of frosting all over the cake. You are trying to encase the cake in frosting so the crumbs are captured. Once the cake is rough coated, put it in the freezer for 20 or 30 minutes to set.
Once set, finish frosting and decorating!
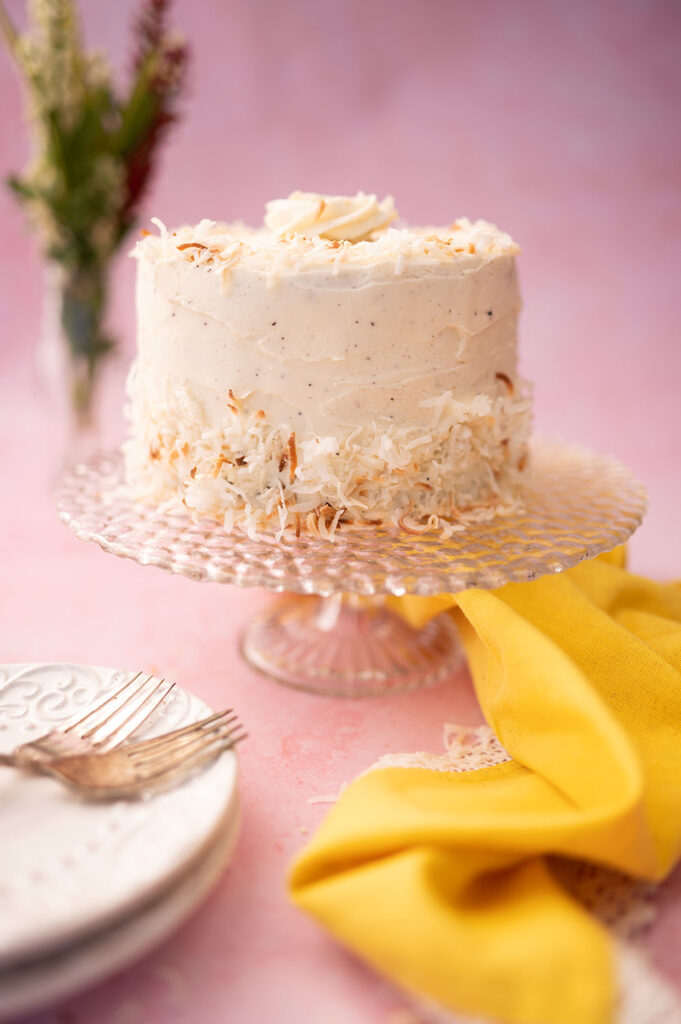
Decorate your Coconut Cake as desired
I piped a large rose in the center of my cake. The 1M tip makes this so easy! It looks pretty, and since coconut cake is generally made for Valentine’s Day or Mother’s Day or a special birthday, I think the piped rose is appropriate.
But this part is up to you! Though taking five minutes to pipe a rose onto a cake will make you look like a master of cakes.
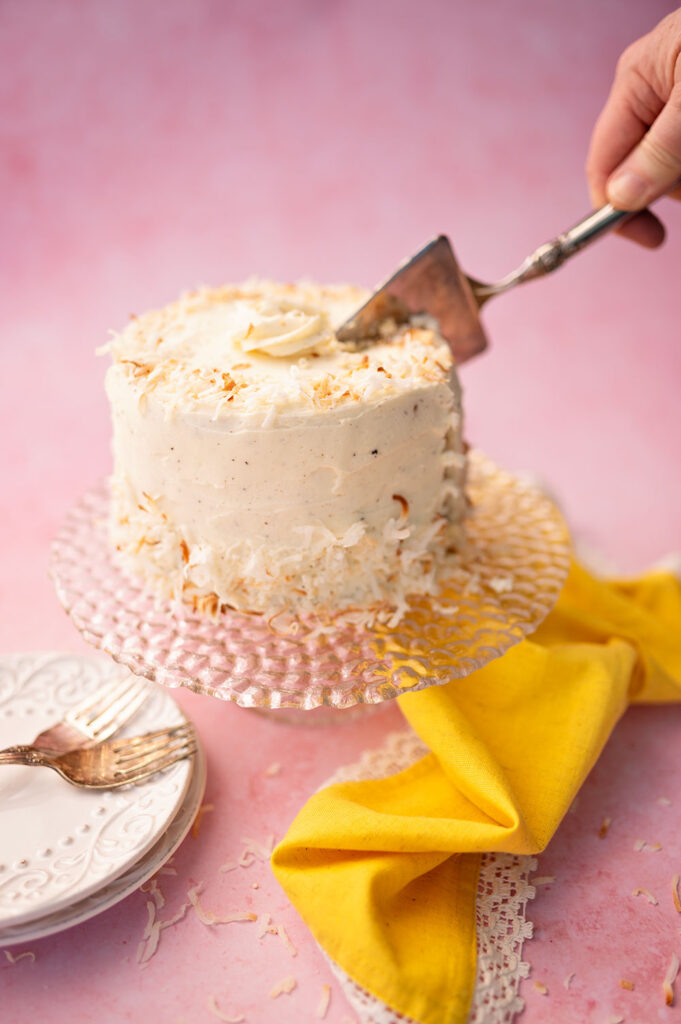
Finish decorating with toasted coconut
I carefully sprinkled toasted coconut on the edges of the cake on the top layer. I also placed by hand a layer along the lower third of the cake.
Cakes look more professional if you apply toppings or frosting along the bottom edge of the cake where it meets the cake plate. This added step will finish the look of your cakes more than anything else.
🥥

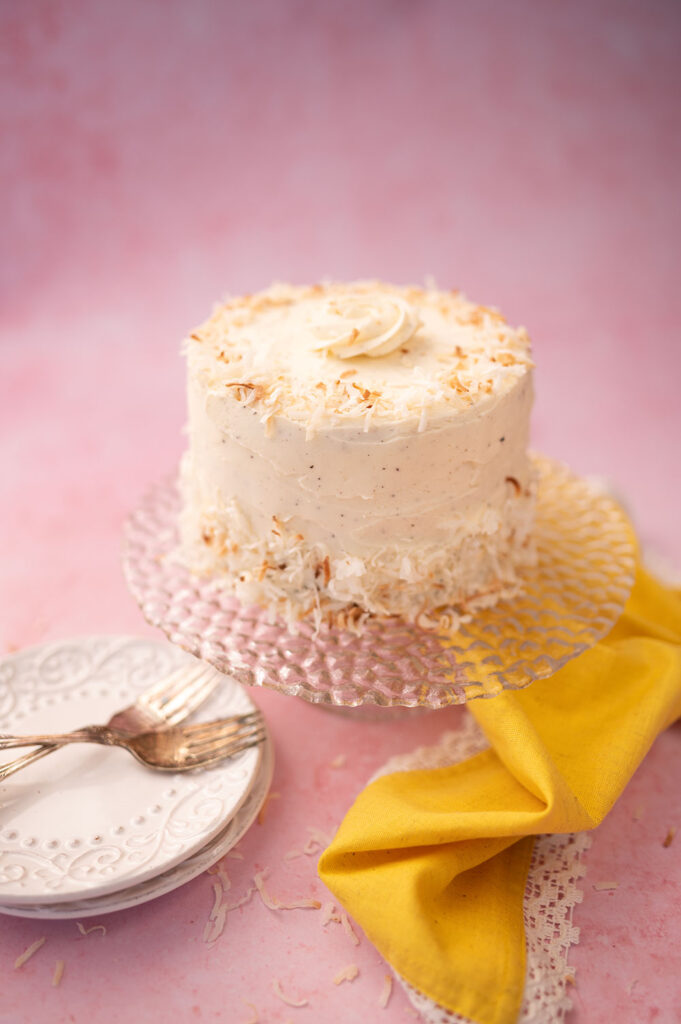
What is the final result?
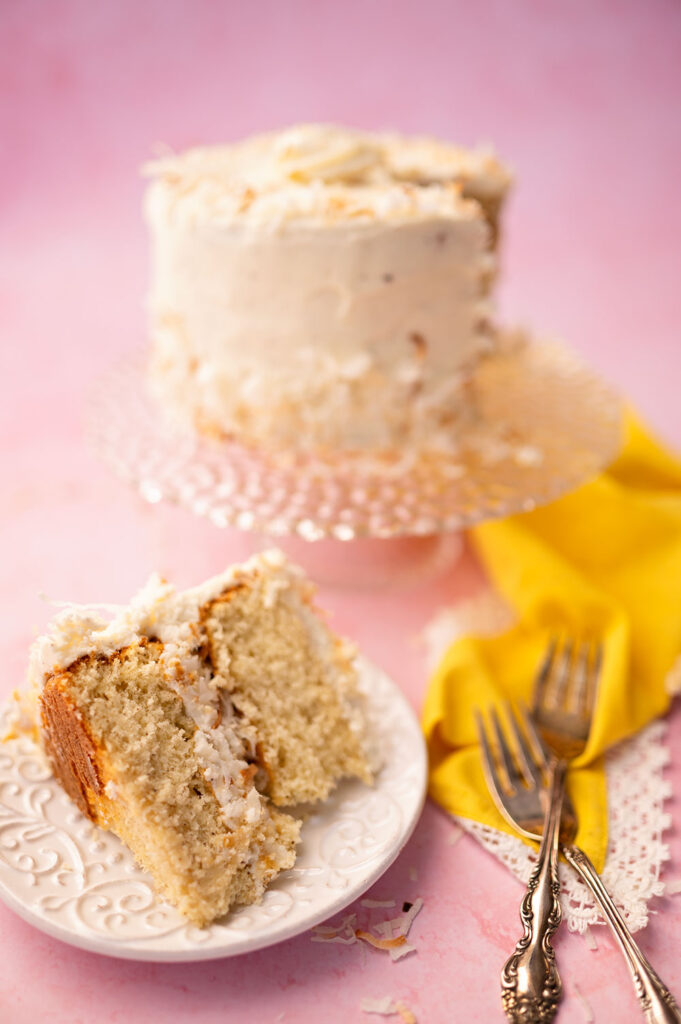
Taking those few extra steps in preparing your coconut cake made with cake mix will yield a beautiful, delicious cake that will impress your family and friends!
Happy baking my friends!! Enjoy your delicious treat!
Coconut Cake made with Cake Mix
- Total Time: 41 minutes
- Yield: 10 1x
Description
Enjoy a Delicious coconut cake made with cake mix that will leave your friends and family begging for your secret!
Ingredients
For the Cake:
- 1 – 15.25 oz cake mix. I used Duncan Hines® Dolly Parton’s Coconut Cake Mix
- 1 cup whole milk, buttermilk if you have it
- 1 stick of melted butter
- 4 eggs
- 1/2 teaspoon coconut extract
- 1 teaspoon vanilla bean paste
For the Frosting:
- 2 sticks softened butter
- 3 1/2 cups or 420 grams of powdered sugar
- 1 tablespoon vanilla bean paste
- 2–3 tablespoons whole milk or heavy cream to thin frosting as desired
For the Decorations:
- 1 bag of sweetened, shredded coconut
Instructions
For the Cake:
- Preheat oven to 350°F
- Prepare cake pans.
- Combine cooled, melted butter, eggs, and flavorings In a mixing bowl. Mix on medium speed until well combined. About 60 seconds.
- Stop mixer, add all the contents of the cake mix to the wet ingredients. Run mixer on low speed to combine mix with wet ingredients. While running the mixer on low, stream in the milk. Run on low until everything is moistened, about 30 seconds.
- Increase mixer to medium speed and run for 2 minutes. This is an important step so don’t short cut it.
- Distribute batter evenly across prepared cake pans. Bake as directed on the package. If you use 6″ pans like I used, bake them the same time as 8″ pans. Check for doneness using a toothpick. Cool cakes in the pan on wire racks for 15 minutes. Removed from pans, leave on the racks until cooled completely.
For the frosting:
- Whip the butter for 5 minutes on medium high in a stand mixer fitted with a paddle attachment. Stop frequently to scrape down the sides.
- While the butter is creaming add your flavoring. Fat carries flavor so adding your flavoring now is a great way to enhance the taste.
- Add powdered sugar in TWO additions. It is important the sugar is sifted as lumpy sugar will give you lumpy frosting. Nobody wants that. Mix the first addition for 3 minutes and be sure to scrape down the bowl and the paddle several times to make sure everything is mixing properly. Add the second addition, and do the same.
- At this point, assess the consistency of your frosting. Time of year and elevation will play heavily into your frosting thickness. Also, if you are frosting a layer cake, you will want denser frosting to go in between the layers.
- Add cream a tablespoon or two at a time and mix well before deciding to add more. You don’t want it so thin it won’t hold its shape. If you desire color in your frosting add it now.
- Run the mixer on a lower speed and add color one drop at a time until desired hue is created.
To toast the coconut:
- Preheat oven to 350°F
- Spread 2 cups (or the whole bag) coconut evenly over a cookie sheet line with parchment. Transfer baking sheet to the preheated oven and bake for 4-6 minutes If you are using a very dark or black baking sheet, bake for only 4 minutes.
- Remove from oven and use a spatula to turn/stir the coconut, once again redistributing evenly over the baking sheet. Return to 350°F oven and bake another 5 minutes (Note: if you are using a very dark or black baking sheet, check after 4 minutes).
- If coconut is not adequately browned, return to the oven in 2 minute increments, stirring in between, until coconut is toasted.
- Allow coconut to cool before using.
Assembly:
- Assemble your layer cakes by putting frosting and some toasted coconut in between each layer. If your cakes dome on top, evenly slice them away to create a flat cake.
- Frost cake as desired.
- Decorate by piping frosting swirls or flowers and add toasted coconut as a final decoration.
Notes
I recommend toasting the coconut as the first step. While the coconut is toasting, prepare your cake pans.
- Prep Time: 15
- Cook Time: 26
- Category: Dessert
- Method: Baking
- Cuisine: American

Hi! I’m Pattymac
Baker, Quilt Maker, Gardener