Easiest Quilt for Beginners
If this is the year you’ve decided to learn about quilting, then you’ve come to the right place! Allow me to share what I believe is the easiest quilt for beginners.
Often times the most difficult thing about starting a new hobby is figuring out where to begin. Quilting requires so many different skill sets, and honestly, it can feel like everything is overwhelming and just TOO HARD. Even as someone with a little experience, I get frustrated with too many little pieces and getting seams to line up perfectly and meeting the the precision that is frankly necessary in quilt projects. But what if I told you there is a fun quilt you CAN make and not get twisted around seam allowances and seam matching and all of that? My dear reader, allow me to share what I believe is the easiest quilt for beginners.
The easiest quilt for beginners is a Mismatched Patchwork design.
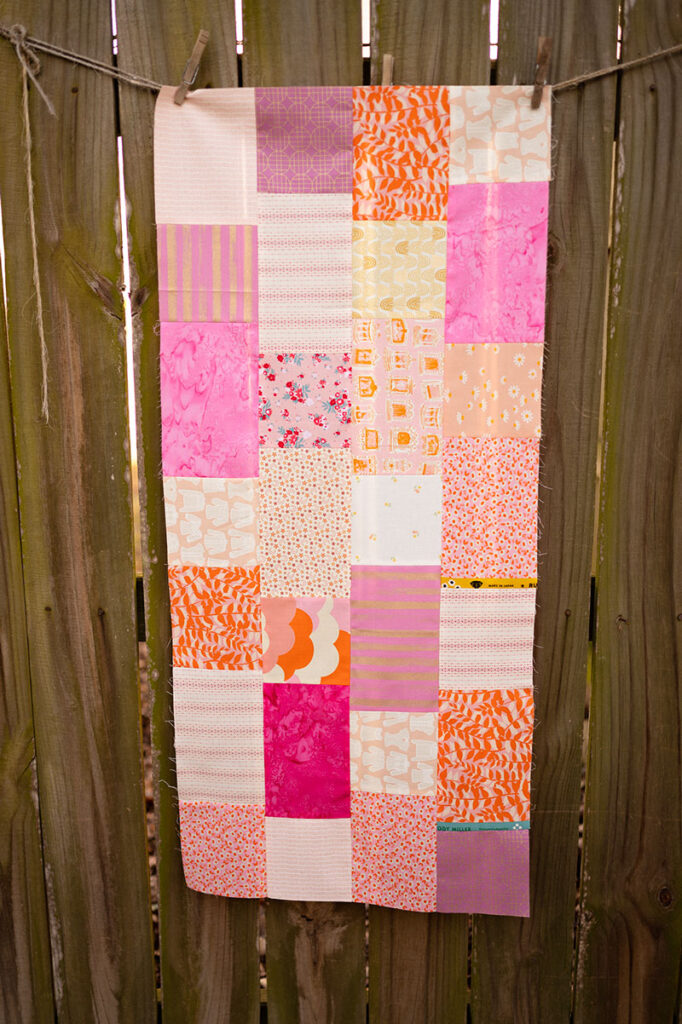
Here’s an abbreviated version of a full sized quilt sewn in Mismatched Patchwork. This size is perfect for a table runner.
🪡
Why do I believe Mismatched Patchwork is the easiest quilt pattern for beginners?
- As a teacher, presenting new information and project ideas to students is a balance between skill building, technique development, and enjoyment. It doesn’t matter if you produce a perfect project if you hate every minute of the process. If the process is so tedious and so challenging that it’s an exercise in frustration, the likelihood of continuing to new projects is pretty unlikely. The one and done mindset is not good for taking up hobbies. The point of having hobbies is to find something enjoyable that you want to invest time and money and effort into over years with the goal of growth WHILE having fun.
- Since I talk so much about quilting and sewing, I’m always looking for fun new projects and ways to introduce these old school hobbies to a new generation of people. And not scaring people off in the first 10 minutes with overly complex projects is the best way to have success. Additionally, some of us who have experience don’t want every single project to build in complexity. For me, it gets to a point where it’s not fun anymore if it’s so complicated that the least little thing can throw off a huge project, and maybe you don’t even realize there was a problem until you get to the end.
- Most people start out with a patchwork quilt for a first quilt. A patchwork quilt is made from squares that are sewn together generally in rows and rows are added until the piece is the desired length. It’s looks playful and fun when it’s finally together, but all those squares create a ton of intersecting seams that need to line up. In a regular patchwork quilt, precision is really important or else the seams don’t line up and the patchwork loses its grid structure.
- Enter the MISMATCHED PATCHWORK design where there are no intersecting seams allowing for a more relaxed approach to a patchwork design.
What is the easiest type of quilt to make? The Mismatched Patchwork design is truly the easiest beginner quilt pattern.
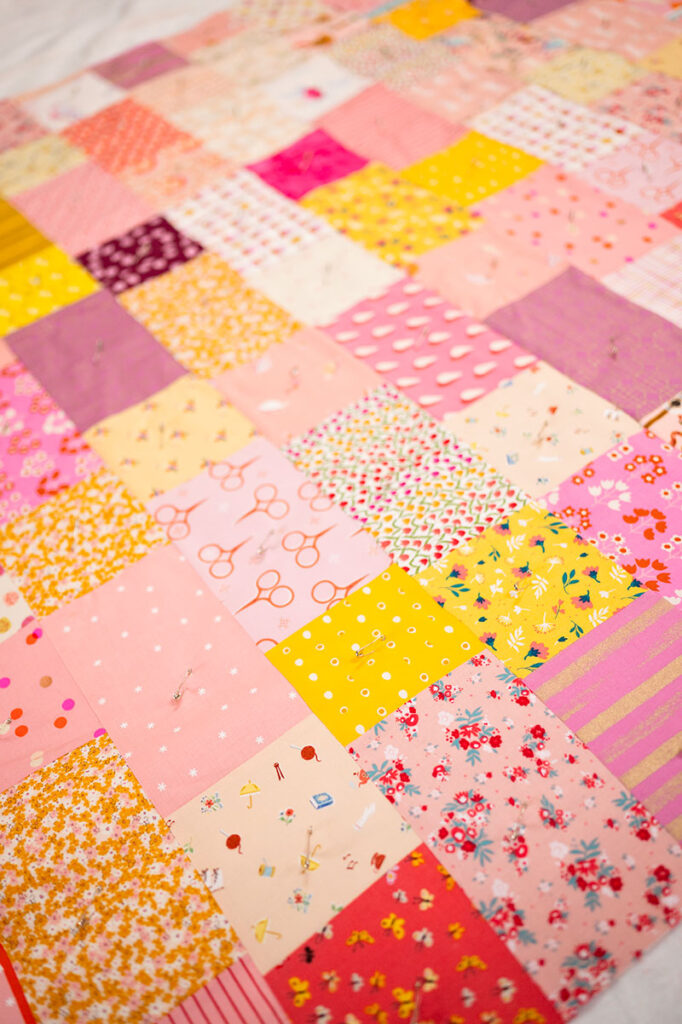

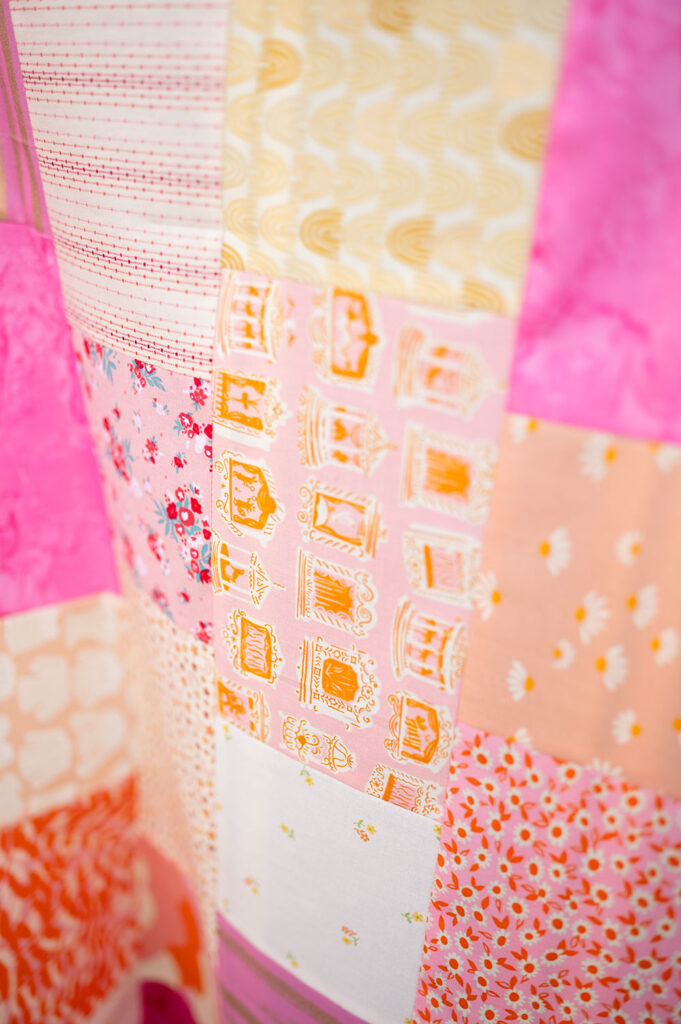
An Explosion of color combined with a whimsical print makes the best patchwork
Why is a Mismatched Patchwork Quilt the easiest?
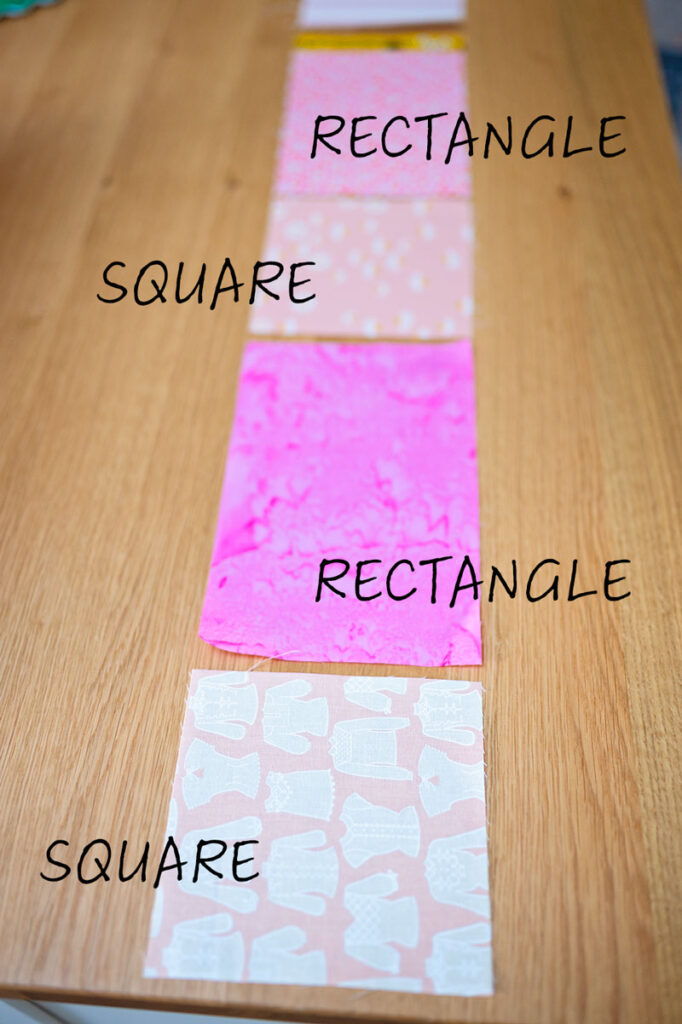
Easy unit construction! The quilt is based on pairing a square to a rectangle as a unit, and then connecting the string of units to a row. Simple unit construction!
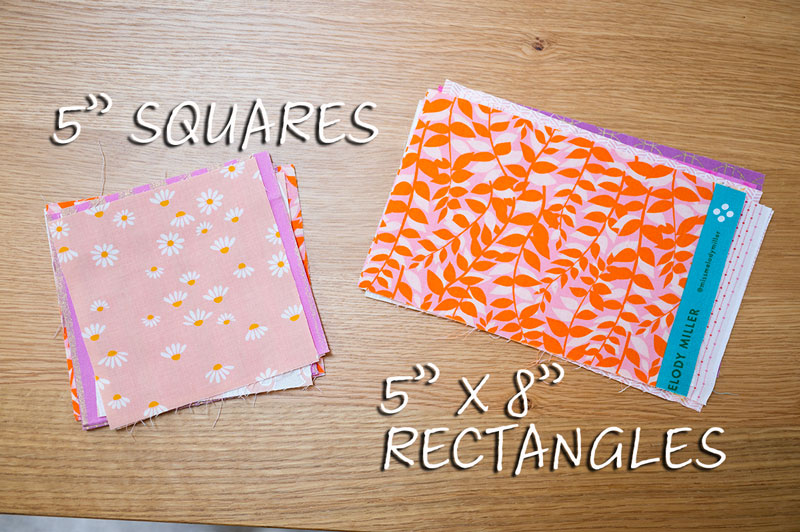
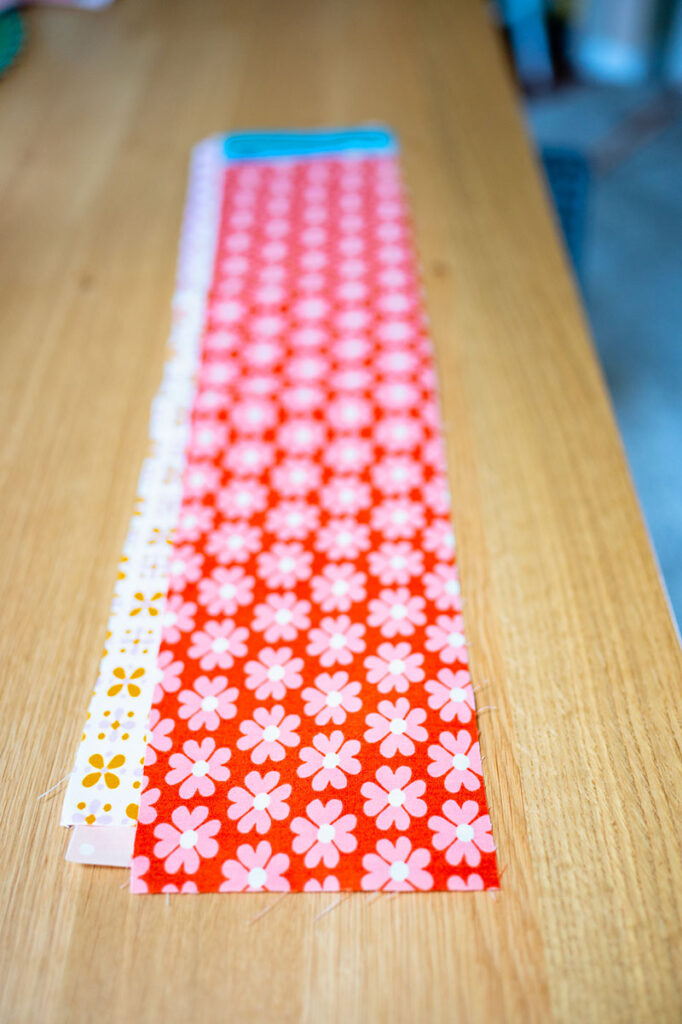
Basic cutting! I cut my strips in 5” segments. A 5” strip is easy to cut from stash fabrics and once the WOF strip is cut, it’s randomly sub cut into 5” squares and 5” x 8” rectangles.
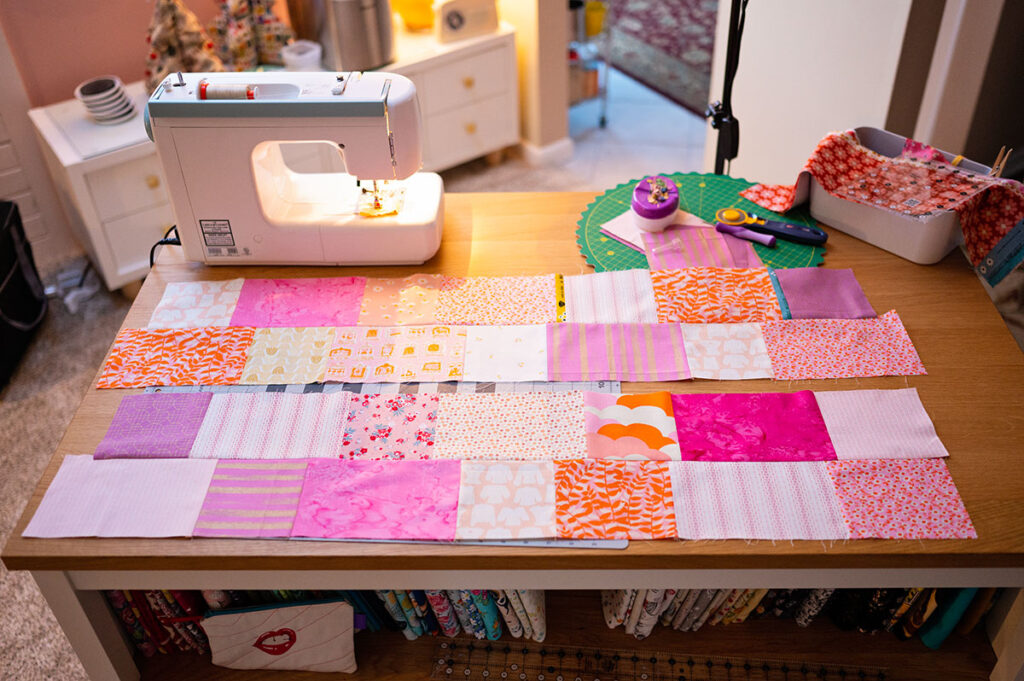
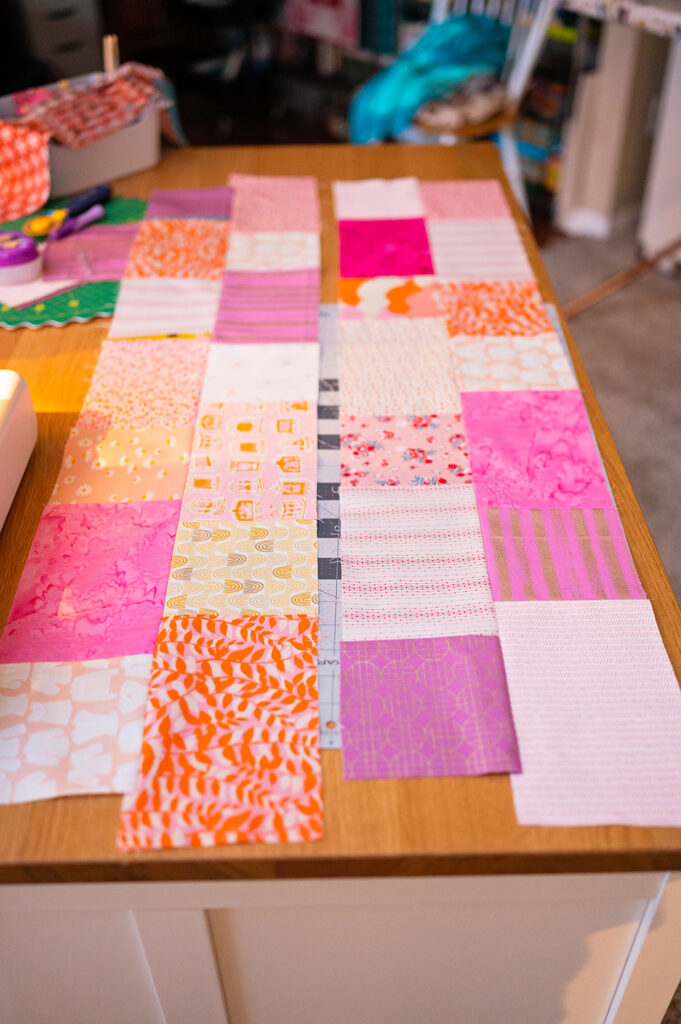
Simple quilt construction! Once four rows are made, lay them out so the seams do not line up and then connect them to make a section. I like to construct my quilt tops in sections and then I put the bigger sections together at the end. To work in sections feels manageable and it makes putting a large piece together a lot easier. Do you want to sew 4 sections together at the end or fiddle with a huge project that needs a single row added? I always prefer working with bigger completed sections than attaching those smaller units to craft the final project.
Truly a No Pattern Method of Piecing a quilt!
The only “pattern” required is that you cut and sub cut your strips in a consistent method: squares and rectangles. Sew a row, lay it out and if you want a wider quilt, add a couple more units. If it’s too big, use the seam ripper and remove a few units. If you want a longer quilt, add an extra section.
Mine is made from 4 sections of 4 rows put together with 2 more rows on the end to add an additional 10”. If we compare to a standard size quilt chart, it measures closest to the Twin size. If this is your first bed sized quilt project, that’s a good size to start with, because it’s still a lot bigger than you think. But if you want something big enough for your king size bed, then you can add to it until the size you want is obtained.
Did I mention the Easy pressing technique? As long as seams are neatly pressed and all going one way on a row, then you’re golden! No complex pressing diagrams needed.
Quilts generally go together as individual blocks with a design created by the individual blocks and units in the pattern. The more blocks and units needed to craft a particular design, the more pieces you have to cut and sew.
This design for the easiest quilt for beginners works because each block is made by piecing to easy units together: a square and a rectangle.
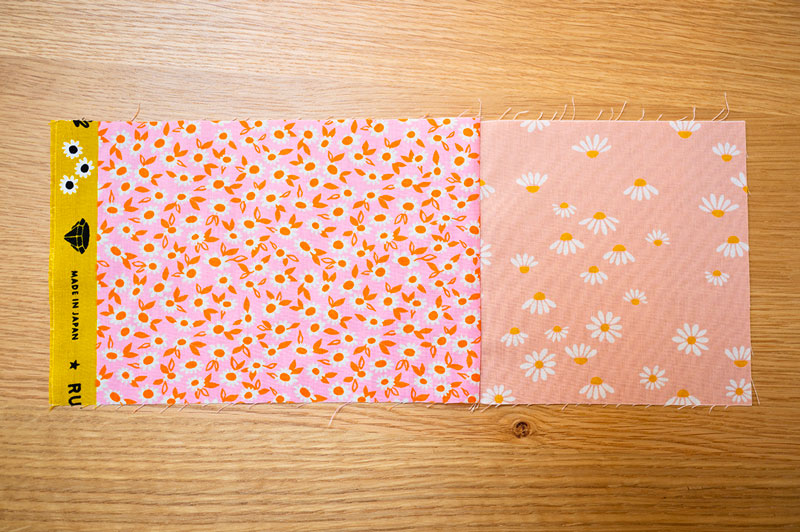
Piece one 5″ square with one 5″ x 8″ rectangle. Sew using a quarter inch seam. This is your block! Make a bunch of these and sew them together in rows.
Each row is made by alternating a square and a rectangle to form a row. I sewed 7 pieces together in each row to make a table runner. You can add as many pieces as you like to achieve the width needed for your project.
Once 4 rows are completed, piece them together as one section. The trick to this easy quilt is to lay out the rows next to each other, and fiddle with them so none of the seams line up. The amount they offset can be different every row. It doesn’t matter. Don’t worry about uneven ends, because they are trimmed even when the whole quilt top is put together.
How to trim the easiest beginner quilt
Once the quilt top in complete, give it a good press and using a long quilting ruler, trim the uneven ends to the shortest end.
I used a 6″ x 24″ Creative Grids quilting ruler, (affiliate link) a Fiskars cutting mat (affiliate link) and an Olfa 45mm rotary cutter. (affiliate link)
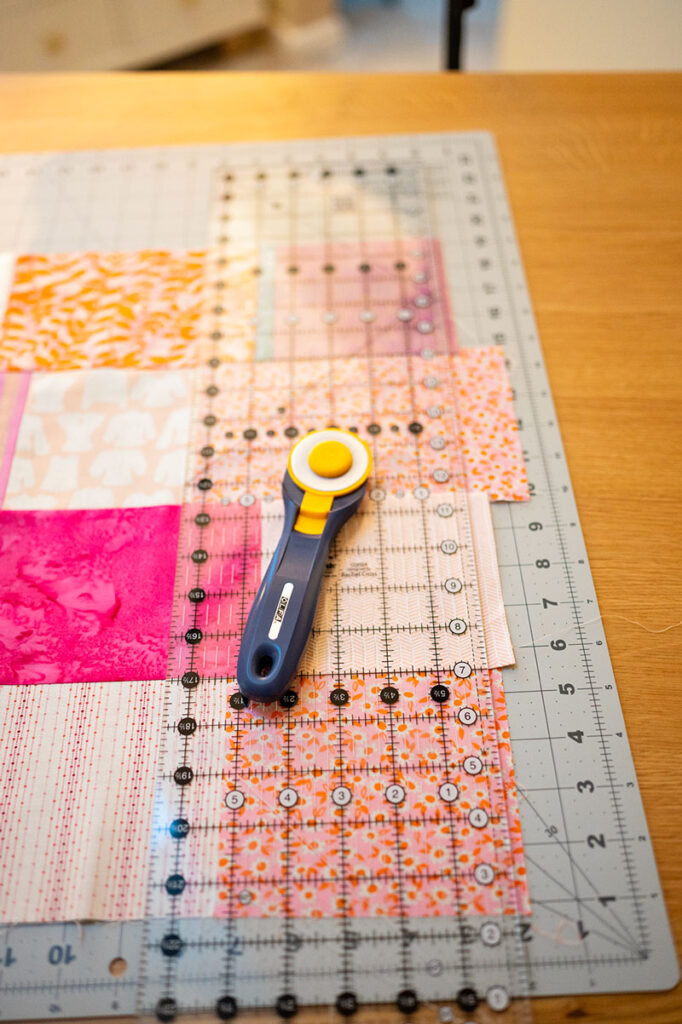
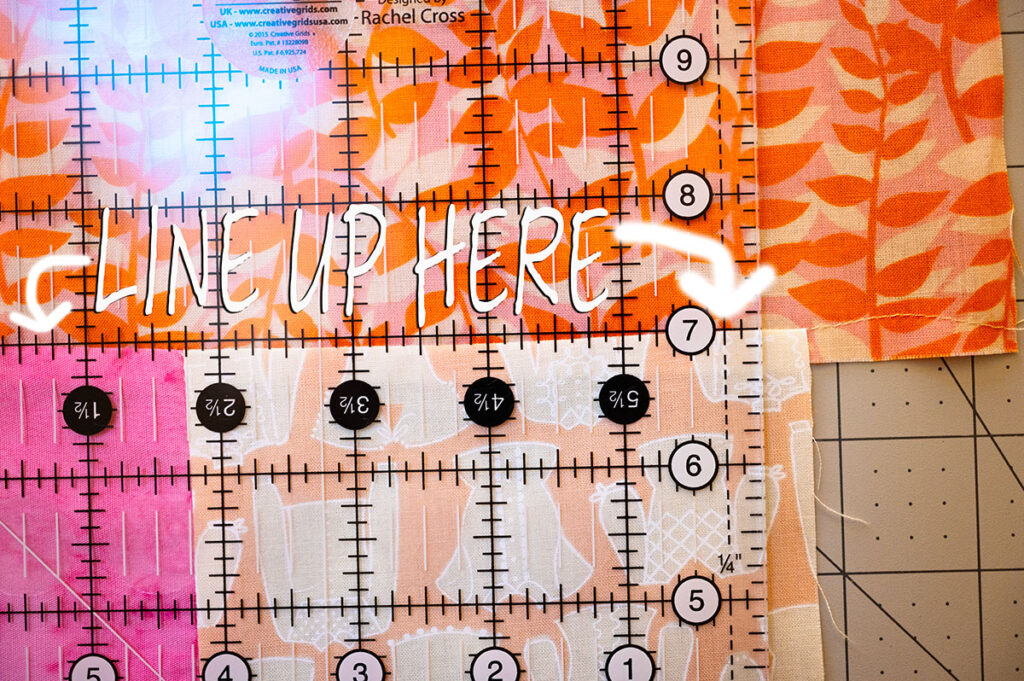
Line up the horizontal seams with the horizontal lines on the quilting ruler. If your patchwork quilt top is several sections, you want to carefully trim from section to section to get an even result.
Quilting the easiest beginner quilt
Once the ends are even, prepare a quilt sandwich with the batting and backing of your choosing. Quilt as desired.
The piece in the picture is the perfect table runner size. Simply place 7 blocks alternating square and rectangle to complete each row. Make and attach 4 rows for a table runner.
Want something larger? Extend your rows and make 4 or 5 four row sections. Perfect bed sized quilt!
Tips for Success:
- Have a good mix of directional and non directional prints. And make sure the directional prints are all going the same way.
- Focusing on one or two dominant colors makes a cohesive look. My quilt sample focuses on mostly pinks with some yellows thrown in. Pink and yellow are great together and having a mix of 2/3s pinks to 1/3 yellow felt balanced to me.
- Don’t forget your neutrals!! While quilting is all about the fun of color, neutral tones create a look that’s not so over whelming. Don’t forget to add plenty of neutrals to your stash when you start building a collection.
- Feeling tired? Stop working. Pushing through when fatigued will quickly turn your hobby into a job. That’s not the point of having a hobby! Goal setting is great but don’t let the goal setting take over the fun of the project. This will be more difficult for Type A personalities, so do your best.
- Try to keep identical prints from touching and don’t let similar colors pool. Evenly disbursed colors and prints create the best Patchwork designs. It will lend a random look to the finished product. Even if you took the extra time to plan on what fabric to place where in a row.
- Don’t think too hard about it. We don’t want the same print to show up next to itself in nearby locations. But don’t obsess too long over what to put where. That will take away from the randomness of the patchwork.
How to make your own Mismatched Patchwork Quilt
Cutting Instructions
- Cut WOF 5″ strips from 25 fabrics for a twin sized quilt. Subcut each strip to 5″ Squares and 5″ x 8″ Rectangles.
- Cut 28 pieces from scraps for the table runner. Cut an even number of squares and rectangles.
- Cut WOF 5″ strips from 52 fabrics or some variation of fabrics so there are 52 strips to subcut to squares and rectangles for a Queen sized quilt.
Assembly Instructions
Pair a square and a rectangle as a base unit and sew as many as desired to make a rows the length you want, but a good rule of thumb is this:
- Table Runner: 7 blocks in a row with 4 rows combined
- Twin Sized Quilt: 9 blocks in a row with 18 rows combined
- Queen sized quilt: 18 blocks in a row with 18 rows combined
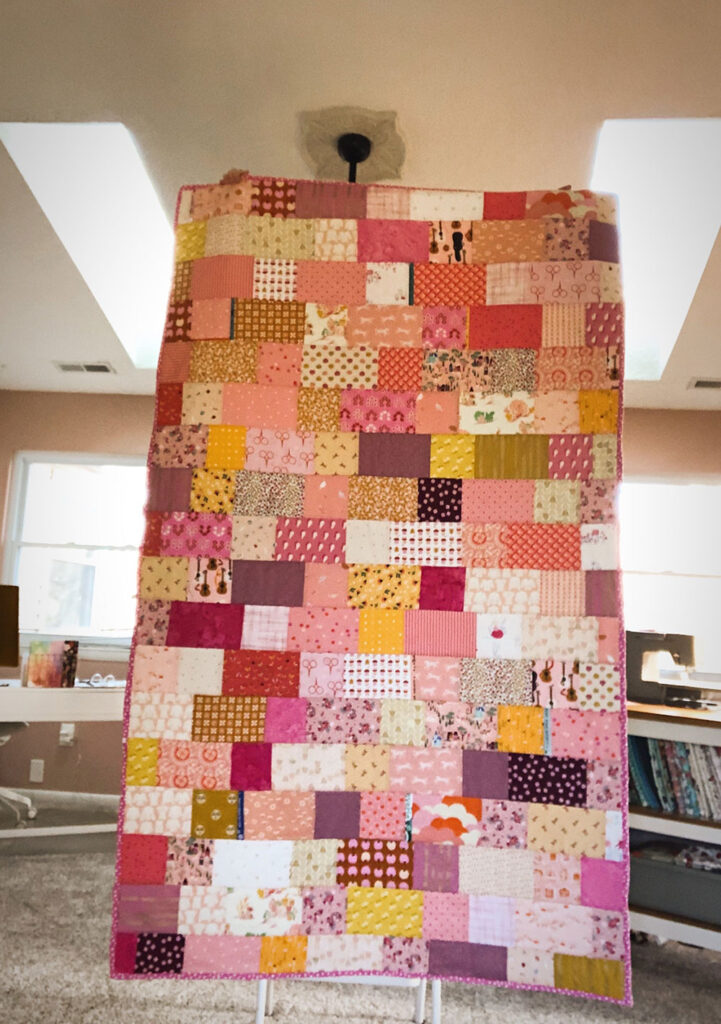
My completed twin size Mismatch Patchwork Quilt!!
Please forgive my less than stellar photo of my finished quilt. It’s too cold and wet to go outside and find a better setup for the picture. Make this easy quilt by sewing 9 blocks together for each row.
I wanted you to see a finished quilt. It’s a darling project, no matter the size. Table runner to queen size quilt, this pattern is awesome.
🧵
I hope you enjoyed learning about this really fun concept for piecing patchwork quilts. More sizes and information will be coming so be sure to sign up for the email list to be notified. I absolutely LOVE my newest quilt and I’m excited to work on other size variations. This is a fun way to use fabrics from a scrap bin as well as mix many favorite prints into one quilt. You’re only taking a 5″ strip from the yardage so it’s a great way to enjoy using some special fabric stash without using it all up in one single project.
Enjoy this fun video demonstration on putting together your very own Mismatched Patchwork quilt.
Hi! I’m Pattmac
Quilt Maker, Baker, Gardener
I love figuring out new ways to use pom poms, where I can stash more fabric, and I’m always wondering what to bake next…chocolate or lemon? When not dreaming up new things to make (or bake), I love riding my beach cruiser on the Boardwalk, escaping to mid week movie matinees, and planting new things in my tiny but mighty container garden.