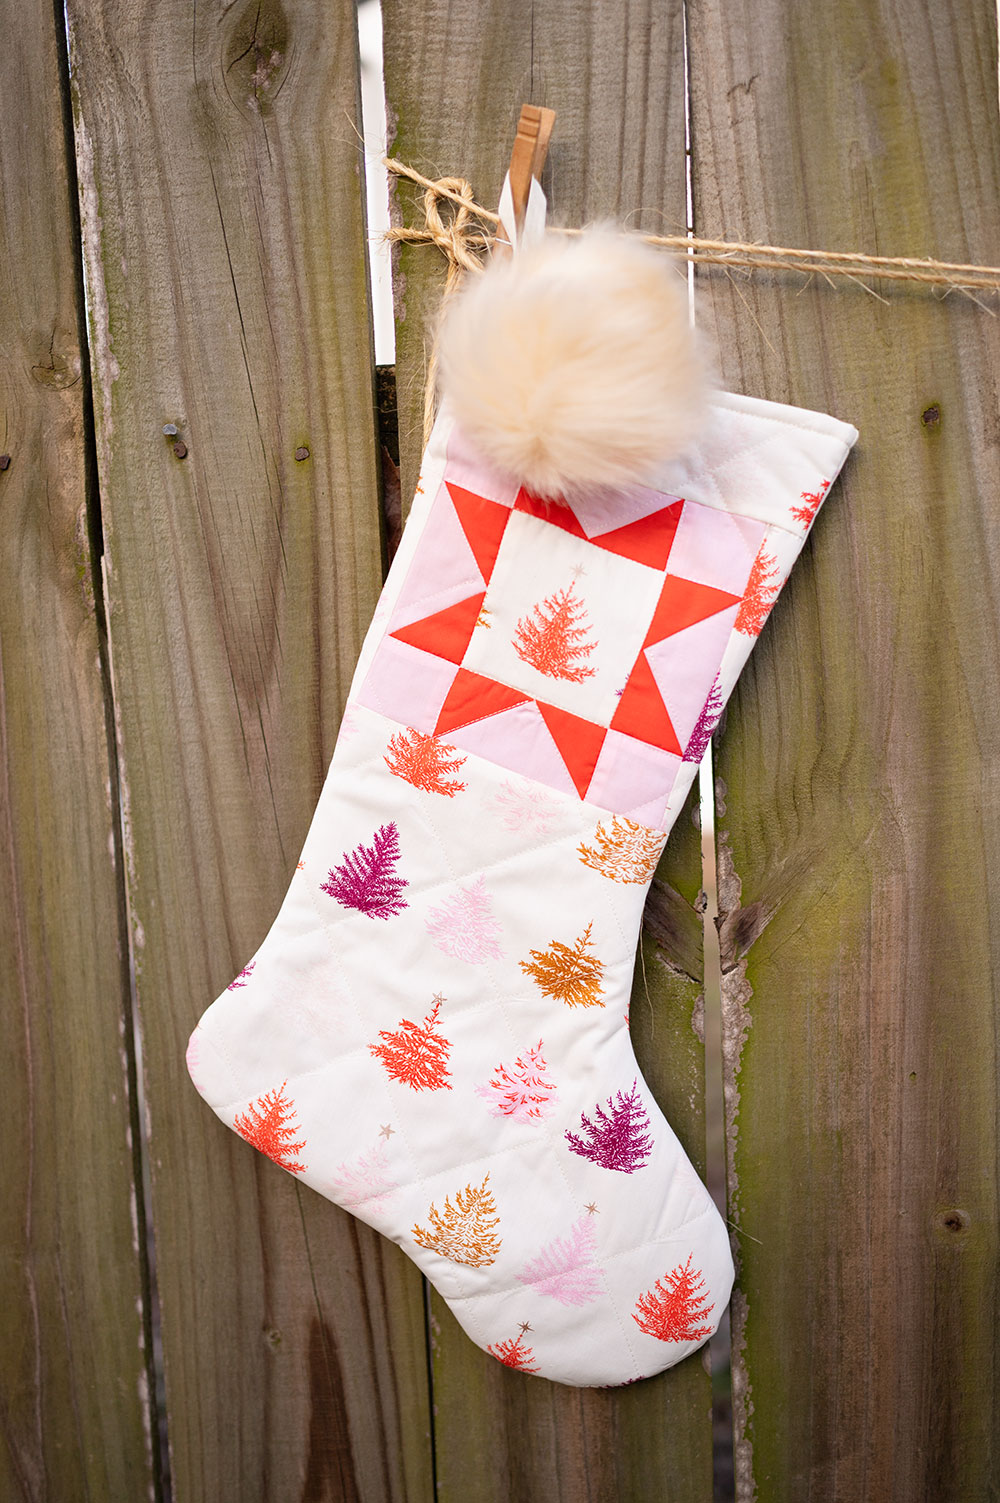
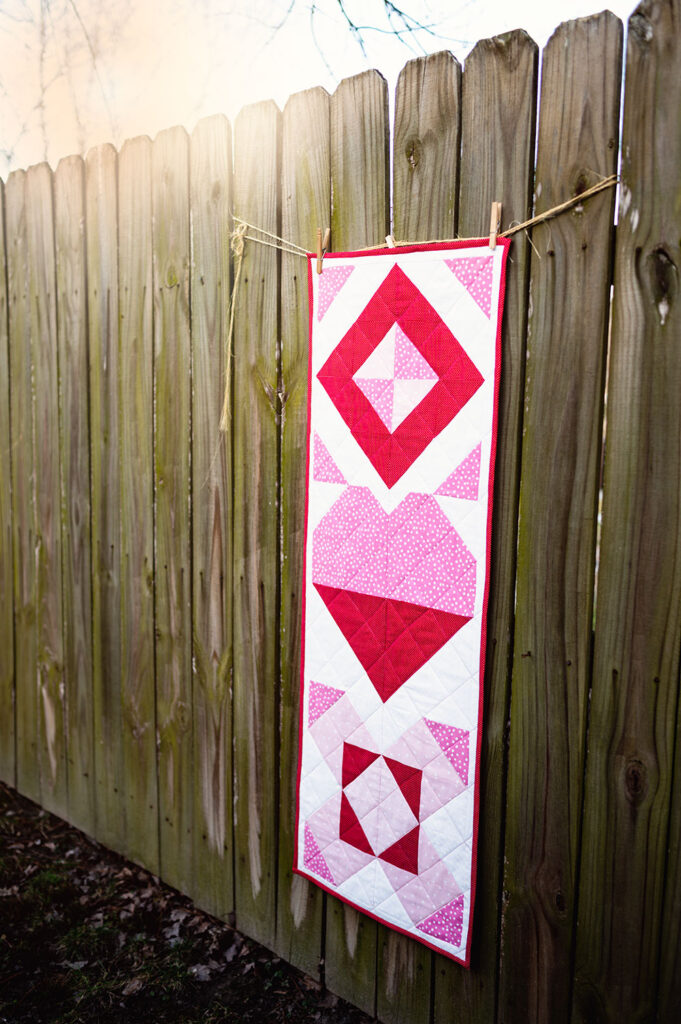
Love My Valentine Table Runner
Disclosure: This post may contain affiliate links. As an Amazon Associate, I earn from qualifying purchases. 😊
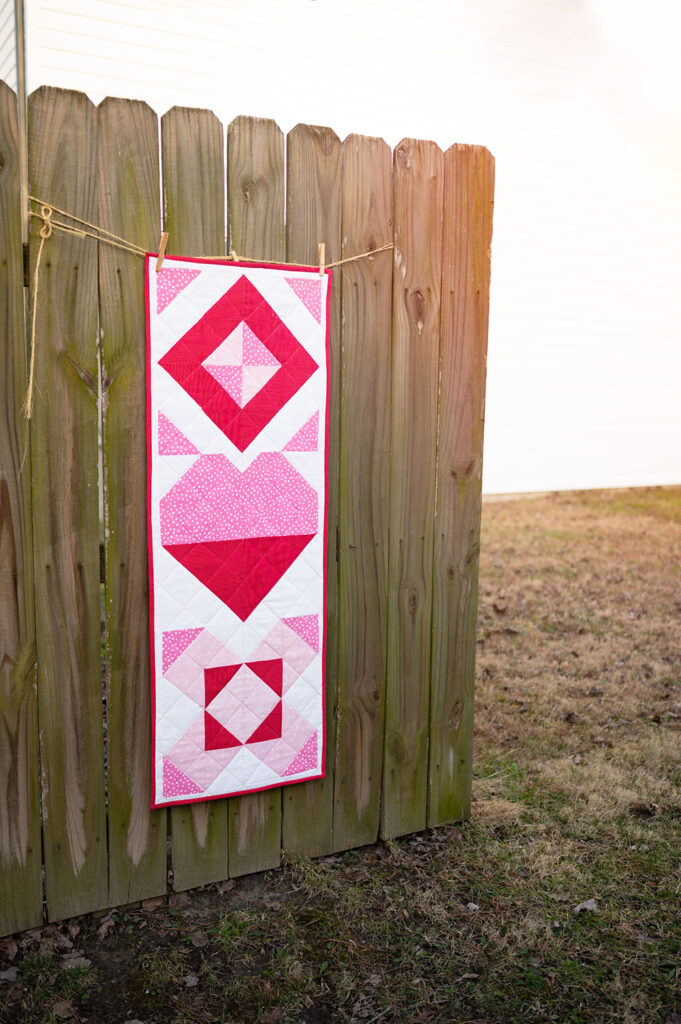
One of the great joys of quilting is making decorations for special holidays. Nothing celebrates the change of seasons like quilted table runners. Show your February spirit with today’s Love My Valentine Table Runner.
Valentines come in all shapes and sizes! So many single people lament the holiday celebrating love, when the truth is, Valentines don’t have to be only romantically inclined partners. So even if your dinner companion has 4 paws, decorate your table with a colorful mini quilt that I named the Love My Valentine Table Runner.

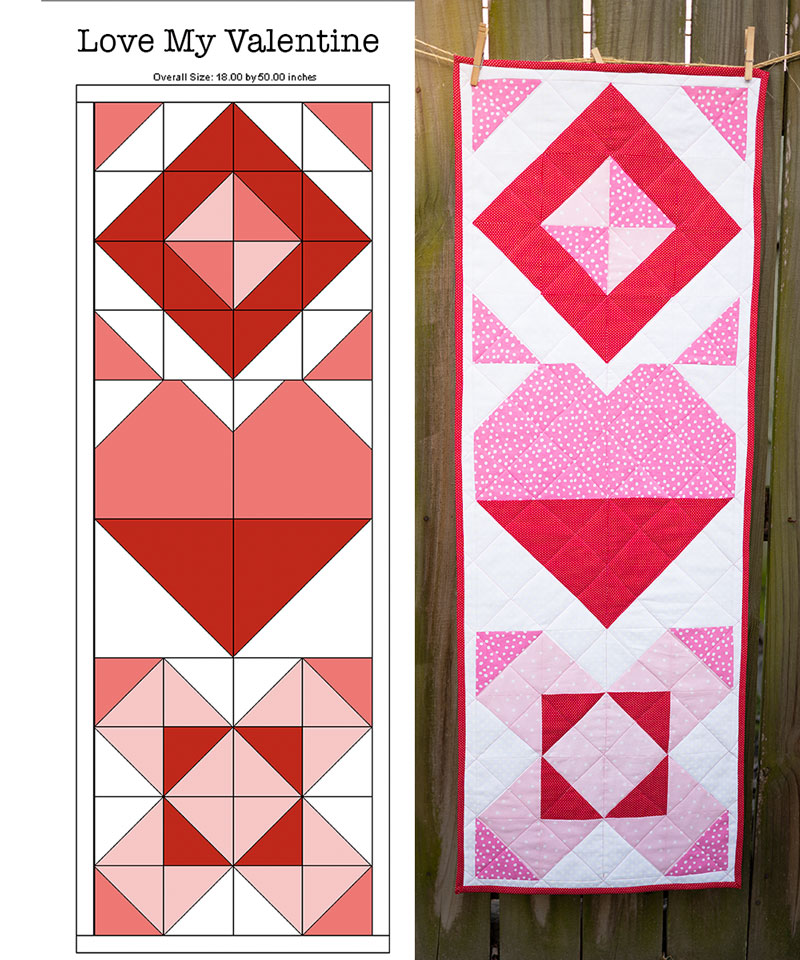
Illustration with Finished Table Runner
How do you Make a Simple Table Runner?
- As a quilting project, we first construct 3-5 quilt blocks. Odd numbers read better aesthetically speaking, so I always make mine with 3-5 blocks. The blocks should be the same size. Generally they are 12″ blocks, but today’s sample is 16″.
- A table runner is generally long and skinny so place your blocks all in a line. You can sash or not sash. I’ve done both, but today’s sample is sash free.
- Construct your favorite classic blocks and update them using seasonal fabric to instantly create a decoration for any holiday of your choosing.
Half the fun of quilting is customizing blocks and patterns into shapes and colors YOU like the best. But in case you prefer to follow a pattern, the post today will provide general cutting and assembly instructions.
How to construct the Love my Valentine Table Runner:
- Piece the 3 blocks described below: diamond, heart, ribbon
- Join the 3 blocks
- Apply a 1.5″ border in the background fabric
- Quilt as desired
- Bind off
Common questions about using and making table runners:
- What fabric is best for table runners? This is a quilting blog, so we use quilting cottons. Cottons are are good choice because they are natural fibers, and there are endless varieties of colors and prints. You are sure to find something you like!
- Should a table runner be as long as the table? The length of your table runner is up to you. Ideally, it should hang at least six inches over each end of your table, but shouldn’t hang further than your tablecloth. For example, if your table is 60 inches long, your table runner should be at least 72 inches long, allowing for six inches at either end of the table.
- What color is best for table runner? This is up to you!! You might want something that matches your paint, but I make my runners to reflect seasons or holidays.
- What is the point of a table runner? They are used to make table decorations more visually appealing, as they can help to define seating arrangements. Using a table runner is a popular option for people who prefer their decorations to match, giving a consistent and symmetrical finish.
- Does table runner have to match napkins? No matching necessary!! But if you want to make some cute napkins, I have some really fun and fast to make hemmed napkins I recommend to everyone.
This pattern features a Valentine table runner, and I’ve used shades of red and pink which are classic colors for Valentine’s day. You might like to use special prints or make this project in your favorite shades of blue.

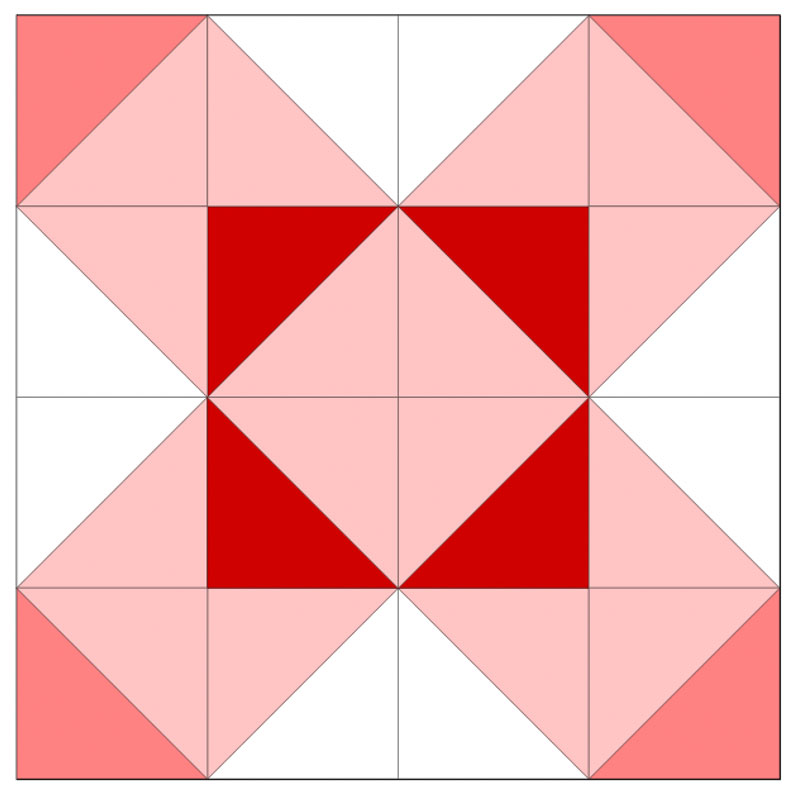
Diamond Block 
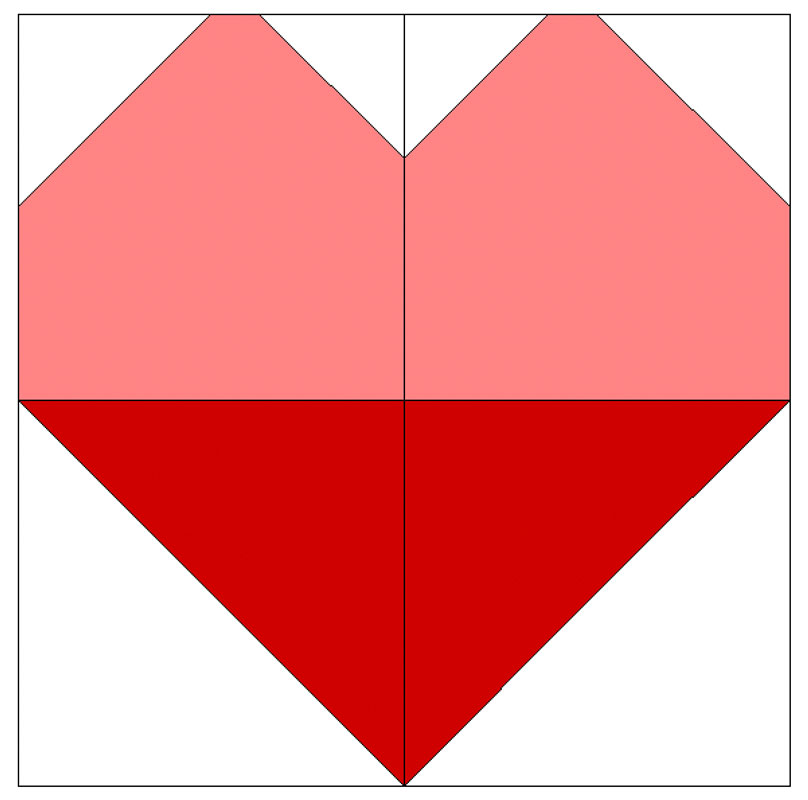
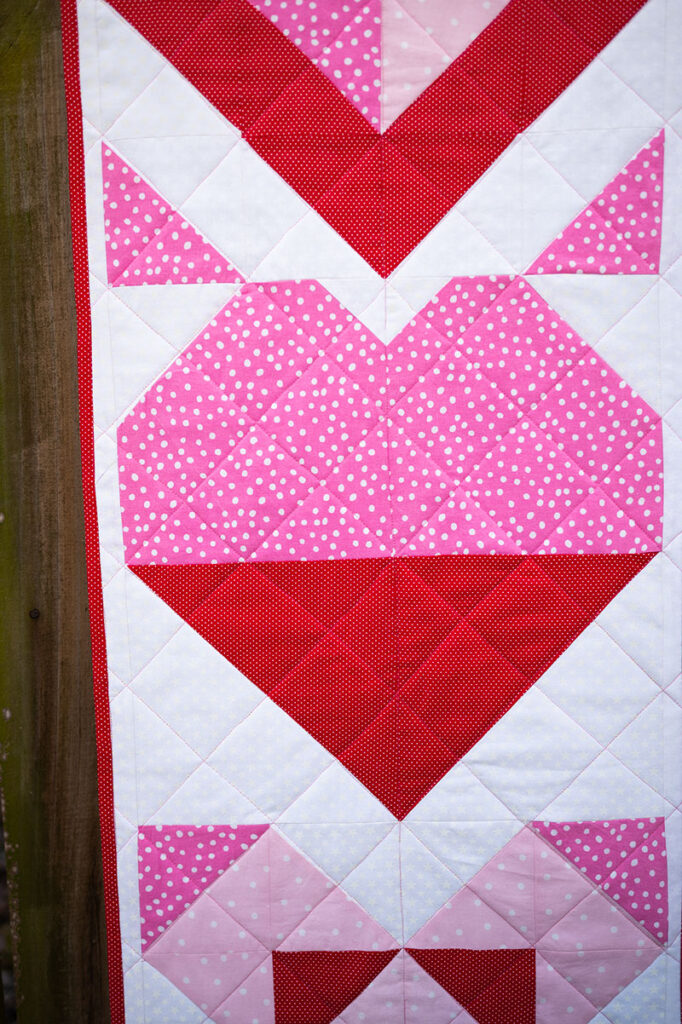
Heart Block 
Ribbon Star Block


Yardage and general instructions
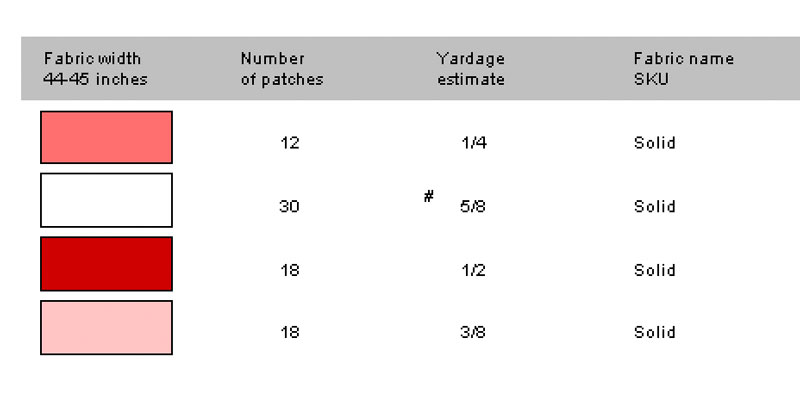
Specifically for the table runner, you’ll want 3 colors and a background. I used a red and two shades of pink with a white background. This plays with monochromatic color if you were to use a color wheel. The pinks are essentially the red mixed with varying degrees of white to create a tint of the red. If you wanted to experiment with color, you could play with shades of blue or oranges or even a violet shade. You could also explore triadic color schemes like red, yellow and blue or purple, green and orange. If you would like more information on working with color, I wrote a little about it when I designed my Power of 3 Row Quilt.
I use Electric Quilt to design my quilt projects and blocks. It will give me finished measurements and yardage. The only thing is that I think it cuts (literally) things little close in terms of yardage requirements, because it assumes perfection: No mistakes in cutting or no need to go back and redo a little something here and there. I think that’s unrealistic, so I always recommend having a bit extra, and the cutting instructions I provide gives a little wiggle room.
Full yardage Requirements:
- Background fabric: 1 yard
- Color A (red): 1.25 yards
- Color B (pink) 1/2 yard
- Color C (light pink) 1/2 yard
- Binding: 12″ WOF (assumes 3″ binding strips, cutting and joining 4 WOF strips)
- Backing: 1.5 yards
Details about this quilt:
- Finished measurements: 18″ x 50″
- Each quilt block is 16″ finished size (or 16.5″ unfinished).
- Border is cut from background fabric as 1.5″ strips.
- Quilt Batting: I generally use the 80/20 blend and purchase it on sale. Use whatever you have on hand or whatever you want to purchase.
- Thread: You’ll need thread for piecing and thread for quilting the final project. I used traditional lattice style quilting on my finished project. It uses a little less thread and it’s much easier to do on a domestic sewing machine.
- Quilting: The instructions generally reads “quilt as desired” so I worked in a classic lattice pattern which I’ve come to absolutely love.
🍬

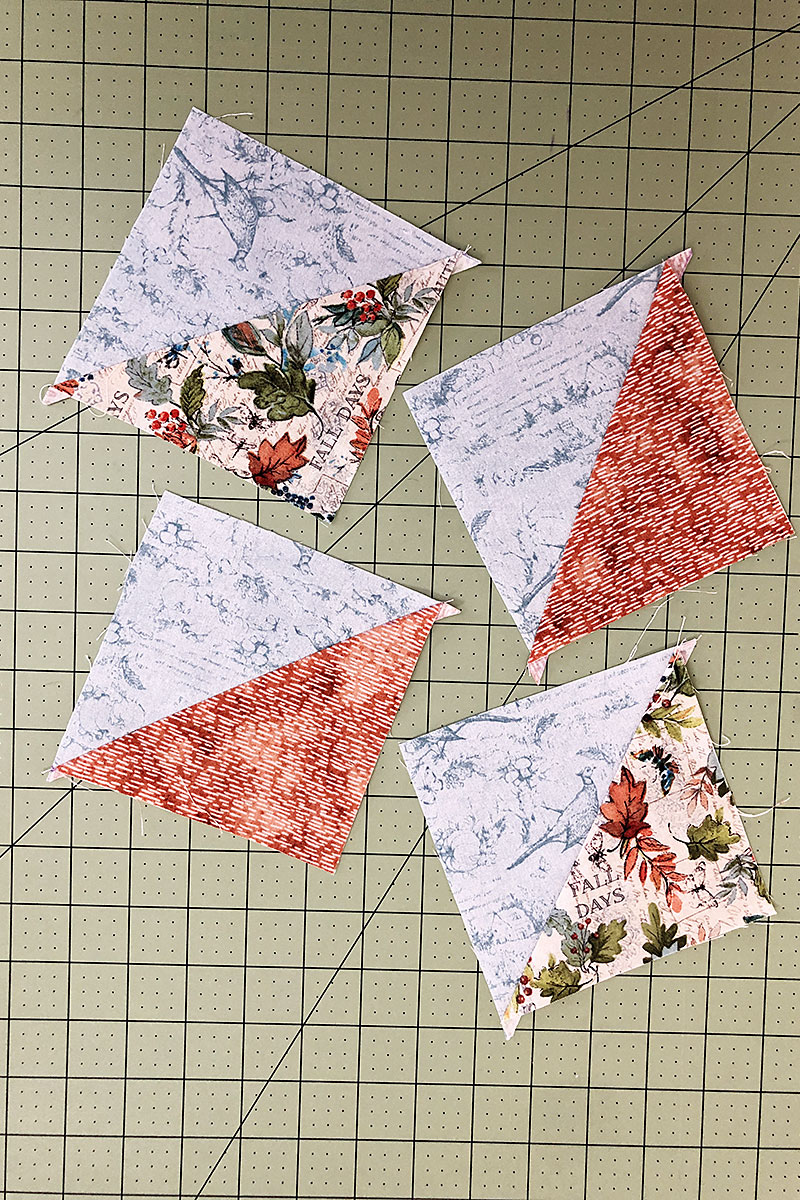
Cutting Instructions For The HST Diamond ✂️
Color A (Red):         6 - 5.5" Square
Color B (Pink):        3 - 5.5" Square
Color C (Light Pink):  1 - 5.5" Squares
Color D (White):       6 - 5.5" Squares
For complete instructions on piecing the Diamond please see the tutorial on piecing it. Also note this version is larger and the cutting instructions reflect the larger size. If you prefer a 12″ version, simply follow the cutting instructions in the original tutorial.
💎
Cutting Instructions for the Big Heart: ✂️
Color A (Red):       1 - 9.5" Square
Color B (Pink):      2 - 8.5" Square
Color C (White):     1 - 9.5" Squares
Color C (White):     2 - 4.5" Squares
Color C (White):     2 - 2.5" Squares
For complete instructions on piecing the Heart please see the tutorial on piecing it. Also note this version is larger and the cutting instructions reflect the larger size. If you prefer a 12″ version, simply follow the cutting instructions in the original tutorial.
❤️
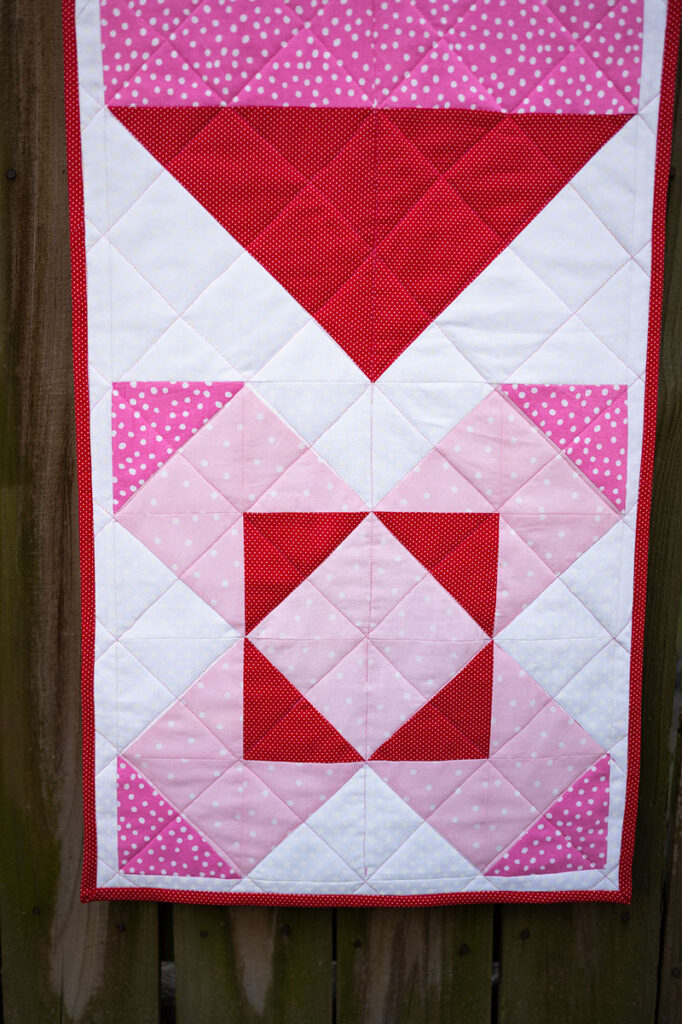
Cutting Instructions for the Ribbon Star: ✂️
Color A (Red):         2 - 5.5" Square
Color B (Pink):        2 - 5.5" Square
Color C (Light Pink):  8 - 5.5" Squares
Color D (White):       4 - 5.5" Squares
🎀
I don’t recommend jumping to conclusions or making assumptions, but in quilting there are always a few things you can expect.
- Assume 1/4″ seam allowances
- To get the best HST unit, we generally over cut and then square up. The standard instruction in patterns says to cut over by 7/8s inch which I think is difficult. I make it easier and size up my working blocks a full inch, construct the HST units and trim each unit down to the finished size. Which for the Diamond and Ribbon Star are 16 – 4.5″ units and 4 – 8.5″ units for the heart,
- Use stable quilting cotton and adding fabric starch while pressing makes for a more stable unit of construction.
- The backing fabric is almost always pieced. In this case by cutting two 24″ WOF strips, seaming them together on the 24″ edges, and trimming to the proper length.
- Backing and batting are always cut a few inches larger all around for basting and quilting. The excess is trimmed away after quilting to square up the completed quilt.
Make your quilting easier by using the right tools for the job
- Rotary Cutter (affiliate link)
- Cutting mat (affiliate link)
- Square Rulers (affiliate link)
- Pretty Fabrics (affiliate link)
- Really good iron (affiliate link)
Quilting should be fun and a way to express your unique personality
Remember to have fun as you put this Valentine Themed table runner together! Colors and value are placed with specific intent, so if you decide to experiment, try to put the lights and darks in the same approximate positions to best reveal the shapes and design of the pattern.
I like putting a narrow border in the background fabric to give a little space between the blocks and the binding. It makes it easier to preserve points, and getting the binding onto the piece is not as exacting as it would have to be if 1/4″ seam allowances were critical to maintain.
I used the same red print for my binding and I love how it perfectly frames the quilt. I cut my binding a little wide at 3″, and it makes machine finishing my projects 100% easier.
❤️
Hi! I’m Pattymac
Maker, Baker, Gardener
I’m a creative lifestyle blogger living and working in Coastal Virginia. When I’m not mixing or stitching or taking pictures, I’m out exploring the cook book section of my favorite library or munching my ow home baked cookies at a mid week movie matinee