DIY Zipper Tote Bag
You know you want to sew your own bags, but the mortal fear of bag construction leaves you hiding in a closet. Today, it’s time to put that fear to rest. We’re going to talk about an easy DIY zipper tote bag.
We all know you’ve been admiring the lovely bags that come in a wide variety of shapes and sizes. They spill across your screen whether you’re scrolling instagram or browsing youtube videos. Stop admiring and start sewing them with my diy zipper tote bag.
First things first. There are specific parts that go into bag construction, and most all of them have these same or similar components. There are variations, of course! But if you understand the basic parts and how they go together, you should be able to tackle any number of different bag patterns.
This tutorial will give you a high level overview of how this specific bag goes together.
If you need detailed information on completing the individual parts, I’ll link you to other tutorials that will address those parts specifically. Not everyone needs to see how to cut and sew straps or how to box corners, or installing a zipper, so those will be explained separately. Otherwise, the tutorial gets so long it’s too difficult to follow.
Now that we have that out of the way, let’s meet today’s project.
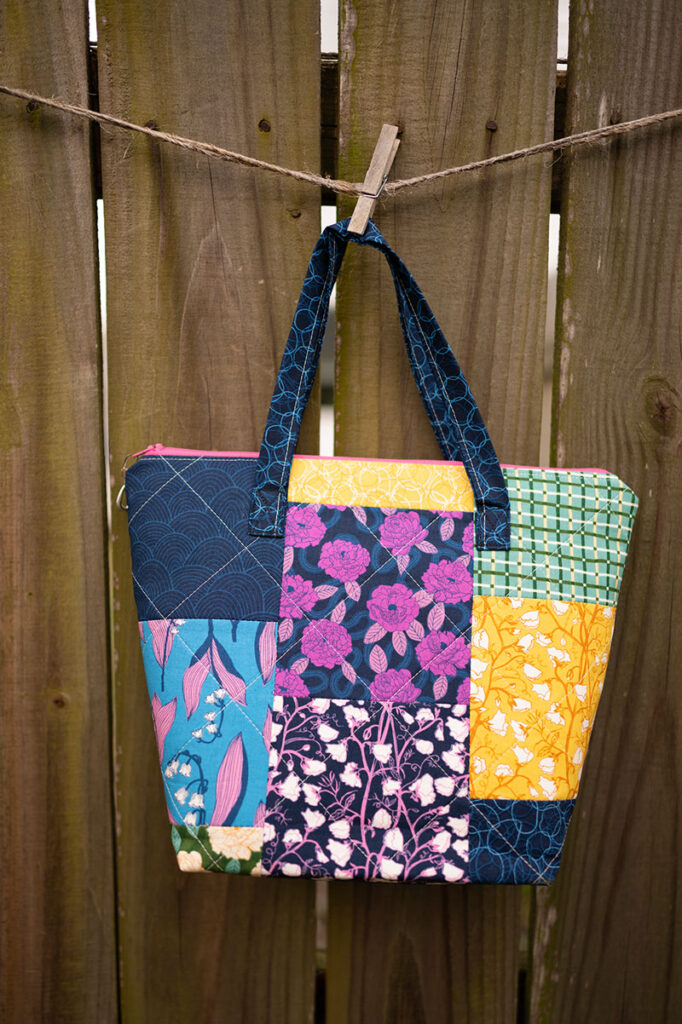
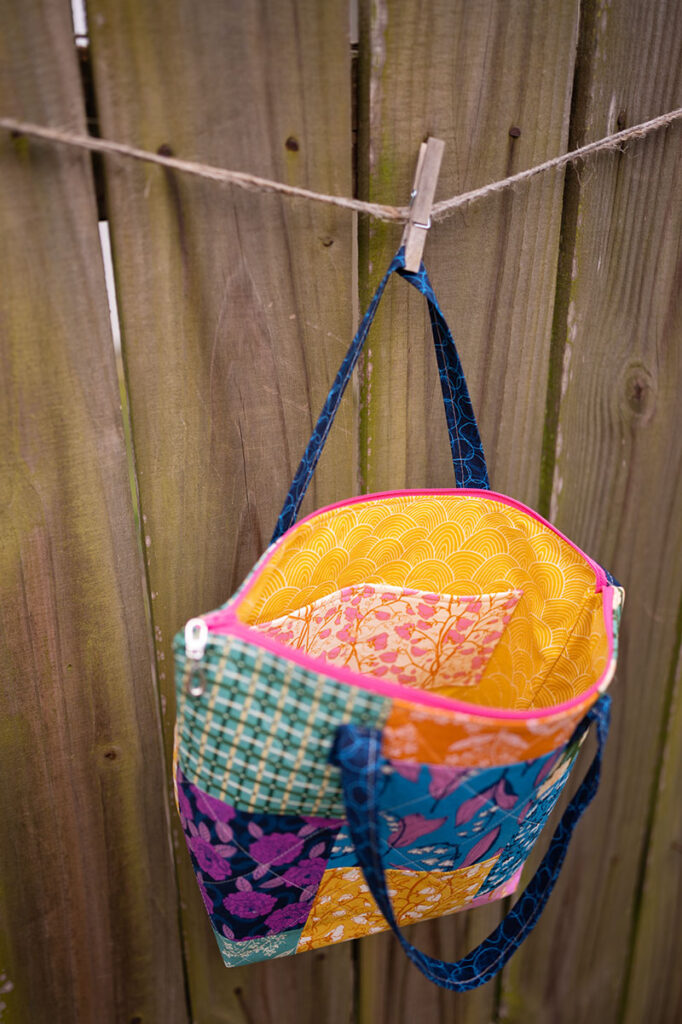
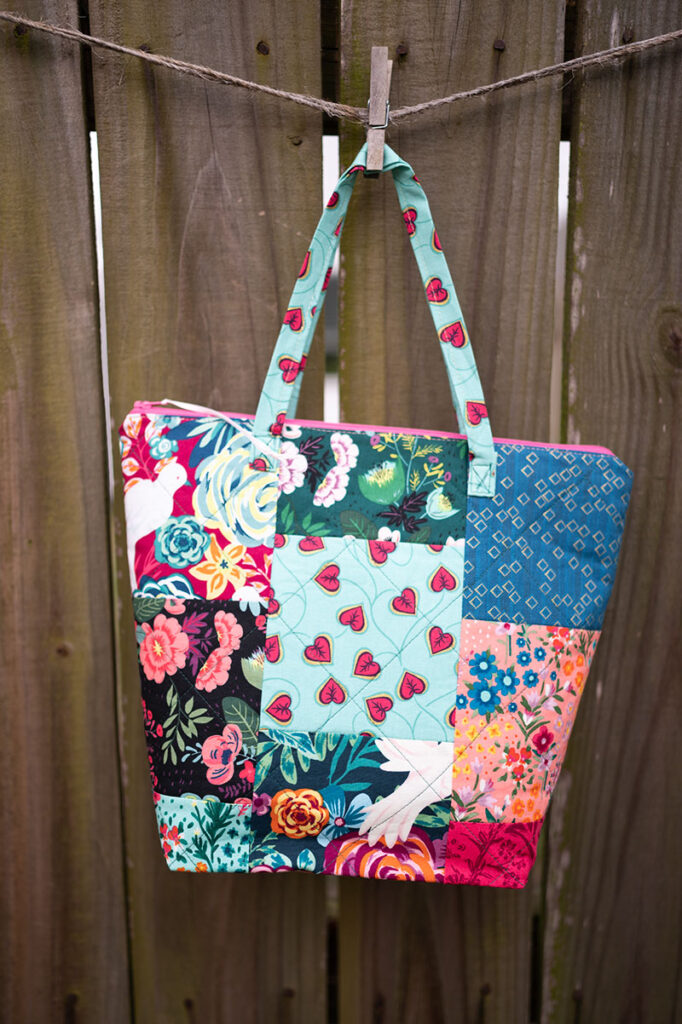
To quote a famous song, “Isn’t she lovely?”
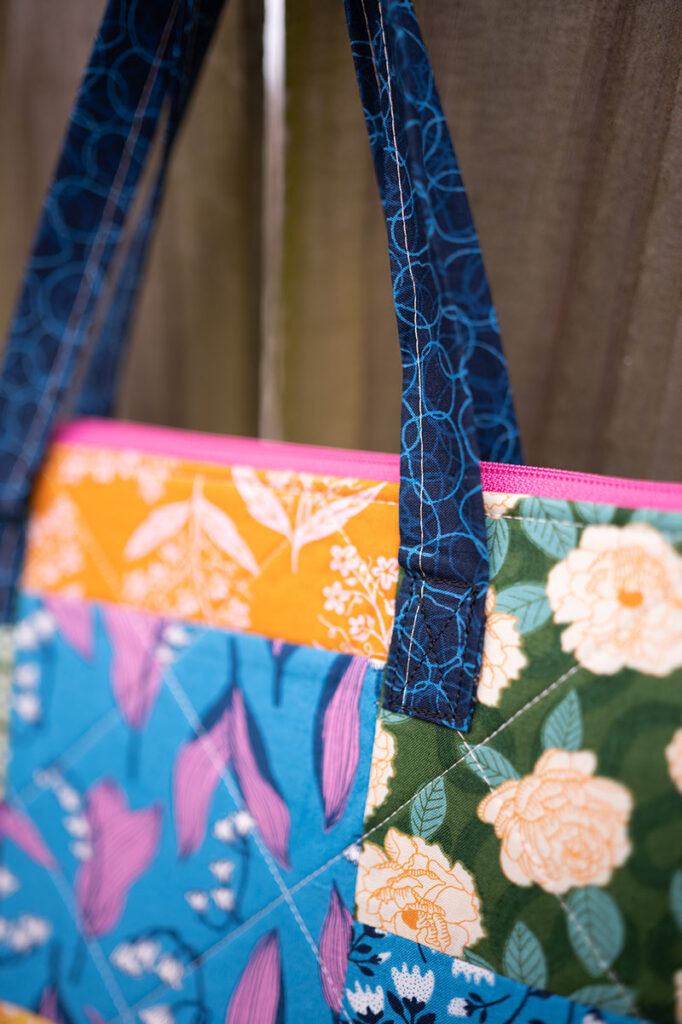
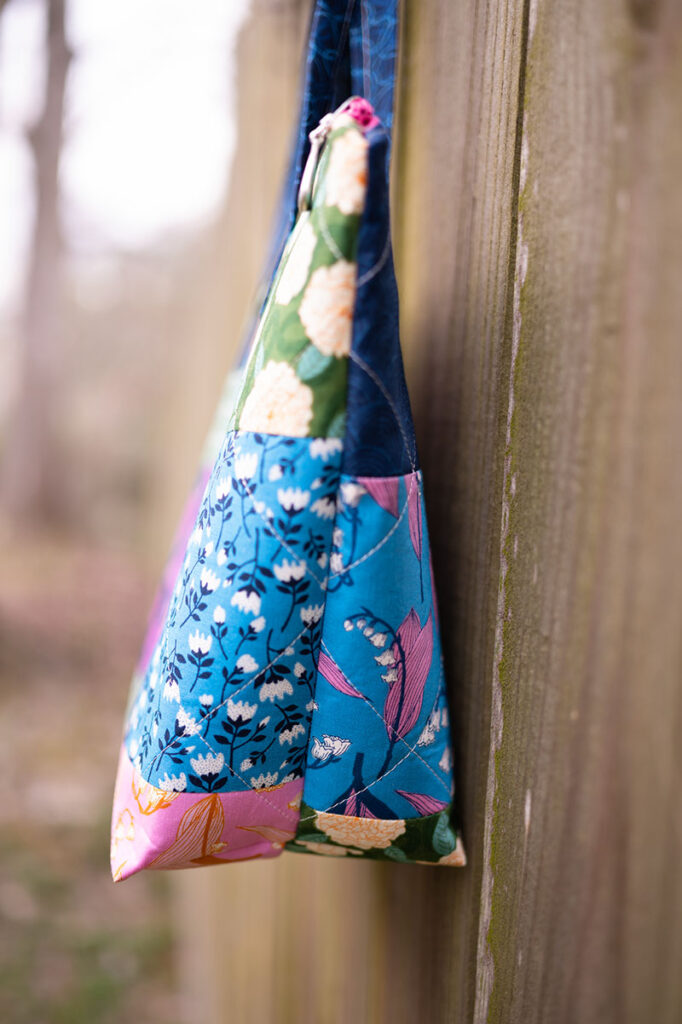
I call this bag the Alice Bag, and she’s a fun patchwork tote made with 5″ squares, featuring a zipper closure, and fabric straps for handles. There’s also a small pocket inside with a contrast lining.
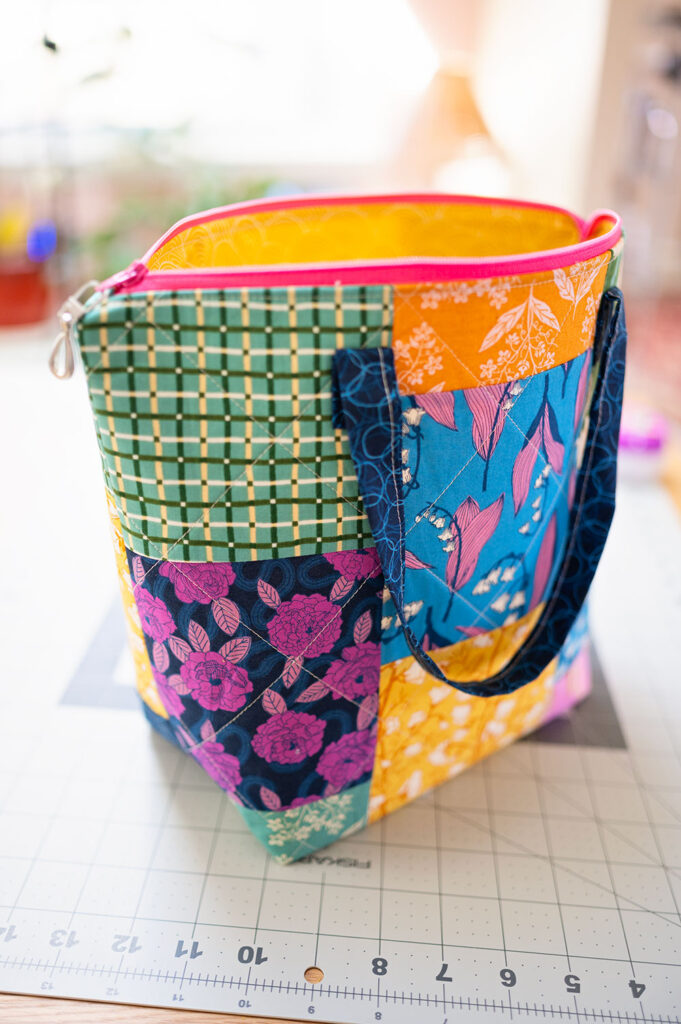
The outer shell is quilted and has large boxed corners allowing the finished bag to sit up on its own and provide ample space inside the handbag.
🪡
Most bags are constructed using similar components.
- Decorative outer shell
- Contrast inner lining
- Pockets
- Straps
- Some sort of closure, in this case a zipper
- Boxed bottoms for shape and structure.

Boxed corners 
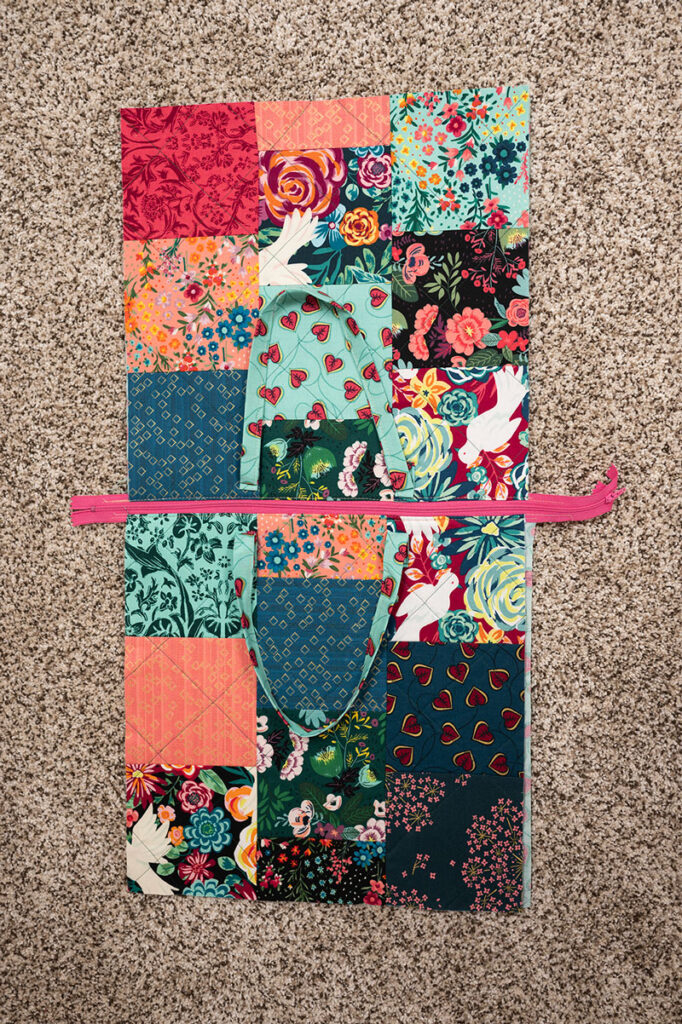
Bag sits up on its own Colorful inside with pocket

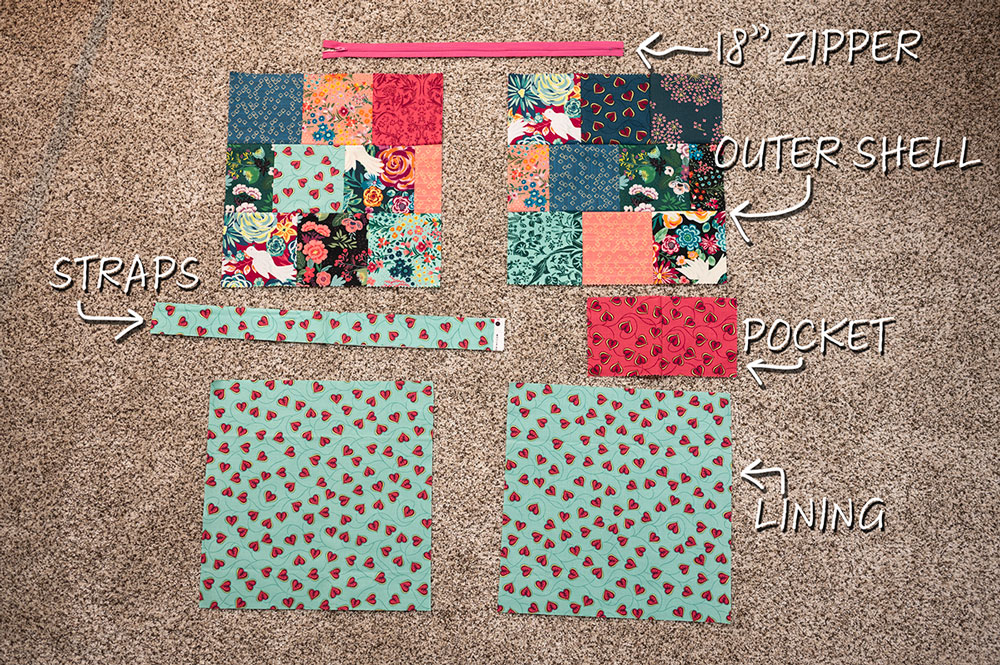
Parts of the bag shown together
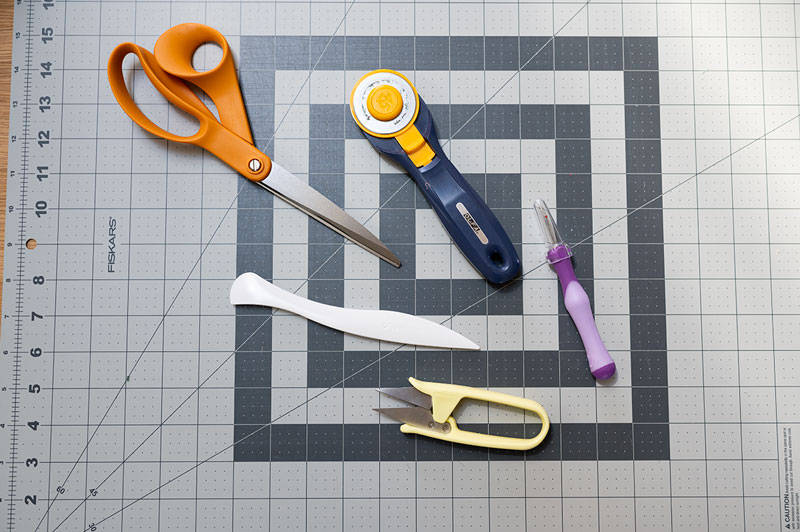
Bag making requires quite a few tools. While you don’t need them all to sew zipper bags and pouches, using them will yield a more professional looking finish. I’ll split the list between the must haves and the things that are nice to have to sew an easy zipper tote bag.
Must Have Tools:
- Sewing Machine
- Rotary Cutter (affiliate link)
- Cutting Mat
- Fabric Scissors
- Marking tool like a pen or pencil
- Pins
- Seam Ripper: Trust me. You’re going to need this one
- All Purpose Sewing Machine Foot: Used this to both quilt my outer shell AND to sew the bag together.
- Quarter Inch Sewing Machine Foot: Used this to piece the squares used in the outer shell
- Steam Iron: Steam is your friend in bag making
- Ironing Board
Nice to Have Tools:
- Clover Point Turner: I use this tool to give me sharper corners, (affiliate link) to open seams and to mark fabric for quilting straight lines.
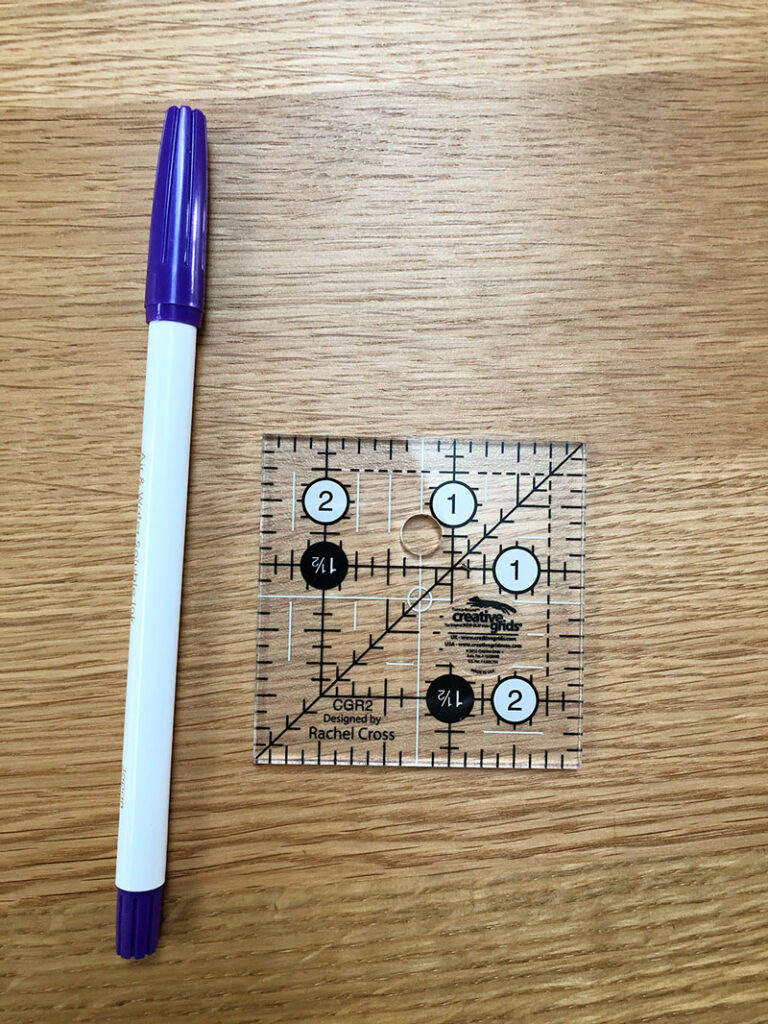
- 2.5″ Square Quilting Ruler: I used mine to cut my corners for boxing, but you and measure any way you prefer.
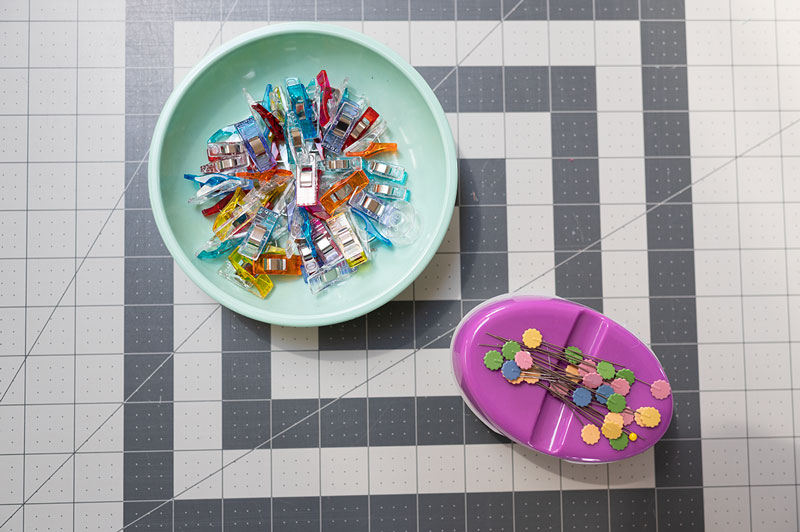
- Wonder Clips: Sometimes clips are preferable and easier to pins
- Thread Snips: Cuts threads close (affiliate link) for a more professional finish.
- Long Quilting ruler to cut and square up project pieces: Squaring up the outer shells after applying fusible is a must. Once they are squared and even, lay over top of lining pieces and trim lining to match the outer shells. Your pieces will be in the neighborhood of 13.5″ squares at this point.
- Walking foot for sewing machine: best for sewing thicker projects and a must have for most quilting projects
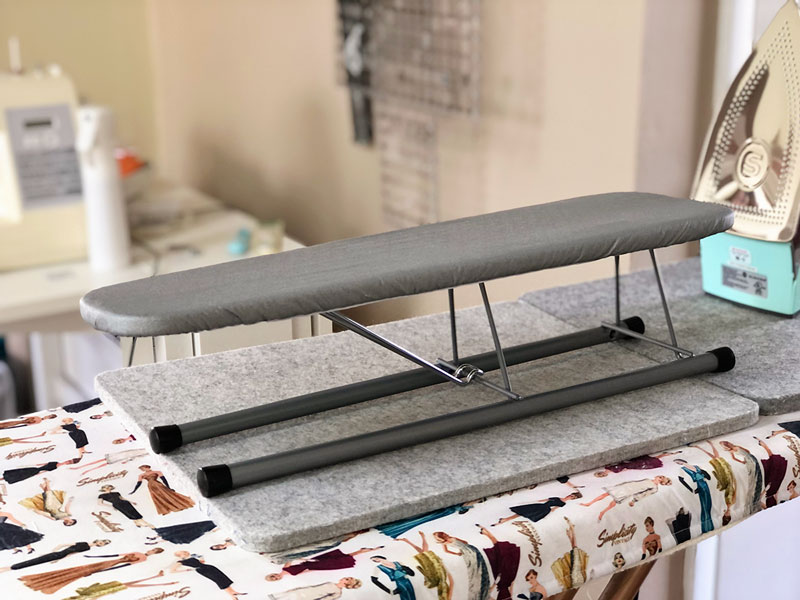
- Sleeve Board: used to press smaller pieces like (wait for it) sleeves. (affiliate link) But also great for giving bag projects a really good steam press
- Press Cloth: I use a press cloth to apply anything fusible. I find a tea towel is the perfect thickness (affiliate link) AND it is large so it’s easy to use.
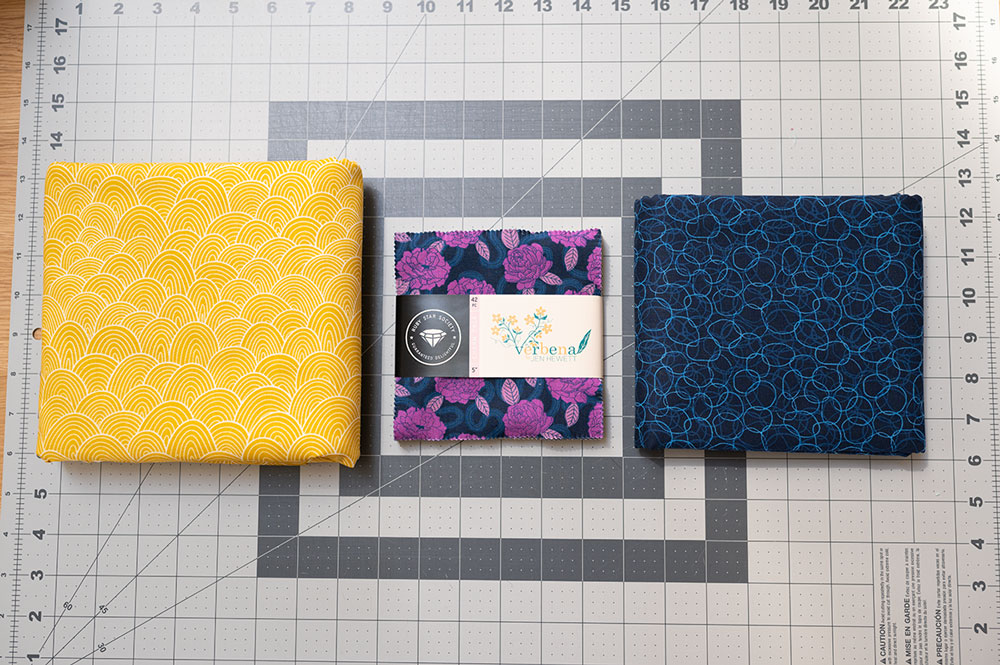
Materials Needed for this DIY zipper tote bag
- 22 – 5″ Squares: 20 will make up the quilted outer shell and 2 will construct the inside pocket.
- 3/4 yard of coordinating fabric: This is for the lining and the straps. About a half yard for the lining, and a 3″ WOF strip for the handles.
- 18″ Nylon zipper: Nylon zippers are safe to sew over with the machine and the best choice for beginners
- Thread: You’ll want both coordinating and contrast thread for the best results
- Quilt Batting: I use fusible batting for most of most of my bag projects because I like the structure it provides, but you can use whatever batting you prefer. A lot of people cobble scraps together for their bag projects.
- Interfacing: a light interfacing is nice for adding structure to straps and the pocket.
- Zipper Pulls are an added decorative element and can be something simple like a ribbon or something fancier you purchase. I’ll show you both options.
Ribbon Zipper Pull Purchased Zipper Pull
Cutting instructions:
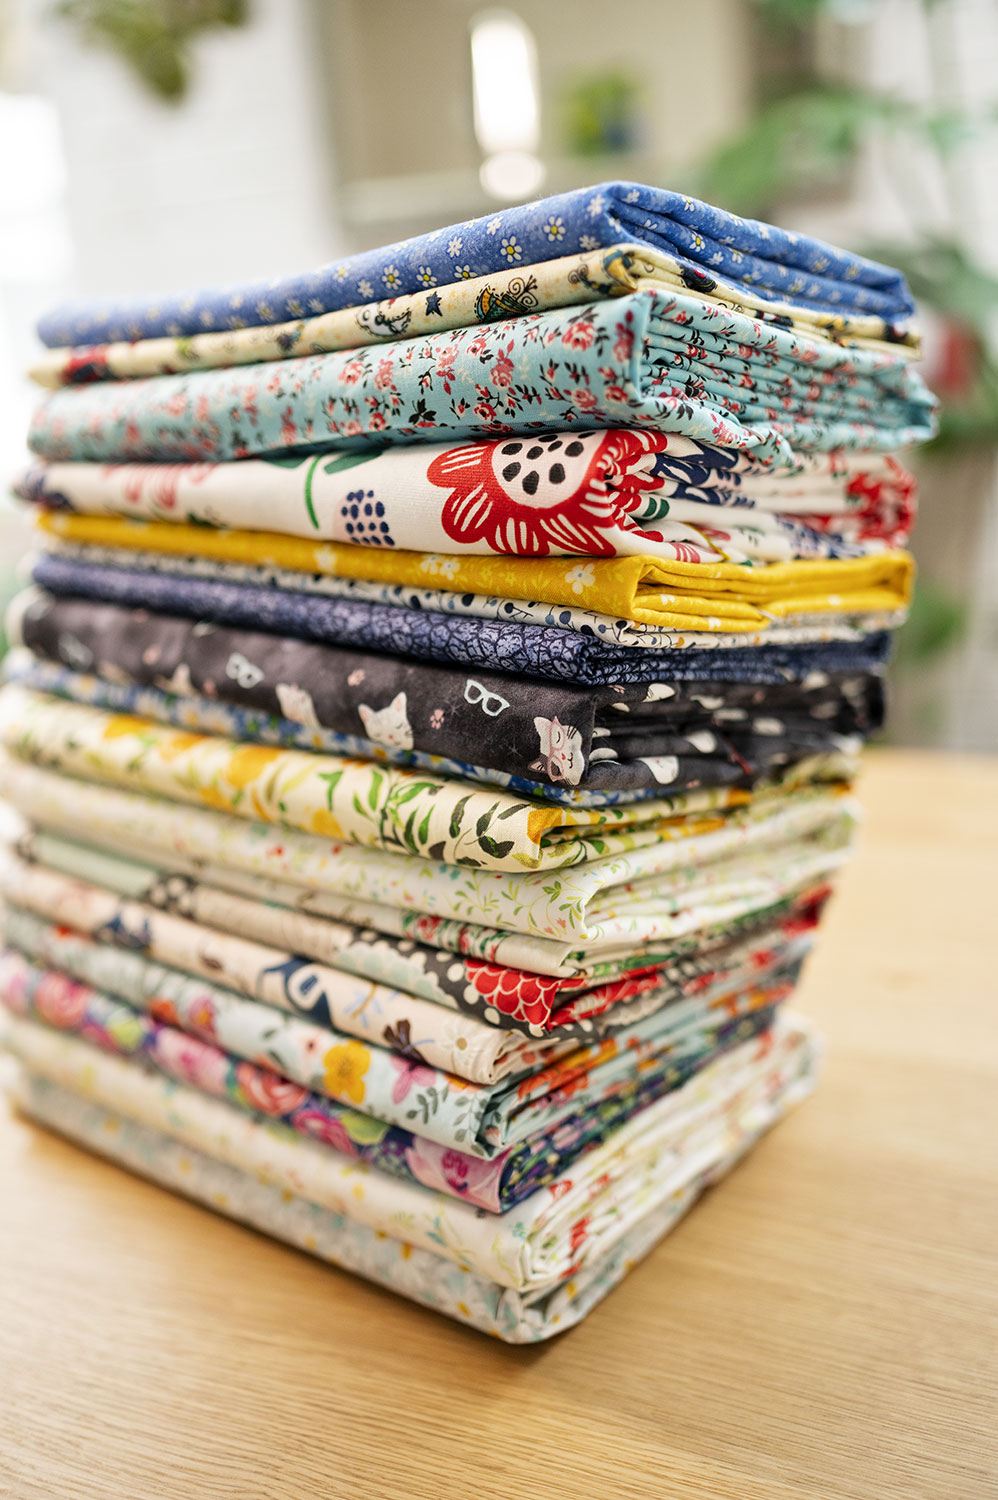
- Outer shell: 20 – 5″ Squares: This project is perfect for precuts! Time to use some of those charm packs (affiliate link) that have been sitting around for a while in your stash, or an inexpensive way to try out a new collection.
- Lining: 2 – 14″ x 14″ Squares: Using something fun and contrasting is always a good choice for a lining. This is cut slightly oversized to allow room to trim exactly to outer shell once done.
- Pocket: 2 – 5″ Squares: I included a small pocket for the inside of the bag which uses 2 – 5″ squares sewn together
- Straps: 1 – WOF 3″ Strip cut from a coordinating fabric. Will cut in half to create two straps measuring about 21″. Make sure the two pieces are even.
**Please note that once the outer shells are quilted, they will need to be trimmed and squared. Things can get a little stretched here and there applying fusible so squaring up is critical. Make sure the outer shells are the same size. They will be roughly 13.5″ square, maybe a little smaller, maybe a little bigger. Once the outer shells are trimmed to size, lay one on top of the stacked lining pieces. Trim away any excess from the lining so that lining and shells are identical.
If you are perfect with your seam allowances and pressing technique, your outer shell will be a perfect 14″ square losing little fabric trimmings. But… maybe you are not an experienced quilter and getting perfect seams is difficult. Heck it’s difficult even for experienced quilt makers. This is why I over cut the lining and trim back the outer shell. You have wiggle room to trim your shells to perfect squares and then trim your lining to the exact size.
I used fabric from the Verbena Collection designed by the Ruby Star Society for my newest bag
Steps to sew your DIY zipper tote bag
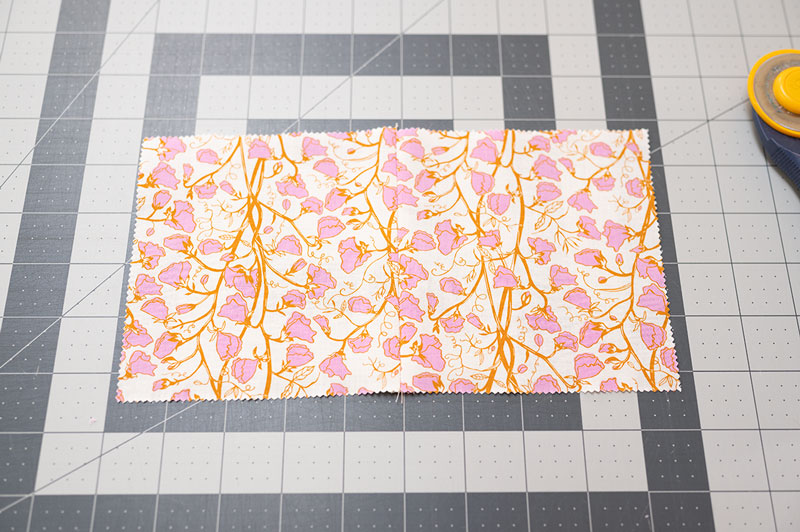
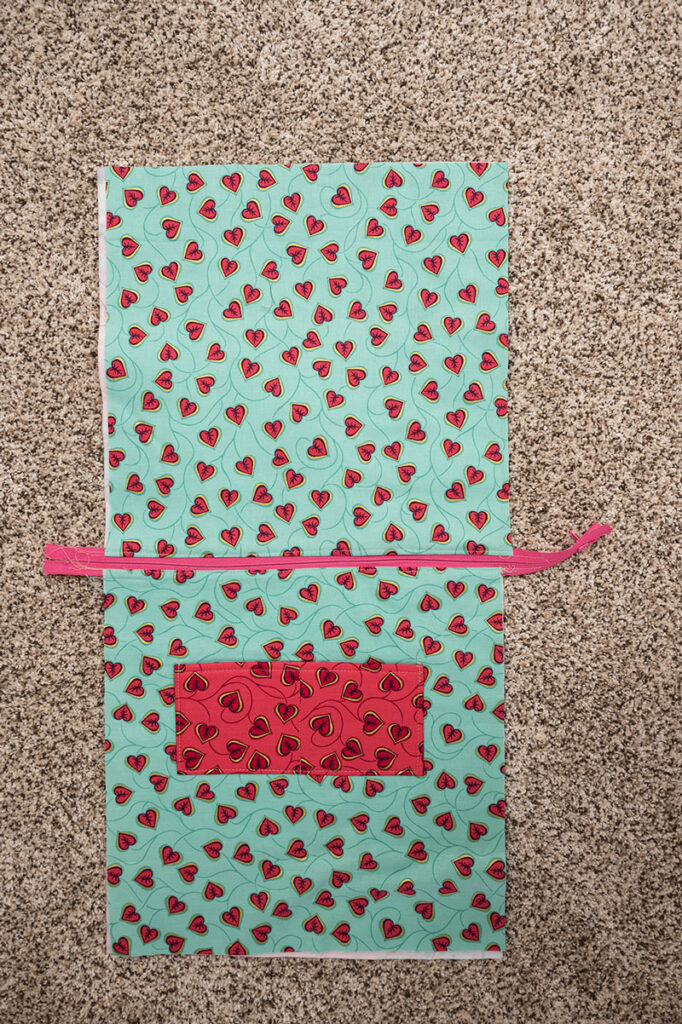
1. Prepare the Pocket:
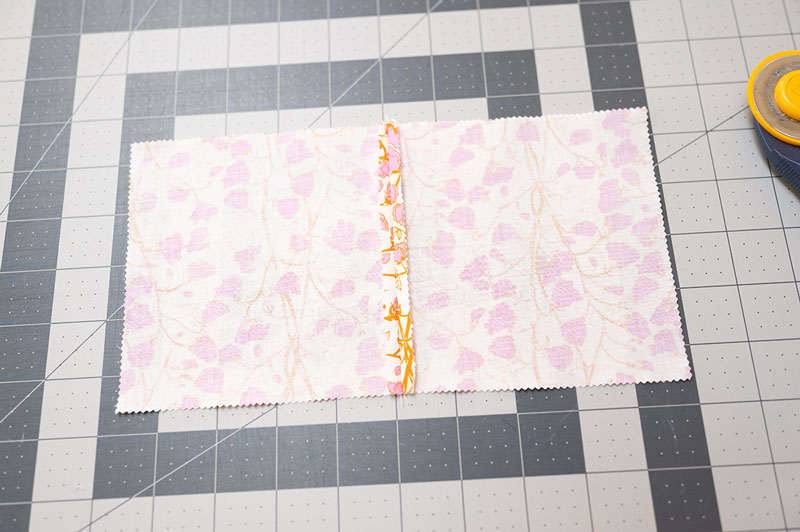
- Sew two matching 5″ squares together and press the seams open.
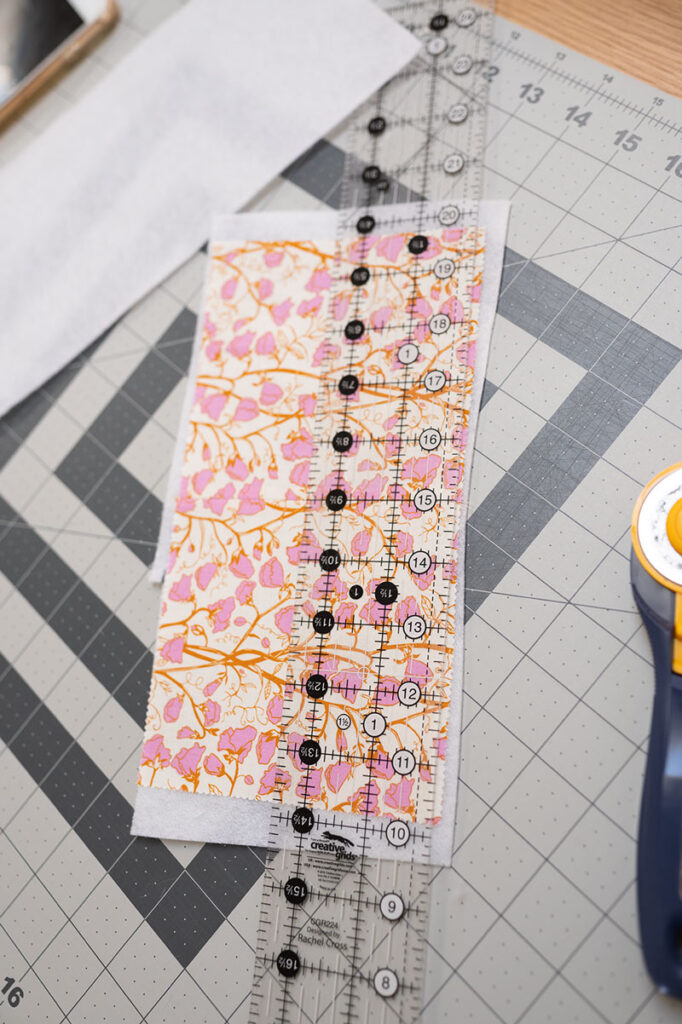
- Apply a fusible interfacing or quilt batting to provide structure
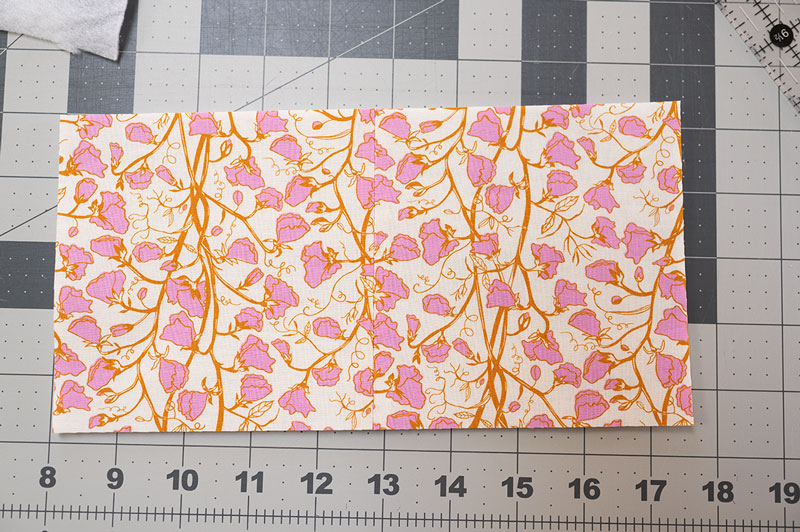
- Square up the rectangle so the sides are straight and even
- Hem the top edge by folding fabric over about a quarter inch and sew in place.
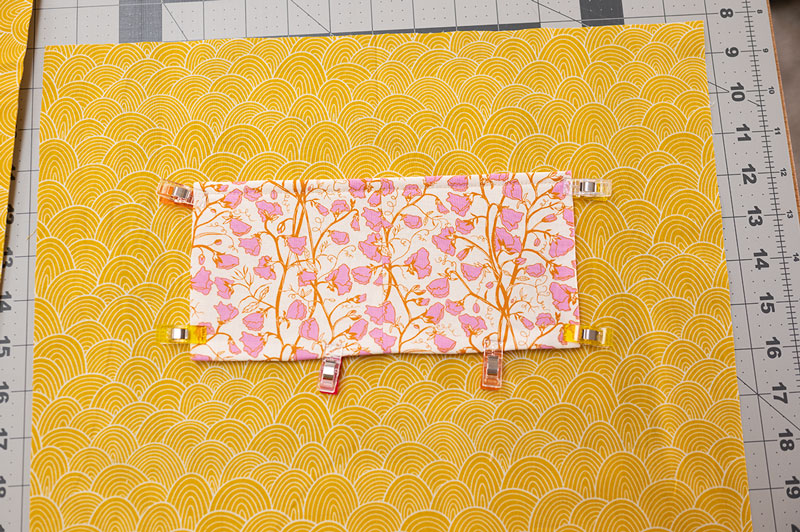
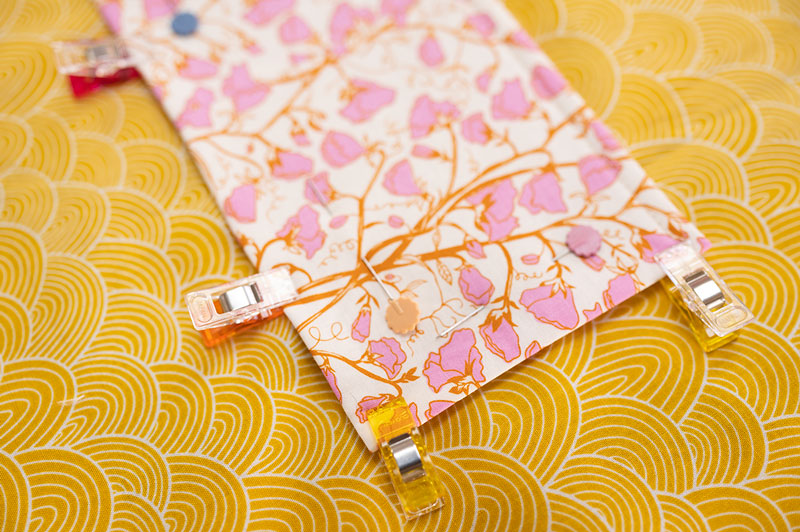
- Press the other 3 sides with about a quarter inch fold, and clip in place. I generally do the east and west sides first then press the bottom edge in place making sure the corners are even. Just clip them. The sewing in place of the last 3 sides takes place when the pocket is sewn in place on a piece of lining fabric.
- Place prepared pocket into place on on lining piece. Pocket should be down about a third of the way from the top and the center seam should be in the center of the fabric with east/west orientation. Lining AND pocket should be right sides UP.
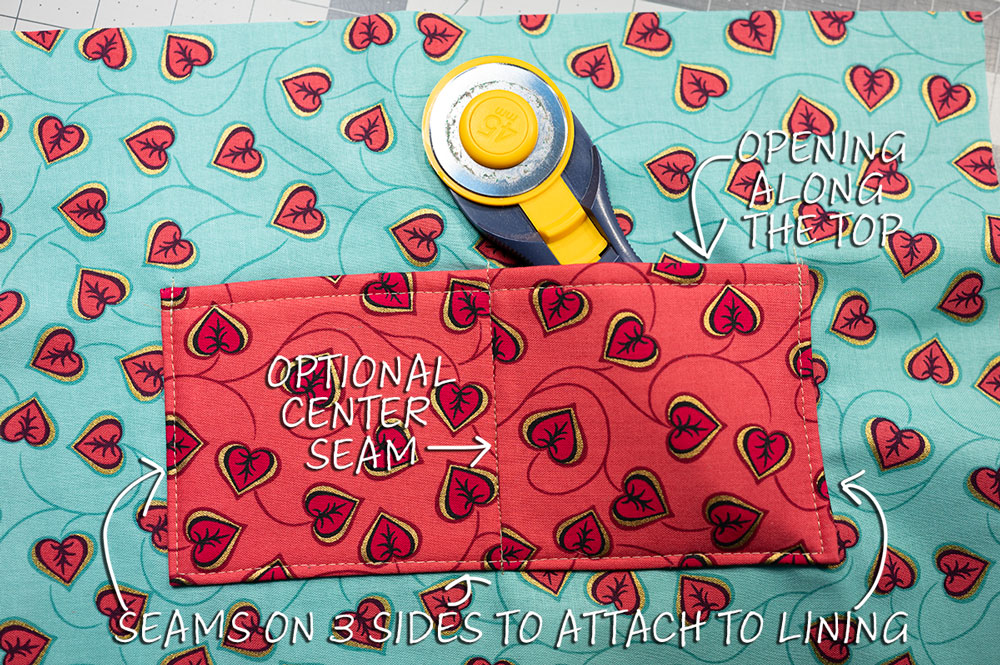
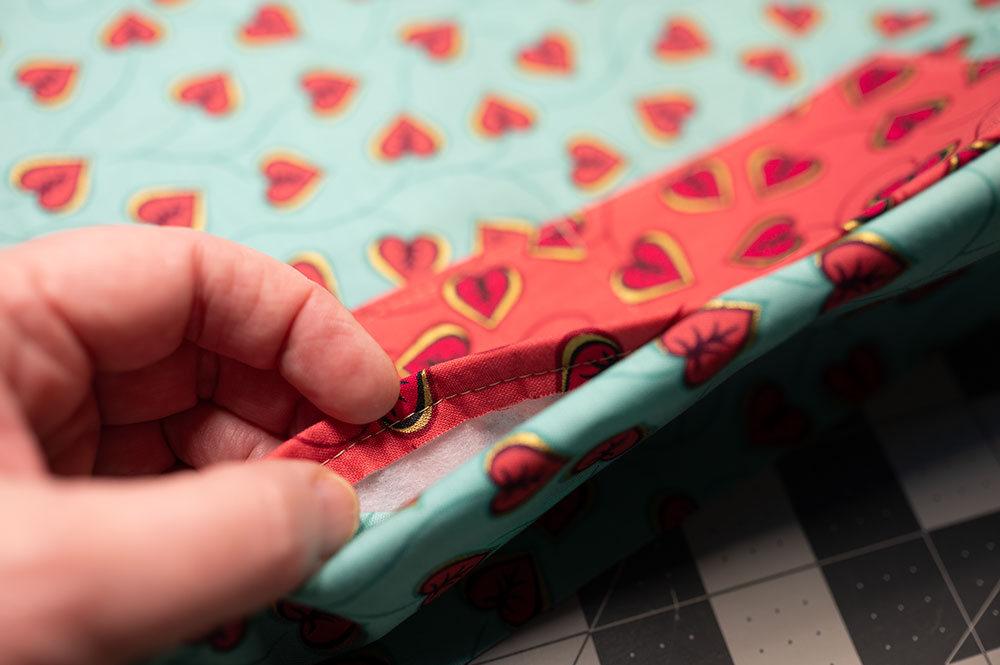
- Pin pocket into place on lining and edge stitch on THREE sides leaving the hemmed top OPEN. Backstitch on top edges to secure.
- Stitch in the ditch along the center seam of the pocket which creates two smaller pockets in one.
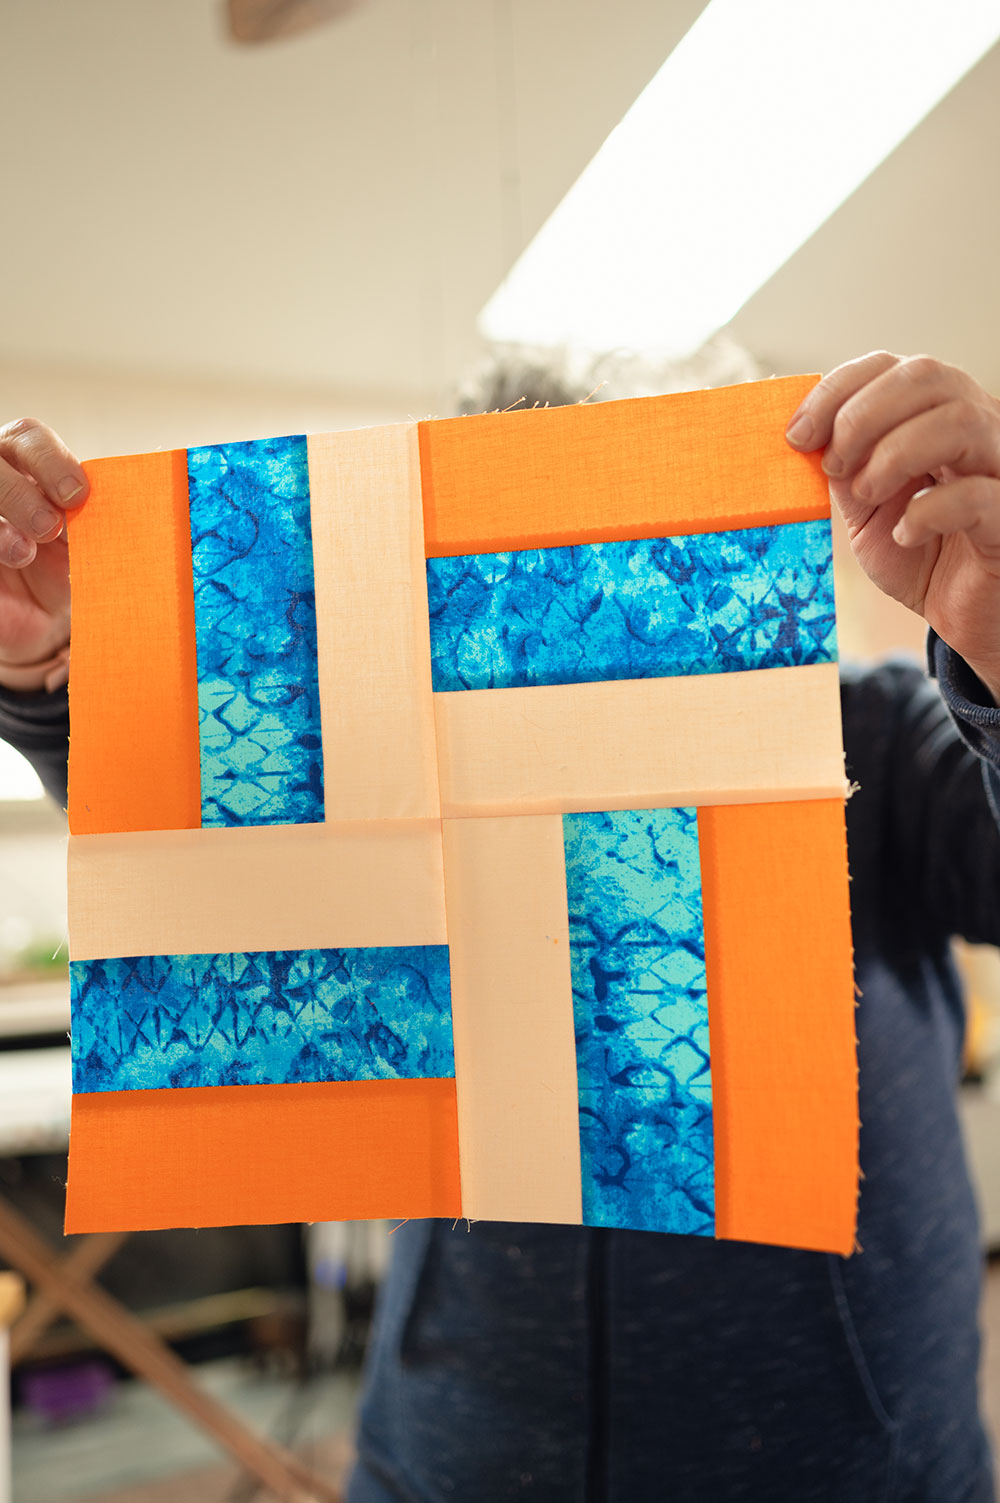
2. Prepare outer shell. Make two panels.
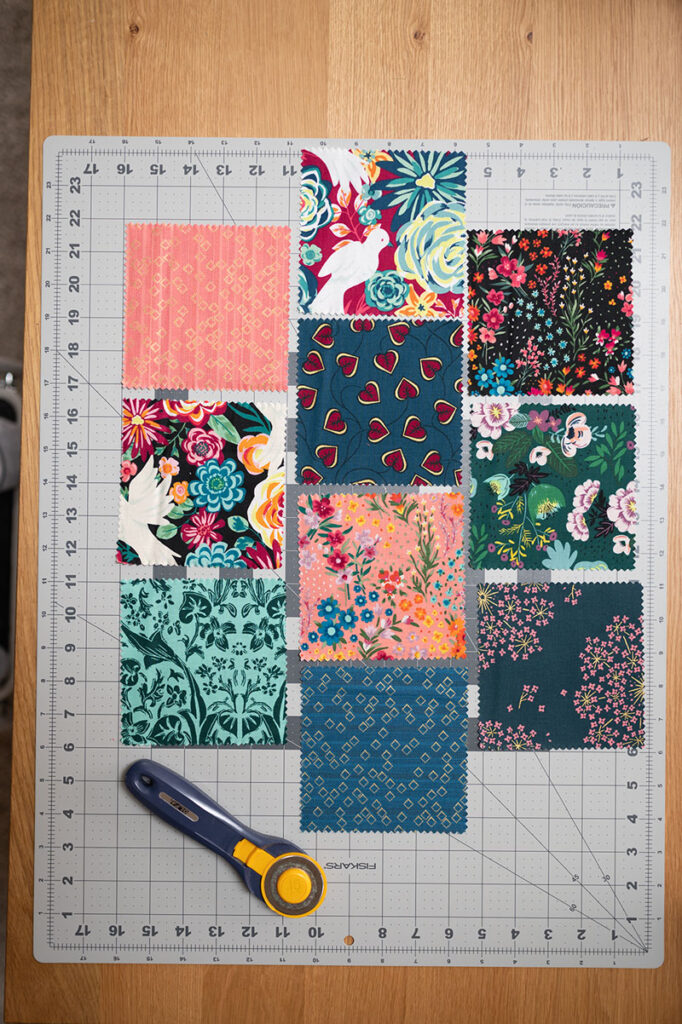
Lay out 10 – 5″ squares and decide on placement. Make 3 columns with 3 on the outside and 4 in the middle. Make TWO panels following these instructions.
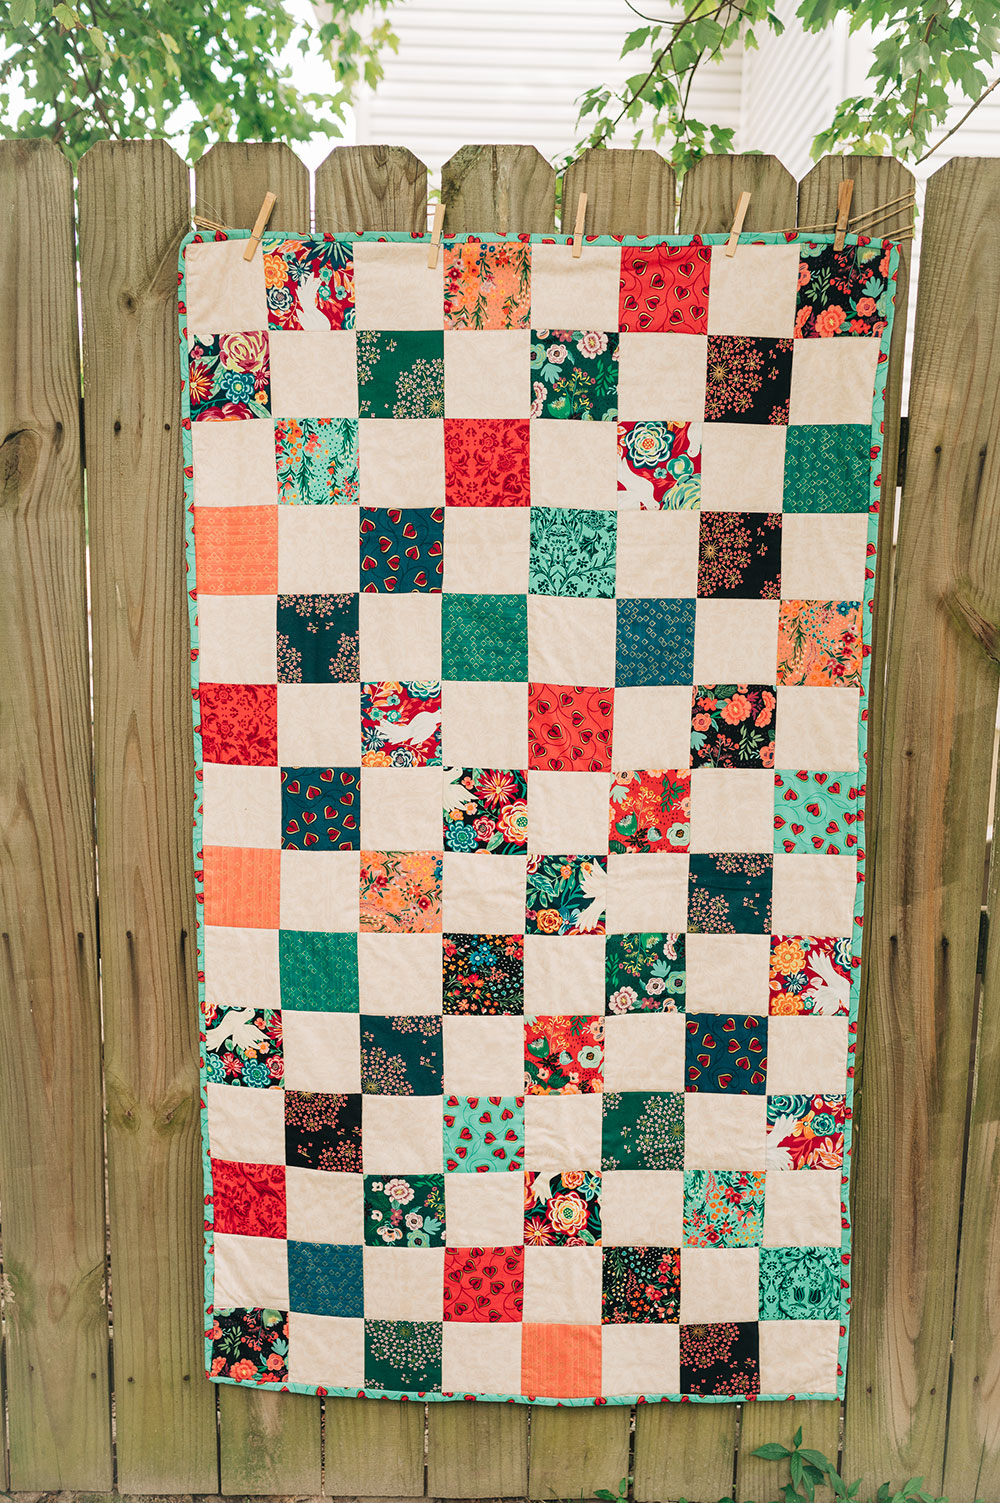
Similar to the Mismatched Patchwork quilt, the seams will be offset.
The fabric placed second from the top in the center column is what I call the spotlight fabric. Whatever goes here becomes the focal point on that panel.
😍
Using quarter inch seams, piece each column of fabric together.
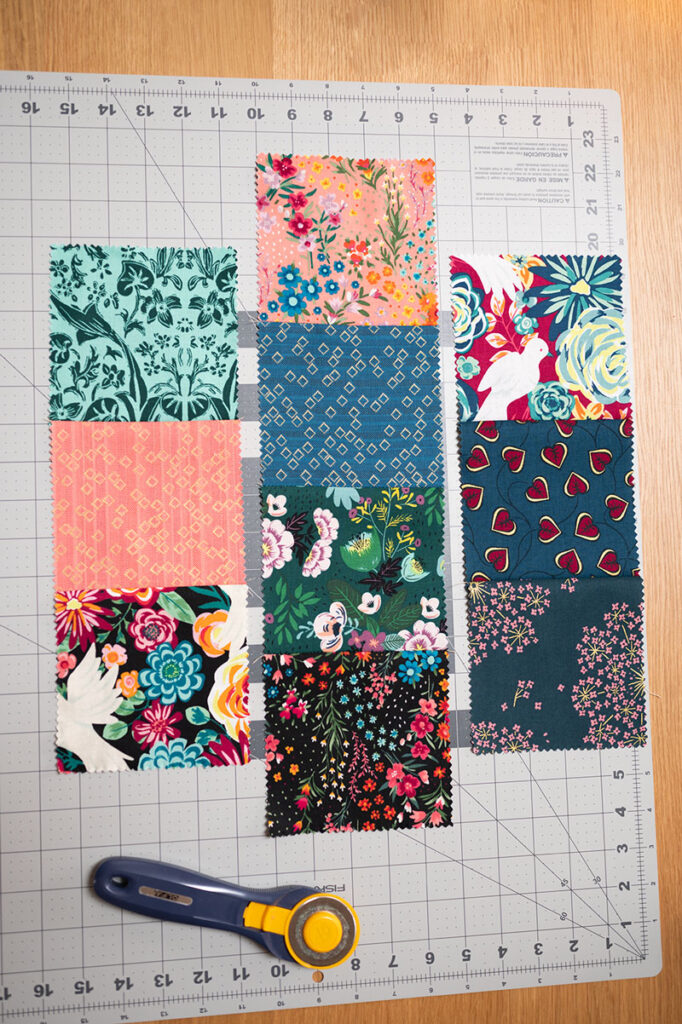
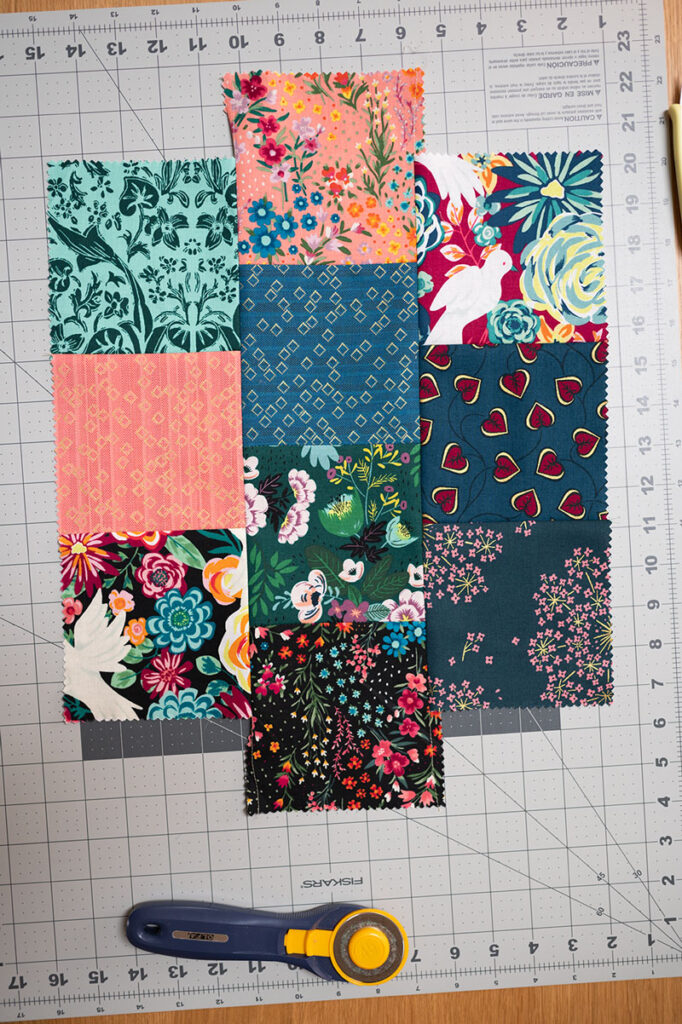
Piece the columns together using quarter inch seams. Remember that we are OFFSETTING seams, and not lining them up. You will have fabric hanging off the top and bottom of the center column. This is correct.
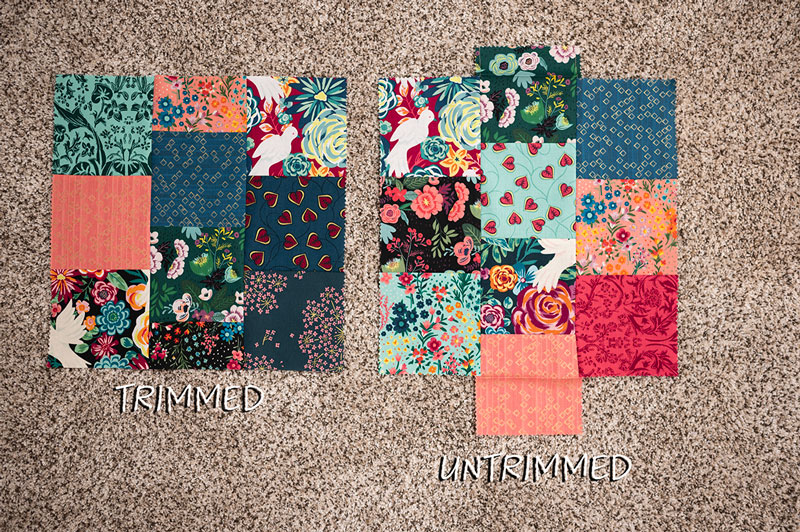
Once the 3 strips are combined, trim to make top and bottom edges even.
Trimmed and untrimmed parts shown together. Once trimmed, quilt fabric as desired. I used fusible quilt batting and a simple lattice pattern.
3. Make and secure the straps
Make the straps:
- Take the 3″ WOF strip and cut in half.
- Press in half folding WS together.
- Open up strip and fold raw edge of one side in to meet the pressed line. Press into place. Do the same to the other side.
- Fold both raw edges in and press into place. At this point, raw edges are encased you have 4 thicknesses of fabric in one strip.
- Edge stitch along the side where the fabric folds meet. This will secure the folded fabric together. I generally use a contrast thread and a longer stitch, like 3mm, for this purpose.
- Make 2 and trim them evenly once pressing and sewing is complete.
Secure the straps:
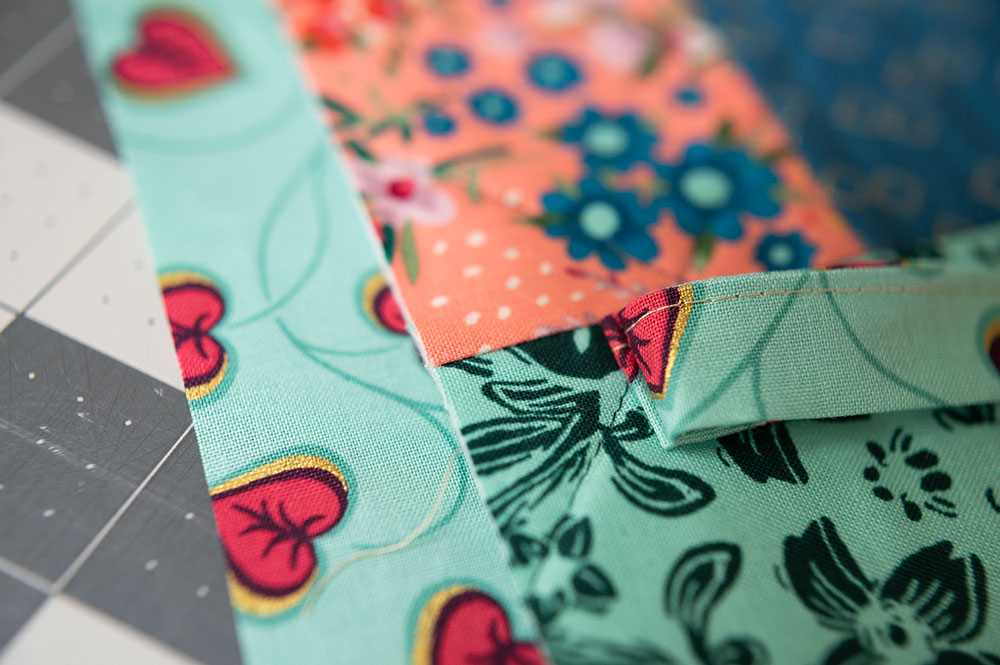
- To secure the straps to the bag, we fold the raw edges over onto themselves so they are encased.
- Press into place and pin to secure
- Do this to all four raw ends
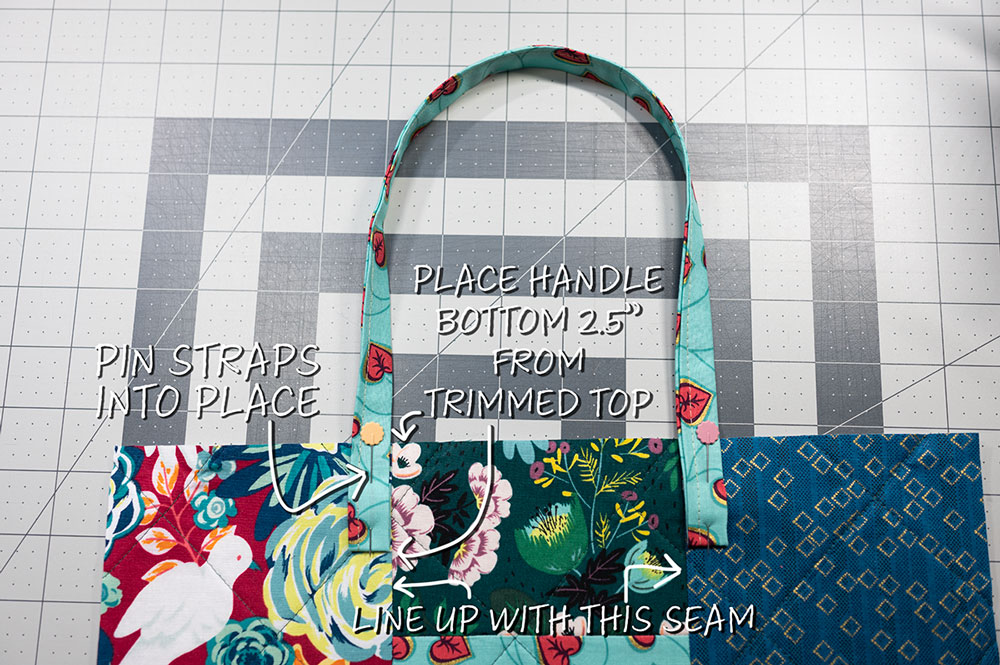
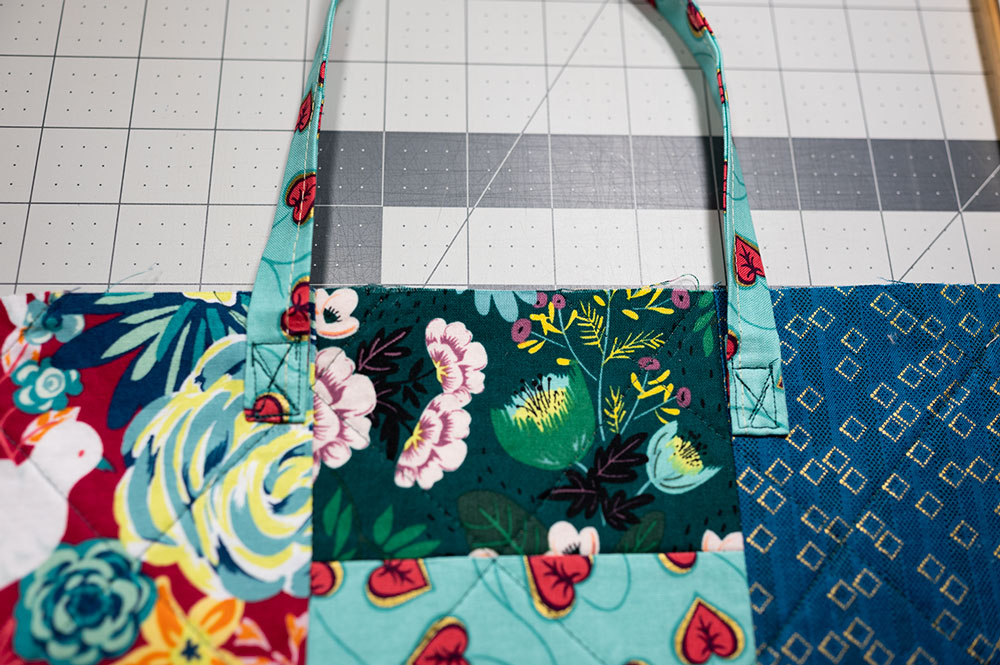
- Align an edge of the strap on either side of the seam running down the center column of the outer shell.
- Place bottom edge of the strap about 2.5″ from the top edge of the outer shell. Pin into place.
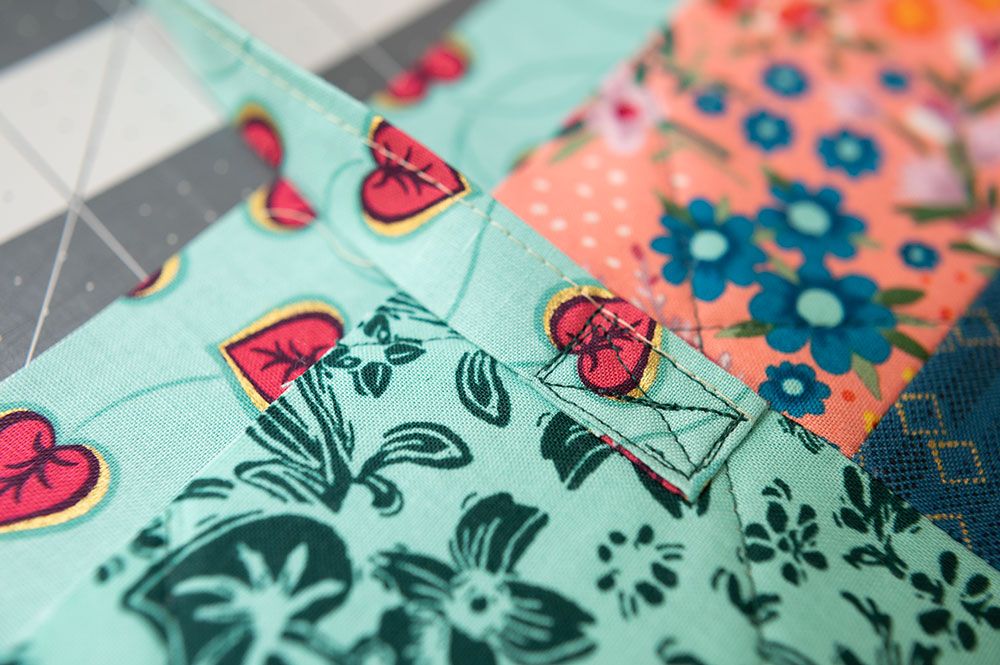
- Using a matching thread, first sew a box shape onto the strap to secure the folded edges into place and to hold the strap on the bag. When the four sides of the box are sewn, follow and X shape in the center of the box to sew the final stitches.
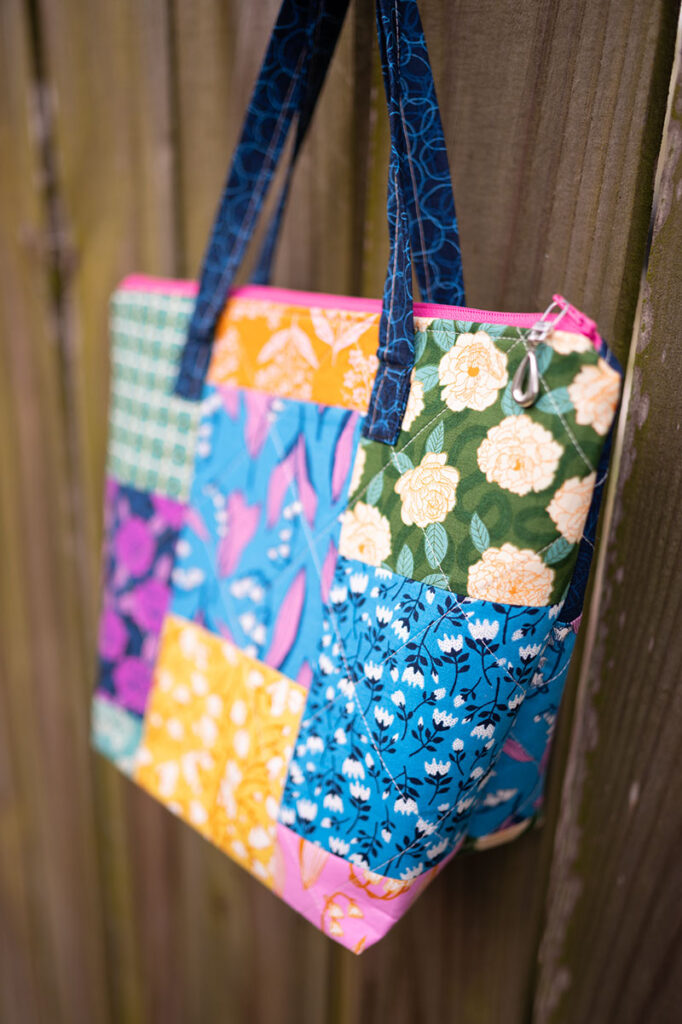
- Please note that on the green bag I used dark thread to show the shape of the box and the X so you could see it, but on the blue bag, I used a dark matching thread so it would be far less obvious.
4. Put in the zipper
I go into detail about how to put a nylon zipper into bags in my post about making a zipper pouch. If you are unsure about how to put zippers into bags, I recommend making that project first. Sew two or three of the smaller zipper pouch projects first to get the hang of the zipper installation. The bonus is that the zipper pouch fits perfectly into the tote bag, so you’ll already have a cute pouch or two to go into your completed tote.
It’s not hard to install zippers, but it’s several steps, and it’s very particular in the way you lay your pieces to get them just right. Including full instructions on zipper installation here make for a long blog post to be even longer. Sewists who are comfortable making zipper bags will already have their favorite method of installation, and newbies will need more instructions. Specifics are omitted here so more advanced sewists can move through the instructions, and beginners who need more assistance can follow the instructions to make the companion zipper pouch first to get the hang of things.
😮💨
Lining side with installed zipper Outer shell side with installed zipper
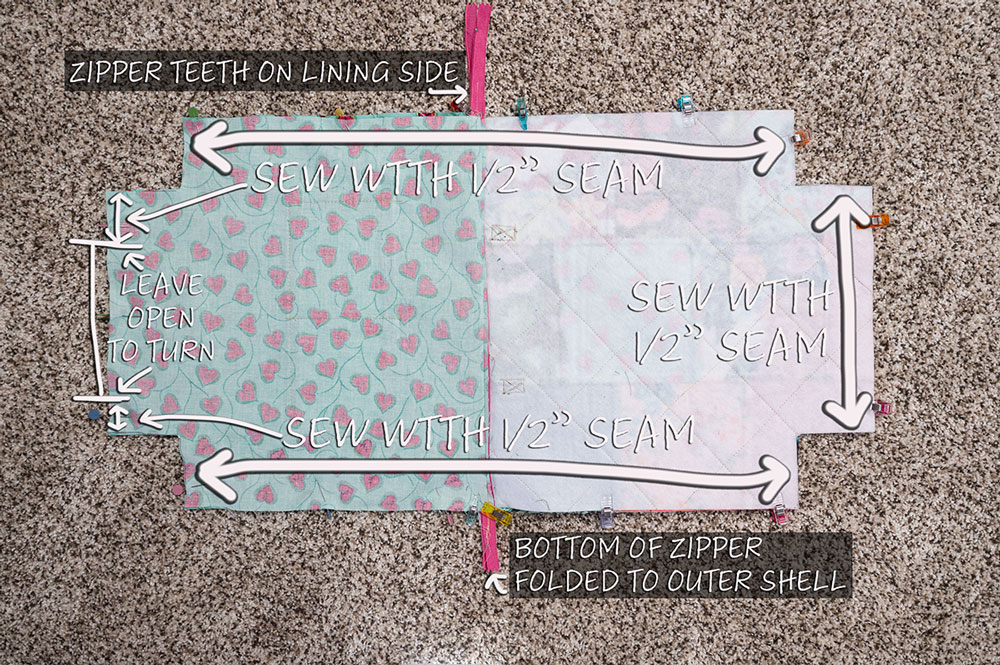
5. Prepare bag for final sewing
First step here is to get everything trimmed to the same size. We over cut the lining in the beginning so there’s plenty to trim back at this point. Lay a completed, trimmed, shell onto the lining pieces and trim to the same size. I find that often it’s difficult to get seam allowances perfect etc. so giving yourself a little leeway in cutting the lining pieces helps. This way you trim the lining to match the outer shell pieces right before putting everything together.
I will again refer you to that post on how to put together the zipper pouch, because it’s the same procedure in terms of meeting the lining to lining and shell to shell remembering to partially unzip the zipper. If you are comfortable with that project, this one will be much easier for you.
Once you put lining to lining and shell to shell, prepare the project for boxing the corners. If you haven’t done this before, refer to this post about how to box corners with a lot more detail.
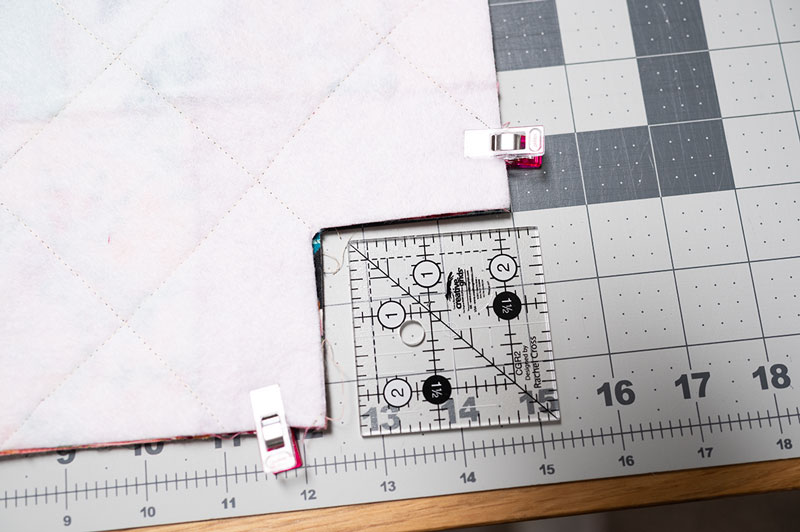
Cut 2.5″ squares from each corner to prepare for boxing. This is a good sized bag and a substantial boxed corner helps it to stand up.
Once the four corners have been cut, sew all the way around with a 1/2″ or 3/8″ seam allowance remembering to leave an opening in the lining for turning out. Also, remember to partially unzip the zipper so you can get through to turn the bag fully.
Once the bag is fully sewn, use a long quilting ruler to trim edges even. This will also trim away the excess zipper tails on the long sides of the project. Use the quarter inch seam line on the ruler to align on the stitch line to ensure an even cut.
Once you’ve turned out, sewn the lining shut, and pressed your DIY zipper tote bag you’ll find you have a VERY lovely bag.
I know I dropped that on you kind of fast, but once you turn your project out, it really comes together fast.
Gently poke out your corners with the point turner. Finger press the seams with the same tool so the outer shell is as opened as possible before pressing. Take your time with this! We don’t want to damage any of the sewing we’ve worked so hard on, and have to re-turn the project and sew damaged seams again. This is not a time to be overly aggressive.
Boxed bottom and mismatched side seams Colorful inside with pocket Contrast straps and specialty zipper pull
Tips and Tricks for Success when sewing a DIY zipper tote bag
- It might sound old fashioned and over used, but the advice about having really good lighting and taking your time is really important when it comes to sewing bags. Bags aren’t necessarily difficult, but they are persnickety. So take your time and work when the light is good.
- Bags are to sewists what socks are to knitters….an excuse to do something a little bit loud and full of personality. Work with dynamic, colorful prints and you’ll always have a bag you’ll love to carry.
- Precuts are made for a fun bag project. A package of 5″ squares, Charm Packs as we call them, are perfect for a simple patchwork project like this. You should have enough product in one charm pack to create two outer shells.
- Consider sewing handles in dark fabric to hide dirt and wear.
- Pick something unexpected and dramatic for your bag lining. Even if you sew an outer shell in a conservative palette, consider something surprising for the inside lining
- I prefer fusible quilt batting for bag projects because it offers a little more structure without being too soft. I find I can straight line quilt it pretty easily on a domestic sewing machine using an all purpose foot.
- If you still feel overwhelmed with making your own bag project, I highly recommend a class from Craftsy called Learn to Sew: Simple Bags taught by Nicole Vasbinder. (affiliate link) It’s the class I took years ago when I wanted to learn how to make my own project bags for knitting. It’s over 2 hours of instruction, and sometimes we need a deep dive like that to understand a project. I know I did! You can buy it as a stand alone course, which is what I suggest to try out the Craftsy format.
- In the meantime, enjoy my video tutorial on constructing this bag. It should answer most of your questions, but the Craftsy class is still a great option if you feel like you need a little more instruction.
🎒

Hi! I’m Pattymac
Sewist, Baker, Quilt Maker