Saw Tooth Star Quilt Pattern
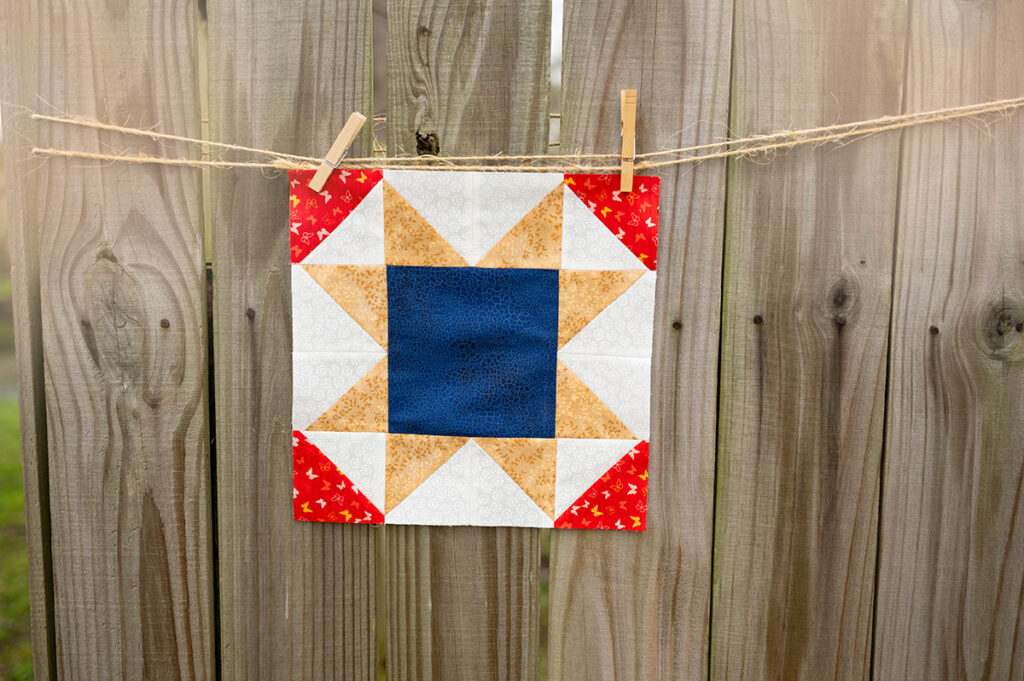
Today’s Quilt block is an old school classic. It’s a quilt block every quilter should know how to cut and piece, and because it’s such a classic, the Sawtooth Star quilt pattern is the first block in the Power of 3 Row Quilt.
If you don’t know, the Power of 3 Row Quilt is being presented with a new block each week. In each post tutorial, you will receive the instructions to make a complete block as well as cutting instructions if you decide you want to make all four blocks to construct the first row of the row quilt. This post presents the Sawtooth Star Quilt Pattern. ⭐
All The Blocks In This Series Are Constructed To Be 12″ Finished Blocks.
Row 1: The Sawtooth Star (today’s block)
Row 2: A Patriot’s Heart
Row 3: The Diamond Block
Row 4: The Classic Pinwheel
Row 5: The Stair Step Block
Where did the Sawtooth Star originate?
Lovely Suzy of Suzy Quilts has a project tutorial to make a whole quilt using only the Sawtooth Star. She shared a little historical information on the block as well. “This block became standardly known as the Sawtooth Star in 1884 when a pattern was published by Farm & Fireside magazine. However, even after 1884, publications were printing this pattern under various names such as Evening Star, Variable Star, Square and Points (super original) and North Star.”
“Sticking with the very common practice of naming a quilt block based on household items and things observed in everyday life in early America, the Sawtooth Star received it’s name from the triangles that are reminiscent of a saw’s cutting edge.”
So it’s been around for a while, and it’s an American classic. There are a couple of ways to construct them. In this tutorial, we will be using the half square triangle version of this classic. I have a pretty thorough half square triangle, or HST, tutorial if you need the information.
What do we need to construct one block?
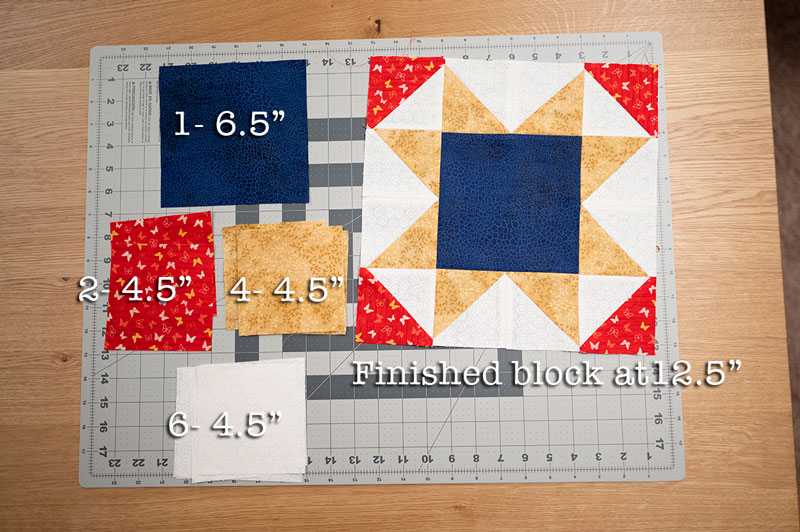
Cutting instructions to make one 12″ Sawtooth Star:
Color A (blue):                          1 - 6.5" square
Color B (red):                           2 - 4.5" squares
Color C (Yellow):                        4 - 4.5" squares
Background color (White):          6 - 4.5" squares
Tools to Make the Sawtooth Star Quilt Pattern:
- Rotary cutter (affiliate link)
- Cutting Mat (affiliate link)
- 6.5″ Creative Grids Square Ruler (affiliate link)
- 4.5″ Creative Grids Square Ruler (affiliate link)
- 3.5″ Creative Grids Square Ruler (affiliate link)
- Pins (affiliate link)
- Wonder clips (affiliate link)
- Pen or Pencil
- Iron (affiliate link)
- Press Mat (affiliate link)
- Sewing machine
- 1/4″ Foot (affiliate link)
Step-by-step tutorial:
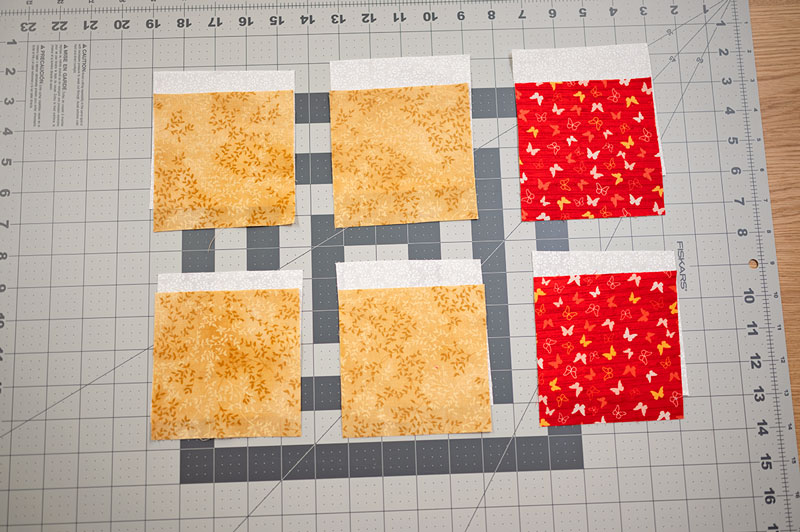
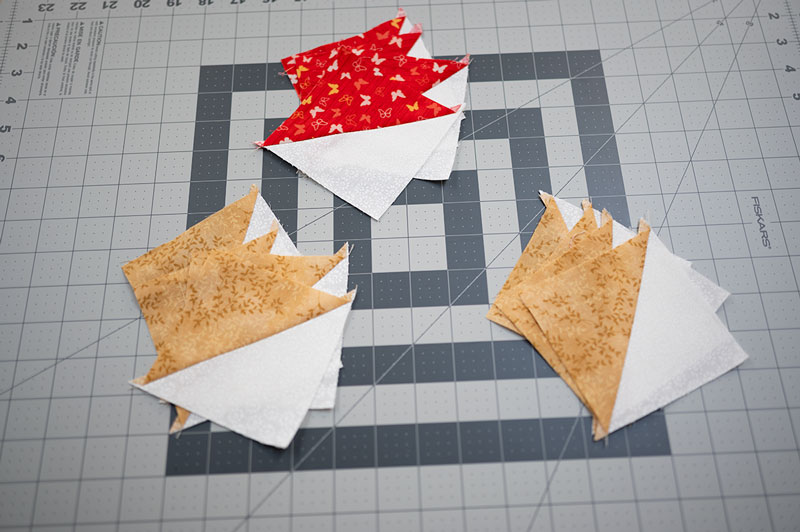
The first step is to put the large, center square to the side and pair the smaller 4.5″ squares with a corresponding white (your choice of background color) square. You will have 6 sets of squares.
Turn the fabrics right sides facing and mark sew lines 1/4″ on either side of the diagonal. Secure fabric as desired. Sew ON the drawn lines. A more complete tutorial on making Half Square Triangle Units is available if you need to review that first.
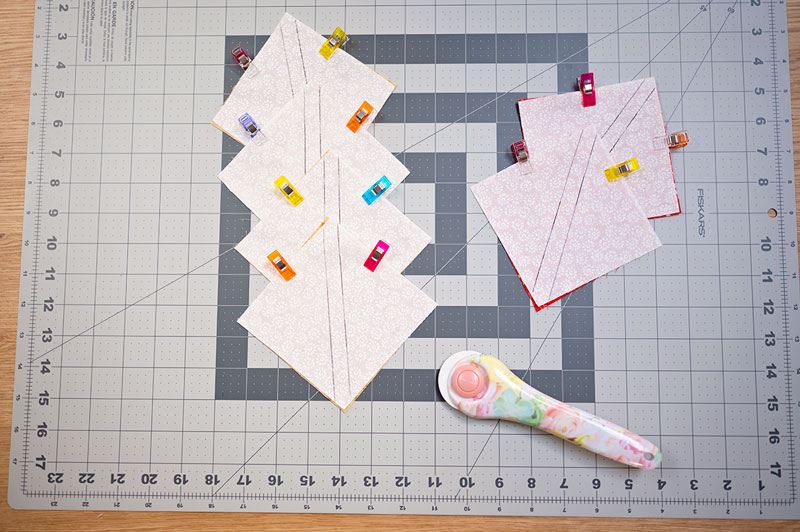
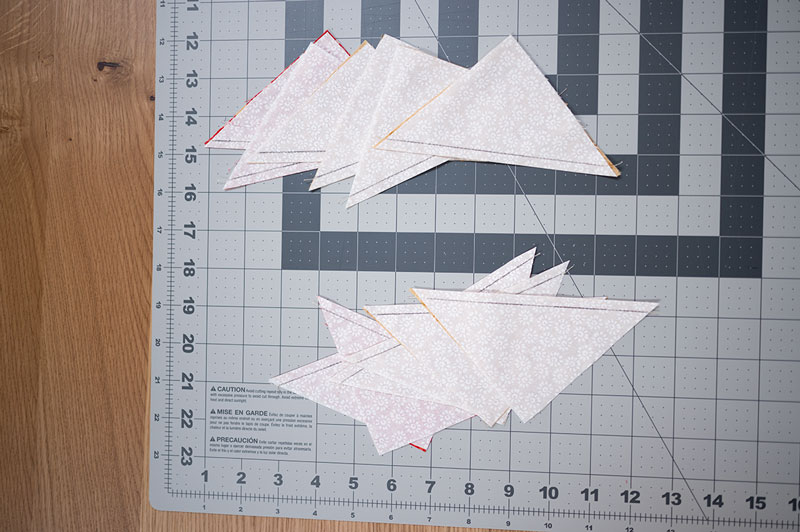
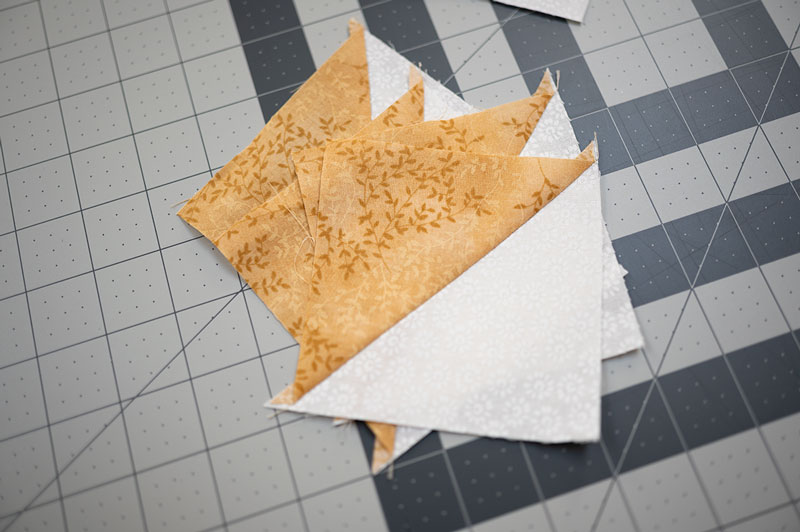
When all 6 units are sewn together, cut each square into 2 triangular units. Cutting is IN BETWEEN the sewn lines.
All the HST units are constructed for the final block at this point.
Take the trimmed units to the pressing station and carefully press each open being careful to press the seams to the dark side.
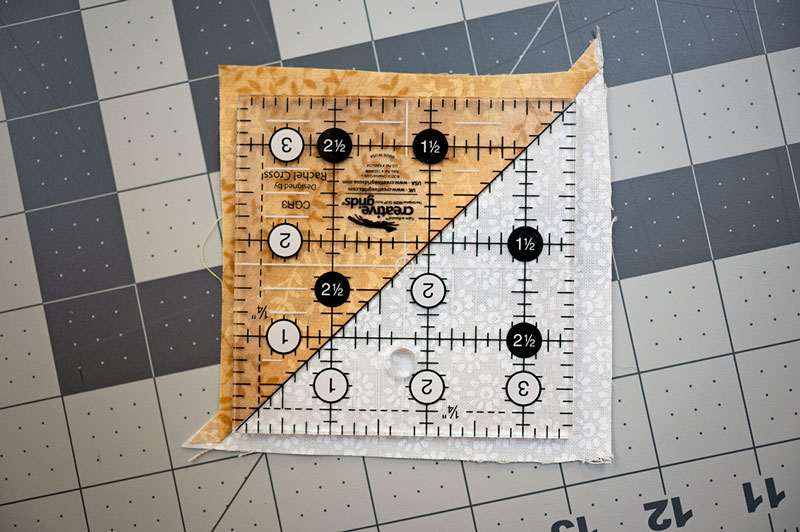
Once the half square triangle units are cut and pressed, trim them to size.
We cut the original squares over size to compensate for the fabric taken up by the seam allowance created during sewing. I recommend cutting the original squares a full inch over sized from the final size called for in the block pattern. It’s easier to manage, and the trimming yields a much nicer finished unit. Line up the diagonal line of the 3.5″ square ruler with the seam and trim all the way around. Trim each unit individually.
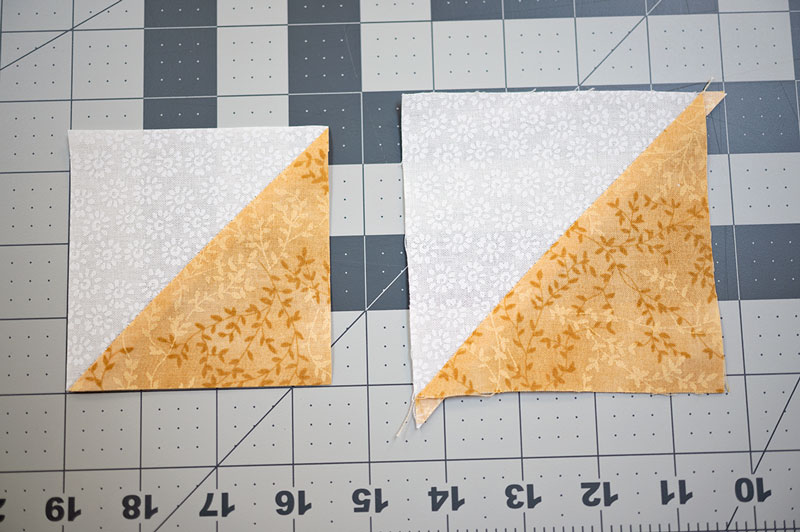
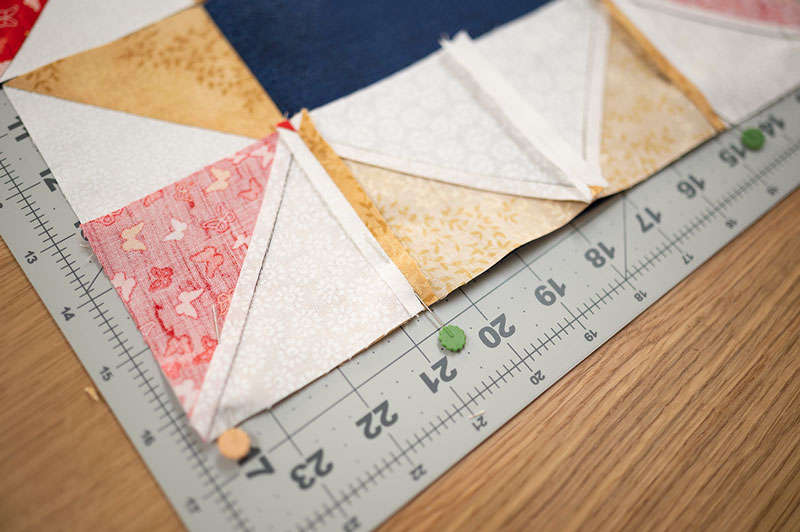
Trimmed vs Untrimmed HST units. The trimmed units are what we use in the block pattern. Once the half square triangles are constructed and pressed, we will trim ALL if them to a final size of 3.5″ square. Once trimmed to the final size, we then piece the block together. Remember, we cut our original squares over sized, piece the units and trim to required size.
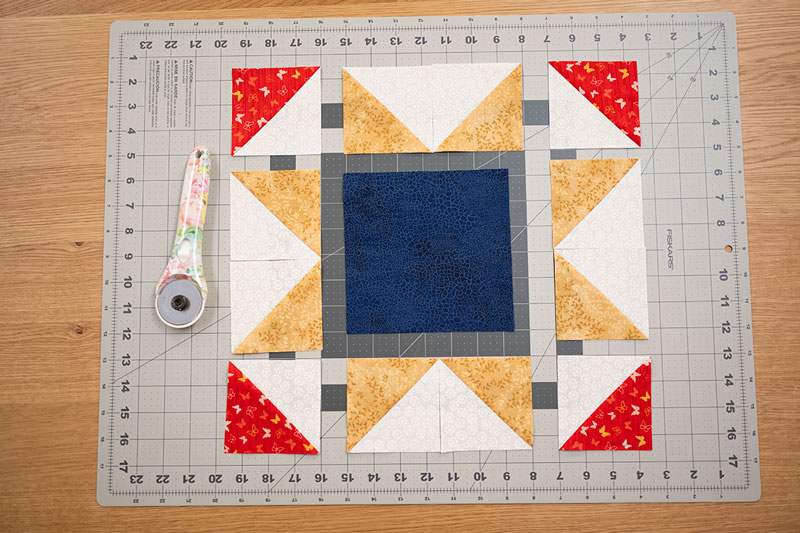
Once all the HST units are trimmed, lay out the block. Carefully putting the individual blocks into place ensures the block is pieced correctly.
TIP** Take a photo prior to piecing units together to be sure they are all situated properly. Review the photo before sewing.
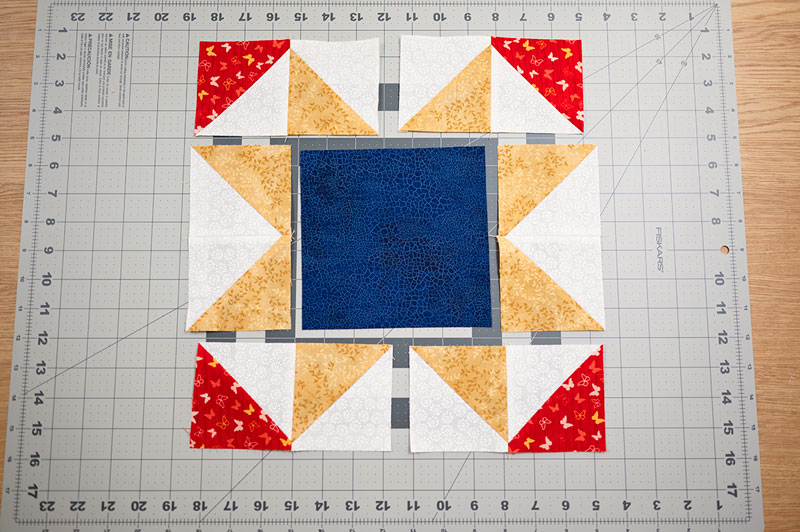
Approach the block as 3 rows. Carefully piece together the inner and outer hst blocks on the top and bottom rows. In the wide middle row, piece the outer hst units together. Be mindful of the seam allowances make sure points line up as expected. Press seams OPEN once sewn in place.
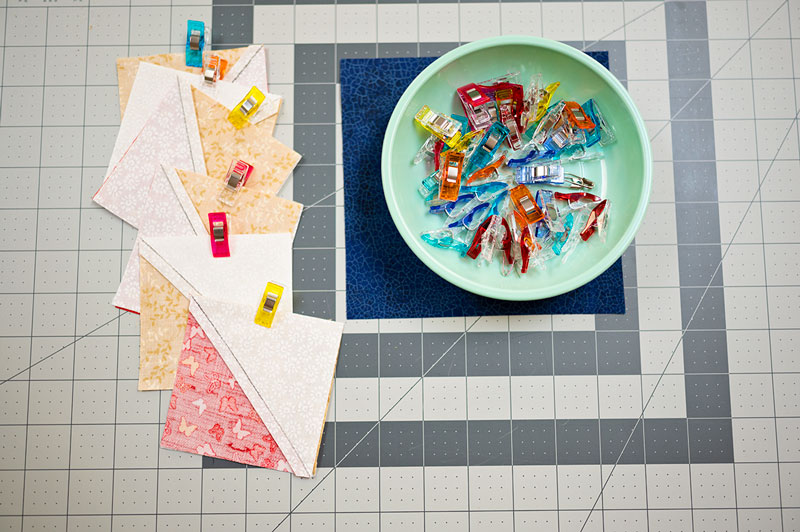
Using Wonder Clips to attach block units together for piecing works well. The clip also serves as a visual queue for what side to sew. Remember to maintain a 1/4″ seam allowance throughout the project.
Now it’s time to complete the 3 rows. Join the top and bottom rows together along the center seam. Join the outer units, the rays of the sun, to the central block. Remember to press seams OPEN once sewn in place.
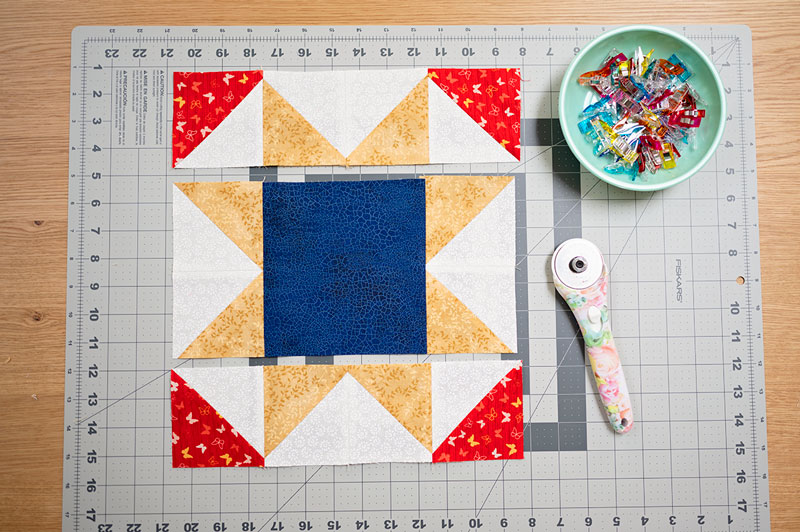

Finally, we attach the top and bottom rows to the central unit. Make sure to align the seams around the center block. For best results, it’s important these seams line up.
This is where pinning becomes important. The pins don’t shift so aligning your seams perfectly and securing will yield the best results. Pin at each spot where it’s critical the seams line up. Ease fabric through the machine as needed.
Notice the seams are pressed open to give a better visual landmark for preserving points and for lining up seams.
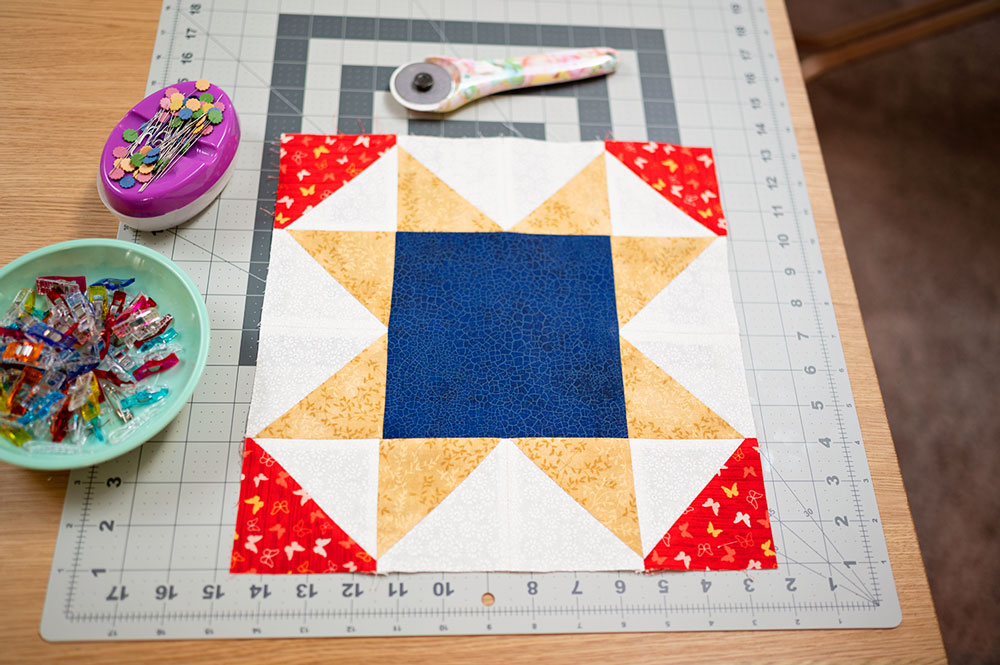
Once the rows are joined, carefully press the seams open for the flattest result and inspect the points. Notice the 1/4″ seam allowances are preserved all the way around the block for perfect placement into the project.
Cutting instructions to complete the first row in the Power of 3 Row Quilt:
Color A (blue):                 4 - 6.5" squares
Color B (red):                  8 - 4.5" squares
Color C (Yellow):              16 - 4.5" squares
Background color (White):      24 - 4.5" squares
Background color (White):       5 - 2.5" x 12.5" sash strips
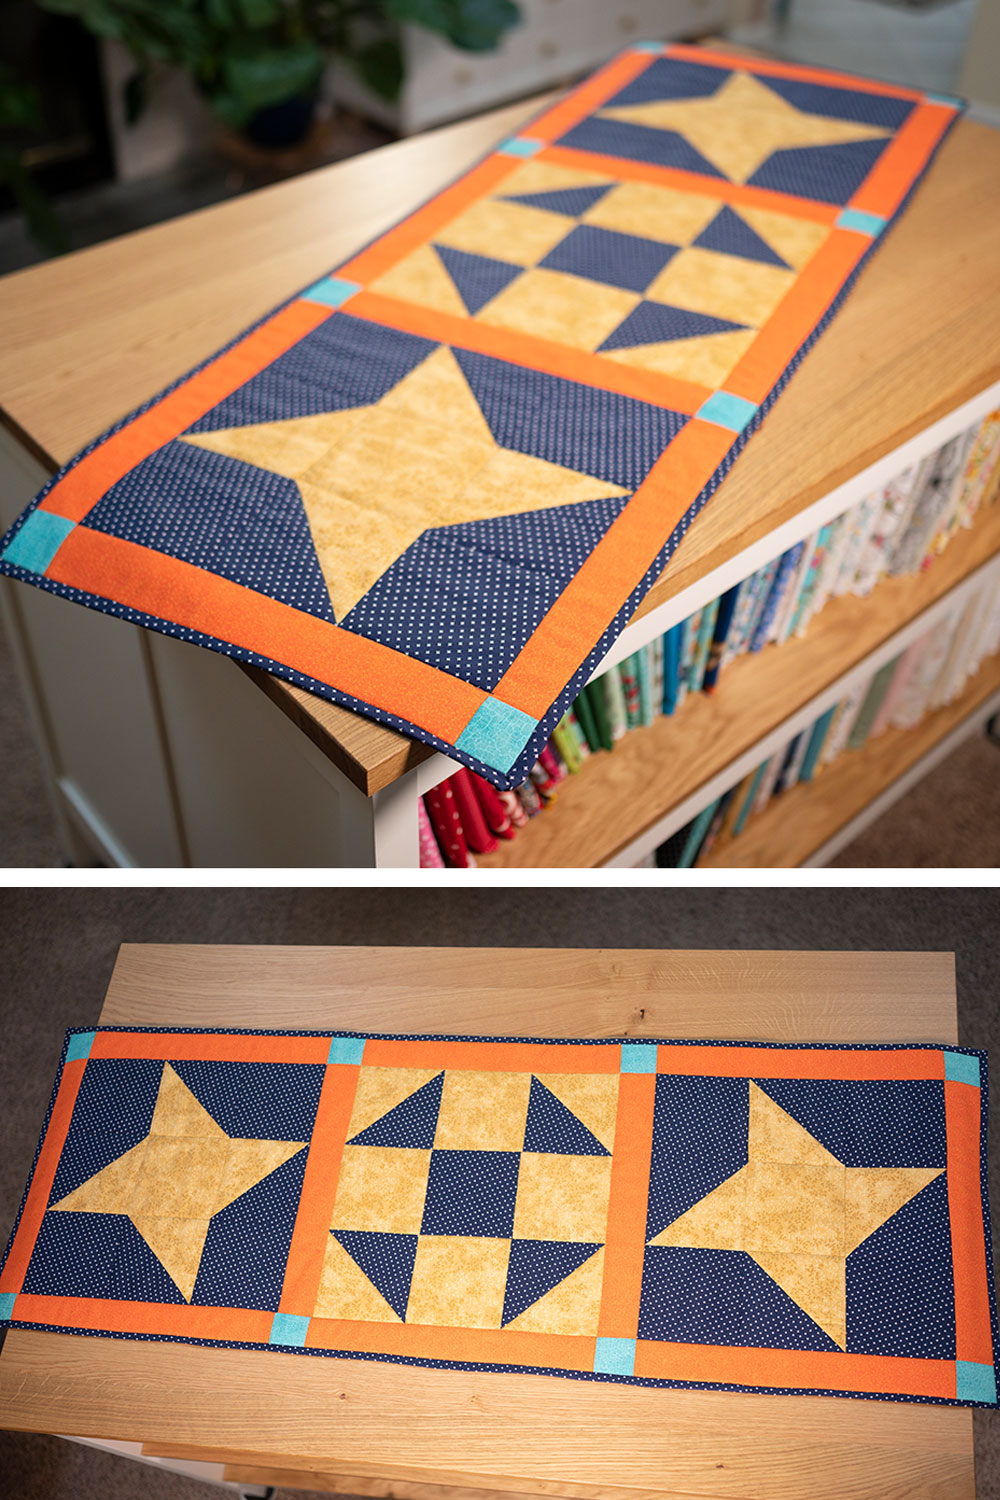
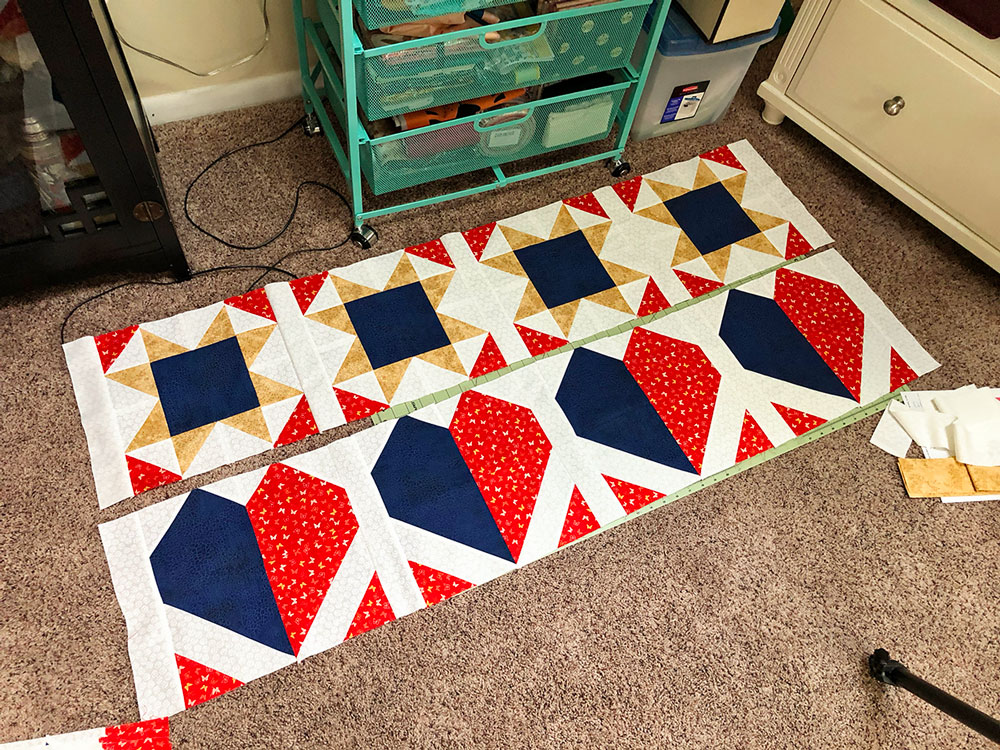
To make the complete row, you need 4 finished 12.5″ blocks and 5 strips of sashing to join the blocks together in one long row. Here’s the first and second rows of the quilt coming together:
Final tips for success:
- Remember that the 1/4″ seam allowance is assumed in all quilt patterns, so do yourself a favor and get a 1/4″ presser foot or carefully mark an accurate line on your sewing machine to keep your seams straight.
- Careful cutting is important for accuracy.
- You may trim your squares any way that works for you, but I find using the square in the exact size needed is the best way to ensure accuracy.
- Spray starch adds body and stability to the fabric, so use as desired.
- Don’t stretch or pull fabric. You don’t want your HST unit to be warped.
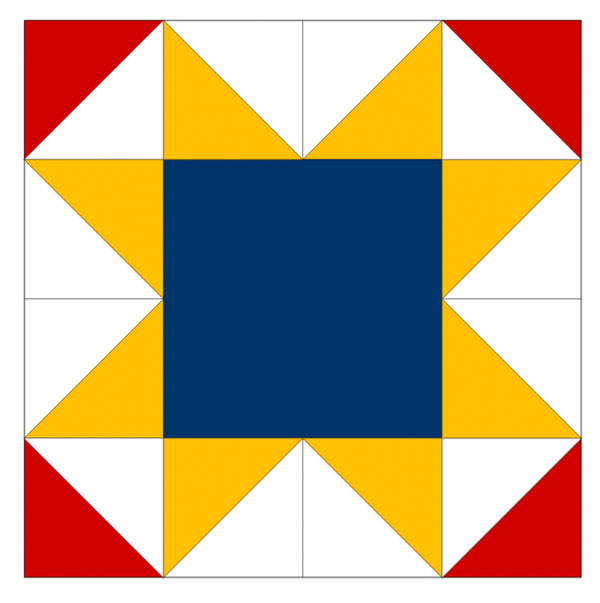
Use this illustration as a pattern to understand the cutting and construction of the Sawtooth Star Quilt Pattern and be looking for a downloadable pattern giving you cutting instructions for multiple sizes.
How to follow along with the Power of 3 Row quilt:
- I’ve designed this quilt around publishing a new block once a week. So you will see the instructions to construct each new block once a week. I’ll share the instructions to make one block as well as all 4 if you wish to construct a full row each week. I recommend making a full row each week and at the end of the 5th week, you have all the rows completed and joined.
- Be sure to subscribe to my youtube channel where we will be making a new block each week and I will also drop in with live check ins to see how everyone is progressing and to answer questions.
- Subscribe to my email list so you receive notification when the new block design publishes.

Hi! I’m Pattymac
Maker, Baker, Quilter
I’m a creative lifestyle blogger living and working in Coastal Virginia. When I’m not mixing or stitching or taking pictures, I’m out exploring the cookbook section of my favorite library or munching my own home baked cookies at a midweek movie matinee.