Flying Geese
Disclosure: This post may contain affiliate links. As an Amazon Associate, I earn from qualifying purchases. 😊
Today’s post will satisfy the unique combination of Bird Nerd and Crafty Quilter. “How can that be?” you might ask. Let’s look at constructing a basic unit of quilting and create Flying Geese 4 at a time!
While there are 1000s and 1000s of different quilt blocks that comprise 1000s of unique quilt designs, it generally boils down to how the designer incorporates a handful of basic quilt units. Some familiar units in quilting are as follow: 4 patches, 9 patches, half square triangles, Y block quilt block and rail fence units among them. Today we are going to discuss how to make Flying Geese units 4 at a time using the Eleanor Burns method. It doesn’t work in all instances, but when it can be used, I believe it generates the most perfect flying geese units with the least amount of stress. As a bonus, this method will create 4 finished units at once!

A perfect 6 x 3 Flying Geese unit

What are the parts of a flying geese unit?
Flying geese are constructed using two fabrics where
- One is the goose
- The other is the sky
So deciding on which is which before you cut anything is important.
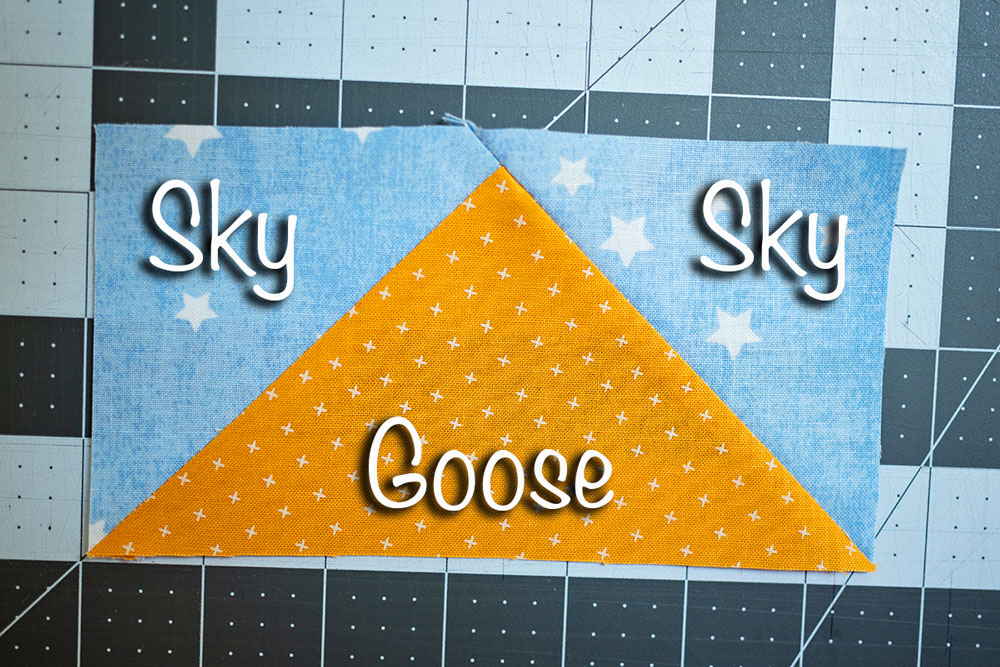
There are several methods for constructing flying geese units, but in this tutorial we are going to focus on the Eleanor Burns method of making them. Specifically this demo will feature the 6 x 3 flying geese unit.

Decide on your sky and goose fabric first.
- Cut the sky fabric 9″ square
- Cut the goose fabric 7.5″ square
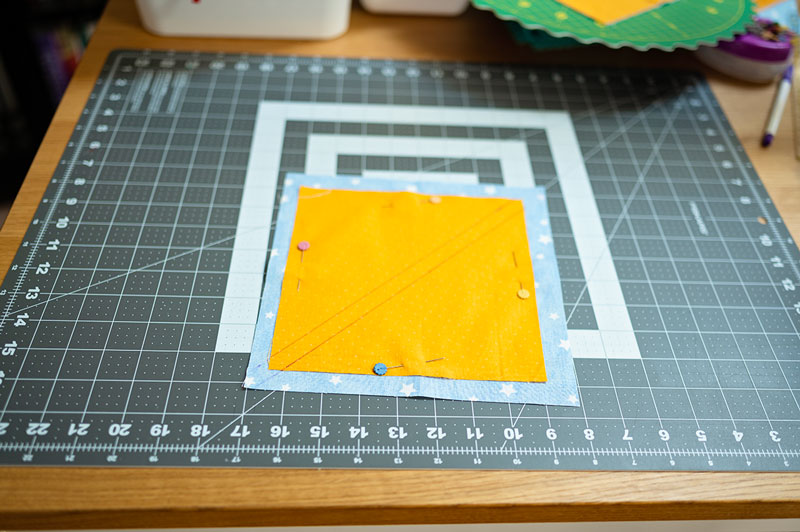
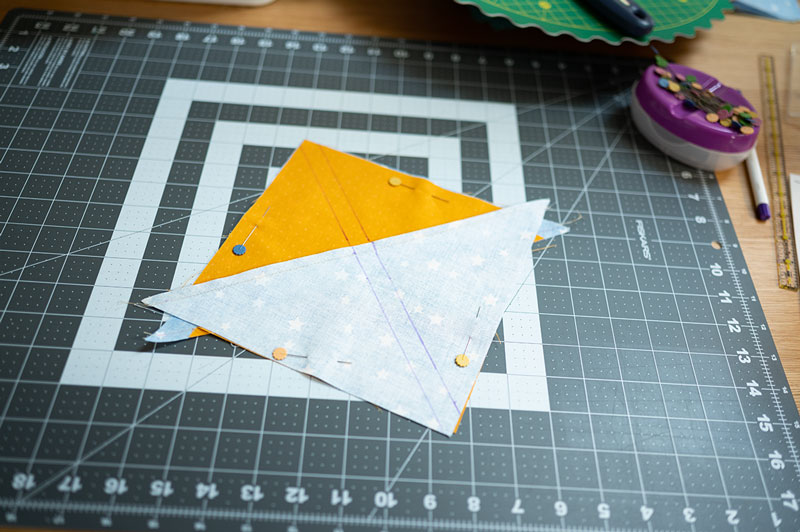
Place fabrics right sides facing with the smaller square centered.
- This part of the process is very much like making a half square triangle unit. I mark my sewing lines 1/2″ apart and sew on the lines.
- Secure the fabric together by pinning. I pin on all four sides of the smaller square to keep it all together.
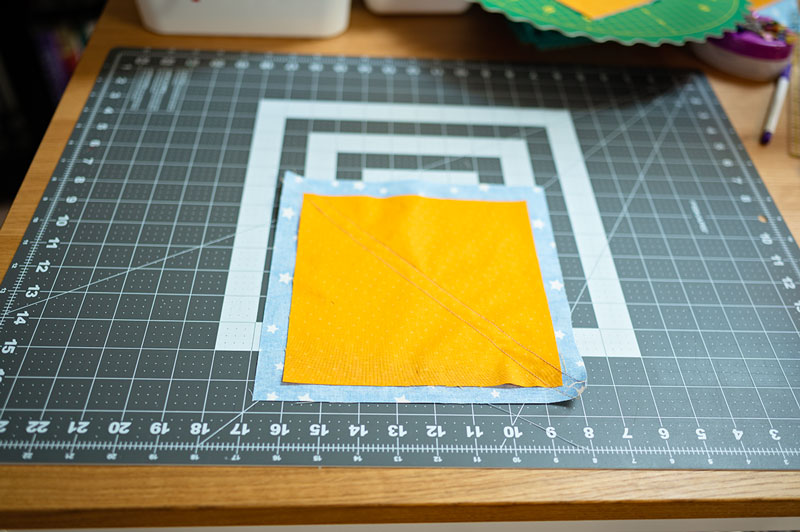
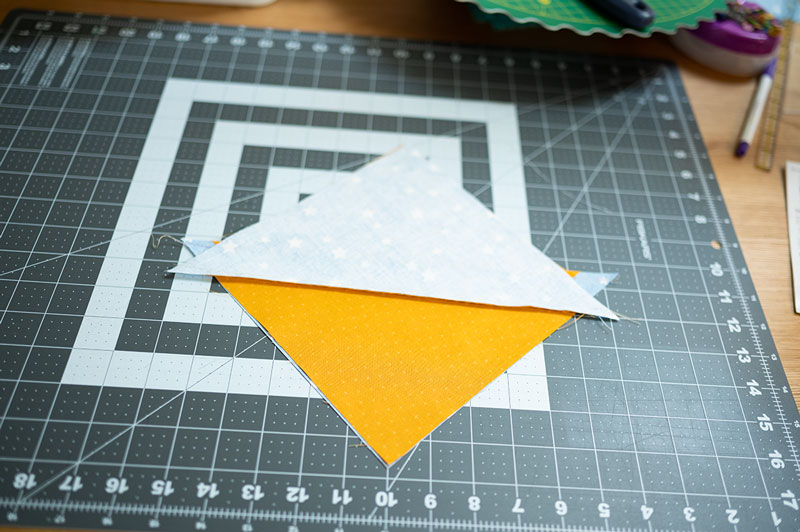
Fabric squares are now sewn together.
To set the stitches, press the fabric before cutting.
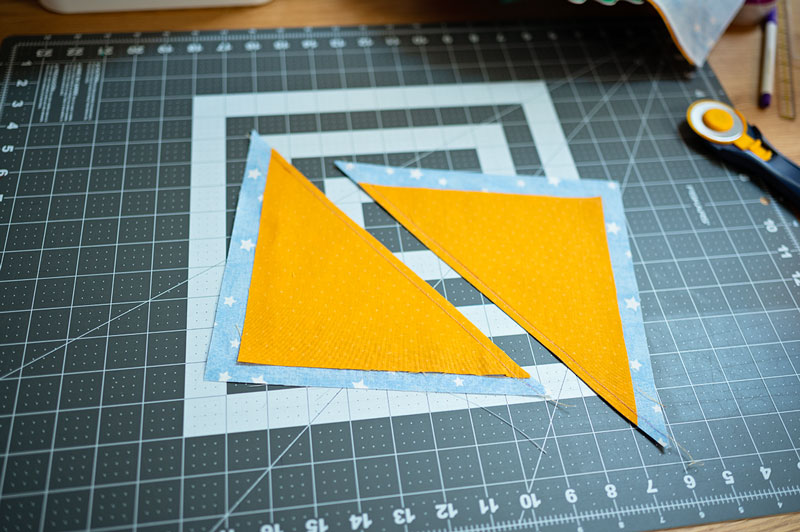
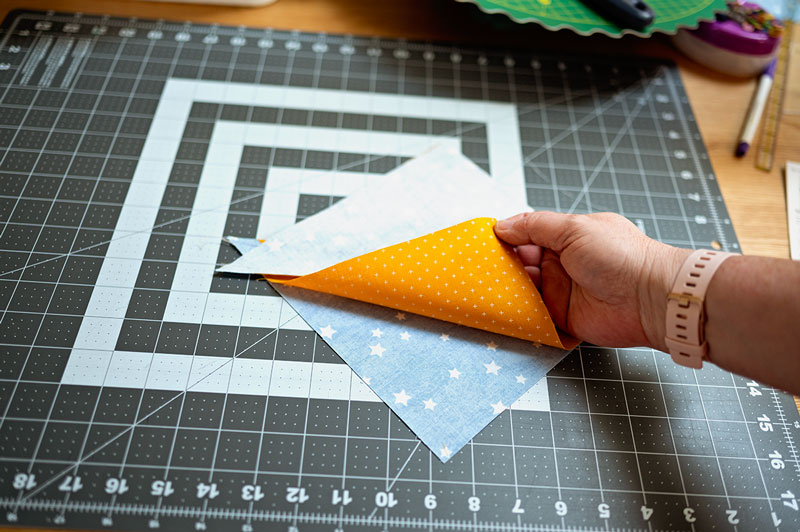
Cut in between the stitch lines
Carefully cutting in between stitch lines will yield two funny looking triangle blocks.
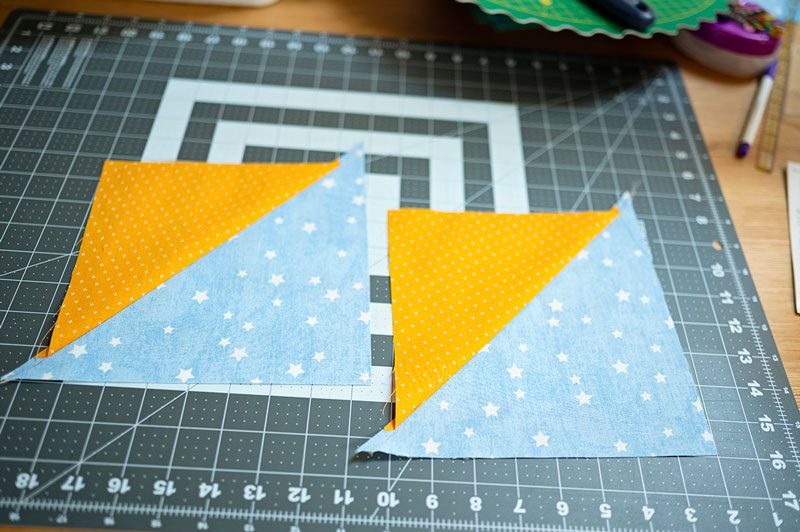
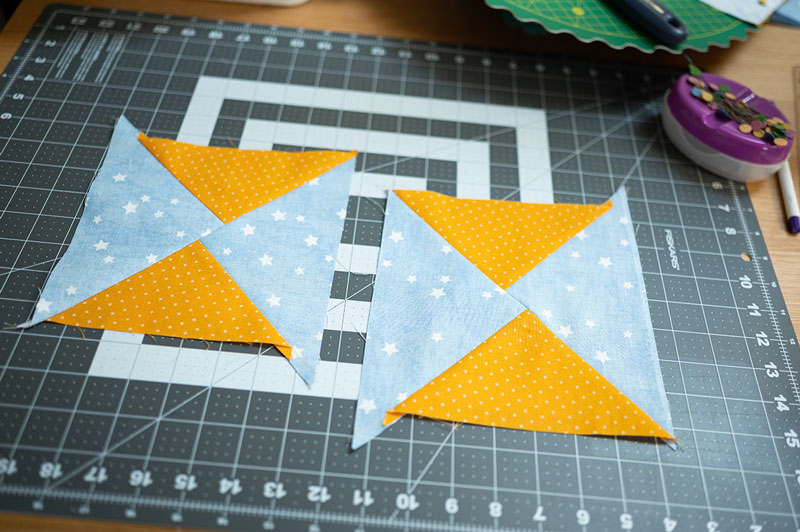
Press blocks
- Take the two units to the iron and press open to reveal two wonky looking HST units.
- Press seam allowance toward the sky block, or in other words, press to the larger side.
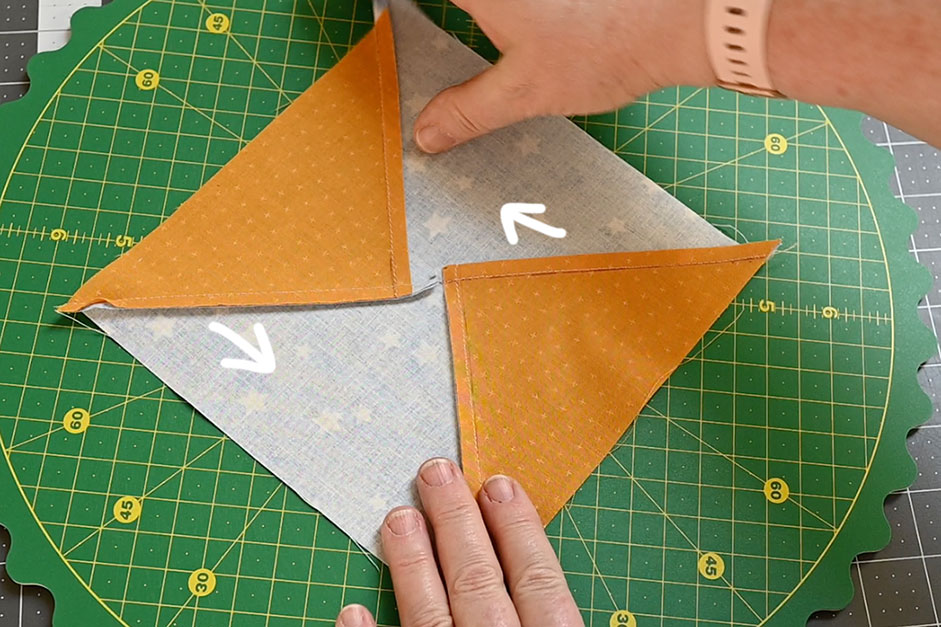
Place the two wonky HST units right sides together.
The main thing in this step is to be sure the EDGES line up and that the opposite fabrics are touching.
Making sure the geese and sky parts are touching is a very important step in setting up the flying geese.
- Notice the opposite fabrics are touching.
- Also notice the perimeter of the squares are lined up all the way around
- You’ll feel like you’re doing something wrong at this step in the flying geese construction because the center seams are wonky.
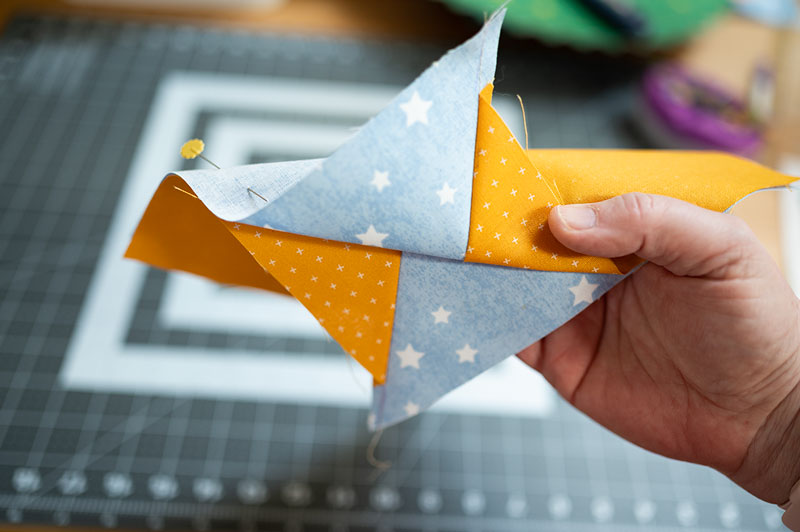

Play close attention to the offset center seams!
This is correct. It looks funny and it will feel like you’re doing something wrong. You’re not. This is the correct setup for the next step in constructing flying geese as Eleanor Burns recommends.
Now we repeat what we did in the beginning.
- Secure the wonky HST units, center seams offset, with pins on all four sides.
- Draw two sewing lines, 1/2″ apart and sew on those lines.
- This part of the process is exactly what we did in the beginning in terms of making two more odd HSTs.
Jumping ahead in our process:
Once the unit has been sewn together, cut apart, press, and two odd looking square units are revealed.
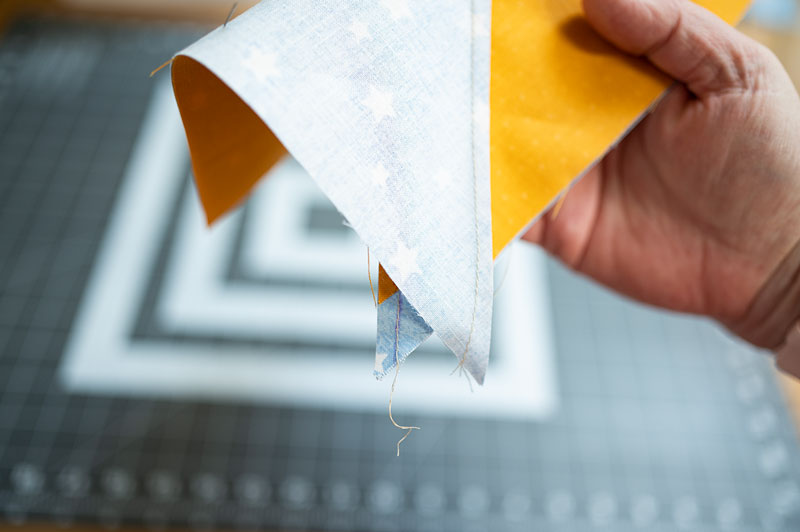
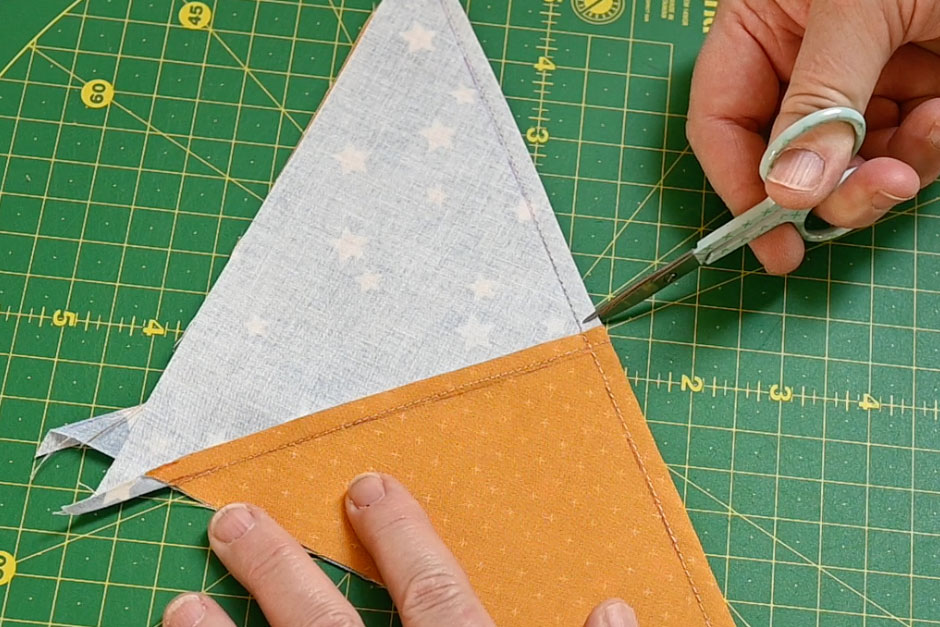
There is a bit of a trick to get the blocks to lay flat, so let me show you what’s happening on the back.

Snip the seam on the sky side 
Press seams in opposite directions
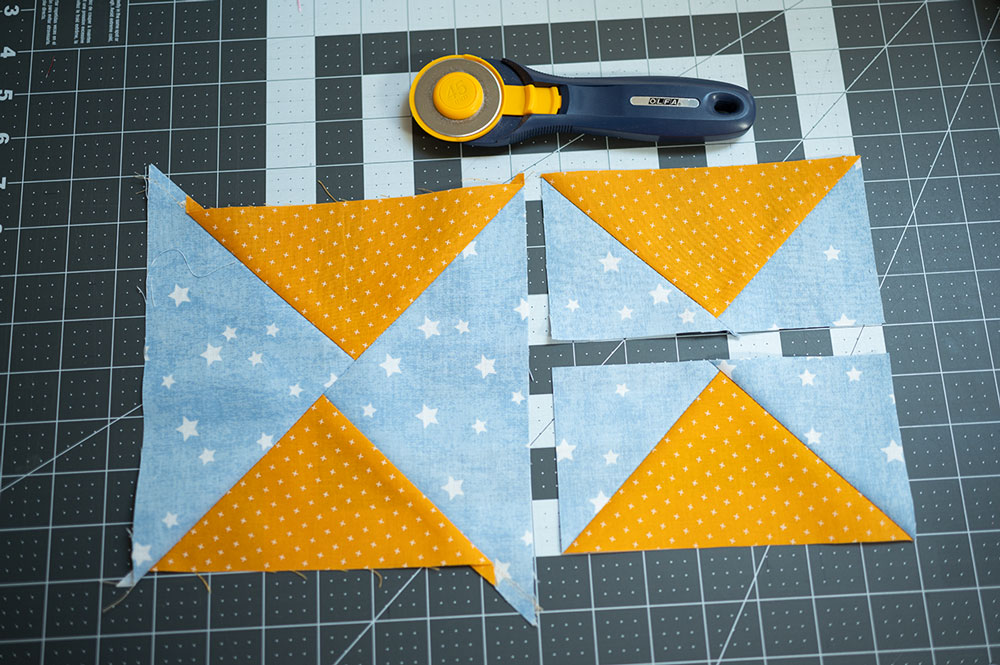
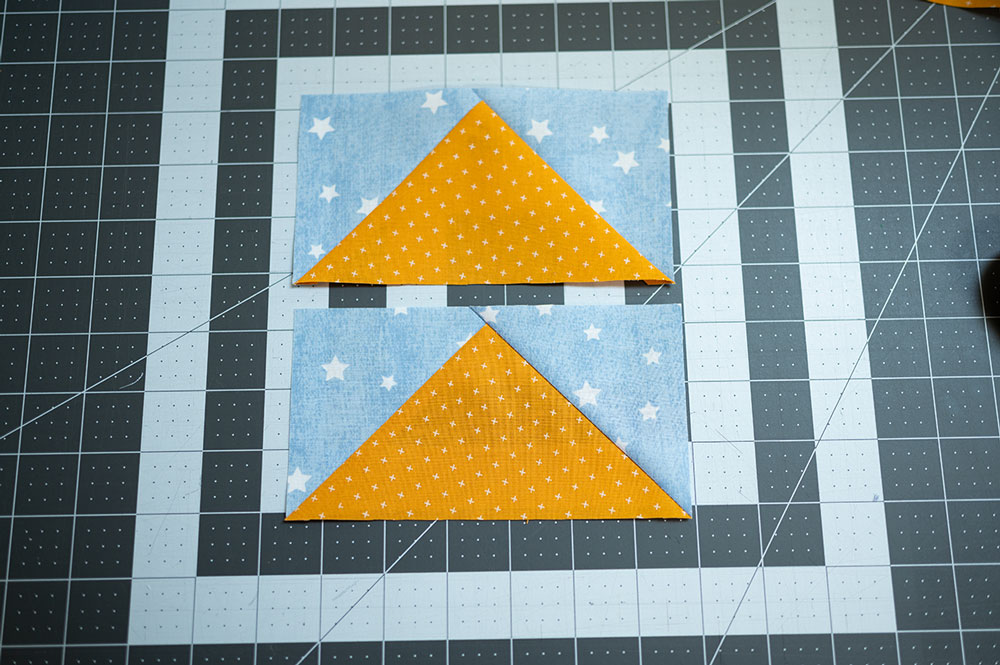
Time to trim the flying geese!
- Now it’s time to get out the Quilt in a Day ruler for 6 x 3 flying geese (affiliate link) and trim.
- The ruler is designed to give the most accurate cutting diagram. I used a little painter’s tape on the wrong side of the ruler to assist me visually in proper arrangement.
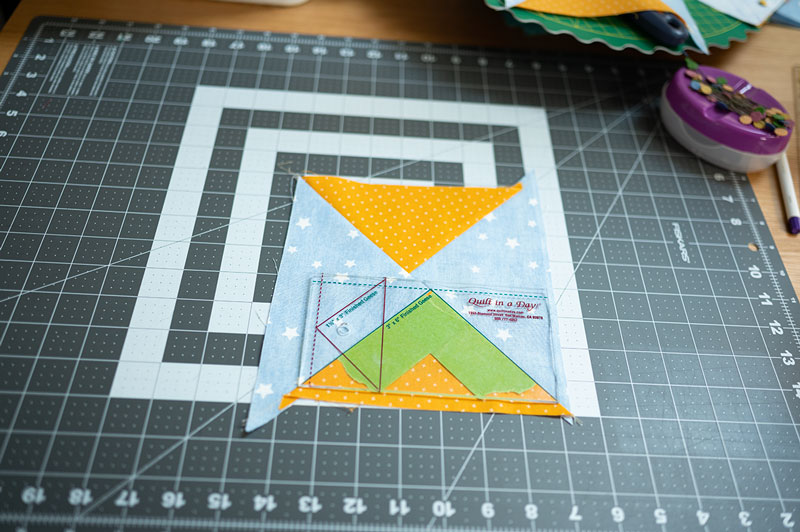
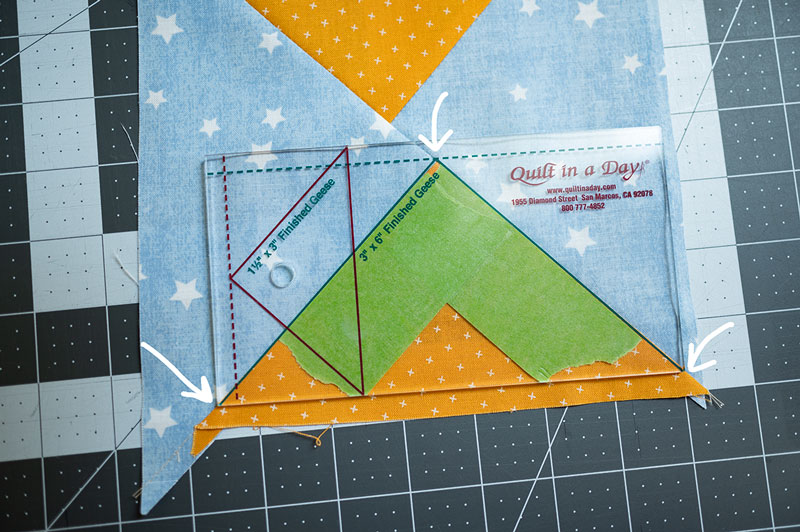
Proper alignment is essential
- Use the outline printed on the ruler to assist with lining up the block for trimming.
- The ruler allows for the 1/4″ seam allowance above the point. This is the top of the goose’s beak.
- Lining up the two sides so the seam line goes right through the corner points of the ruler give the most accurate unit
- I recommend cutting the top edge first to separate the units. Removed the untrimmed unit from the cutting space so it is not accidentally damaged.
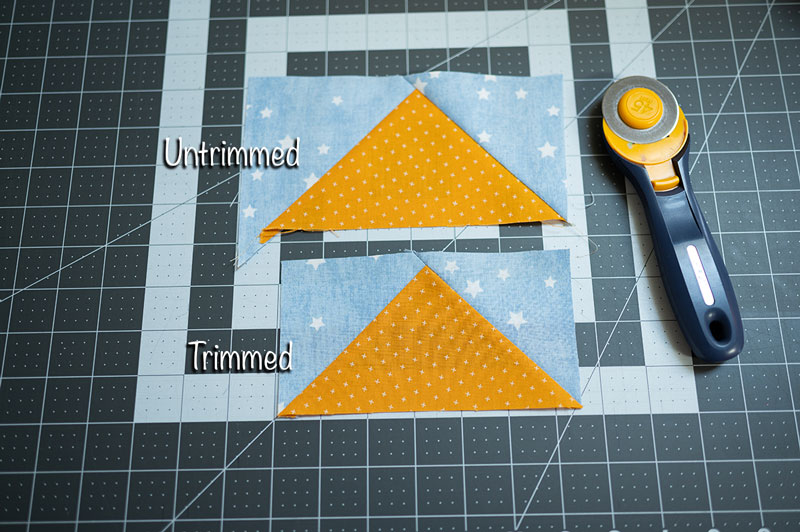
Perfectly trimmed flying geese are a thing of beauty.
- Notice the two perfectly trimmed flying geese next to the uncut block.
- While you might lose a little more fabric in seam allowances and trimming, the finished units are always perfect.
Some people don’t like to have any waste whatsoever in their quilt making.
- While I understand that sentiment as fabric is expensive, I also believe my time and mood are important. So I don’t mind over sizing units and trimming them down to perfect, finished pieces.
- I quilt for enjoyment, so I find satisfaction in creating perfect units that go together better in block designs. The better your individual units, the better your overall block is going to be.
The great thing about quilting is that it’s a customizable hobby.
- You get to decide your favorite methods of unit construction.
- You get to pick out your fabrics and put them together the way you like best.
- You select the patterns you want to make, and you decide which unit construction method suits you best.
The same quilt pattern could be made by 5 different people all at the same time and give 5 completely different results. To me, that’s the fun of this wonderful hobby!
Tips for success in piecing Flying Geese Units:
- Use non directional prints. Using toss prints or something non directional like a polka dot will create more consistent units. Stripes or other clearly directional type of fabrics require more advanced piecing techniques to keep blocks more consistent. This tutorial is a beginner’s method or for people, like me, who like to keep it simple
- Starch the fabrics well while they are still large squares. Flying geese have a lot of bias introduced so are easy to stretch out of shape. Starch will provide a little more structure.
- Careful pressing is important. Because there is so much bias in the units, it’s a good time to turn off your steam setting and carefully press the fabric. Refrain from pulling the fabric.
- Bring your patience. The first couple of times you make Flying Geese blocks you might make a few mistakes. And that’s ok! We learn through doing, so don’t be afraid to make a few mistakes.
- Invest in the Quilt in a Day rulers (affiliate link) to enjoy trimming perfect units every time!

Hi! I’m Pattymac
I’m a creative lifestyle blogger living and working in Coastal Virginia. When I’m not mixing or sewing or taking pictures, I’m out exploring the cook book section of my favorite library or munching on my own home baked cookies at a mid week movie matinee.
– Pattymac / Maker, Baker, Garden Enthusiast