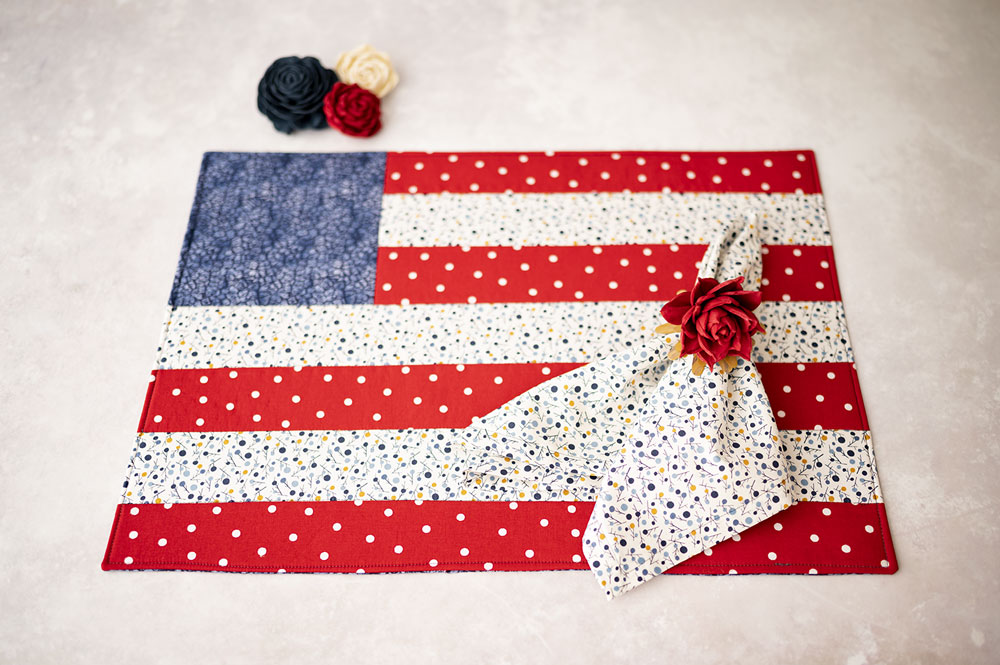
Patriotic Quilted Placemat Pattern
This post has affiliate links to products I use and love. If you buy something I can make a small commission, so thanks in advance. 🙂
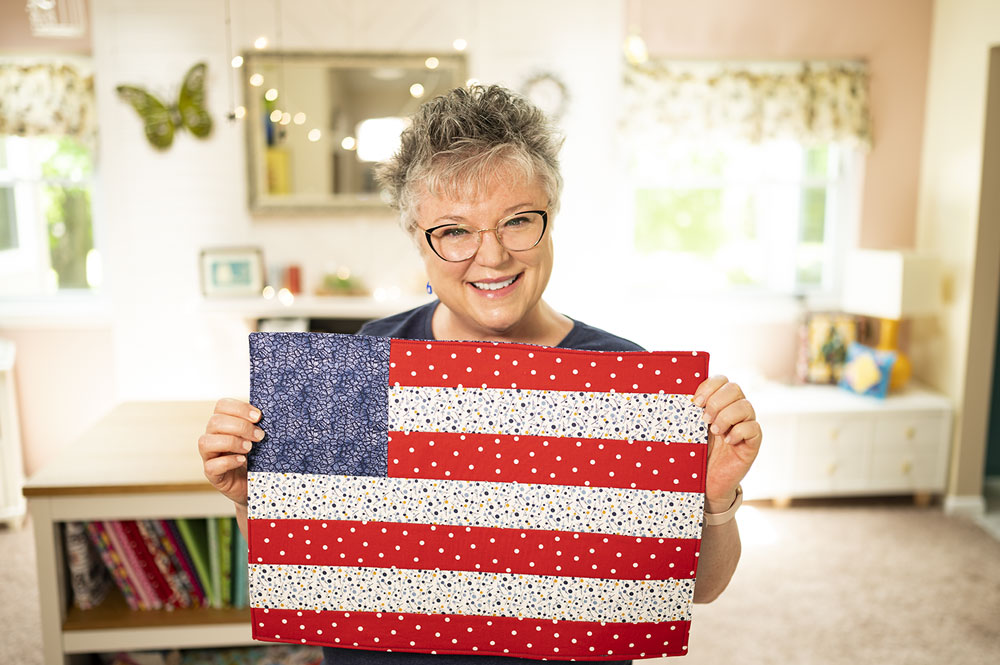
It’s the height of summer and that can mean only one thing. Time to break out all the Americana and American Flag stuff possible. In today’s update, allow me to share a Patriotic Quilted Placement Pattern.
You will love this project, because not only is it cute as a button, it’s fun to piece and quilt. You can make a set of 2 with coordinating napkins in an afternoon. Let me show you how to make Patriotic quilted placemats for your summer table.
Why is this Patriotic quilted placemat pattern enjoyable to make?
I designed this small quilting project to be fun and satisfying. I used standard ruler sizes to cut the fabrics to keep the measurements simple, and I sewed the 2.5″ strips into strip sets to make the cutting, sub cutting and piecing easy as a slice of cherry pie. Which would be amazing with your beautiful new American Flag inspired placemats.

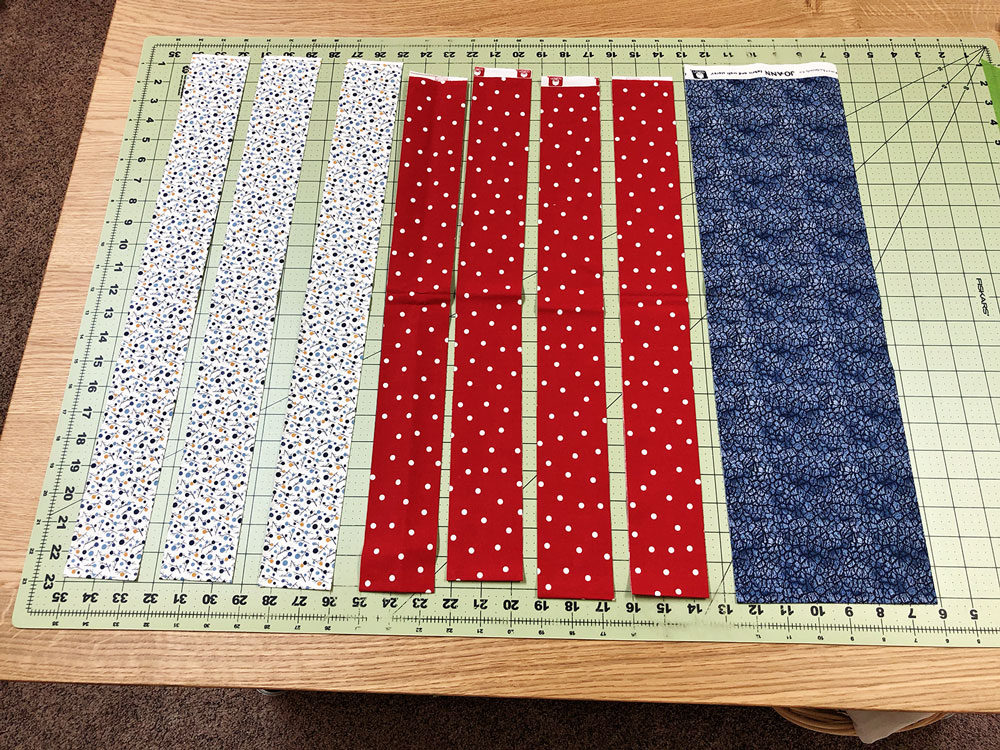
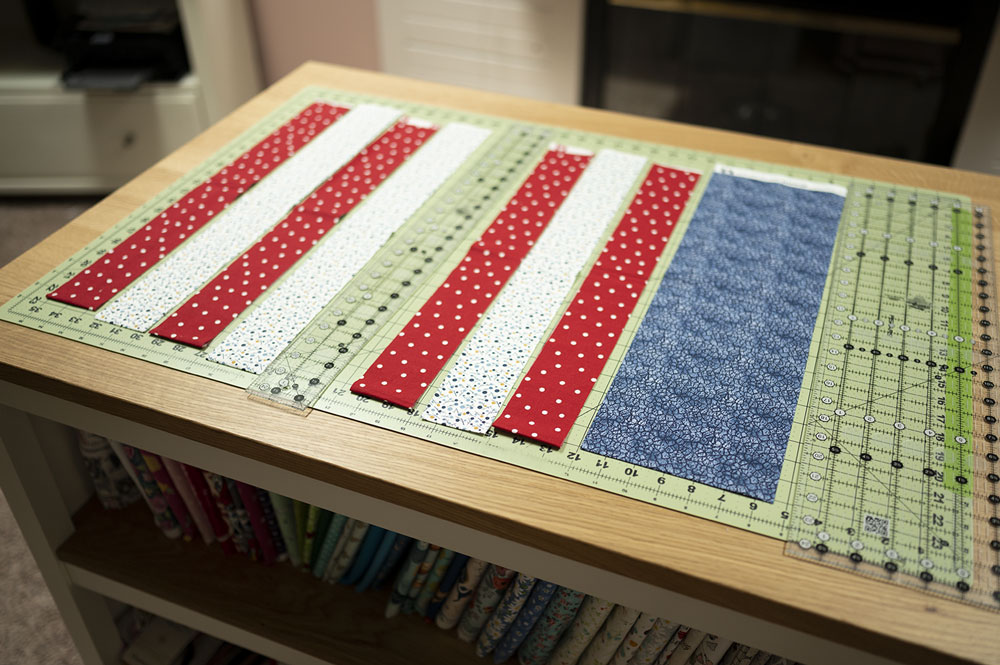
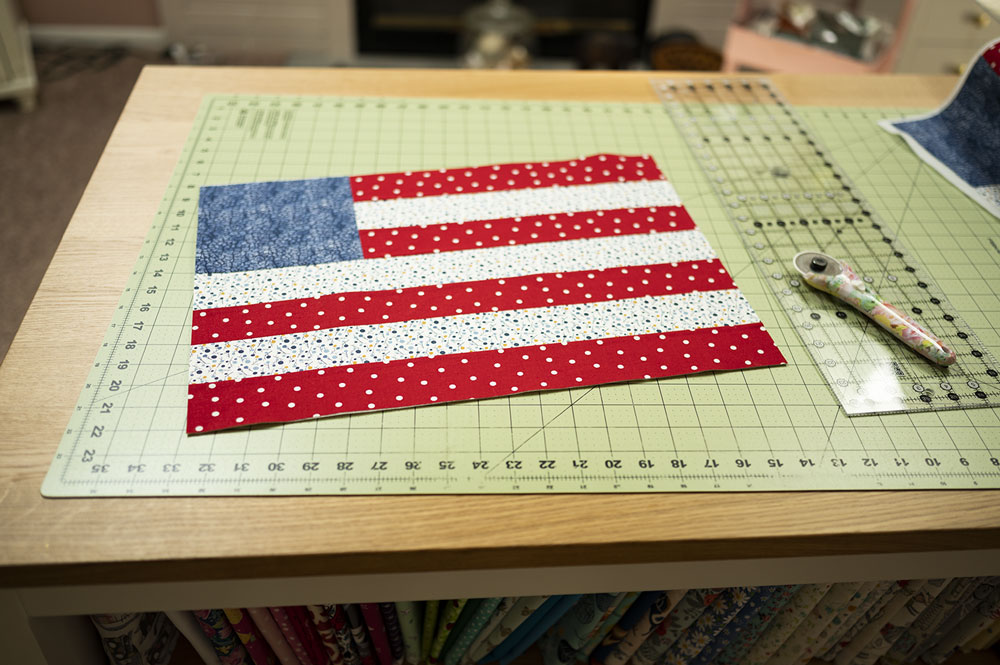
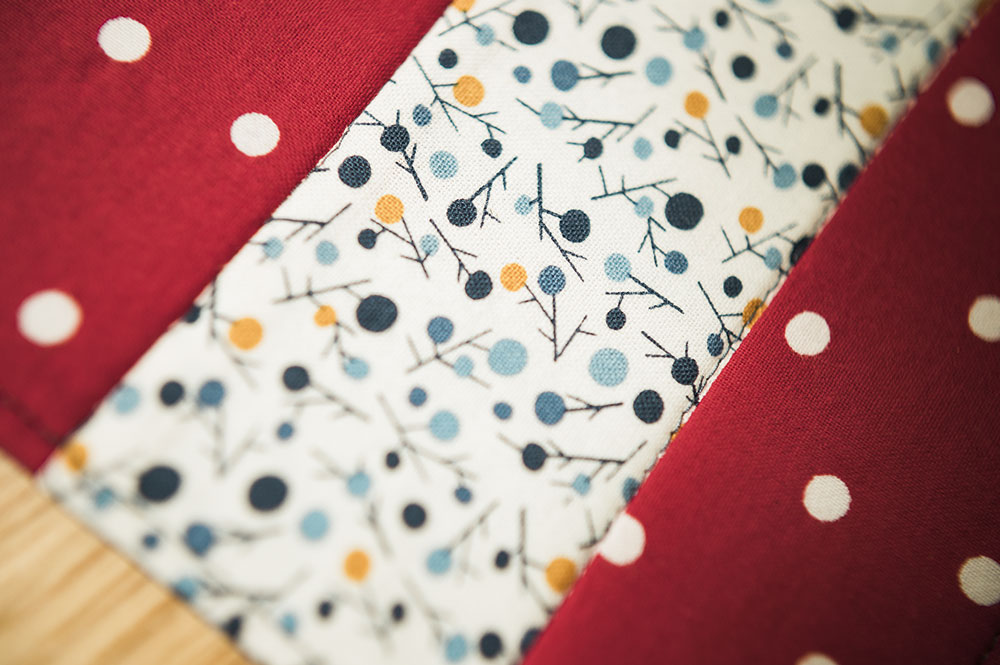
To begin, select 3 fabrics in the colors of red, white and blue. Cut the fabric on WOF (width of fabric) in 2.5″ strips and one 6.5″ strip. I picked these from my fabric stash.
Supply List:
- 3 fabrics in the colors of red, white and blue in quilting cotton. You will use all three colors on the front of your placemat, and one of the fabrics will be used as backing fabric. You will need a quarter yard or so of the red and white and a half yard of the blue for the star field and backing.
- Fusible quilt batting
- Thread
- The project as written will make 2 finished placemats.
- As an option, a coordinating fabric can be cut into 20″ x 20″ squares and sewn into mitered corner dinner napkins. I highly recommend this option!
Tools and Equipment:
- Cutting Mat
- Rotary cutter
- 6.5″ x 24.5″ quilting ruler
- 2.5″ x 24.5″ quilting ruler
- Wonder clips or pins
- Sewing machine
- Iron with pressing mat or Ironing board
Optional Tools: (but they make the process so much easier & yield a more professional looking finished Patriotic quilted placemat pattern)
- 1/4″ Presser foot for piecing
- Walking foot for quilting
- Point turner
- Thread Snips
- Smaller ruler to do the subcuts
- Pattern weights to hold the fabric in place while cutting
We begin by cutting the strips:
- 4 Red WOF 2.5″ strips
- 3 White WOF 2.5″ strips
- 1 Blue WOF 6.5″ strip
The cutting instructions above will make 2 flag fronts for the placemat. Double the red and white cuts if you want four.
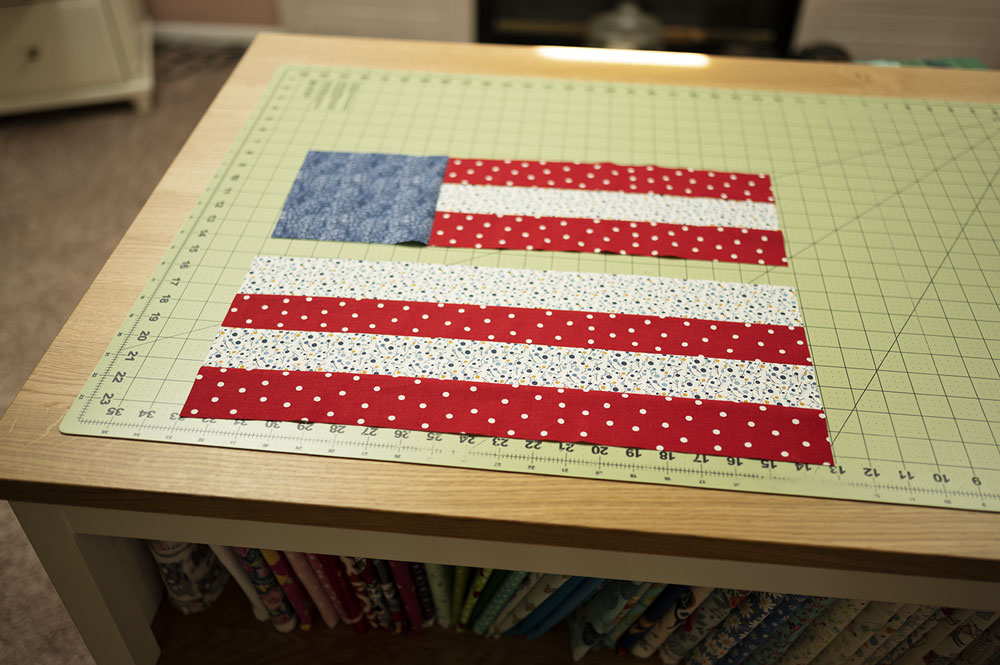
The strips arranged as they will be pieced together.
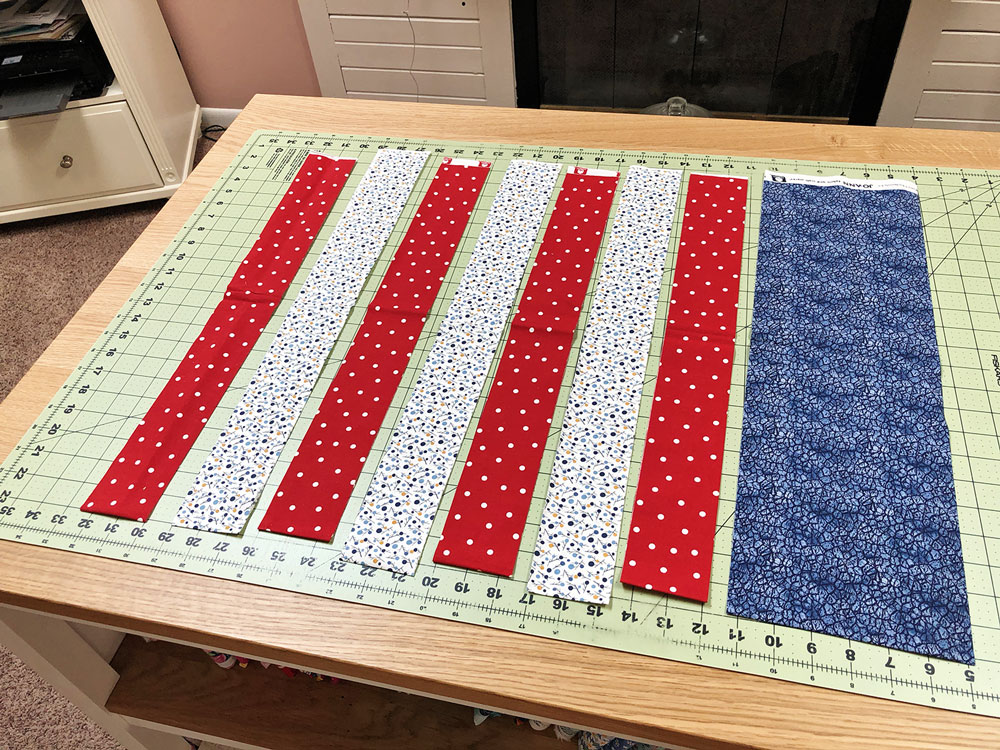
It’s important to begin and end with red strips for the strip portion of the flag.
We start by piecing TWO strip sets.
- One is 3 strips placed red, white, red.
- The second strip set is red, white, red, white.
What is a strip set?
A strip set means piecing two or more strips together. Using a 1/4″ seam allowance, we will sew two strips together along the long edged of the fabric. Generally we cut a strip on WOF, which means width of fabric. Standard cottons are typically 42″ selvage to selvage, so the strip set in this case is sewn along the full 42″ cut edge.
Why do we sew strip sets?
By sewing long strips together we save ourselves a little time and effort. The method for using a strip set is to sew two or more strips together along the long cut edge, press the pieced strip set and then using a fully pieced and pressed set, we then subcut the size pieces we need for the pattern.
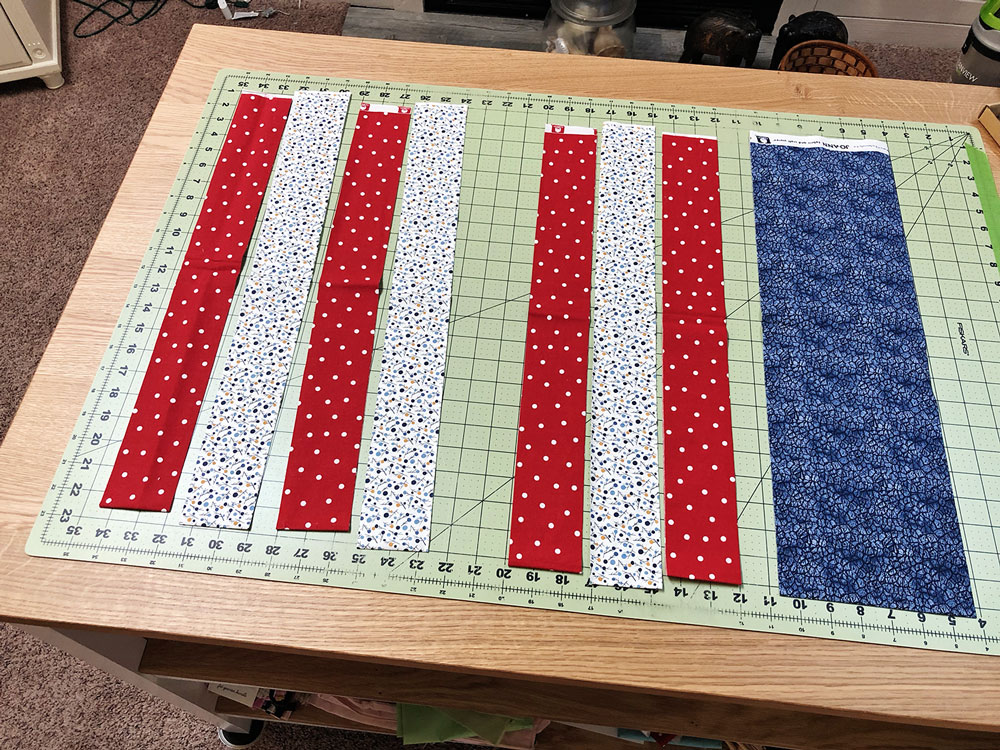
 Strip sets subcut and laid out on the cutting table for final piecing.
Subcut Measurements:
- Cut the Blue 6.5″ strip into 6.5″ squares.
- Subcut the strip set with 3 strips into 14″ long pieces.
- Subcut the strip set with 4 strips into 20″ long pieces.
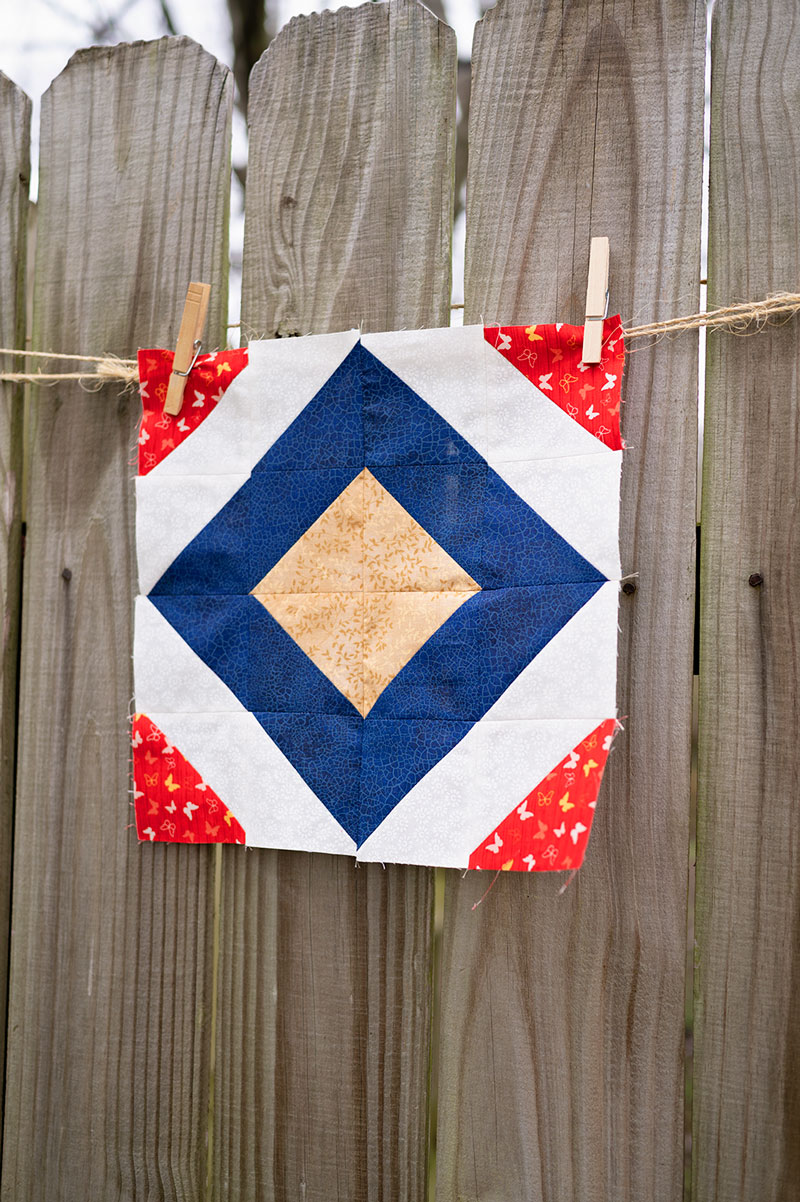
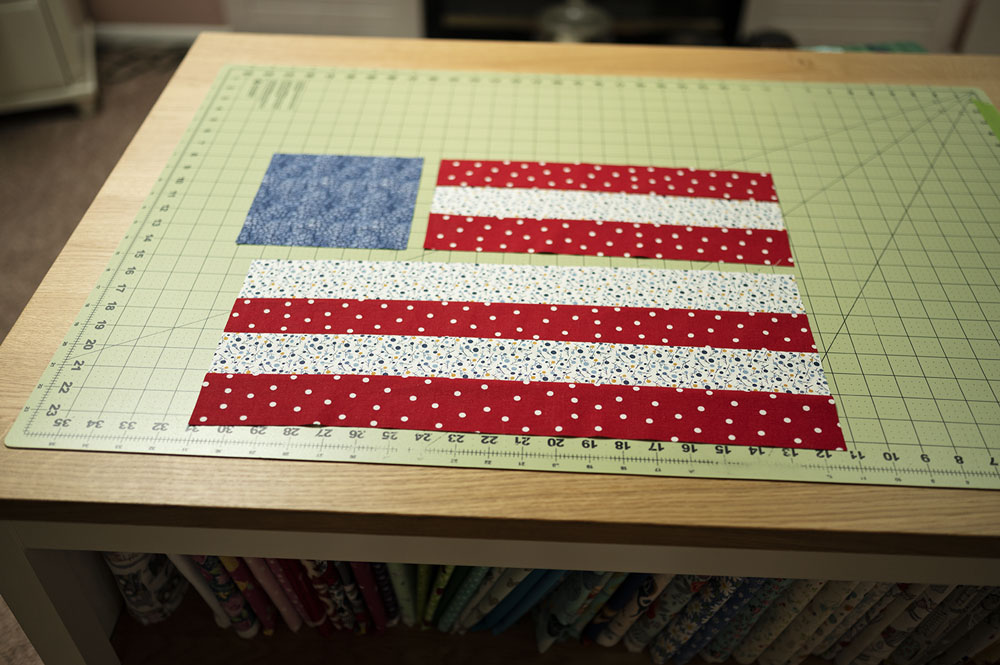
Once your 3 components are subcut as instructed above, put your flag together as follows:
- Piece the blue square to the strip set with 3 strips. Remember to use a standard 1/4″ seam allowance throughout this project.

2. Place the top half right sides together with the bottom half and secure using clips or pins.
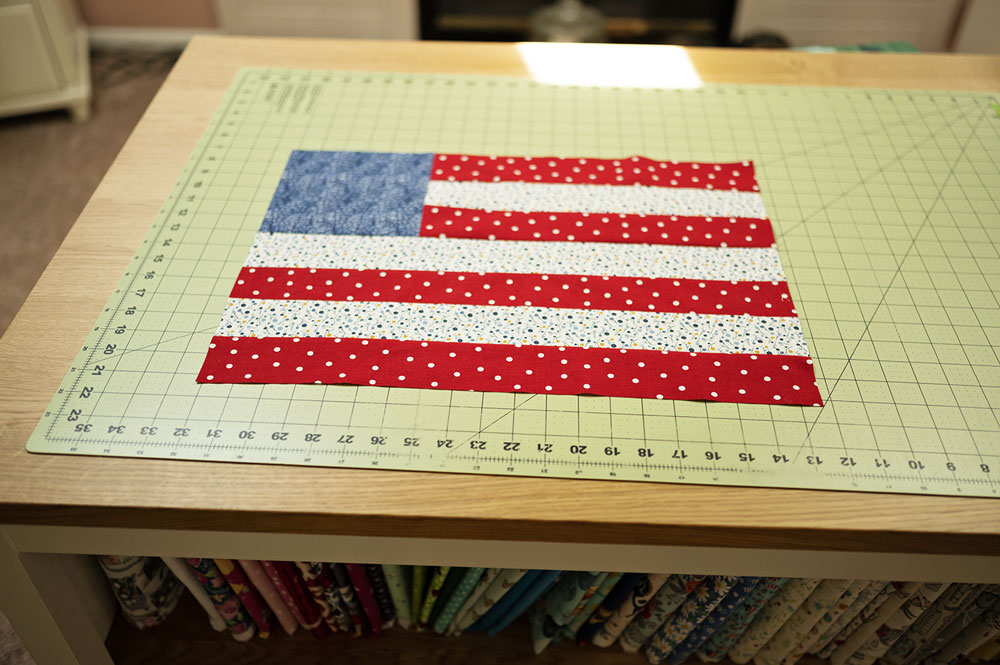
3. Your quilt block is complete! This is the front of the finished placemat.
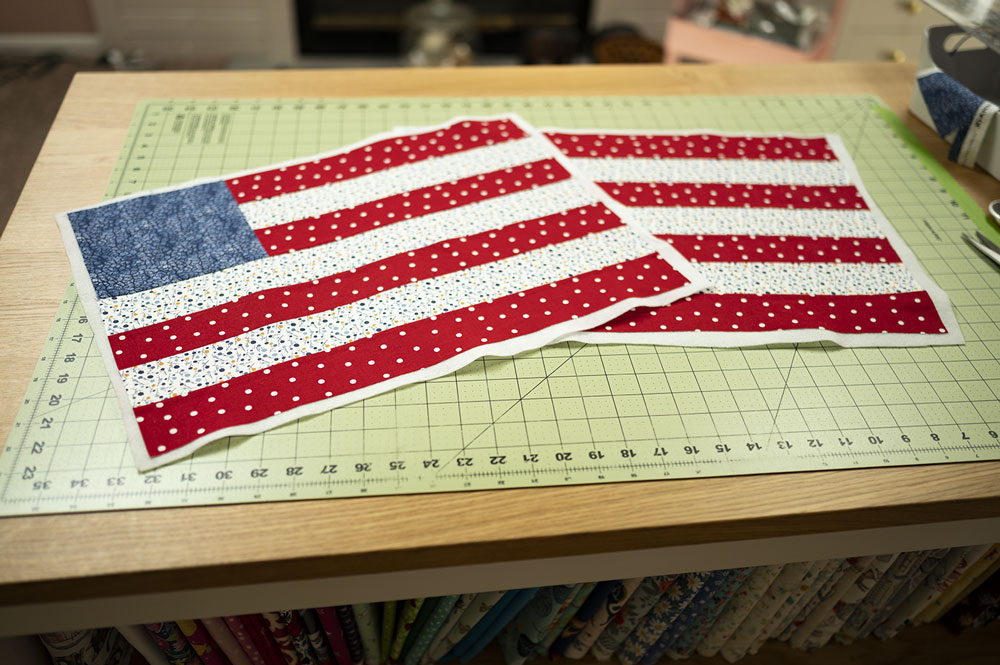
Working with fusible quilt batting:
I love fusible quilt batting for smaller projects like bags, and zippered pouches, pillows and of course, placemats! Why you ask?
- It’s not drapey so it’s perfect to provide structure to projects while providing light loft that gives that quilted look when we do the actual quilting at the end.
- Once the fabric is affixed to the quilt batting, it’s attached and no need for pin or spray basting.
- I purchase mine in Joann by the yard. It’s on the same shelving as the interfacing. I wait until either the interfacing goes on sale for half off or I used a 50% off an item coupon, and then I purchase 3 or 4 yards at that time. It’s won’t spoil, so buying ahead and having it in your supply cabinet is a great idea. I like to keep supplies on hand so if I’m inspired, I can start the project right away without needing a run to the store.
- Follow the manufacturer’s instructions for applying the fusible batting. You will need a good hot iron and a press cloth. You do NOT want to get glue from the fusible on your iron, so make sure you put a press cloth in between the iron the project.
Cut the fusible a bit larger than the fabric you’re applying it to. We cut the fusible a little bit larger…maybe an inch or so bigger all the way around, afix the project to the the batting, using the larger quilt ruler, square up the project.
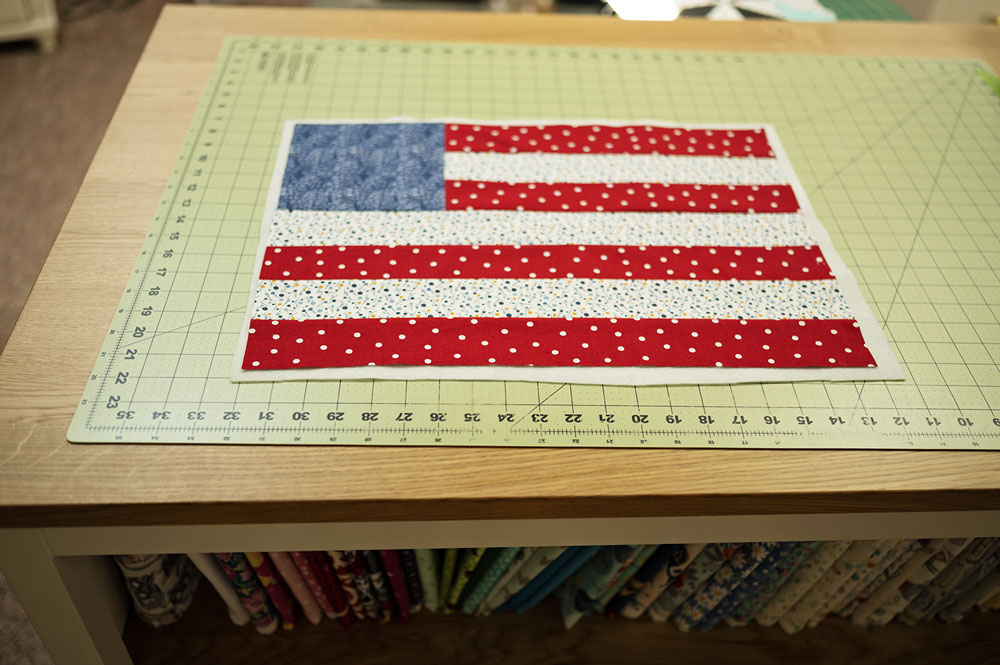
Steps to finished the Patriotic Quilted Placemat Pattern:
- Once the Flag front of the project is ready, match it to a piece of yardage cut 20″ x 14″.
- Place the pieces right sides together and secure into place.
- Sew all the way around the secured project using a 1/4″ seam allowance. Remember to leave an opening large enough to get your hand inside the project to turn the work. Also remember to secure the stitches at the beginning and end of the stitch line.
- Carefully clip the corners to remove weight.
- Turn the project right side out.
- Use the point turner to open corners and seams.
- Press the project being certain to press the seam allowances into place at the site of the opening.
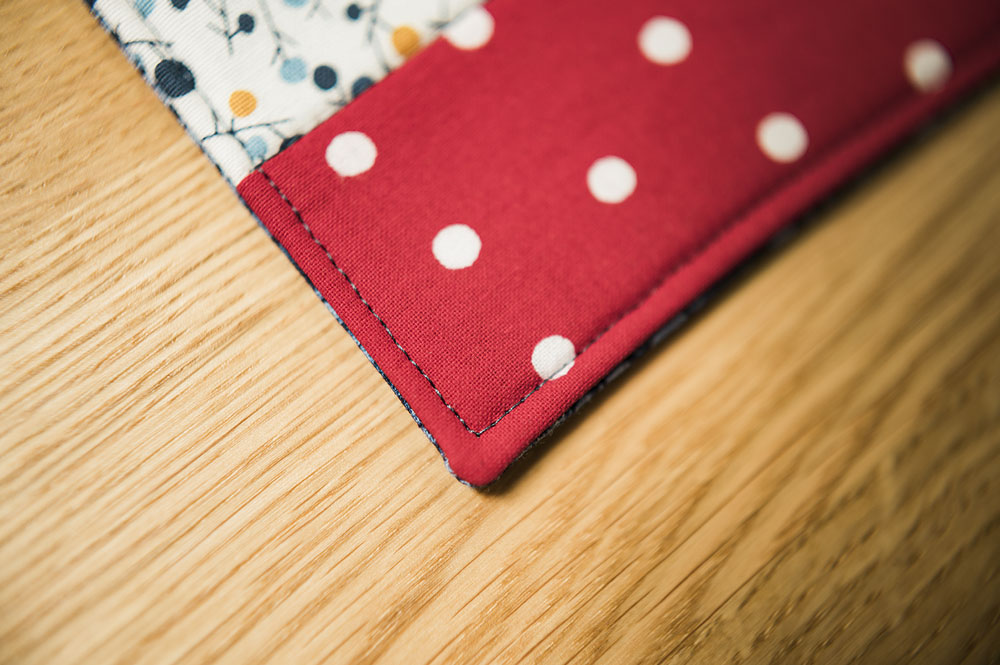
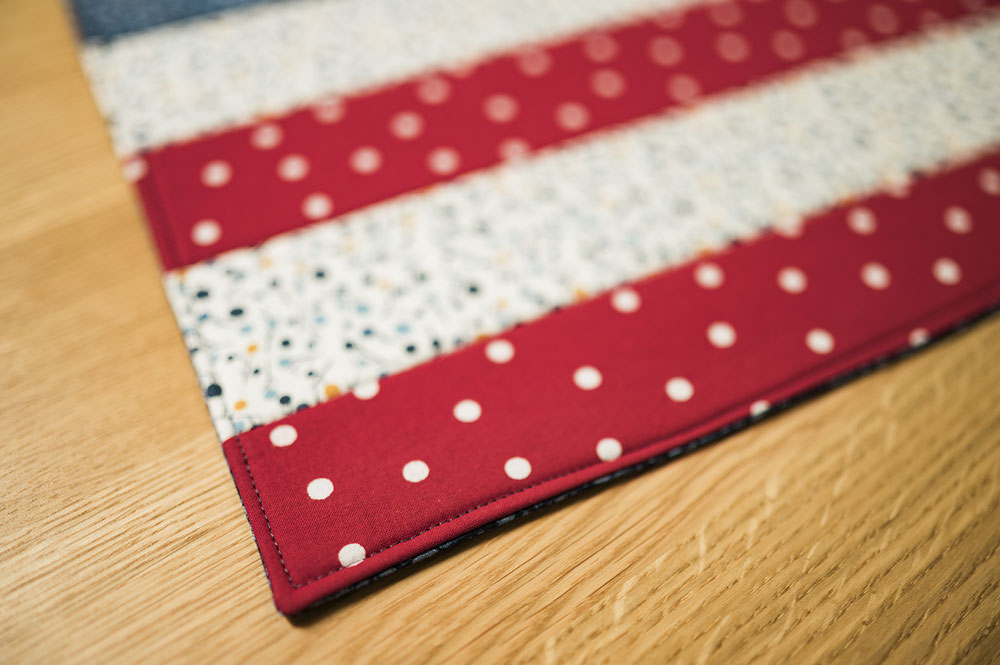
- Edge stitch all the way around at about 1/8″ of an inch. A longer stitch length looks nice here, so go with 3mm. The edge stitch looks nice and closes the opening of the placemat at the same time.
- Quilt as desired. I used the stitch in the ditch method with my walking foot. Whatever method you choose, it looks best if you stay inside the edge stitching.
Edge stitching at the corner Edge stitches provide finishing Stitch in the ditch does not have to be perfect
Enjoy your lovely Patriotic Placemats! They are beautiful all year long, but I think they are especially appropriate in the summer. I have created a video tutorial to accompany today’s written post for the Patriotic quilted placemat pattern, so I hope you will enjoy watching this as well.
Hi! I’m Pattymac
Sewist, Maker, Baker
I’m a creative lifestyle blogger living and working in Coastal Virginia. When I’m not mixing or stitching or taking pictures, I’m out exploring the cook book section of my favorite library or munching my own home baked cookies at a mid week movie matinee.