Christmas Tree Napkin
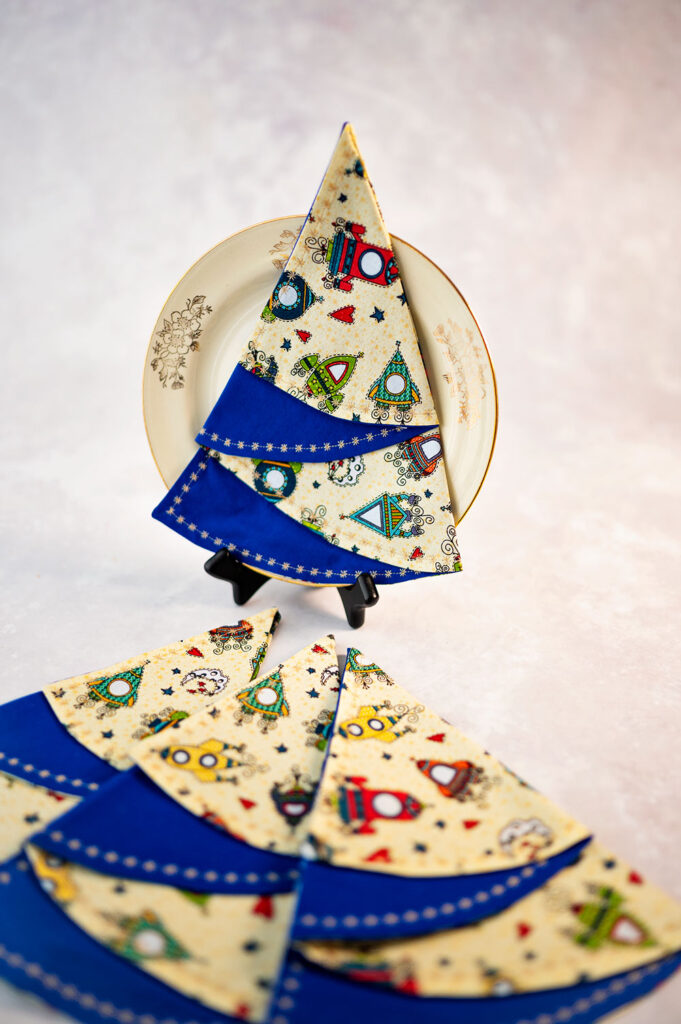
Learn how to sew and fold this darling Christmas Tree Napkin, and enjoy the magic of Christmas all year long.
It’s the time of year when our minds turn to creating fresh, seasonal home decor. And if you are looking for ideas for your Christmas sewing, you will love today’s tutorial on making a Christmas Tree Napkin.
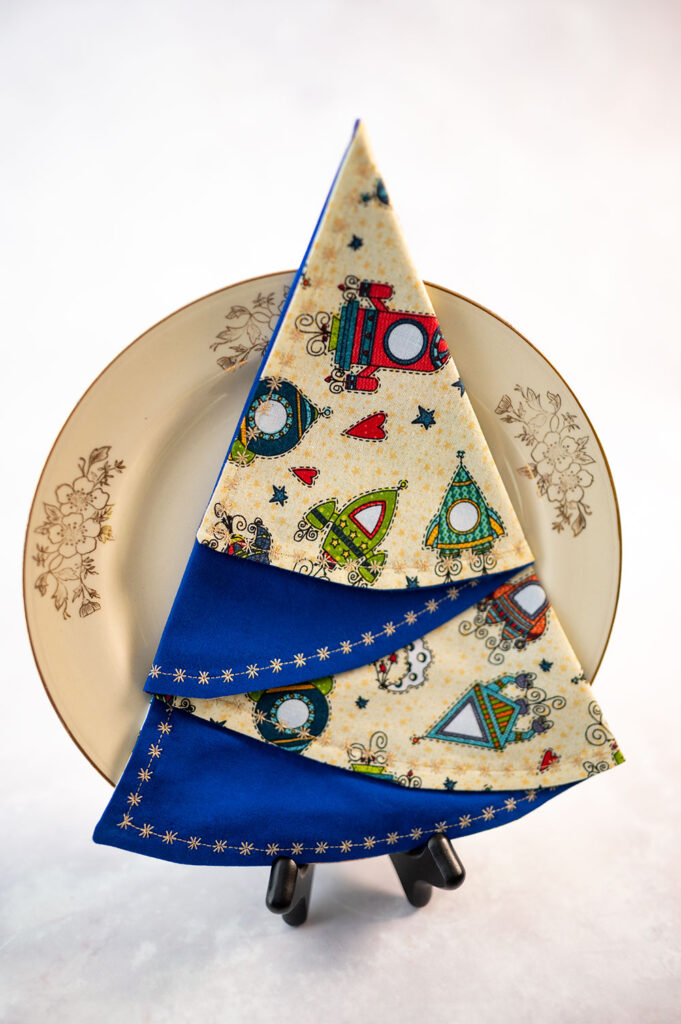
Tips for Fabric Selection for your Christmas Tree Napkin
- Select two different fabrics both made of cotton, woven material. Quilting cotton is ideal.
- Selecting a print and a contrasting solid makes a dramatic presentation.
- Select a non directional print for best success. This means turning the fabric any which way doesn’t throw off the pattern. In other words, you don’t want the sky to be below the grass if your print were a direction that relied on having correct placement.
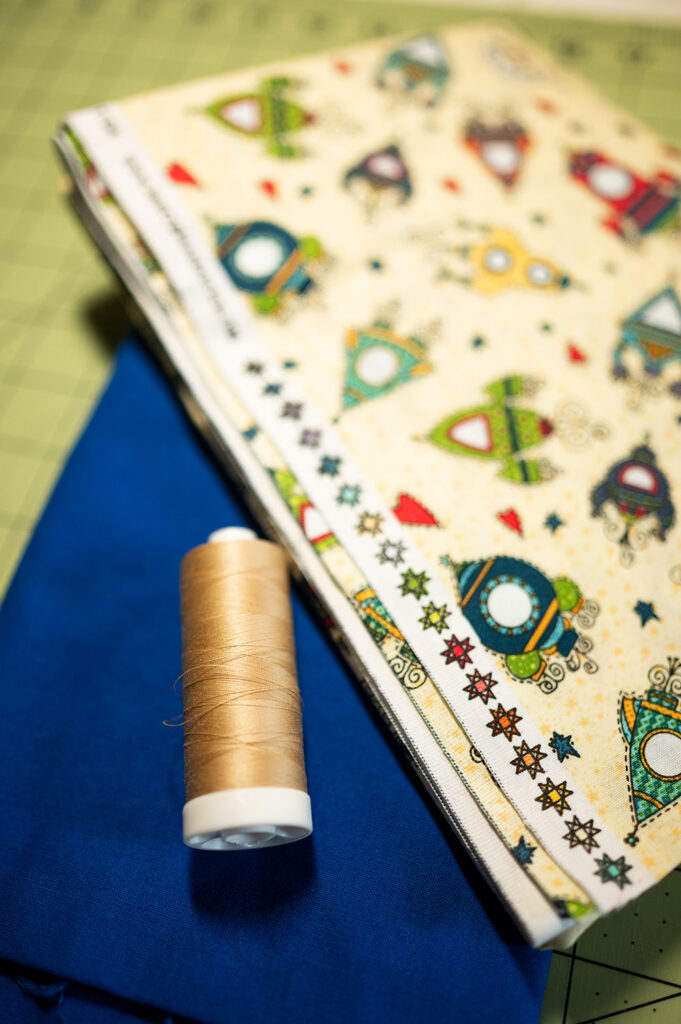
- If you are having trouble matching two fabrics, look on the selvage edge of your print and review the colors used in printing the fabric. Decide on a contrasting fabric with color that approximates something in the range of the print.
Use the fabric selvage to select contrasting fabric
Before we can start cutting out our napkin for sewing, the pattern has to be made.
Materials needed to make the Christmas Tree Napkin pattern:
- Some kind of paper about 20″ long and 10″ tall. I use brown paper designed to wrap packages, but you could use parchment paper or even a paper grocery bag cut open.
- Pen or pencil
- Long Ruler or straight edge. A quilter’s ruler 6″ wide by 24″ tall is ideal.
- Quilter’s triangle or a tool to help give 45 degree angles.
- Length of non stretchy string tied around the pen or pencil giving an 8″ length from end to writing tip.
- Paper scissors. In other words, not your fabric cutting scissors.
Instructions to make the Christmas Tree Napkin pattern:
- Lay rectangle of paper flat on a surface. If paper is not flat, it can be ironed with a hot, DRY iron.
- Using a finger to secure one end of the string in about the center of the paper along the lower edge, stretch string taught, and draw a half circle shape on the pattern. The string will keep the pattern in an accurate half circle.
- Be certain to cut a straight edge on the long side of the paper that is properly squared. The quilting ruler really helps with this.
- Cut out the pattern.
- Your final pattern will measure 16″ along the straight edge and will be 8″ tall at its peak.
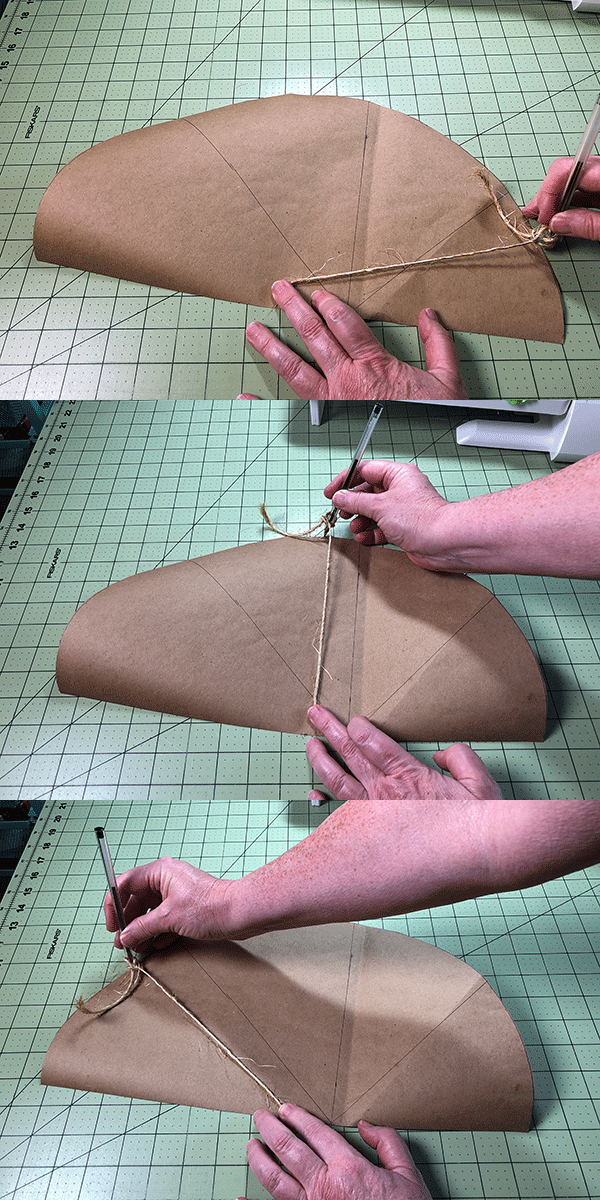
After cutting out the pattern, 3 lines need to be drawn onto the pattern. These lines will indicate the fold lines when it comes time to fold the sewn napkin into the shape of the tree.
To mark the fold lines on the pattern:
- Measure 10″ from the lower left corner along the straight, bottom edge of the pattern.
- Draw a line perpendicular from the bottom edge to the top of the semi circle at the 10″ mark.
- From the 10″ mark on the bottom of the pattern, draw two 45 degree angles running left and right of the perpendicular line.
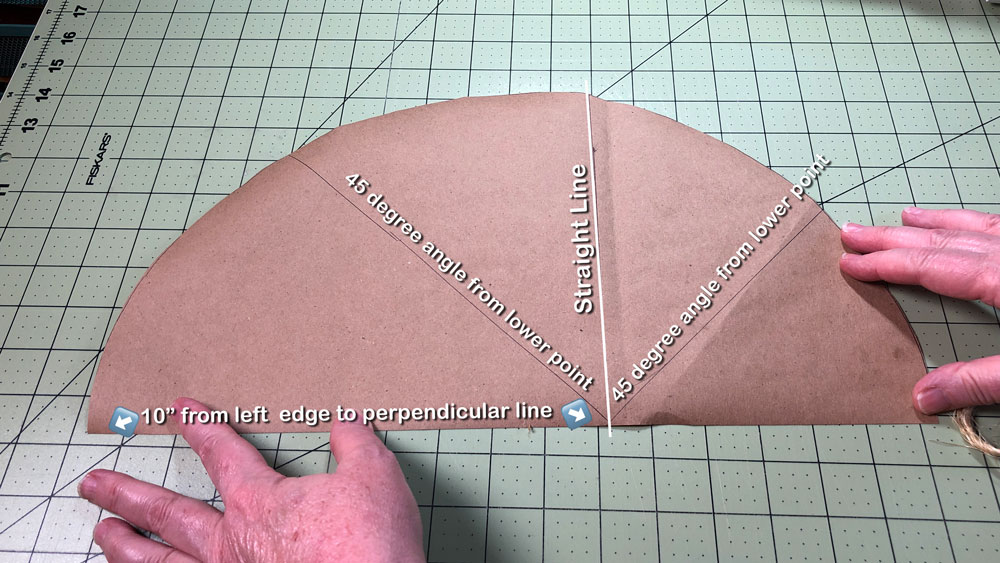
Now that our pattern is ready, let’s talk about what is needed to cut and sew Christmas Tree Napkins.
Supply List:
- Two Fabrics measuring about a half yard each (will make 4 napkins) or 2 fat quarters (will make 2 napkins)
- Contrasting thread
- Fabric Scissors (affiliate link)
- Straight Pins (affiliate link)
- Point turner. (affiliate link) I use a knitting needles, but a chopstick would also work.
- Sewing machine (affiliate link)
- Steam iron and ironing board
- Spray starch
- Pattern we made in the first part of the blog post
- Disappearing ink pen, which isn’t required, but I like to trace my patterns and cut on the traced line instead of pinning the pattern and cutting around that.
How to sew the Christmas Tree Napkins:
- Press and starch both fabrics. Lay out fabrics either folded on width of fabric, selvage to selvage edge, wrong side out, if using yardage. Or lay out the fat quarters flat, folded in half if using fat quarters.
- Place pattern piece made in the first step on top of the fabric with the straight line parallel to the selvage edge.
- Either use a disappearing marker to trace the shape for cutting or pin the pattern to the fabric.
- Cut the fabric following the pattern shape.
- Cut 4 half circles of the print fabric and 4 half circles of the contrast fabric. This will construct 4 napkins.
- For each napkin, match one piece of print and one piece of the contrast fabric, with right sides facing and pin together.
- Using a 1/4″ seam allowance, begin stitching using a 2.5 mm straight stitch to piece the two fabrics together. Sew all the way around, but remember to leave an opening of 4″ along the straight edge to turn the work.
- Once sewn together, clip the corners to reduce bulk and carefully clip around the curve to aid in the turned napkin laying flat. Be careful to clip close, but do not cut into or through your stitch line.
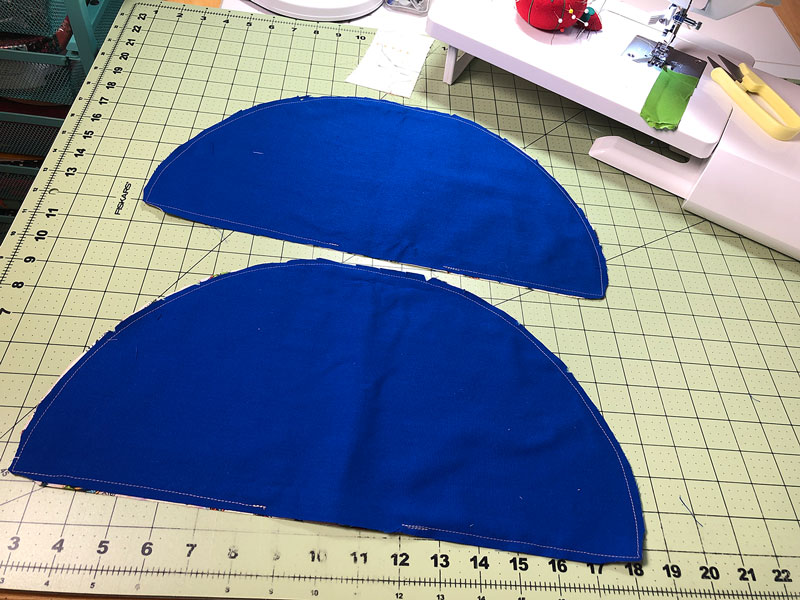
Take a moment to notice a couple of key things in the photo above:
- Look for the opening left on the straight edge. This is where the work gets turned right side out. Be sure you leave enough room to get your hand insided.
- Also notice the notching in the seam allowance on the curved edge. This will allow the project to lay flatter and have a smoother curve.
Now that the napkins are constructed, the fun begins. Let’s get them finished up:
- Turn the napkins right side out.
- Gently push out the points of the corner so they are crisp and square.
- Press napkins flat with a steam iron. Roll the seams between your fingers to get the seams as sharp as possible.
- Press raw edges inside the work. They will roll naturally inward, so press them to stay neat and in place.
- Topstitch all the way around the napkins as desired. Start on a straight side and slowly and carefully stitch all the way around back to the beginning. The topstitch will close and secure the opening used to turn the work.
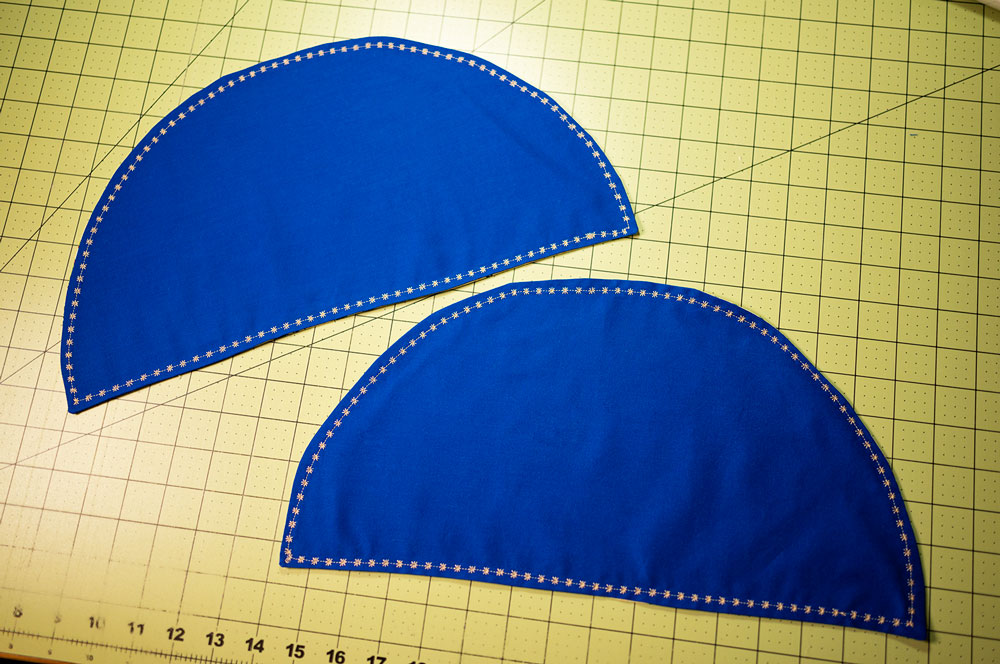

Our last step in sewing and making the Christmas Tree Napkins is to give each napkin a final steam press along the fold lines indicated on the pattern.
- Lay the pattern on a flat surface in front of you with the lines facing up.
- Lay your stitched half circle on top of the pattern. Line the straight edges together. Whatever side is facing up will be the dominant color of the finished tree.
- Locate the straight line 10″ from the left of the pattern edge and first fold the tree to the left using that line for reference.
- Fold what is now the top flap along the 45 degree angle indicated on the pattern back towards the right side.
- Make the final fold along the left side 45 degree angle which will line up perfectly with what is now the left edge of the tree.
- Once the shape is adjusted, remove the pattern and take the napkin back to the steam iron and press in the fold lines. Give the napkin a couple of blasts of steam to set in the folds.
Watch the video below to see exactly how to fold the sewn napkins into the shape of Christmas tree.
That sounds like a LOT doesn’t it?
Allow me to reassure you that it’s not nearly as much as it might seem when going through the written instructions.
First of all, once the pattern is made, it can be saved and reused time and time again. That’s why I like using the brown shipping paper. It’s great for constructing your own patterns. It’s a 5 minute process to make this pattern, so no worries on that.
Enjoy this instructional video on making the napkins to supplement the written instructions included in this blog post.
And as far as making the napkins, it’s reasonable to cut and finish 4 of them in about an hour. So it’s a pretty quick project as sewing goes.
By stacking fabrics with four layers, it will cut enough fabric for two napkins at one time. Using nicer shears, the cutting will go very fast.
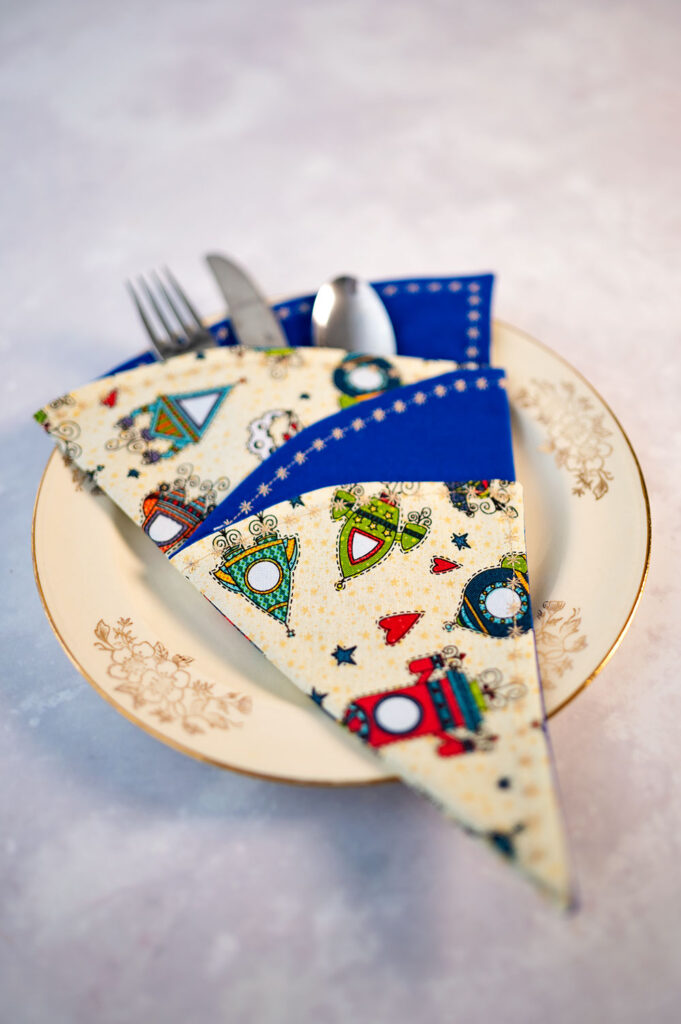

Sewing folded Christmas Tree Napkins is a wonderful way to enjoy playing with prints and colors. And it’s a fun way to start and complete several projects in an afternoon. That always feels so rewarding to me. They are compact, so they will keep well for holiday gifts when the time arrives. 🙂
You might also like
Hi! I’m Pattymac
Sewist, baker, maker
I love figuring out new ways to use pom poms, where I can stash more fabric, and I’m always wondering what to bake next…chocolate or lemon? When not dreaming up new things to make (or bake), I love riding my beach cruiser on the Boardwalk, enjoying classic movies, and planting new things in my tiny but mighty container garden.


