Quilted Table Runner Pattern
This post has affiliate links to products I use and love. If you buy something I can make a small commission, so thanks in advance. 🙂
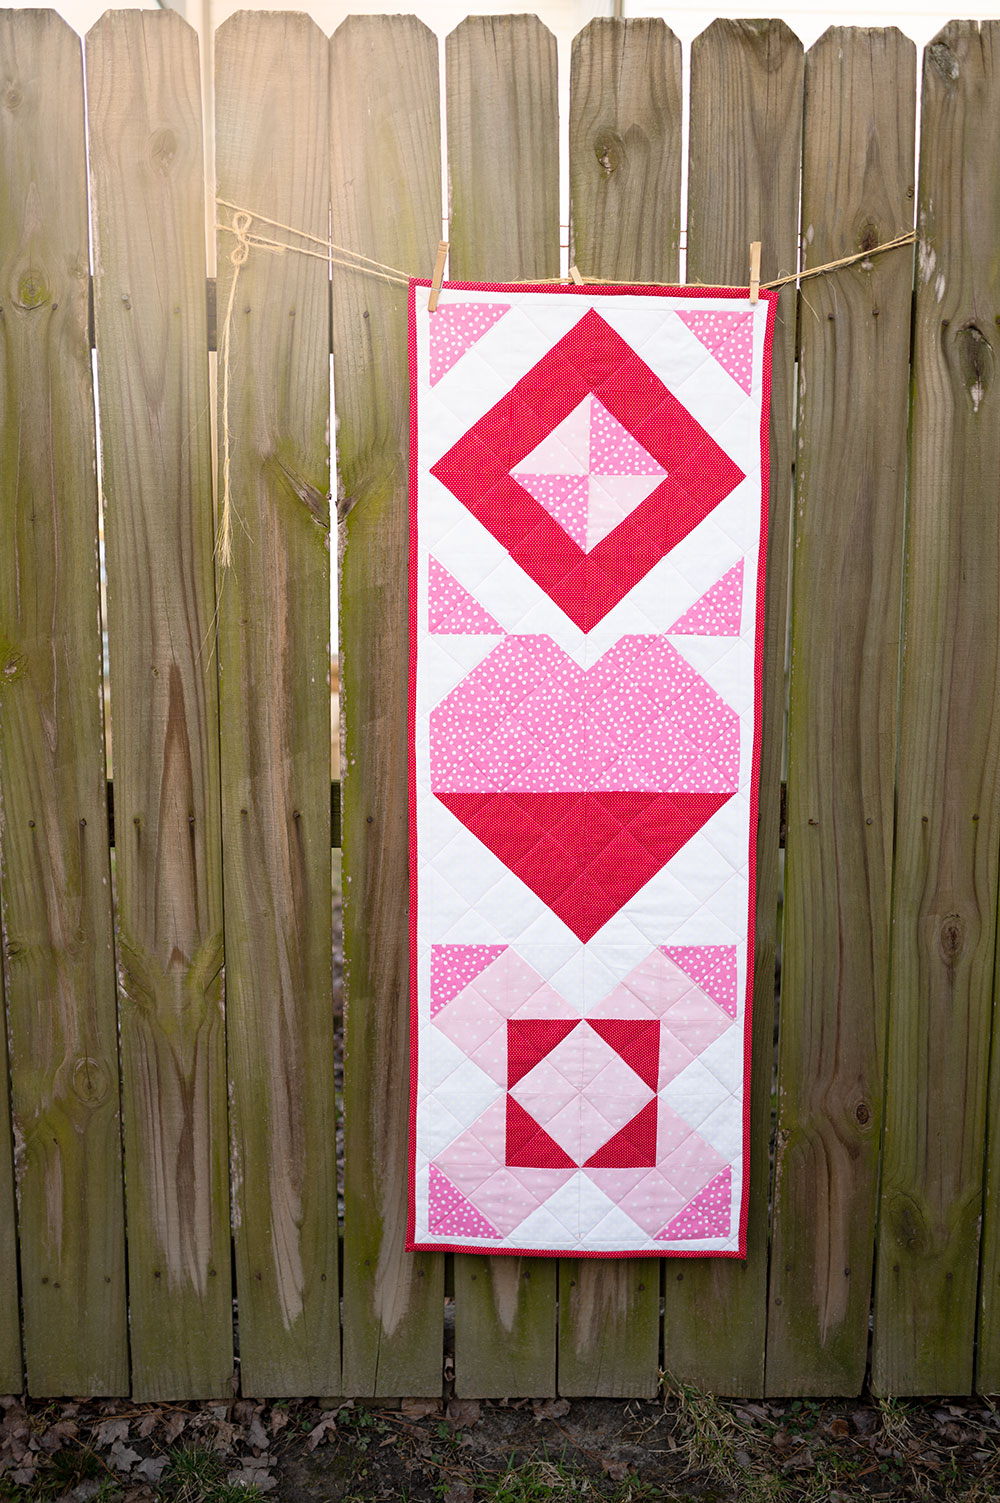
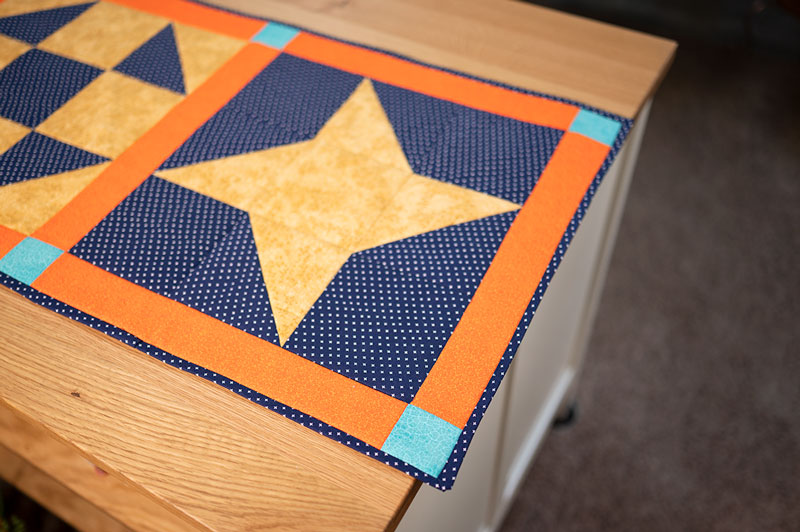
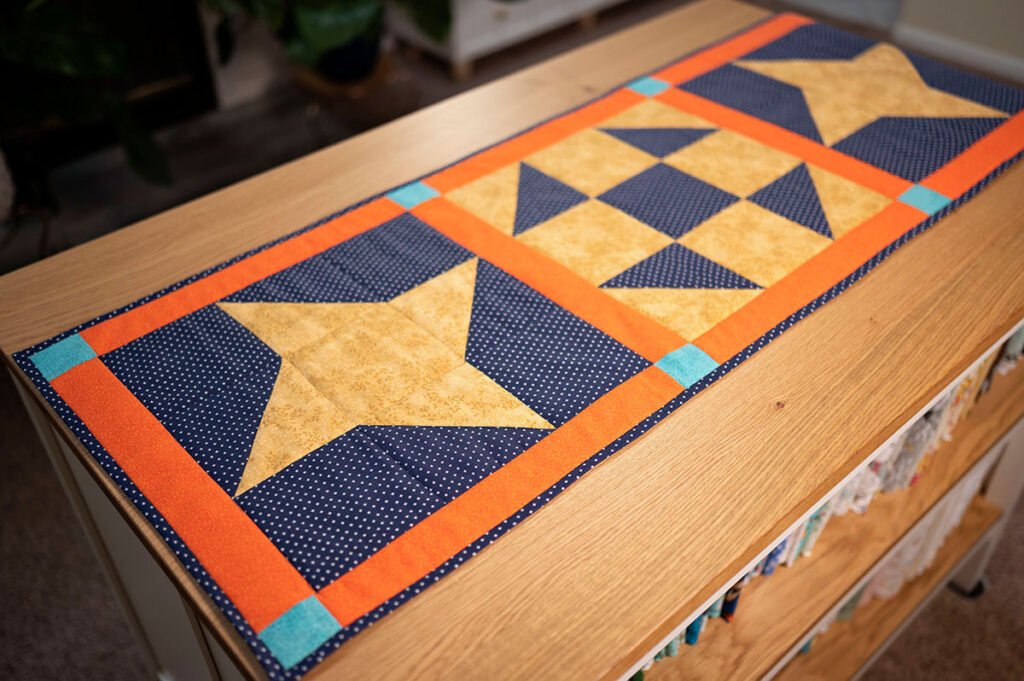
Enjoy a bold interpretation of classic blocks in a colorful quilted table runner pattern.
The change of season calls for updates to our usual table decor. Update yours for the holidays (and beyond) with a beautiful quilted table runner pattern. This one utilizes classic quilt blocks in an over sized finish for a modern update.
What’s the purpose of a table runner?
- A table runner is used to add color, texture, and interest to your table. Update your table for any season!
- It becomes the foundation for your tablescape decor.
- Table runners also protect your table from spills and damage that can be caused by hot pans and dripping candle wax.
- A quilted table runner can also protect a dining table from moisture as a hot dish condensates underneath.

Protect your wood table tops with a quilted table runner

Other questions people ask about using quilted table runners:
- Do you use placemats with a table runner? Sure! Placemats can used with table runners in the same fabric or using colors that complement one other. The runner should be different from the tablecloth, if one is used, so it stands out.
- How do you set the table if using a tablerunner? Generally speaking, a table runner is placed lengthwise down the center of your dining room table. It can be placed directly on the table surface or layered over a tablecloth. If you select a short table runner, place it in the center of the table to highlight a lovely centerpiece.
Don’t forget a seasonal table runner can also be used on a buffet or side table in a foyer. It’s not just for dining tables!
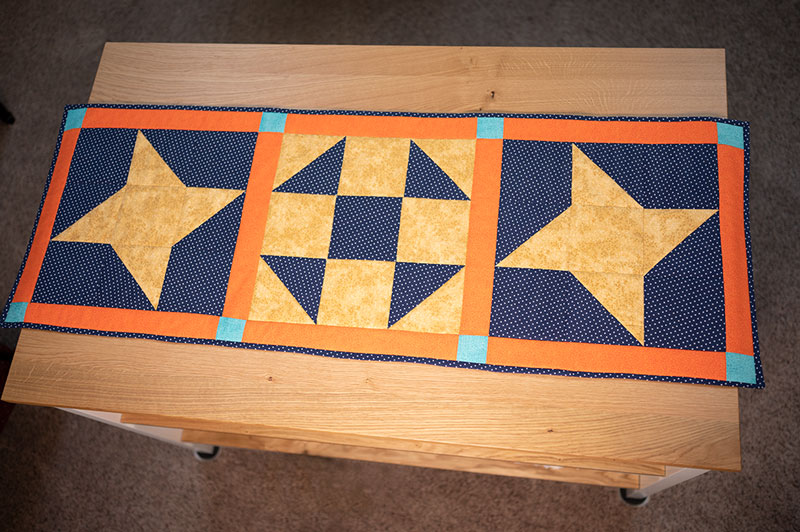
The quilted tablerunner pattern featured today is constructed using 2 classic quilt blocks: the Friendship Star and the Shoo Fly. Let’s take a look at how to construct these much beloved blocks.
The Friendship Star Block:
Constructed from 9 blocks and 2 colors:
- Dark Blue: Color A — 4 Squares
- Gold: Color B — 1 Square
- HST Blocks : 4 total made from color A & B
Cutting Instructions:
- Color A: 6 Blocks
- Color B: 3 Blocks
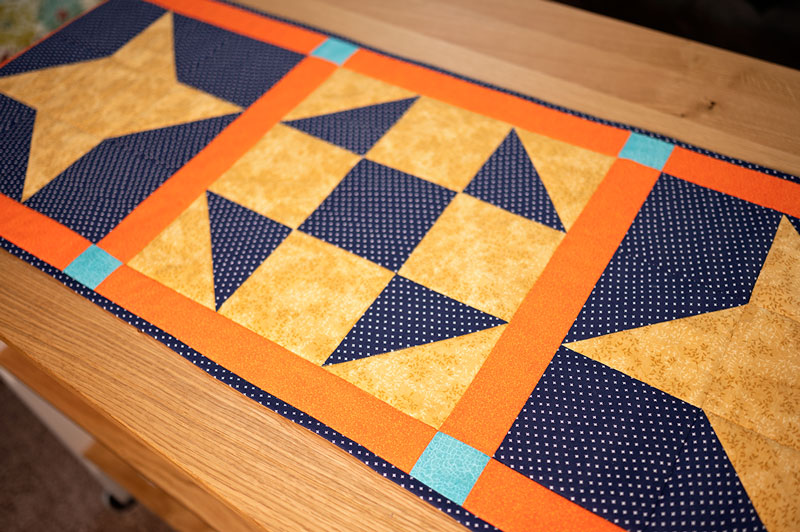
The Shoo Fly block:
Constructed from 9 blocks and 2 colors:
- Dark Blue: Color A — 1 Square
- Gold: Color B — 4 Squares
- HST Blocks: 4 total made from color A & B
Cutting Instructions:
- Color A: 3 Blocks
- Color B: 6 Blocks
The Friendship Star and the Shoo Fly blocks make up the block designs in this quilted table runner pattern. They are classics and turn up over and over in quilt designs. They both have 9 blocks in their overall design, made using half square triangles and solid blocks. They generally utilize 2 colors, and are a great exercise in playing with color complementary balance or with lights and dark, or value.
The color design in this quilted table runner uses complementary colors which are on opposing sides of the color wheel. In this case, the blocks are yellow/orange and blue/violet and the sash is an orange and blue. Using a color wheel to select your color combinations is extremely helpful, and I love this one.
Tools needed for the quilted table runner pattern:
- Rotary cutter
- Cutting mat
- 6.5″ x 24.5″ quilting ruler
- 2.5″ x 24.5″ quilting ruler
- 5.5″ square quilting ruler
- Wonder clips
- Pins
- Thread snips
- Fabric scissors
- Iron
- Ironing board
- Sewing machine
- 1/4″ presser foot
- Walking Foot

Yardage & Materials needed for the quilted table runner pattern:
This quilted table runner pattern uses four colors.
- Color A: Dark Blue — 15 patches — 3/4 yard
- Color B: Gold — 12 patches — 3/8 yard
- Color C: Teal — 8 patches — 1/8 yard
- Color D: Orange — 8 strips — 3/8 yard
- Binding: cut 4 strips 2.5″ wide on WOF and piece together at 45 degree angles to create the long strip. Use your choice of fabric, but I used the Dark Blue, Color A this will take about 3/8s yard.
- Backing Fabric: Approximately 2 yards. Use the cotton fabric of your choosing. Coordinating yardage works well, but I use an inexpensive muslin purchased on sale for quilt backing on most of my quilt projects.
- Quilt Batting: Approximately 2 yards. I used cotton 80/20 as it was already in my stash, but fusible would also work well.
- Thread: 50wt cotton thread is the standard in quilting projects. Quilt as desired. I followed stitch in the ditch style quilting and matched my thread to each color of fabric.
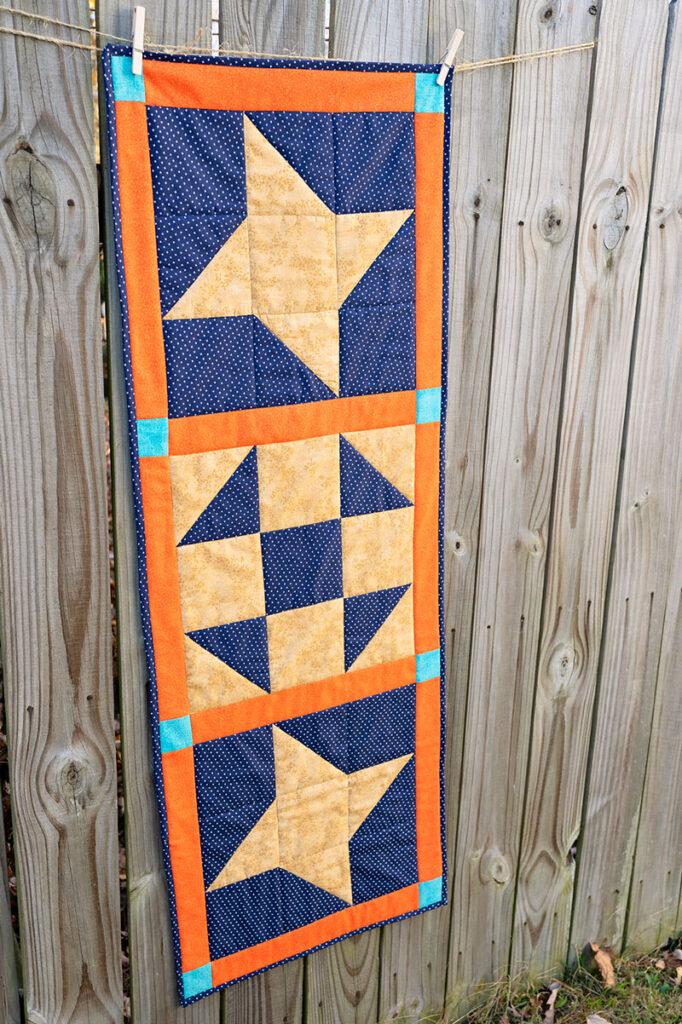
The finished size of this quilted table runner is 54″ x 20″.
Cutting instructions for the Quilted Table Runner:
- Color A: Dark Blue — 15 blocks trimmed to 5.5″ square
- Color B: Gold — 12 blocks trimmed to 5.5″ square
- Color C: Teal — 8 blocks trimmed to 2.5″ square
- Color D: Orange — 10 strips trimmed to 15.5 ” x 2.5″
- Binding: 4 strips cut at 2.5″ wide on WOF
- Backing: fabric cut oversized at 62″ x 25″
- Quilt batting: cut oversized at 62″ x 25″
How to construct this quilted table runner pattern:
- Construct the quilt blocks. This table runner uses 2 Friendship Star blocks and one Shoo Fly Block. The quilt blocks should have a finished size of 15.5″ square.
- Piece orange sash strips between each block to connect them, and add one strip on each end. This will use a total of 4 strips.
- Piece teal squares onto the orange strips making 2 identical long sash strips consisting of 4 teal squares on 3 orange strips, make two of these.
- Piece the long sash strips onto the opposing sides of the quilt top being careful to line up the seams of the teal cornerstone blocks with the seams of the sash running in between and on each end of the quilt top.
- Make the quilt sandwich with the quilt top, the batting and the the backing.
- Quilt as desired.
- Trim off excess batting and backing and square up the quilt.
- Make the binding by piecing the four 2.5″ strips cut on WOF by joining at the 45 degree angle.
- Prepare binding and attach to the quilt.
- Finish quilt as desired and enjoy!

Tips and Tricks:
To better preserve the points in my HST blocks, I cut the blocks for construction a full inch larger than called for, make the HSTs and then trim down to the finished size using the square ruler in the size called for. In other words, for this pattern, I would cut the fabric for the blocks, the dark blue and gold in this case, at 6.5″ wide on WOF. Then cut the long strips to 6.5″ squares. Make the HST blocks and then trim the pressed and starched blocks one by one using the 5.5″ square ruler. I would then stack the fabric squares remaining and trim them using the same square ruler.
Benefits:
- Every block used in construction is perfectly trimmed and sized.
- HST blocks can easily distort and be difficult to get placed properly, so trimming down from a slightly over sized cut practically guarantees an perfect result.
Downsides:
- It takes longer to construct the individual quilt blocks as each HST is individually trimmed before using, and each solid block is also trimmed down a second time.
- Uses slightly more fabric.
While the inspiration for this table runner is the wonderful fall season, it doesn’t arrive in Virginia Beach until late November. Because we are squarely into fall now, I think it’s perfect for Thanksgiving. You might consider some easy to reheat sides with a rotisserie chicken for your Thanksgiving to provide a little more time in your sewing room! I think you can guess what we’ll be doing! LOL