Easy Quilt Block
This post has affiliate links to products I use and love. If you buy something I can make a small commission, so thanks in advance. 🙂
You are not going to like this, but it’s true. What people advertise as an easy quilt block, is not always the case. In fact, I’m kind of shocked by what I see on some blogs being passed off as “beginner quilts” and “easy projects.” It’s no wonder so many people give up and never finish their first quilt. You are being set up!
The truth is this: quilting has a unique set of challenges and while some things are simpler than others, it doesn’t make it easy. However, this doesn’t mean you should give up! In this post we will review the quilt block that I recommend to all beginner quilters, because it truly IS an easy quilt block.
Quilter, meet your new BFF, a truly easy quilt block, the four patch.

It’s elegant in its simplicity, and best of all, you will learn how to properly cut, piece, and trim a quilt top while working with it.
Quilts have 4 distinct parts:
- The Quilt Top, which is the colorful part with all the pieced fabrics.
- The Batting which is the lofty middle layer of the quilt.
- The Backing with is generally a solid piece of fabric.
- The Binding which is the edging we sew onto our finished and trimmed quilt.
Today’s blog post is about making the quilt top, item number one on the list. A quilt top has a series of blocks that are constructed and then sewn together. How many blocks we put together in rows and how many rows we construct will determine the overall size of our finished quilt.
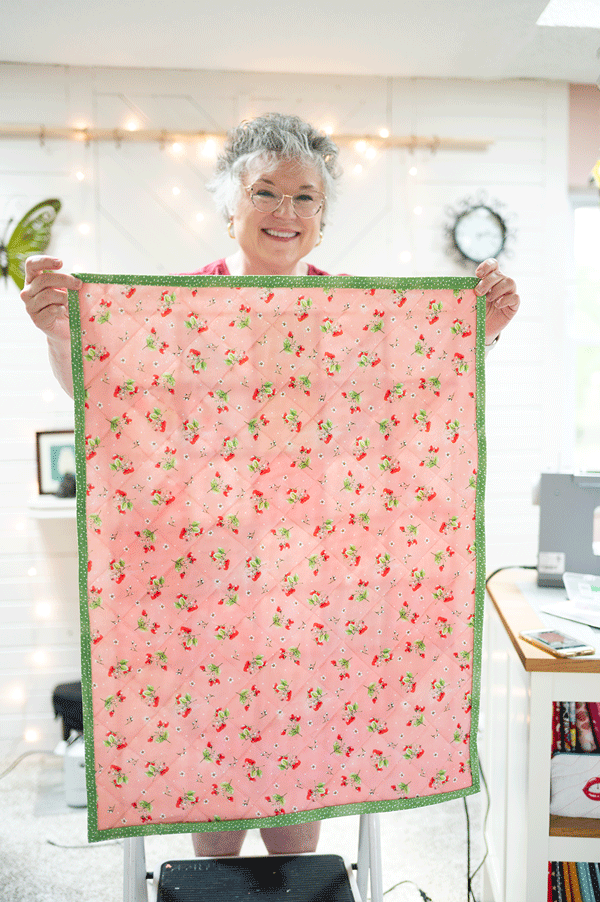
Here’s my twin sized, completed patchwork quilt that used 4 patch blocks as its unit of construction.
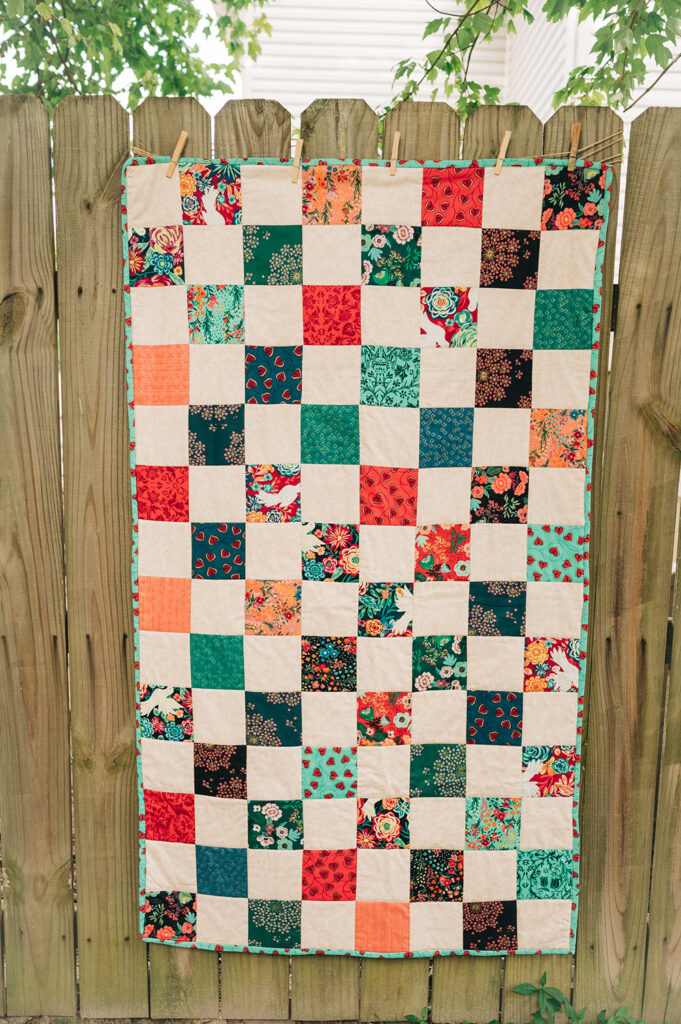
I think a Patchwork style quilt pattern in a smaller size like this is the perfect first quilt. It’s an ideal size for a child, for a student to take with them to the dorm, or for you use when grabbing a luxurious afternoon nap. It’s not too big as to become totally overwhelming, but it’s still a versatile size. You could size it down slightly and make it a baby quilt.
By using a 4 patch as your block, it’s very easy to size up or down your quilt top to what you want. It’s incredibly versatile, and I never met anyone, even non quilters, who did not respond with enthusiasm gazing upon a finish patchwork quilt. It’s nostalgic, but easy to personalize to someone’s taste and preferences by careful use of fabric color and pattern.
So how do we begin?
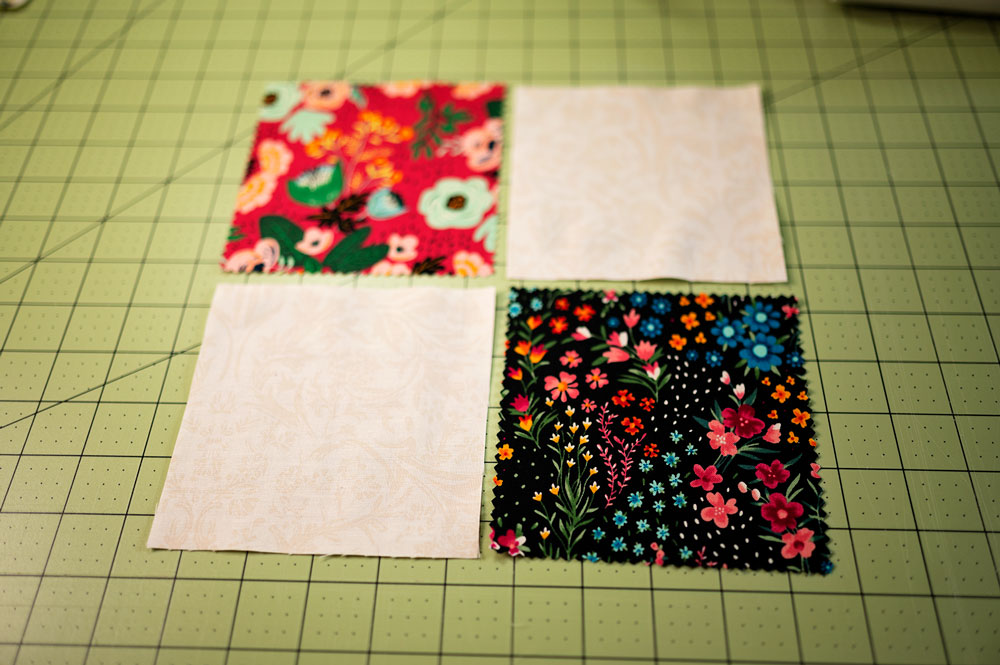
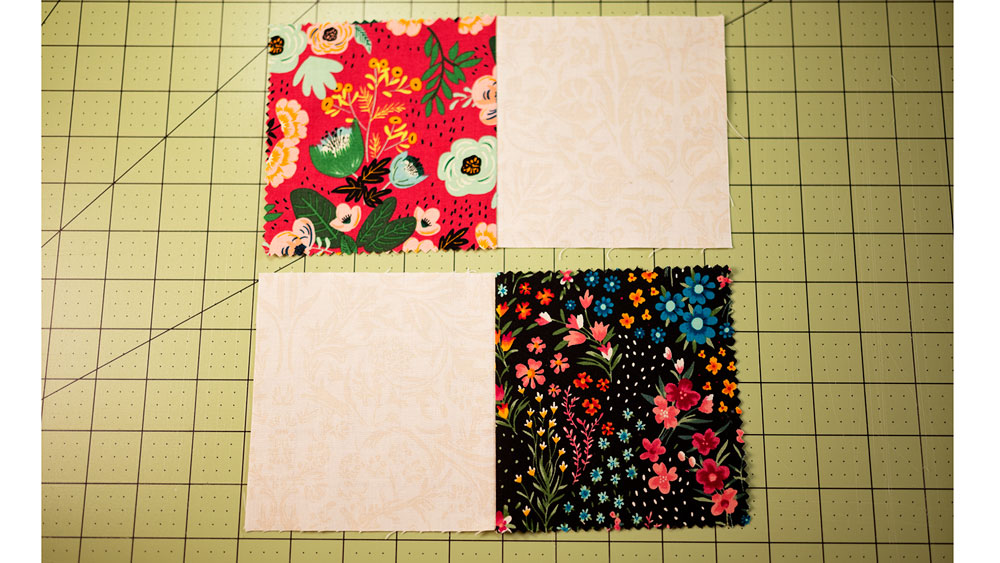
The first step is to cut fabric into the same size squares. I used a charm pack with coordinating yardage to make this block. Charm squares are precuts and they are 5″ squares. I like a charm pack for this project, because it will include fabrics already cut for you, and includes all the designs in a collection. That means you get a nice variety and all the prints are specifically designed to go together. I like to include 2 neutral blocks with my print blocks so the prints can “breathe”, but you could certainly match only prints in your block.
The neutral works, because it’s the same idea as the half square triangle: pair dark and light for maximum impact.
How to construct a 4 patch quilt block:
- Cut all fabrics to the same size. Here we are using 5″ squares. A charm pack will have squares already cut into 5″ squares.
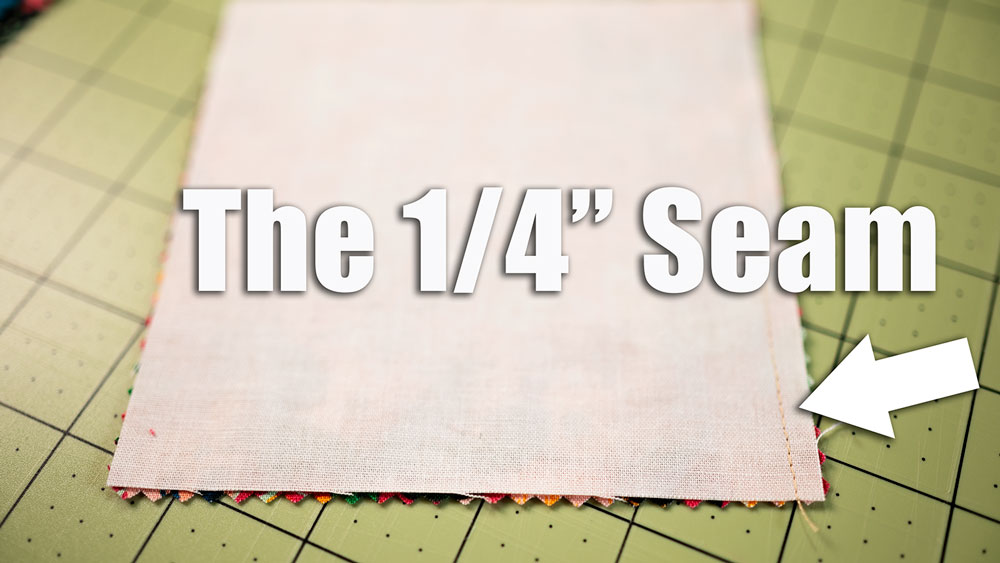
- Place right sides together, and sew a 1/4″ seam allowance to attach the blocks together.
- Press the seam allowance to the darker fabric.
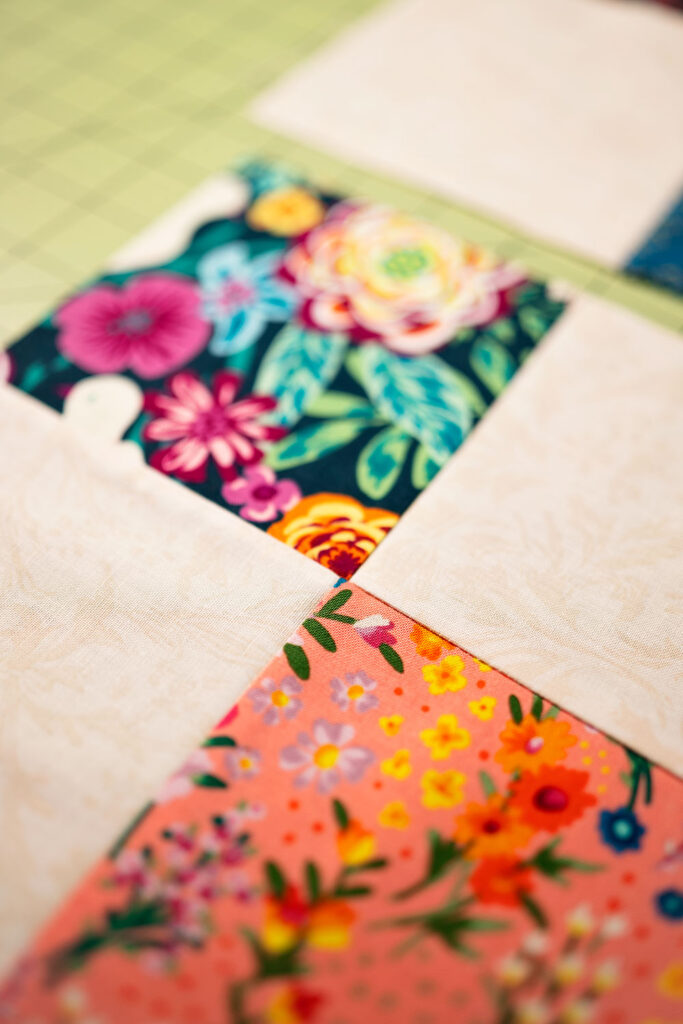
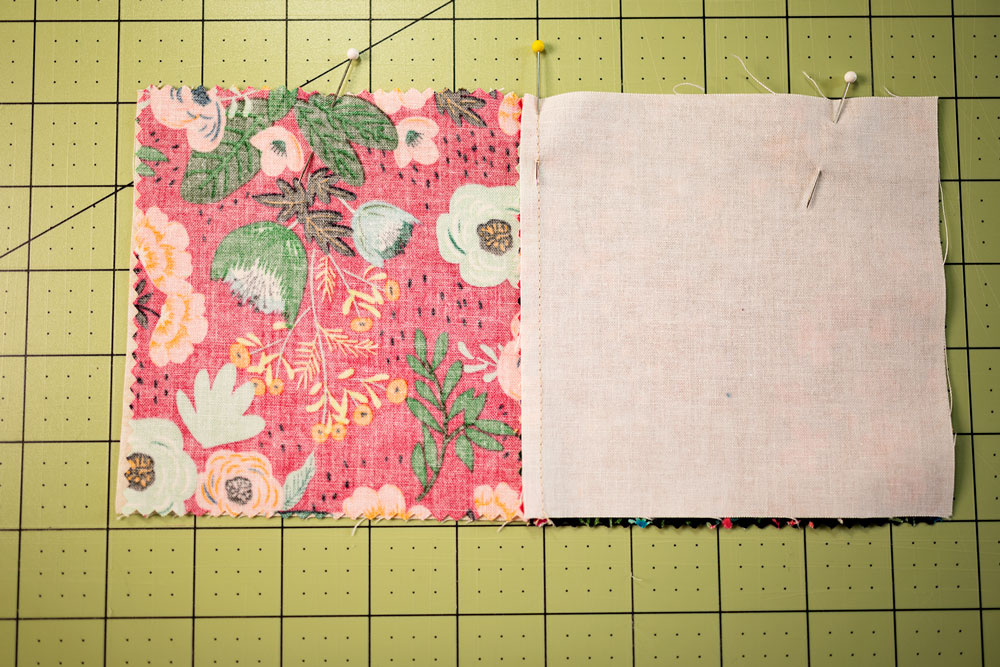
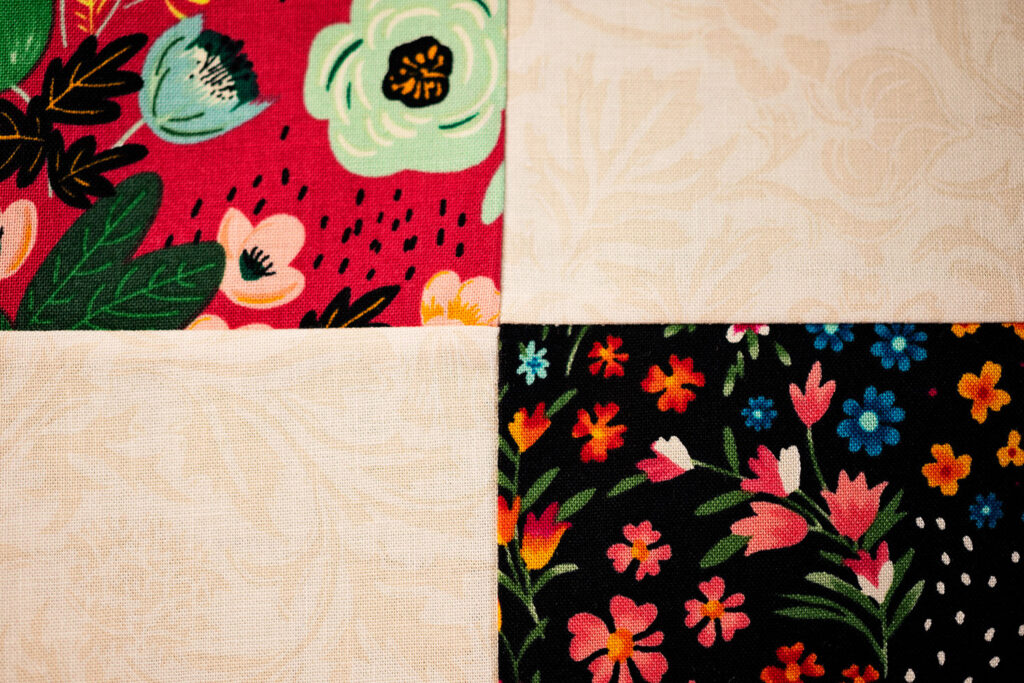
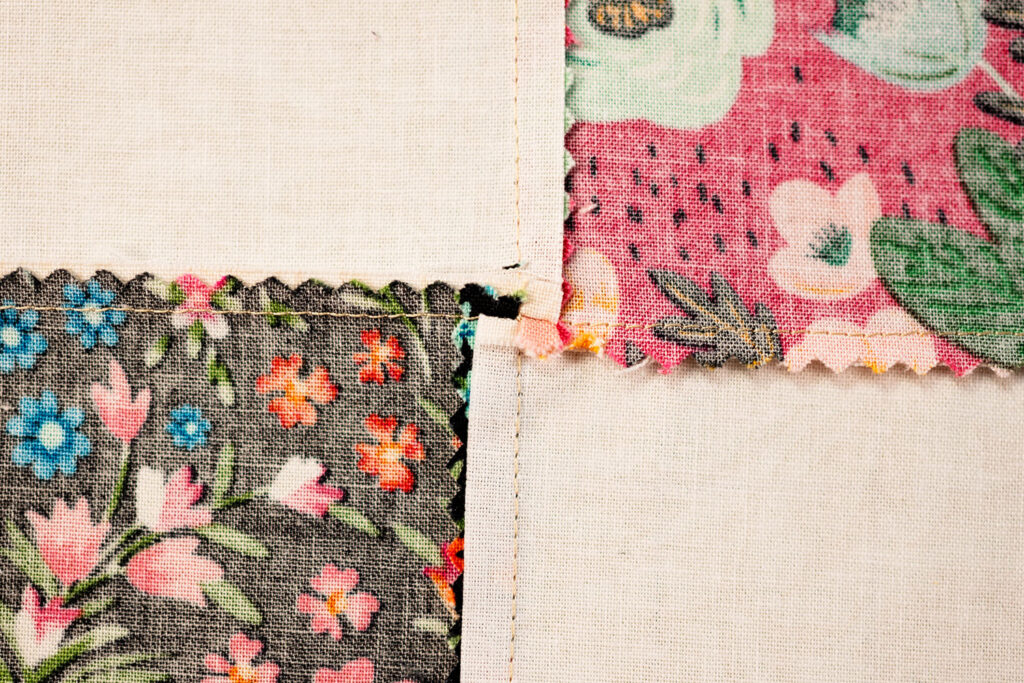
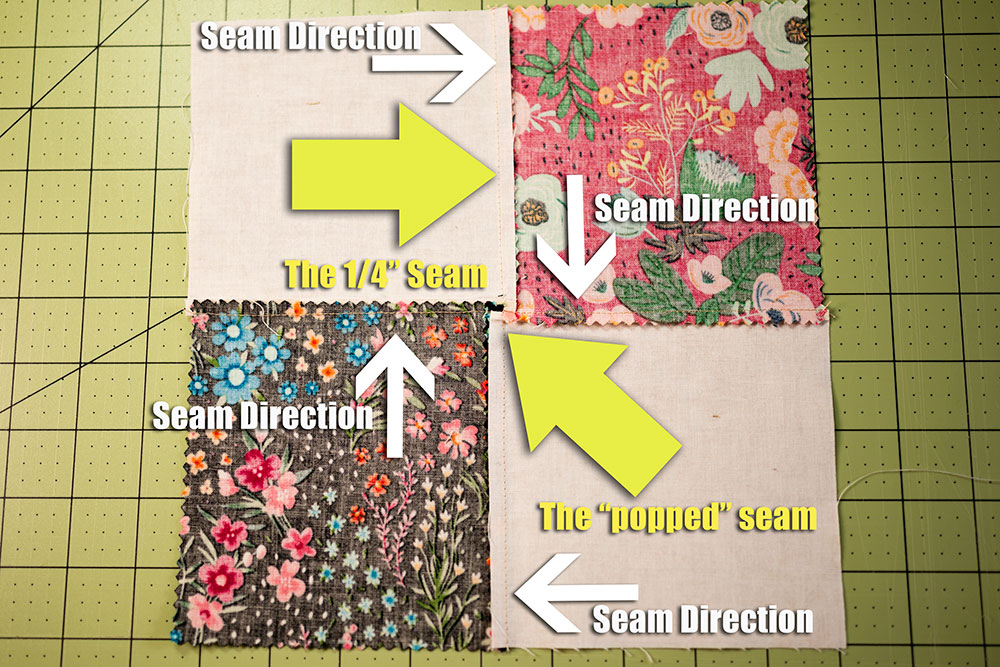
- Lining up the middle seams of the pair of blocks with 2 squares sewn together, pin to secure along the central seam, pin to the right and left of the center seam to secure, and sew together using the 1/4″ seam allowance. Once pressed, you will notice the seam allowance going in opposite directions and this allows the seams to nest together creating a crisp and flat join.
- Open the block once sewn together and “spin” the center part of the block where all 4 corners meet. When it “pops” you will have what looks like a mini 4 patch in the center. This will ensure your block lays as flat as possible. (see the video at the end of the post)
- Carefully press and starch the block. Pressing the seams correctly is critical to obtaining the flattest block possible. And the name of the game when constructing a quilt top is having everything as flat as possible.
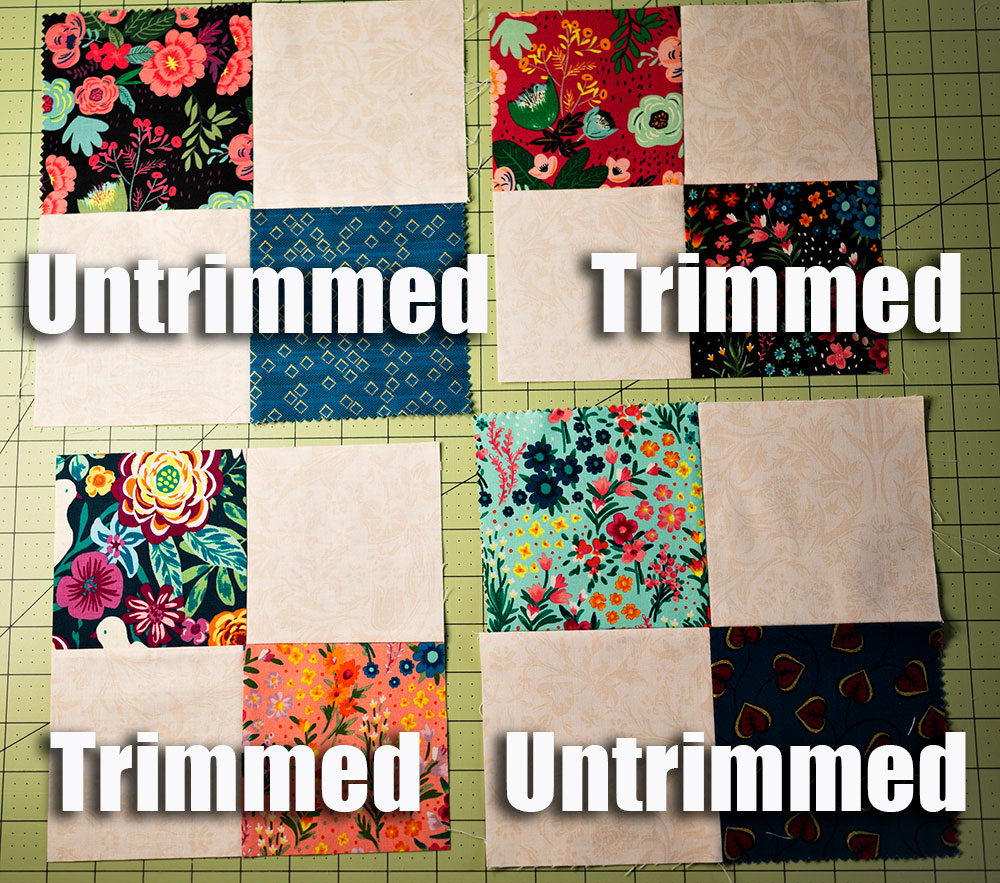
- Trim the block to get it squared up, as well as to get it to the correct size. Having a quilting ruler in a square that is the size you want for your finished block is the easiest way to do this accurately, but you can use the ruler of your choice. I recommend having a ruler in the finished block size to be as precise and consistent as possible. It also makes your job much easier. For purposes of this project, I trimmed to 8.5″ squares.
- Repeat for each block.
Whew. Sounds like a LOT doesn’t it? It is, but it isn’t. Let me explain.
It will come to you easier as you go along, and you will do your work in batches and utilize chain piecing to make this more efficient. But this is the process you need to follow to make the 4 patch block.
Now you know why many people fail when they start quilting. If it’s this much detail to something simple, imagine something complicated.
I’m not saying this to discourage you! Quite to the contrary. I want you to know that if you have tried and had difficulty in the past, it’s probably because you were convinced that something complicated would be really easy. So don’t give up. Try again! And start here. Let’s look at the steps in pictures.

Piece the top and bottom. Mind the 1/4″ seam 
Carefully pin the rows

The perfect center join The spun seam with mini 4 patch on the wrong side
Here’s the thing about quilting: like any other craft you improve through practice. And you can’t improve if you don’t keep going. So KEEP GOING! It’s a fun and challenging hobby. There are so many aspects to quilting, that I don’t think it’s possible to get bored.
Please enjoy this video with visual instructions to accompany the written version in the story. And keep quilting!
You Might Also Like:

Hi, I’m Patty
Sewist, baker, maker
love figuring out new ways to use pom poms, where I can stash more fabric, and I’m always wondering what to bake next…chocolate or lemon? When not dreaming up new things to make (or bake), I love riding my beach cruiser on the Boardwalk, enjoying classic movies, and planting new things in my tiny but mighty container garden.