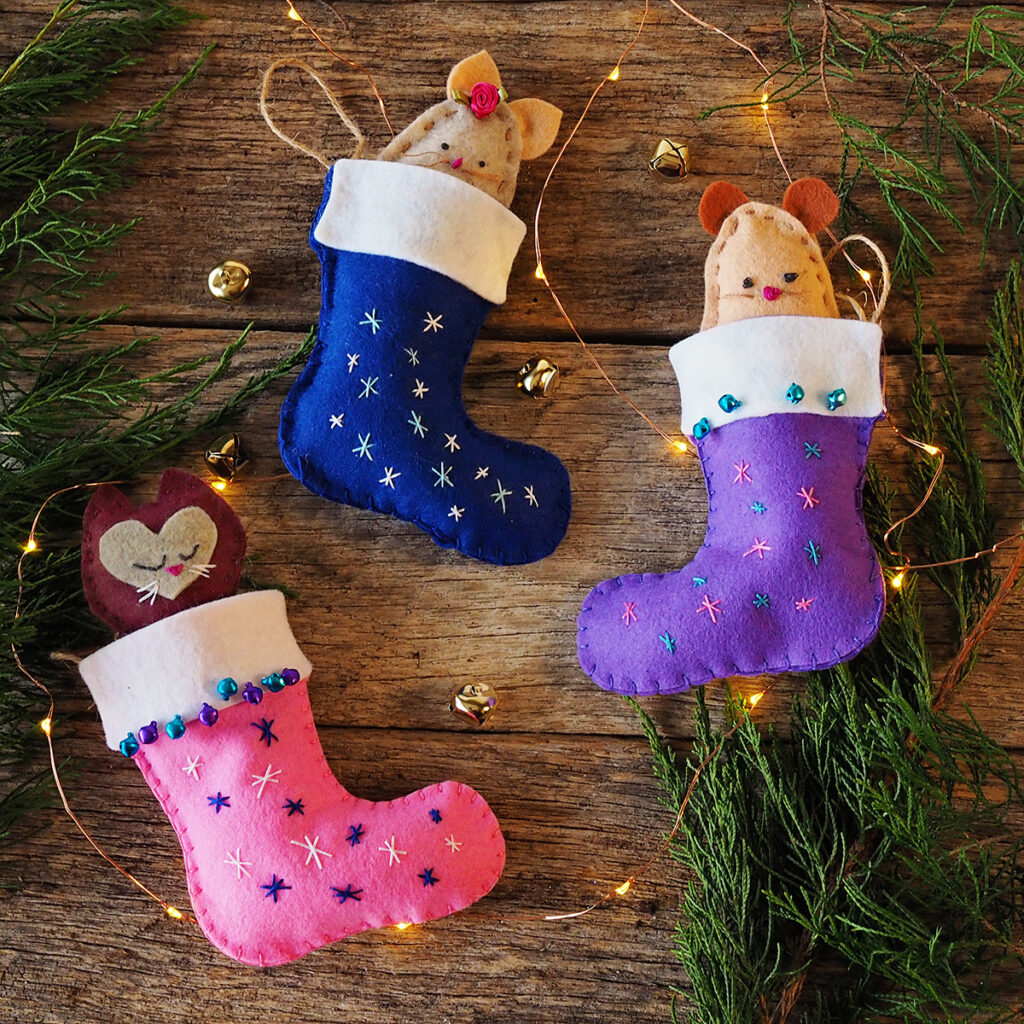
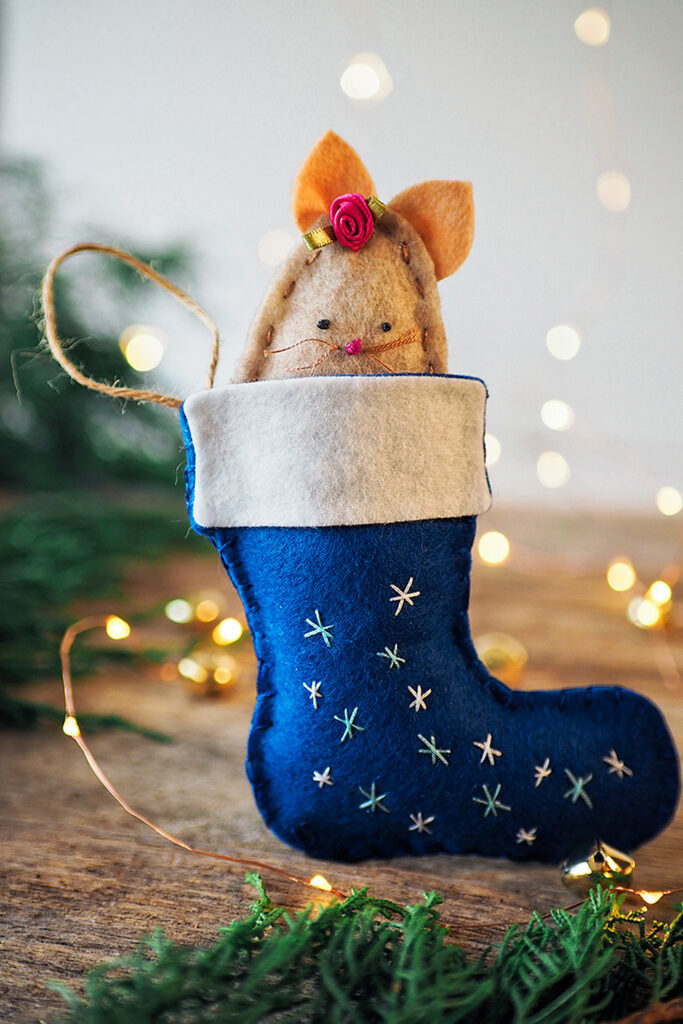
Felt Christmas Craft
The holidays are the perfect time to slow down and feel festive with old fashioned activities. A felt Christmas Craft is a delightful way to enjoy simple hand sewing and create a beautiful and unique ornament.
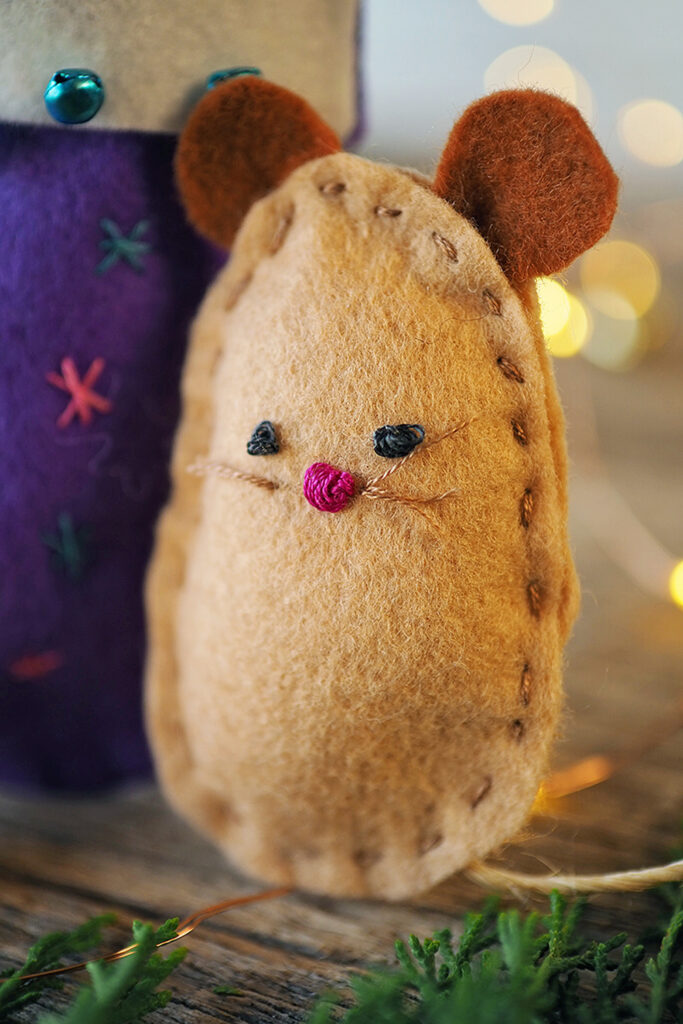
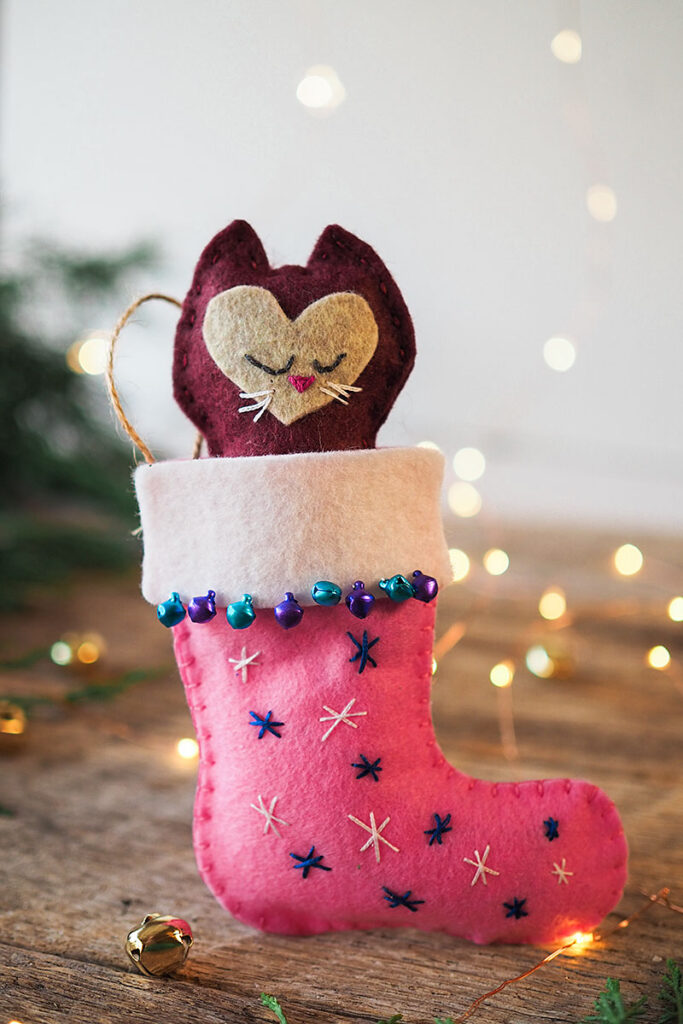
Today’s project includes the adorable Mr. and Mrs. Mouse, the Pocket Kittens (from prior posts), and a free printable for a stocking to tuck away your handmade Christmas felt craft toys. Perfect to place in travel bags, in Christmas trees, inside a larger Christmas stocking or even to take to bed and count the days until Santa arrives.
What do you need to make this Felt Christmas Craft?
- Wool Felt: 8 colors are shown in the picture above.
- Embroidery floss that both matches and contrasts with the felt: 10 colors are shown in the picture above.
- Embroidery needles
- Small scissors
- Tacky Glue (it’s a brand of craft glue)
- Twine to make the loop for hanging
- Poly Fil stuffing
- Mini bells or tiny pom poms are cute for trim.
- The Free Pattern for the Christmas stocking, and instructions for Mr. and Mrs. Mouse and the Pocket Kitten.

How to make the Christmas stockings and friends:
- Cut out the stocking pieces. You will need to cut two bodies in the color and one white piece for the trim on the stocking. Enjoy this free pattern for cutting out your Christmas Stockings!
- If desired, stitch the stars on the stocking piece below where the white trim will go. This is the front of your stocking. I used two strands of floss.
- Cut a 6″ length of twine. Fold it in half, bringing the ends together. Glue those ends to the back of the front stocking piece behind where the white trim will go.
- Allow the glue to dry at least a couple of hours, but over night is best.
- Attach the front and back pieces together using 2 or 3 strands of embroidery floss with blanket stitch. Catch the twine in the stitches to make it extra secure.
- Glue the white trim to the front stocking piece.
- Allow the glue to dry at least a couple of hours, but over night is best.
- Stuff a tiny bit of poly fil into the stocking to fill it out.
If you can find those tiny little jingle bells, they are adorable as trim on the stockings. They will need to be sewn on. Tiny little pom poms would also be adorable.

Happy Holidays to you and enjoy your adorable Felt Christmas Craft toys. Tucking one of these in with your gift of Christmas cookies is a sweet surprise and will be a treasured gift for years to come.
You might also like:


Hi! I’m Pattymac!
Sewist, Baker, Maker
I love figuring out new ways to use pom poms, where I can stash more fabric, and I’m always wondering what to bake next…chocolate or lemon? When not dreaming up new things to make (or bake), I love riding my beach cruiser on the Boardwalk, enjoying classic movies, and planting new things in my tiny but mighty container garden.