My Patriot’s Heart Quilt Block
Having been raised on a farm by a father who served in the military, being Patriotic is in my blood. So when I designed the Power of 3 Row Quilt, I knew it had to include a Heart and I knew that heart had to be red, white and blue. I hope you will enjoy making my Patriot’s Heart Quilt block as much as I enjoyed designing it.
I love this country, and I know that beneath all the crazy stuff that’s floating to the top these days, we are still a good place filled with amazing people. Piecing this block, the second row in the Power of 3 Row Quilt ,is my way of saying how much I still love America. 🇺🇸
All The Blocks In This Series Are Constructed To Be 12″ Finished Blocks.
Row 1: The Sawtooth Star
Row 2: A Patriot’s Heart (today’s block)
Row 3: The Diamond Block
Row 4: The Classic Pinwheel
Row 5: The Stair Step Block

Construction for My Patriot’s Heart Quilt Block
In essence, this quilt block is a fancy four patch. Let me explain. To construct it, you make 4 separate blocks from all the little pieces, and then put them all together. It’s not an especially difficult block to make, but it’s a lot of components and sewing and trimming. And you’ll want to take care about getting all the little pieces into the right places.
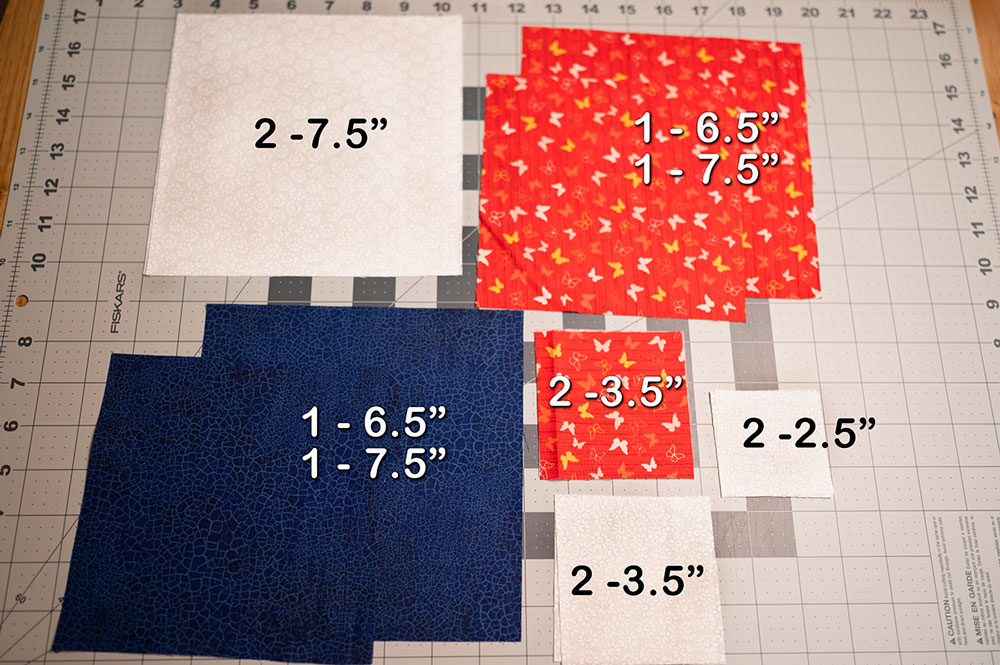
Cutting Instructions: ✂️
Color A (Blue):       1 - 6.5" Square
Color A (Blue):       1 - 7.5" Square
Color B (Red):        1 - 6.5" Square
Color B (Red):        1 - 7.5" Square
Color B (Red):        2 - 3.5" Squares
Color C (White):      2 - 7.5" Squares
Color C (White):      2 - 2.5" Squares
Color C (White):      2 - 3.5" Squares
Ok. Don’t Panic. I know it seems like a LOT of pieces. And it is. But when you start putting the block together, you’ll quickly see where everything goes. Stick with me, and we’ll get you through this!
How to construct the block: 📐
First step is to get everything cut out.
Cut all your squares and lay out all the pieces on your cutting table so you can easily see all 12 squares. Match them by size and color.
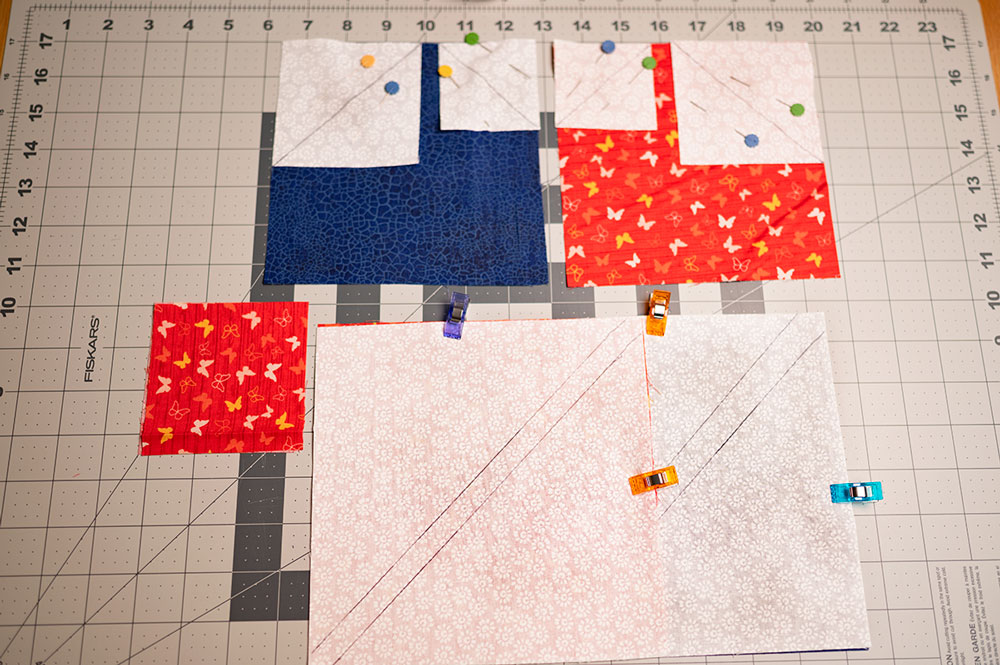
Pin pieces together and mark the sew lines.
Match the 7.5″ red and blue blocks each to a white square of the same size. Mark each set to make 2 at a time half square triangles. If you need a primer on HST blocks I have a great tutorial on that.
Lay out the smaller white squares on the red and blue 6.5″ squares as indicated in the picture. Place the 2.5″ square on the midline and 3.5″ square on the lateral edge. Mark your sew lines as indicated and secure the blocks for sewing.
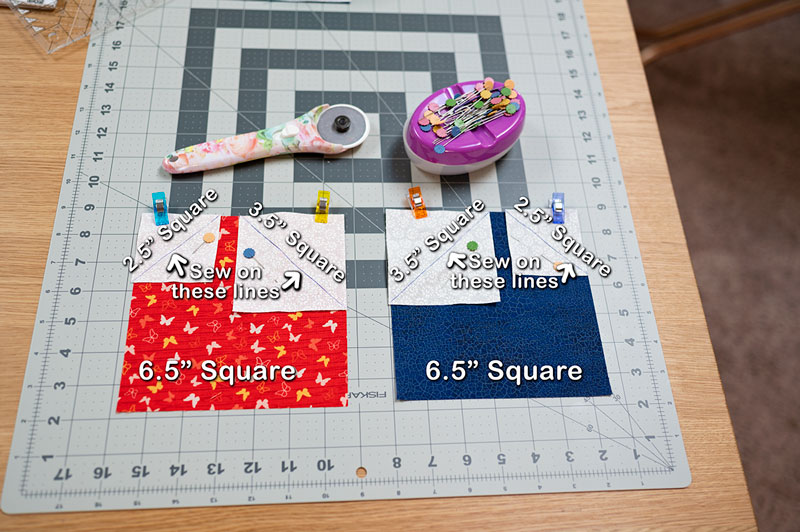
Let’s look at those two top squares more closely.
Notice in this sample I put the 3.5″ squares in the middle. That’s also an option. The main thing is you piece the squares to be a mirror image of each other and mark and sew on the lines as indicated.
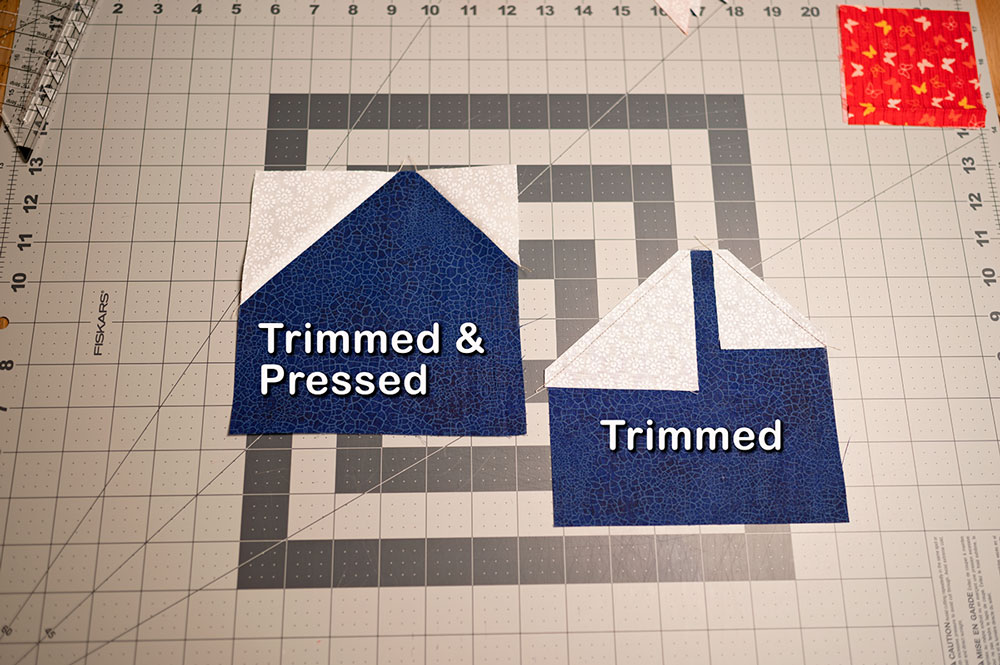
Proper trimming is essential.
Once you’ve sewn the background squares, the smaller squares, into place you will trim the excess away. Keep your 1/4″ seam when trimming and press the flaps open to to create a “new” square: one with the background now attached to this part of the heart. You’ll do this for both upper blocks.
Proper trimming and pressing will make or break this quilt block.
This picture shows the two at a time HST blocks cut apart and the comparison of trimmed and untrimmed top blocks together.
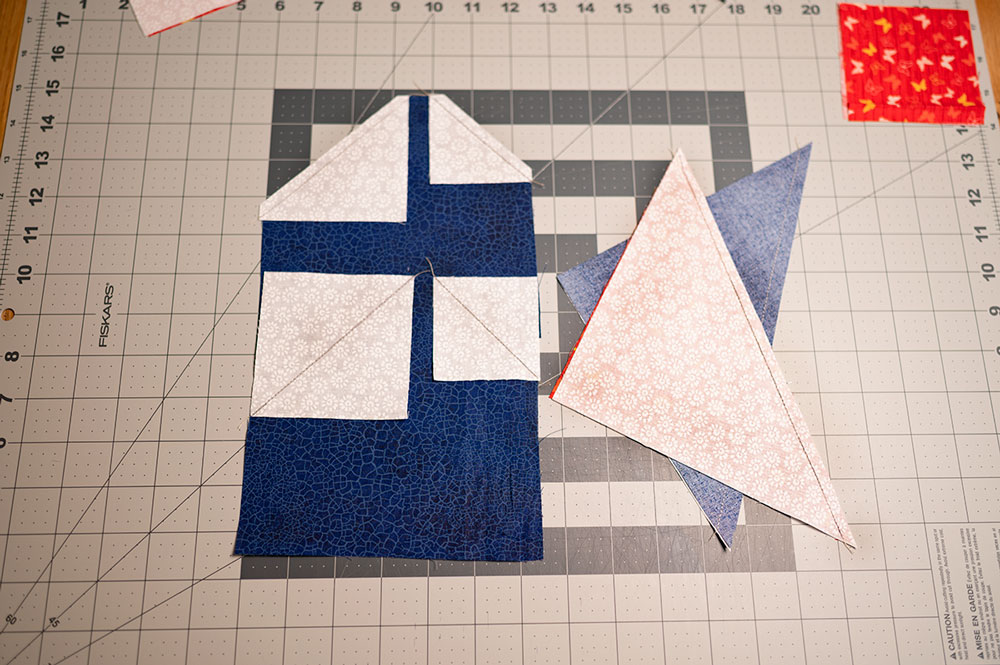
Once the large HST units are constructed and trimmed, it’s time to add the corner piece.
These two half square triangles form the lower part, the point of the heart. Place the small, 3.5″ red square in the corner of the hst with the background fabric. Draw the sewing line and pin into place.
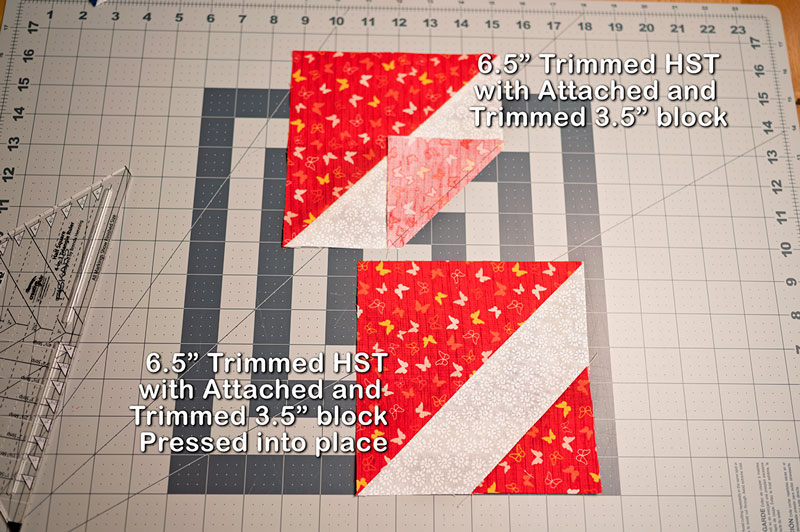
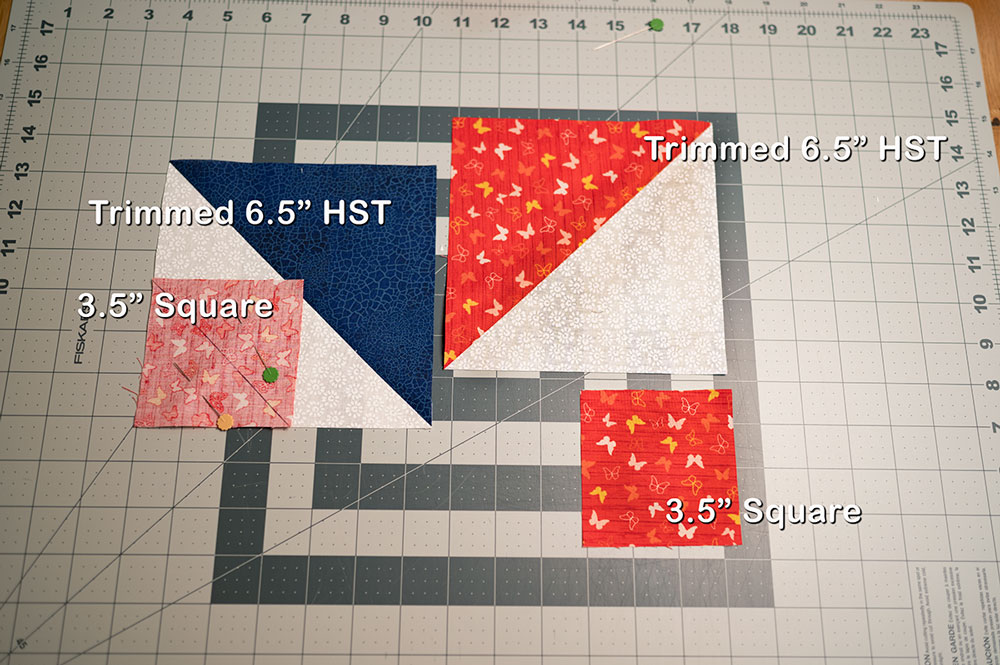
Trim and Press
Once the 3.5″ block is secured, trim away the excess fabric leaving a 1/4″ seam allowance. Press open. Your lower blocks are now complete

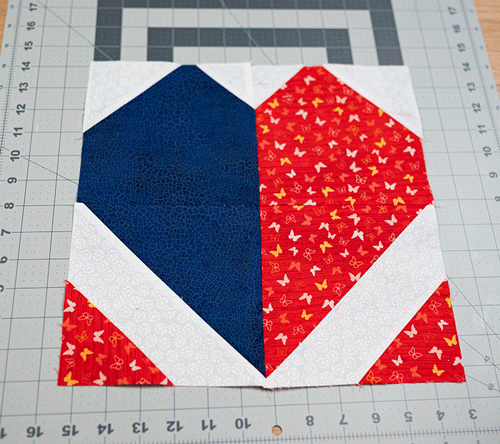
Almost completed quilt block.
Now we’re ready for final construction! Sewing along the midlines, sew the two top blocks together, and then sew the two bottom blocks together creating two units.
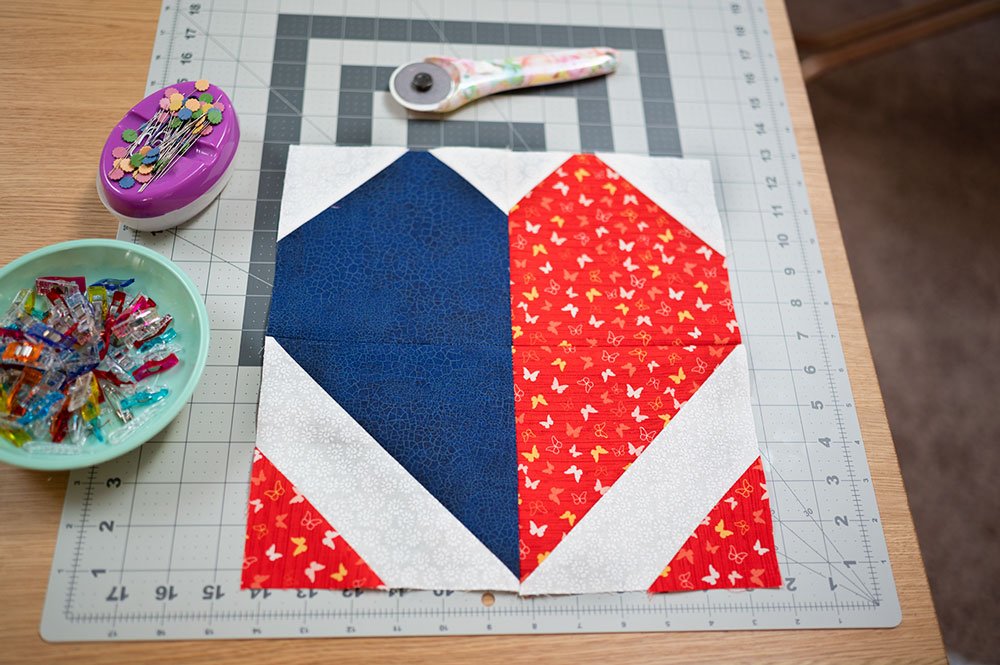
The last step!
Once the top and bottom units are sewn together, simply complete the block by joining the top and bottom units along the midline.Take care to line up the center seam.
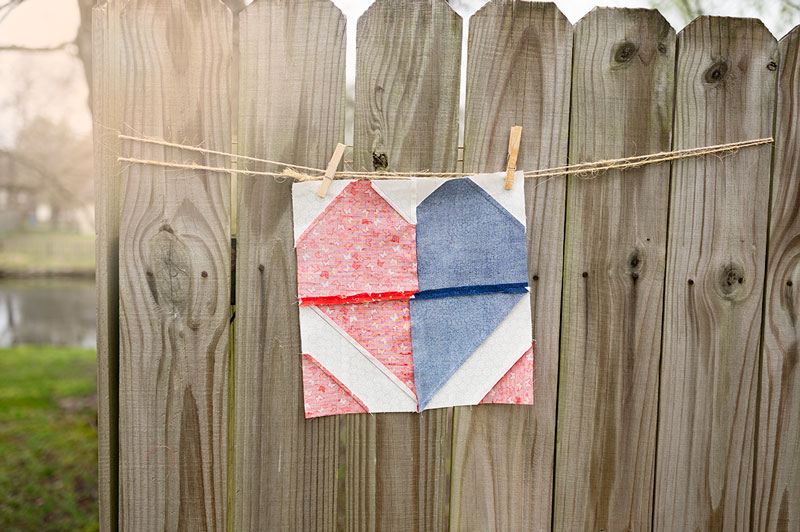
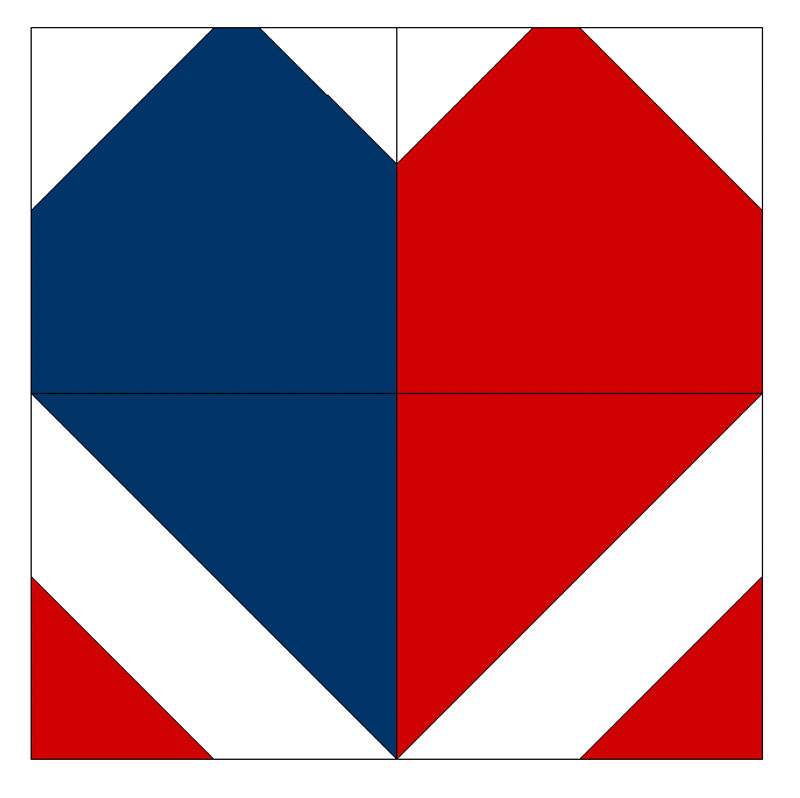
The final Patriot’s Heart Quilt Block
Once the top and bottom units are joined at the midline, the block is complete! Notice the 1/4″ seam allowances are in place all around the block ensuring the points will be retained once the 12.5″ block is pieced into the design.
Now that you’ve pieced your very own Patriot’s Heart Quilt Block, what can you do with it?
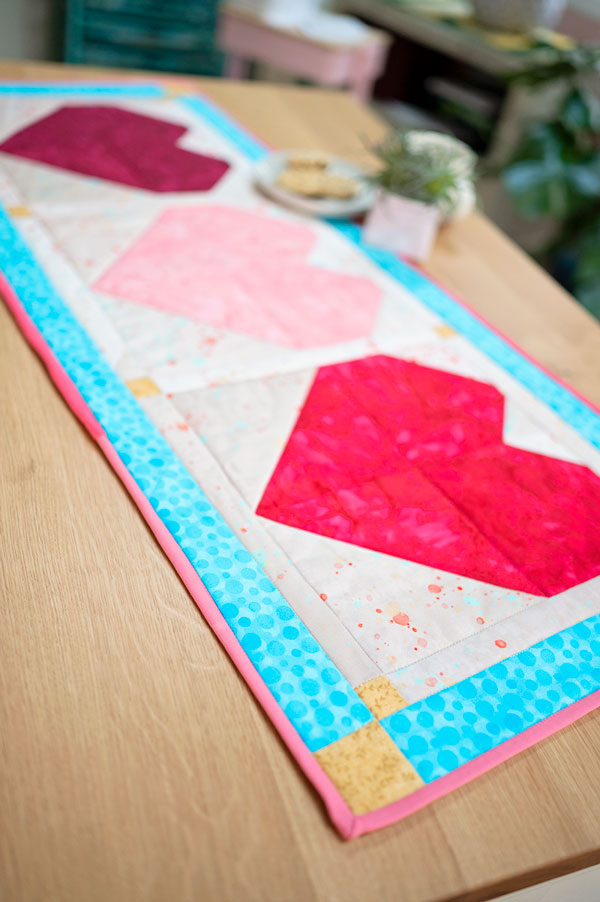
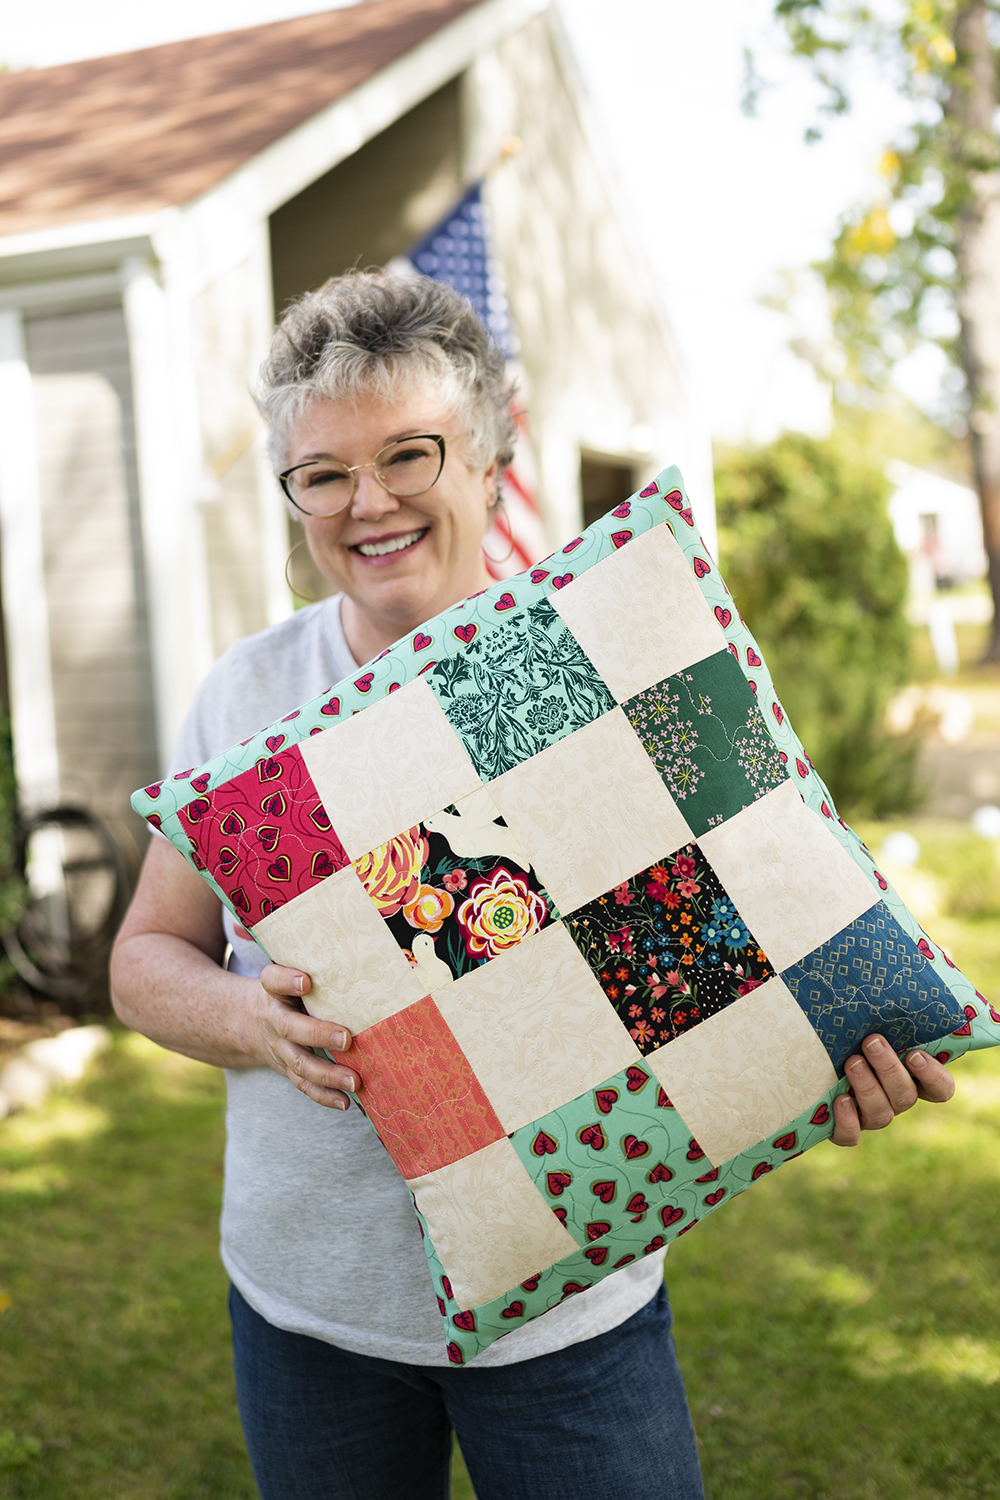
- This is a 12.5″ quilt block and a perfect size for a pillow! Sew 2″ sashing all the way around and you’ve got a beautiful 14″ Pillow. Not sure how to make a quilt block into a pillow? Check out a patchwork pillow I made last summer.
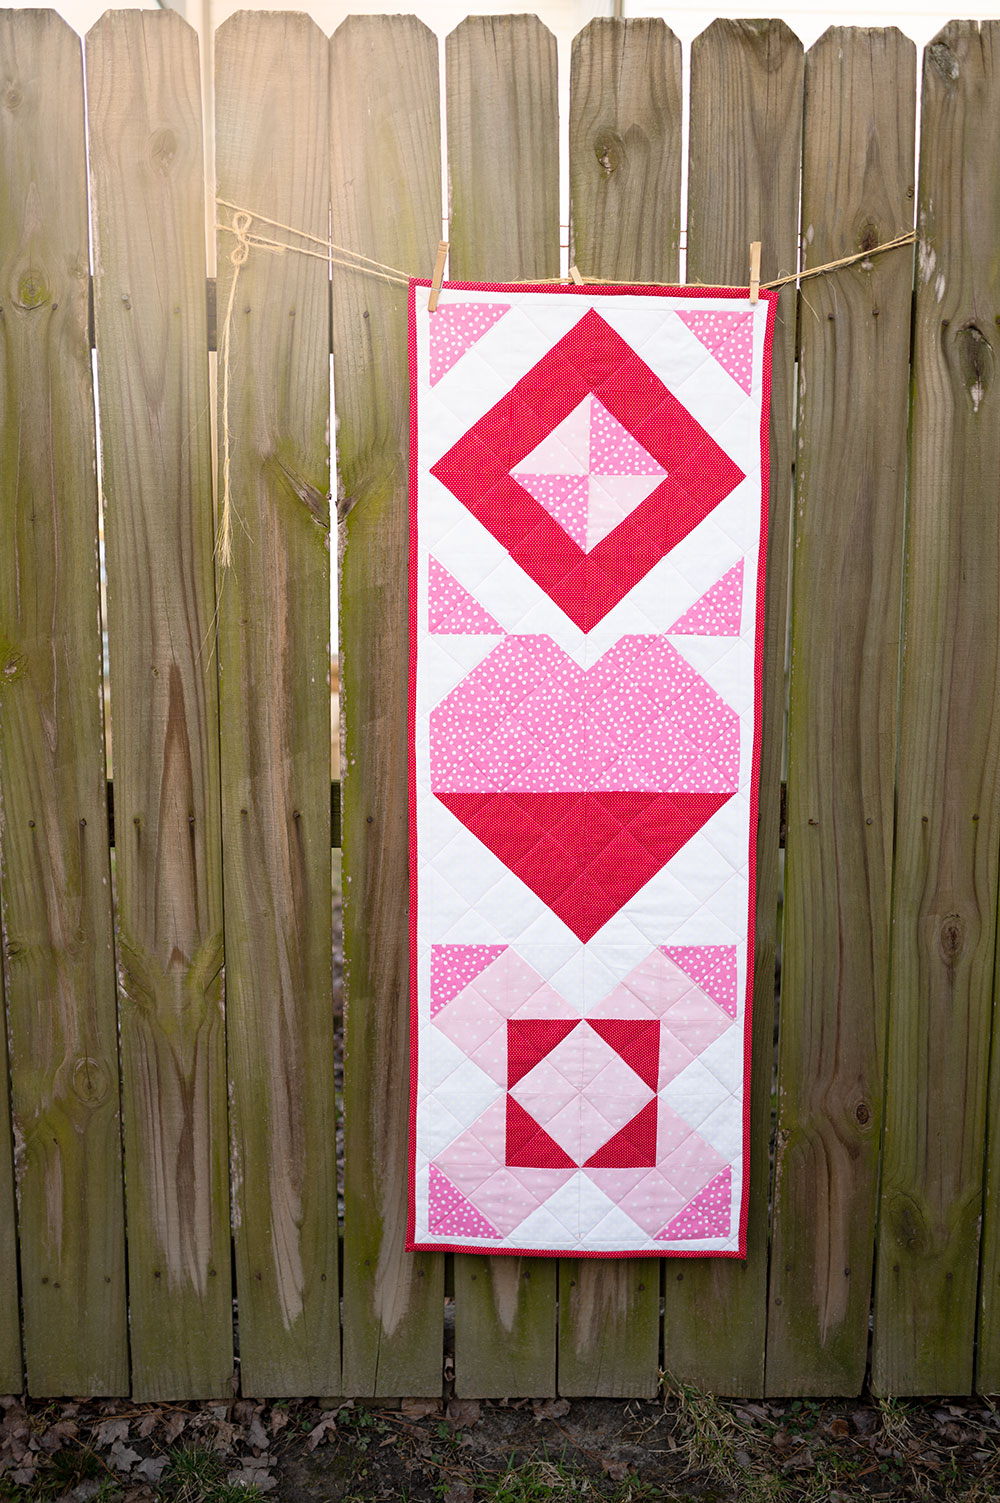
- Finish one into a mini quilt and display on your front door as a door quilt.
- Sew 3 or 4 blocks and piece them into a row to make a table runner.
- Sew 4 and piece them into a wall hanging!
- Sew 4 Patriot’s Heart Quilt Blocks to construct Row 2 of the Power of 3 Row Quilt!
- This block creates LOTS of little trimmings. You can either discard them or sew, press and save the mini HST units they make. Collect these little trimmings into one place and eventually you’ll have enough for a full project! Or Two!
Here are your cutting instructions to make 4 blocks: ✂️
Color A (Blue):       4 - 6.5" Square
Color A (Blue):       2 - 7.5" Square
Color B (Red):        4 - 6.5" Square
Color B (Red):        2 - 7.5" Square
Color B (Red):        8 - 3.5" Squares
Color C (White):      4 - 7.5" Squares
Color C (White):      8 - 2.5" Squares
Color C (White):      8 - 3.5" Squares
Tips and Tricks
- One thing not readily apparent in making this pattern is that the 7.5″ blocks that construct the HST blocks on the bottom of the pattern will make 2 HSTs. In other words, when sewing and trimming your pieces to make one block, you wind up with TWO HSTs of each. So you’re half way to a second block with those extra units.
- The usual instructions for making half square triangles calls for cutting your initial squares 7/8s” over size to compensate for the seam allowance and squaring up. I find that measurement difficult….because well FRACTIONS. 🤔 So I size up a full inch to keep it easier for my brain to manage. And much easier to trim.
- Quilting always assumes a 1/4″ seam allowance. Always.
- Make your quilting easier by using the right tools for the job
- Rotary Cutter (affiliate link)
- Cutting mat (affiliate link)
- Square Rulers (affiliate link)
- Patriotic Fabrics (affiliate link)
- Really good iron (affiliate link)
Remember that in quilting, your wrong side is just as important as the front side. Carefully press your seams to give the flattest block possible. Since this block is in essence a four patch, nesting your seams for the top and bottom halves of the block work beautifully. I then pressed the center horizontal seam open to give me the flattest possible result.
Thanks for stopping by today! I hope you’ll piece your own Power of 3 Row Quilt where we explore the power of using 3 strong colors to create a cohesive color story for our quilt. Here is the illustration of the Patriot’s Heart Quilt block to help you see the construction.
Clicking on the image will take you to a full size version you can download for a reference.
How to follow along with the Power of 3 Row quilt:
- I’ve designed this quilt around publishing a new block once a week. So you will see the instructions to construct each new block once a week. I’ll share the instructions to make one block as well as all 4 if you wish to construct a full row each week. I recommend making a full row each week and at the end of the 5th week, you have all the rows completed and joined.
- Be sure to subscribe to my youtube channel where we will be making a new block each week and I will also drop in with live check ins to see how everyone is progressing and to answer questions.
- Subscribe to my email list so you receive notification when the new block design publishes. 😀