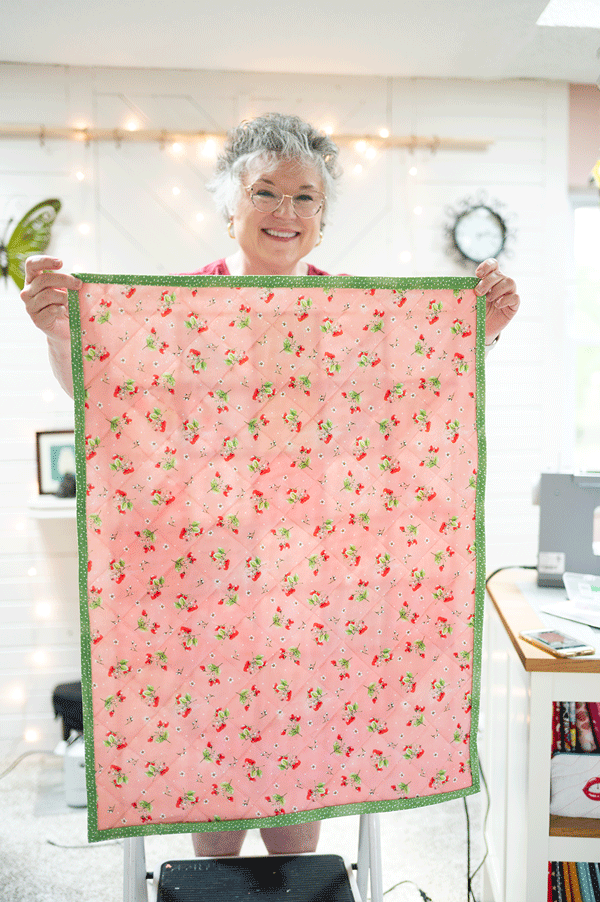
Power of 3 Row Quilt
Hello lovely Makers! Allow me to introduce you to the Power of 3 Row Quilt. This is a new quilt pattern designed to provide a beautiful new block design you can piece each week.
Each row is comprised of 4 blocks of the same design, which is why we call this style of quilt a “row quilt.” One row is made by piecing together a number of blocks of the same design. The start of a new row will include a new block design.
Here’s an illustrated version of the finished quilt design.

The quilt has 5 unique block designs. Each row is made by constructing 4 blocks of each design and then piecing those four identical block together with a sashing piece. To complete this quilt as a quilt along style project, simply construct four blocks of each design and piece them together with the sashing.
What you need to know:
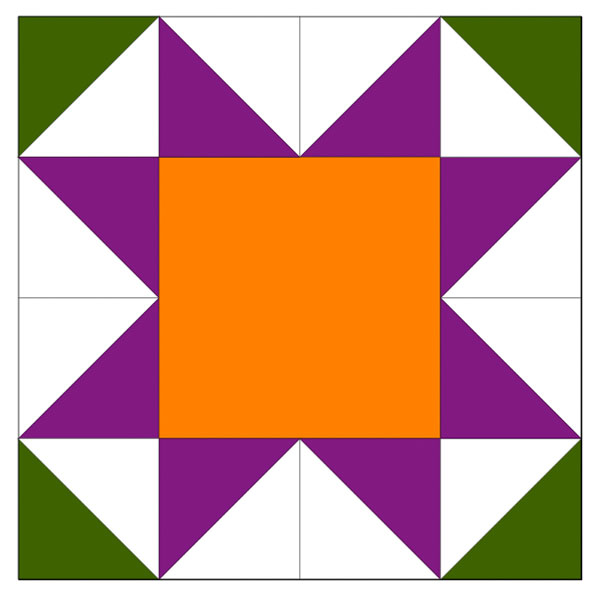
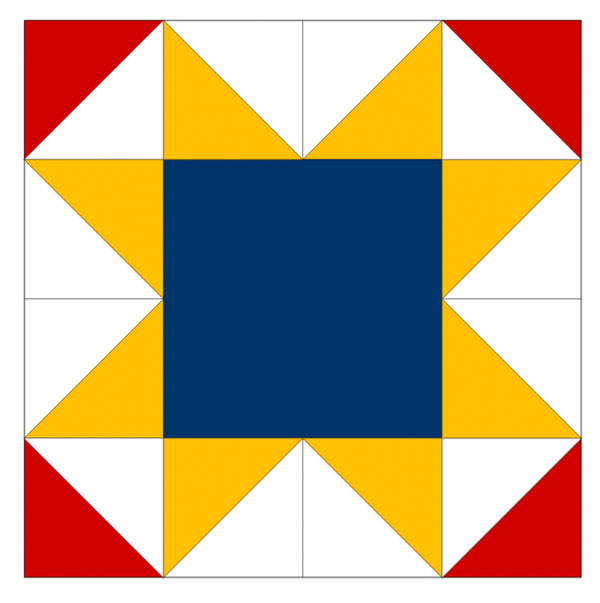
I named this quilt the Power of 3 because it’s designed to use three colors and a neutral background fabric. It can be challenging to pick out your own fabrics for a large quilt project.
I find that using a color wheel to select colors is the easiest way to put something together that will be harmonious in color and pleasing to the eye. For mine, I went with a basic triadic color scheme of red, yellow and blue with white as my background fabric. Another version of triadic color is (believe it or not) orange, green and purple. I know it sounds weird, but it does work.
Let’s take a look at some real world examples:
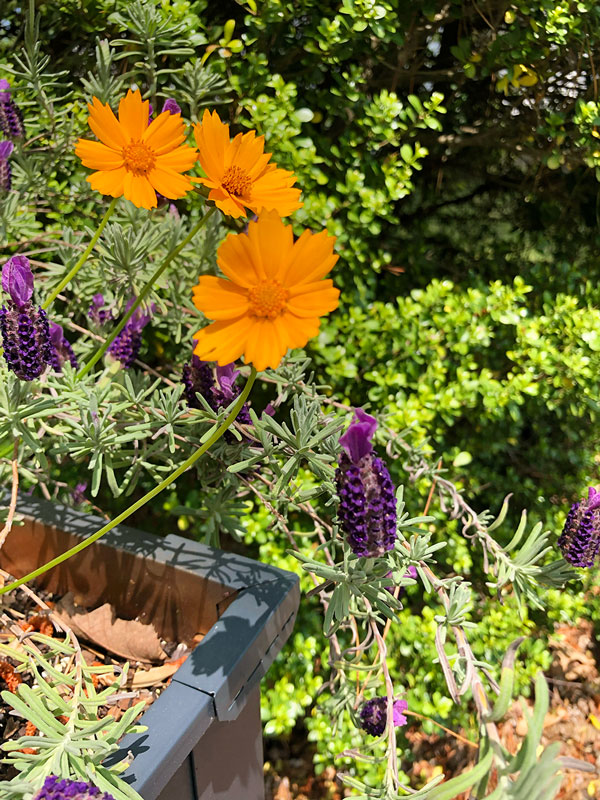

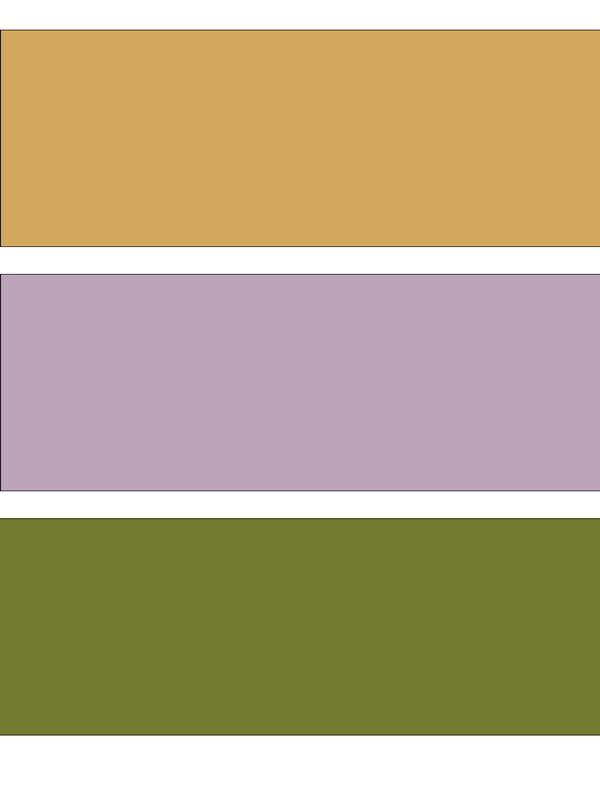
This is a quick snapshot from one of my flower gardens. I was so surprised to see it perfectly demonstrated how pretty this color combination of orange, violet and green can be! The palette I made for you was done by selecting colors from the photo.
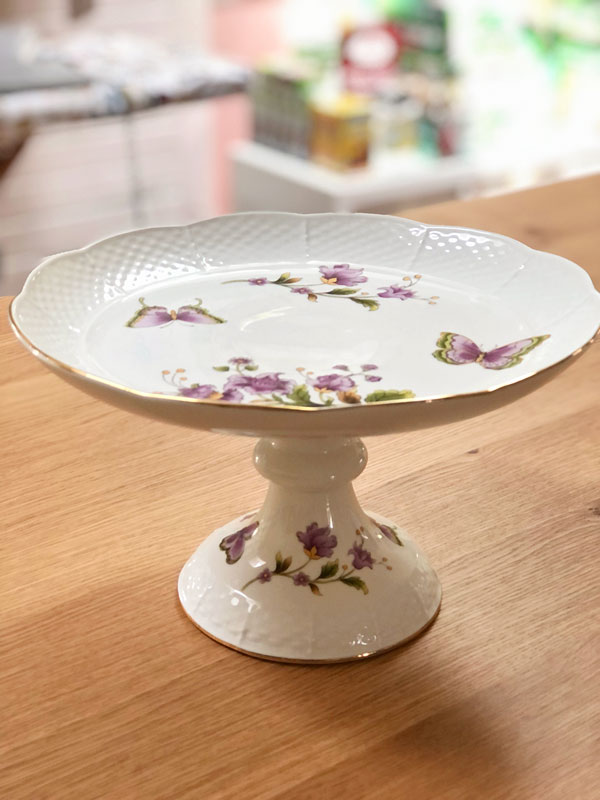
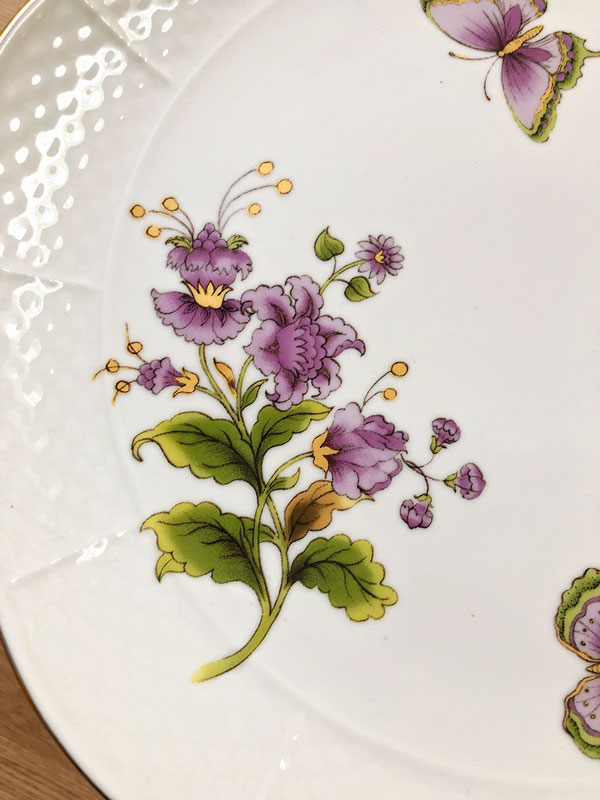
When the orange, violet, green triadic color scheme first came up for me on the color wheel, I thought, “no way could that possibly work.” But then I noticed one of my cake plates painted in that color scheme. I quickly realized how pretty it looks!
I made the color palette by selecting color from those pictures.
Your next question is likely, “What’s a color wheel?”
The invisionapp website defines a color wheel like this: The color wheel is a visual representation of colors, with hues arranged according to wavelength. Color wheels allow color relationships to be represented geometrically, and show the relationship between primary colors, secondary colors and tertiary colors.
Simply put, using a color wheel as a tool, it can help you to make color choices (affiliate link) for any number of projects or designs. I’ve used a few, but this one is my current favorite.
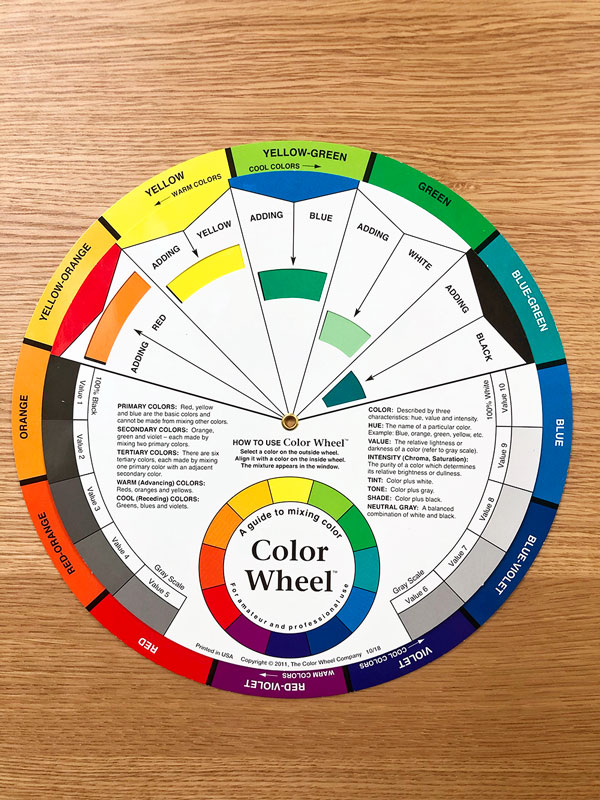
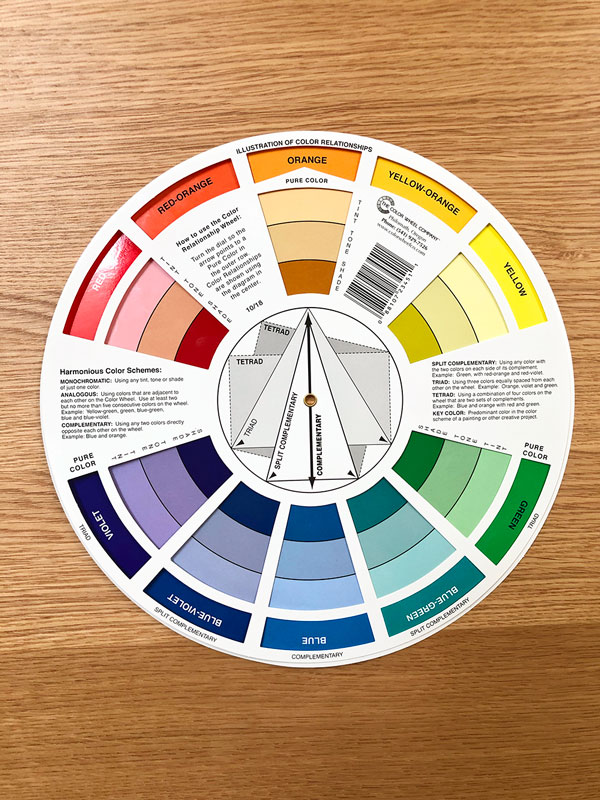
I love this color wheel because it gives SO MUCH information. (affiliate link) It provides derivations of color instead of only showing the pure hue, which can sometimes be a little too much color. The front will help you to select different shades and tints and the back will help you to pick color in terms of their relationships to each other. It’s incredibly helpful and very interesting. Color Theory can get incredibly in depth, so we will keep it very simple here.
Pick 3 colors that work well together. Make a selection that is TRIADIC. That is, select THREE colors in the triad as defined by the back of the wheel OR you could pick analogous colors, which are colors that are essentially the same color but in different value, so light, medium and dark.
My suggestion is to make it easy on yourself if you feel a little over whelmed with color and go with either:
- Red, Yellow and Glue
- Orange, Violet and Green
How to make the Power of 3 Row quilt
- I’ve designed this quilt around publishing a new block once a week. So you will see the instructions to construct each new block once a week. I’ll share the instructions to make one block as well as all 4 if you wish to construct a full row each week. I recommend making a full row each week and at the end of the 5th week, you have all the rows completed and joined.
- Be sure to subscribe to my youtube channel where we will be making a new block each week and I will also drop in with live check ins to see how everyone is progressing and to answer questions.
- Subscribe to my email list so you receive notification when the new block design publishes.
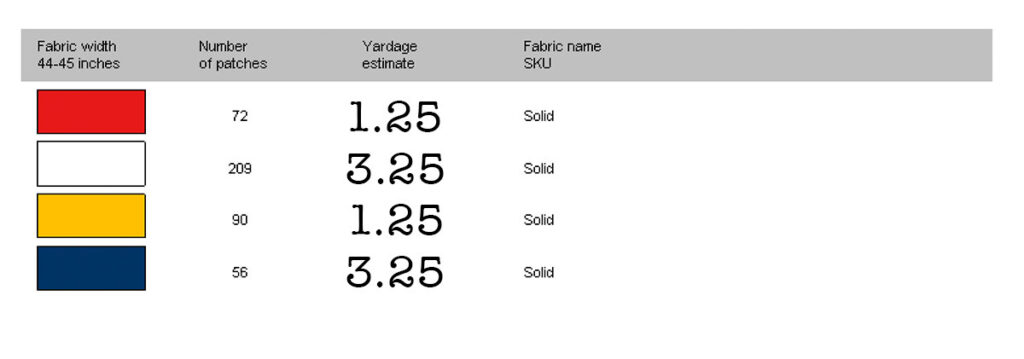
Here are the yardage requirements for the Power of 3 Row quilt:
I use Electric Quilt to design my quilt projects and blocks. It will give me finished measurements and yardage. The only thing is that I think it cuts (literally) things little close in terms of yardage requirements, because it assumes perfection: No mistakes in cutting or no need to go back and redo a little something here and there. I think that’s unrealistic, so I always recommend having a bit extra, and the cutting instructions I provide gives a little wiggle room.
Full yardage Requirements:
- Background fabric: 3.25 yards
- Color A (red): 1.25 yards
- Color B (yellow) 1.25 yards
- Color C (blue) 3.25 yards
- Binding: 2.00 yards
- Backing:
- Wide Back: 2.50 yards
- Regular widths: 5.00 yards
Details about this quilt:
- Finished measurements: 71″ x 85″
- Each quilt block is 12″ finished size (or 12.5″ unfinished).
- Sashing is cut as 2.5″ strips.
- A “classic” twin sized quilt measures 70″ x 90″ so this is about that size. If you want the full 90″ of length, then adding and extra 2.5″ so the 6.5″ border strips for the top and bottom would get you to that measurement. I kept it simple at a 6.5″ border all the way around.
- Quilt Batting: I generally use the 80/20 blend and purchase it on sale. You will need enough for a twin size quilt. Use whatever you have on hand or whatever you want to purchase.
- Thread: You’ll need thread for piecing and thread for quilting the final project. I will be doing straight line quilting on my finished project. It uses a little less thread and it’s much easier to do on a domestic sewing machine.
Each week, I’ll share a new block design and then we will put everything together in the end for a completed quilt. It’s about a 7 week project if you take it in the pieces described here:
- Weeks 1-5: Make one row each week and piece each row together with sashing. When two or more rows are complete, attach the rows together with row sashing.
- Week 6: Attach the border and prepare the quilt sandwich. Begin quilting
- Week 7: Finish quilting and bind off the quilt
The Quilt Blocks of the Power of 3 Row Quilt:
- Row 1: The Sawtooth Star
- Row 2: A Patriot’s Heart
- Row 3: The Diamond Block
- Row 4: The Classic Pinwheel
- Row 5: The Stair Step Block
When the project is completed, I’ll have a printable version of the quilt available for purchase and download in my etsy shop. Some people like to have all the instructions in one place and also have the capability to print the pattern, so the pdf download in etsy will allow for that. In the meantime, I’m looking forward to guiding you through this quilt along journey!

Hi! I’m Pattymac
Maker, Baker, Quilter
I’m a creative lifestyle blogger living and working in Coastal Virginia. When I’m not mixing or stitching or taking pictures, I’m out exploring the cookbook section of my favorite library or munching my own home baked cookies at a midweek movie matinee.