How to make a Pinwheel Quilt Block
The Pinwheel Quilt Block being presented today is row 4 in the Power of 3 Row Quilt. So if you would like to construct the full quilt yourself you will want to complete 4 quilt blocks of each pattern presented. There are 5 block designs in total. Here is the pattern I’ll be walking you through today. ❤️💙🤍 Continue to the end of the tutorial to find links to the introduction to the quilt design as well as the other blocks in the series.
All The Blocks In This Series Are Constructed To Be 12″ Finished Blocks.
Row 1: The Sawtooth Star
Row 2: A Patriot’s Heart
Row 3: The Diamond Block
Row 4: The Classic Pinwheel (today’s block)
Row 5: The Stair Step Block
Tips And Tricks For Constructing The Pinwheel Quilt Block:
- First of all, you need a strong HST game since the entire block is a series of 4 half square triangles pieced together. If you need a refresher on making them, or would like to see a tutorial on them, please visit that tutorial by clicking this link.
- The block as presented is part of the Power of 3 Row Quilt, so it uses a triadic color scheme (red, yellow and blue) plus a background fabric to reveal its shape.
- This block has very easy initial cutting instructions, because every square is cut (and trimmed) to the same size.
- The usual instructions for making half square triangles calls for cutting your initial squares 7/8s” over size to compensate for the seam allowance and squaring up. I find that measurement difficult….because well FRACTIONS. 🤔 So I size up a full inch to keep it easier for my brain to manage. And much easier to trim.
- Quilting always assumes a 1/4″ seam allowance. Always.
Make your quilting easier by using the right tools for the job
- Rotary Cutter (affiliate link)
- Cutting mat (affiliate link)
- Square Rulers (affiliate link)
- Patriotic Fabrics (affiliate link)
- Really good iron (affiliate link)
Cutting Instructions For The Pinwheel quilt block✂️
Color A (Blue):       1 - 7.5" Square
Color B (Red):        1 - 7.5" Square
Color C (White):      2 - 7.5" Squares
Let’s Piece the block!
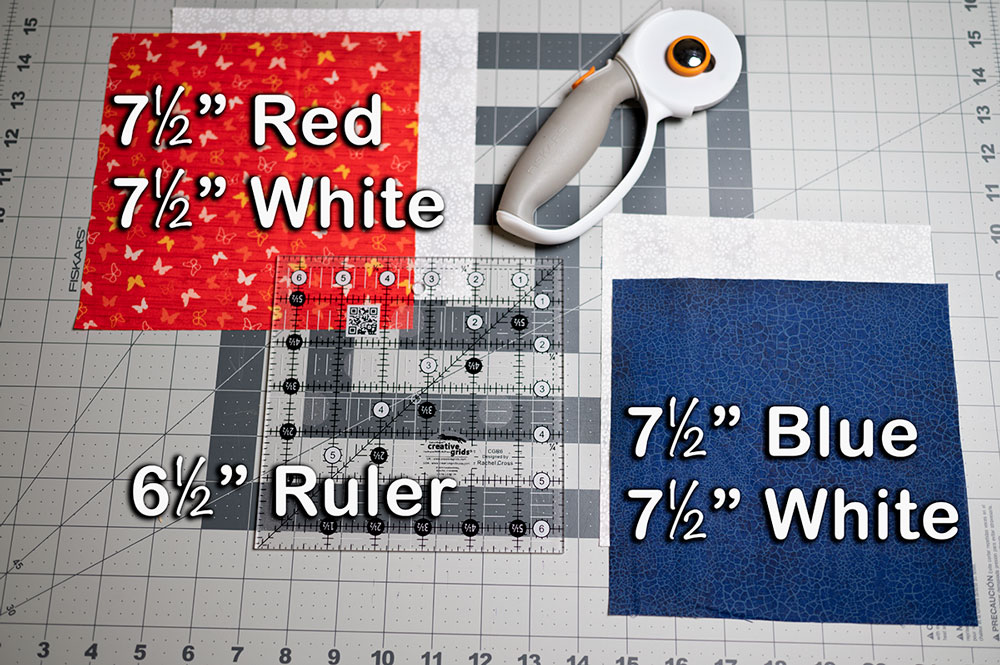
The First Step Is To cut the squares to be used in constructing our Pinwheels
- 1 Blue (Color A) 7.5″ Block
- 1 Red (Color B) 7.5″ Block
- 2 White (Background Fabric) 7.5″ Blocks
We are constructing two at a time half square triangles, so pair each color with its own background square to begin.
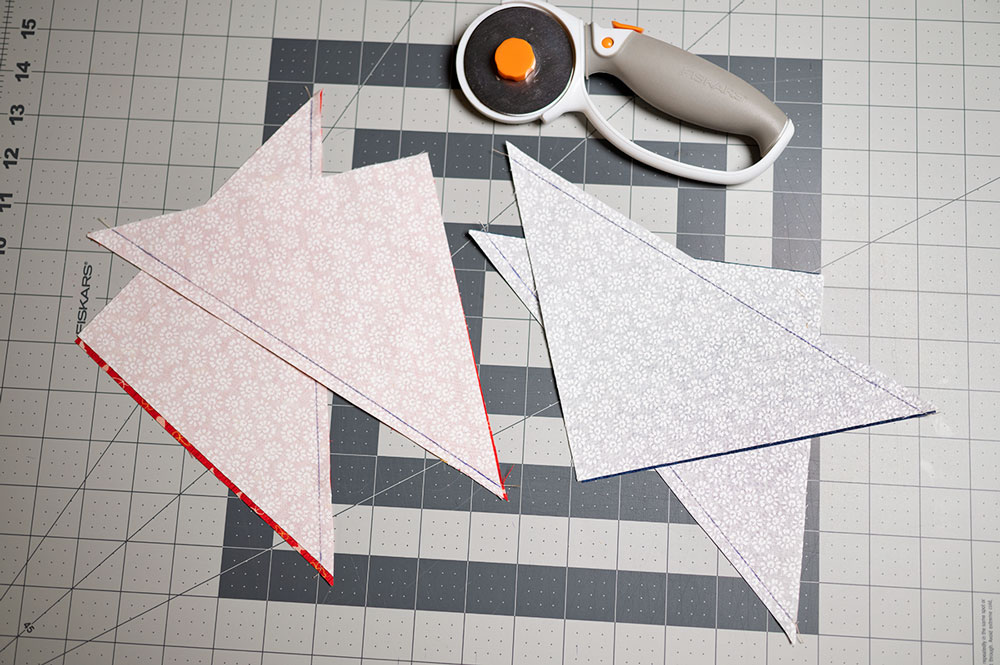
Sew and construct the HST units. Cut them apart.
Sewing stitch lines on two blocks and cutting them apart provides the 4 blocks needed to make the final Pinwheel. They are sewn, cut apart, and ready for pressing and trimming.
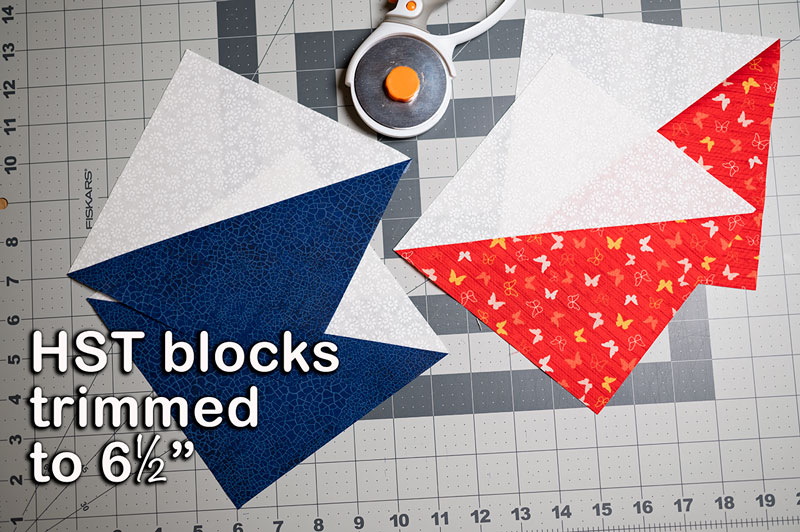
Trimmed blocks ready for piecing.
Once the blocks are pressed, square them to 6.5″. Each HST will need to be trimmed down to a finished size of 6.5″
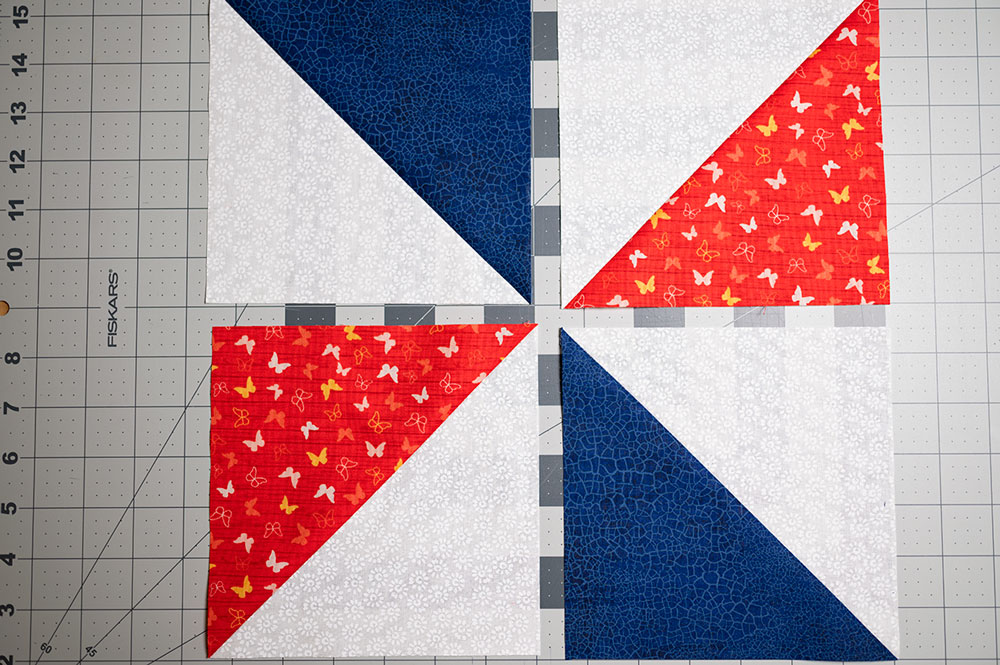
Lay the HSTs into their finished position.
A pinwheel is nothing more that a fancy 4 patch! It’s a 4 patch where each block is a half square triangle. Lay your blocks as you want them to appear and construct your final block like any other 4 patch. Sew them first along the north/south midlines to create 2 units and then sew those two together along the central east/west midline.

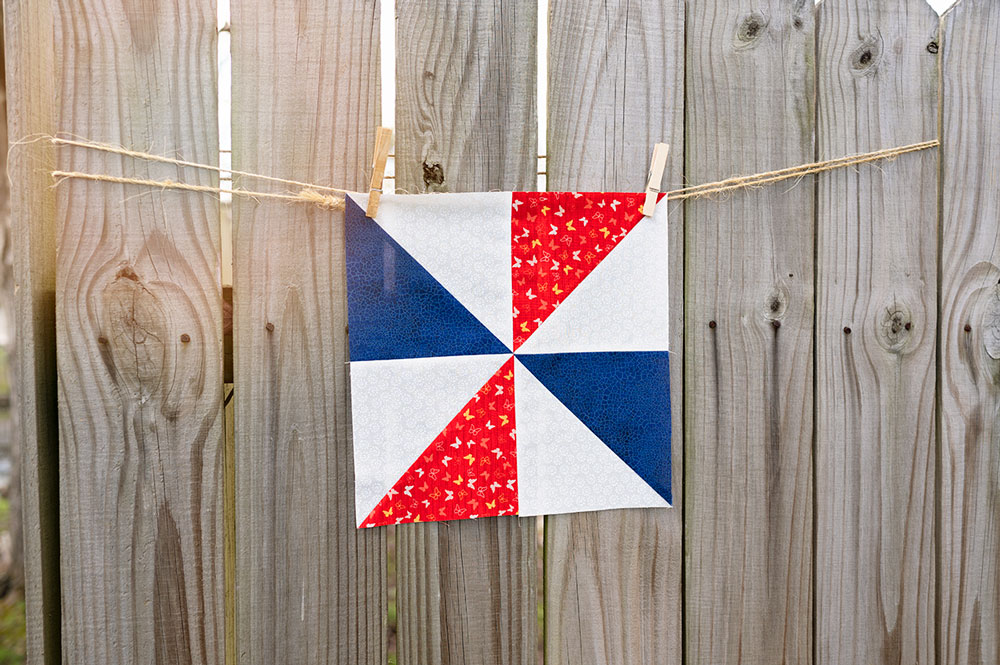
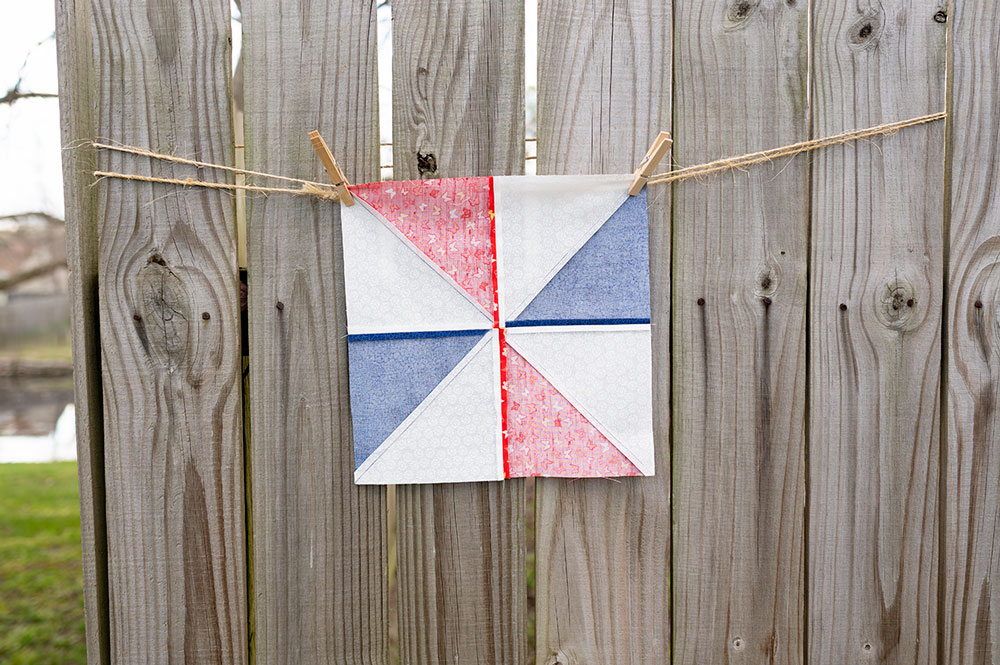
The final Pinwheel Quilt Block
After last week’s Diamond block with all of its intersections and pickiness, I thought having something fun and fast was appropriate! A Pinwheel is another classic quilt block, which is why I like it so much. You know I love a good classic sewn in modern fabrics.
I used my main project colors in this block along with the background fabric. I selected red and blue as my primary colors and then used yellow as an accent color. I love the patriotic feel of these colors together and a series of four of these would make a fantastic wall hanging or table runner.
You can pick any two colors or prints YOU like best, and then pair them with a neutral background fabric for a design that POPS!
Joining in with us on the Power of 3 Row Quilt?
If you are making the full row quilt you’ll need the cutting instructions for the full row which appear below.
Color A (Blue):       4 - 7.5" Squares
Color B (Red):        4 - 7.5" Squares
Color C (Yellow):     8 - 7.5" Squares
You also need instructions for the other blocks:
- Power of 3 Row Quilt Introduction
- Row 1: Sawtooth Star
- Row 2: Patriot’s Heart
- Row 3: Diamond Block
- Row 4: Classic Pinwheel (that’s the post we’re on right now)
- Row 5: Stair Steps
Remember that in quilting, your wrong side is just as important as the front side.
Carefully press your seams to give the flattest block possible. Since this block is in essence a four patch, nesting your seams for the top and bottom halves of the block work beautifully. I then pressed the center horizontal seam open to give me the flattest possible result.
Thanks for stopping by today! I hope you’ll piece your own Power of 3 Row Quilt where we explore the power of using 3 strong colors to create a cohesive color story for our quilt. Here is the illustration of the Patriot’s Heart Quilt block to help you see the construction.
Clicking On The Image Will Take You To A Full Size Version You Can Download For A Reference.

How to follow along with the Power of 3 Row quilt:
- I’ve designed this quilt around publishing a new block once a week. So you will see the instructions to construct each new block once a week. I’ll share the instructions to make one block as well as all 4 if you wish to construct a full row each week. I recommend making a full row each week and at the end of the 5th week, you have all the rows completed and joined.
- Be sure to subscribe to my youtube channel where we will be making a new block each week and I will also drop in with live check ins to see how everyone is progressing and to answer questions.
- Subscribe to my email list so you receive notification when the new block design publishes. 😀